配置pod拉取harbor容器镜像仓库私有镜像:secret保存账号密码
一.系统环境
本文主要基于Kubernetes1.22.2和Linux操作系统Ubuntu 18.04。
| 服务器版本 | docker软件版本 | Kubernetes(k8s)集群版本 | CPU架构 |
|---|---|---|---|
| Ubuntu 18.04.5 LTS | Docker version 20.10.14 | v1.22.2 | x86_64 |
Kubernetes集群架构:k8scludes1作为master节点,k8scludes2,k8scludes3作为worker节点。
| 服务器 | 操作系统版本 | CPU架构 | 进程 | 功能描述 |
|---|---|---|---|---|
| k8scludes1/192.168.110.128 | Ubuntu 18.04.5 LTS | x86_64 | docker,kube-apiserver,etcd,kube-scheduler,kube-controller-manager,kubelet,kube-proxy,coredns,calico | k8s master节点 |
| k8scludes2/192.168.110.129 | Ubuntu 18.04.5 LTS | x86_64 | docker,kubelet,kube-proxy,calico | k8s worker节点 |
| k8scludes3/192.168.110.130 | Ubuntu 18.04.5 LTS | x86_64 | docker,kubelet,kube-proxy,calico | k8s worker节点 |
二.前言
在Kubernetes集群中,为了方便管理和使用Harbor镜像仓库中的私有镜像,我们可以通过配置Pod使用Secret来保存Harbor仓库的账号密码。本文将为您介绍如何配置Pod以拉取Harbor镜像仓库中的私有镜像。
Harbor是一个开源的企业级Docker镜像仓库,它为Docker镜像提供了一个安全的存储和管理环境。Harbor支持私有镜像仓库和公有镜像仓库,可以通过Pod配置来使用私有镜像仓库中的镜像。
使用secret保存harbor账号密码拉取私有仓库的镜像的前提是已经有一套可以正常运行的Kubernetes集群,关于Kubernetes(k8s)集群的安装部署,可以查看博客《Ubuntu 安装部署Kubernetes(k8s)集群》https://www.cnblogs.com/renshengdezheli/p/17632858.html。
三.Docker-Registry类型的Secret简介
在Kubernetes中,Secret用于存储敏感信息,如密码、令牌等。Docker-Registry类型的Secret用于存储Docker镜像仓库的认证信息,包括用户名和密码。通过使用Docker-Registry类型的Secret,我们可以将认证信息与Pod配置关联,使Pod能够访问私有镜像仓库。
Secret有很多类型,比如kubernetes.io/service-account-token类型,Opaque类型,关于secret的更多用法,请查看博客《Kubernetes(k8s)密码管理:Secret》。
四.镜像仓库简介
Harbor是一个基于Go语言开发的Docker镜像仓库,它提供了用户管理、镜像仓库管理、镜像构建等功能。Harbor镜像仓库可以通过HTTP或HTTPS协议进行访问,用户可以通过Docker客户端上传和下载镜像。Harbor官网为:https://goharbor.io/ ,Harbor在GitHub的网址为:https://github.com/goharbor/harbor/ ,Harbor安装包下载地址为:https://github.com/goharbor/harbor/releases 。
镜像仓库除了可以使用Harbor搭建,还可以使用registry搭建,详情请查看博客《搭建docker镜像仓库(一):使用registry搭建本地镜像仓库》。
五.搭建Harbor容器镜像仓库
5.1 安装Harbor
当我们使用harbor搭建镜像仓库,创建项目的时候,如果项目选择公开,则人们可以使用匿名用户拉取镜像,如果项目不选择公开,则必须要docker login登录才能拉取镜像 。
下面在etcd2机器上,使用harbor搭建一个镜像仓库。
由于harbor依赖于docker-compose,所以需要先安装docker-compose。
[root@etcd2 ~]# yum -y install docker-compose docker-ce
去网上https://github.com/goharbor/harbor/releases/tag/v2.4.1 ,下载好harbor离线包:harbor-offline-installer-v2.4.1.tgz 。
[root@etcd2 ~]# ll -th harbor-offline-installer-v2.4.1.tgz
-rw-r--r-- 1 root root 585M 1月   5 11:39 harbor-offline-installer-v2.4.1.tgz
解压软件包。
[root@etcd2 ~]# tar xf harbor-offline-installer-v2.4.1.tgz

[root@etcd2 ~]# rm -rf harbor-offline-installer-v2.4.1.tgz

[root@etcd2 ~]# cd harbor

[root@etcd2 harbor]# ls
common.sh  harbor.v2.4.1.tar.gz  harbor.yml.tmpl  install.sh  LICENSE  prepare
harbor.v2.4.1.tar.gz是安装harbor所需的镜像,docker load -i 加载镜像。
[root@etcd2 harbor]# docker load -i harbor.v2.4.1.tar.gz

[root@etcd2 harbor]# docker images | grep harbor
goharbor/harbor-exporter        v2.4.1     0ee361b5454a   6 months ago   82.7MB
goharbor/chartmuseum-photon     v2.4.1     337a9d03b197   6 months ago   174MB
goharbor/redis-photon           v2.4.1     2bbe19b8cc5d   6 months ago   156MB
goharbor/trivy-adapter-photon   v2.4.1     d39fd42c93f0   6 months ago   151MB
goharbor/notary-server-photon   v2.4.1     e75c68b6638b   6 months ago   111MB
goharbor/notary-signer-photon   v2.4.1     17a627caf6dd   6 months ago   108MB
goharbor/harbor-registryctl     v2.4.1     bff3d2665456   6 months ago   137MB
goharbor/registry-photon        v2.4.1     b46e45c49d6f   6 months ago   79.2MB
goharbor/nginx-photon           v2.4.1     78aad8c8ef41   6 months ago   45.7MB
goharbor/harbor-log             v2.4.1     c86562daee64   6 months ago   160MB
goharbor/harbor-jobservice      v2.4.1     d8baceb5f1f6   6 months ago   220MB
goharbor/harbor-core            v2.4.1     80a4e3e60403   6 months ago   198MB
goharbor/harbor-portal          v2.4.1     1c9ed1cc3cb9   6 months ago   54.7MB
goharbor/harbor-db              v2.4.1     417d0a840247   6 months ago   222MB
goharbor/prepare                v2.4.1     e9158d34970b   6 months ago   257MB
harbor.yml.tmpl是harbor配置文件的模版,复制模版。
[root@etcd2 harbor]# ls
common.sh  harbor.v2.4.1.tar.gz  harbor.yml.tmpl  install.sh  LICENSE  prepare

[root@etcd2 harbor]# cp harbor.yml.tmpl harbor.yml
修改harbor配置文件harbor.yml。
harbor配置文件harbor.yml修改内容如下:hostname修改为harbor私有仓库所在的主机名:hostname: etcd2 ;harbor的账号密码为:harbor_admin_password: Harbor12345 。
[root@etcd2 harbor]# vim harbor.yml

[root@etcd2 harbor]# egrep 'hostname|harbor_admin_password' harbor.yml
# The IP address or hostname to access admin UI and registry service.
hostname: etcd2
# And when it enabled the hostname will no longer used
harbor_admin_password: Harbor12345
#   #   endpoint: http://hostname:14268/api/traces
#   #   agent_host: hostname
#   #   endpoint: hostname:4318
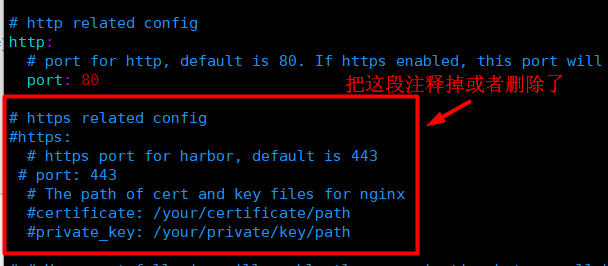
这里不配置https,https的配置直接删除或者注释掉:# https related config#https:# # https port for harbor, default is 443# port: 443# # The path of cert and key files for nginx# certificate: /your/certificate/path# private_key: /your/private/key/path 。
执行harbor安装脚本。
[root@etcd2 harbor]# ./prepare
prepare base dir is set to /root/harbor
WARNING:root:WARNING: HTTP protocol is insecure. Harbor will deprecate http protocol in the future. Please make sure to upgrade to https
Generated configuration file: /config/portal/nginx.conf
......
Generated configuration file: /config/jobservice/config.yml
Generated and saved secret to file: /data/secret/keys/secretkey
Successfully called func: create_root_cert
Generated configuration file: /compose_location/docker-compose.yml
Clean up the input dir

#安装harbor
[root@etcd2 harbor]# ./install.sh

[Step 0]: checking if docker is installed ...

Note: docker version: 20.10.12
......
Creating harbor-db ...
Creating harbor-core ...
Creating harbor-jobservice ...
Creating nginx ...
✔ ----Harbor has been installed and started successfully.----
此时harbor镜像仓库就安装成功了。
5.2 创建项目
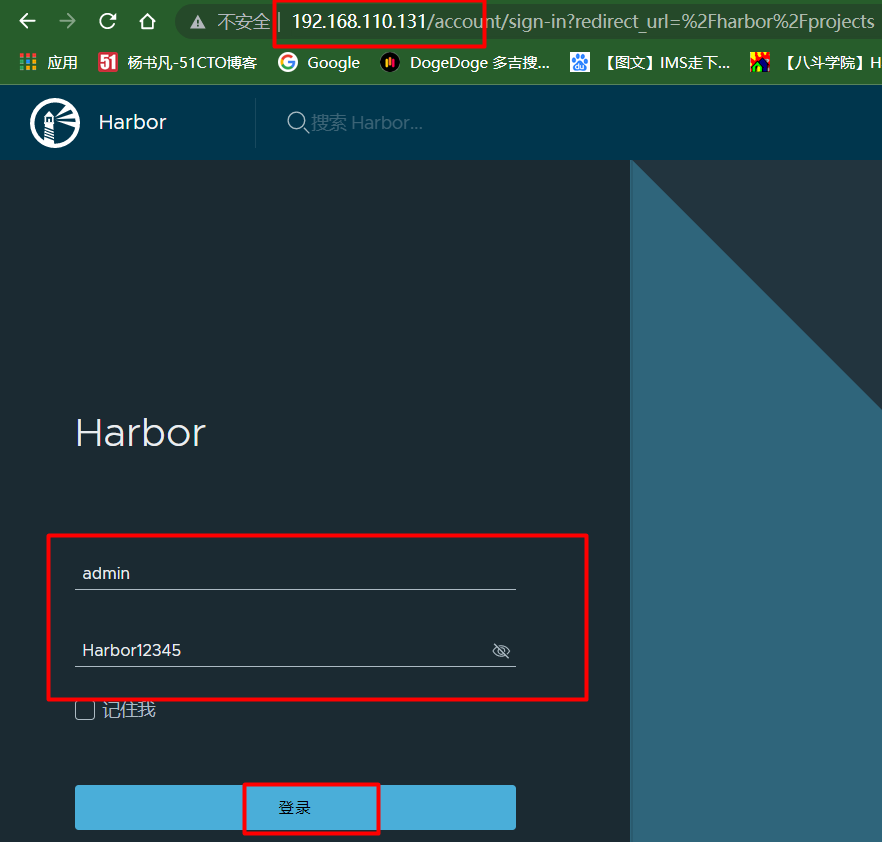
直接在浏览器输入harbor所在机器IP地址:http://192.168.110.131/,打开主页输入账号admin,密码:Harbor12345进行登录。
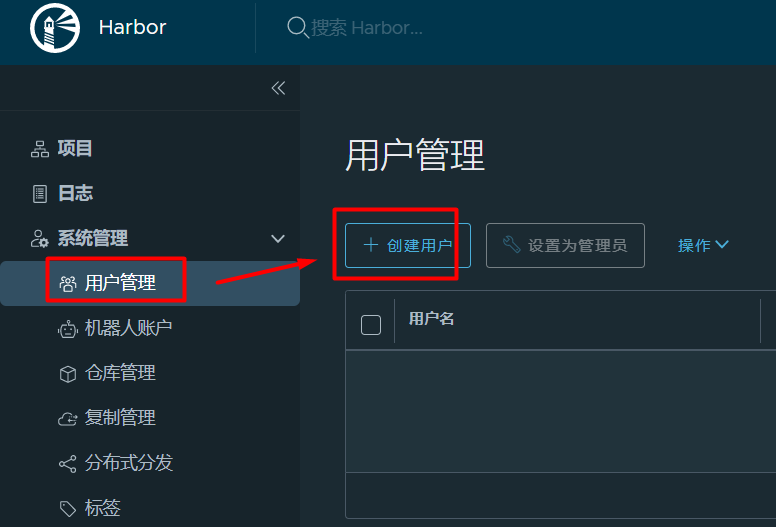
创建一个用户:点击用户管理-->创建用户。
创建一个test用户。
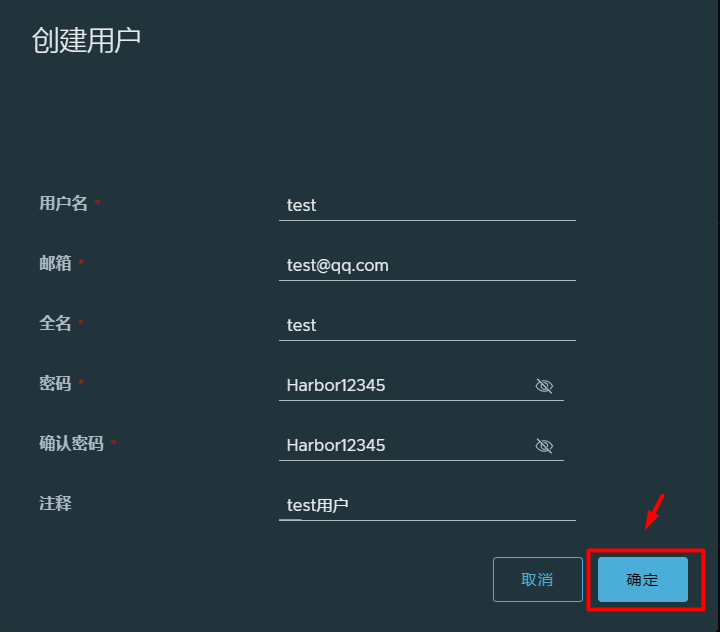
现在test用户就创建好了。

接着创建一个项目:点击项目-->新建项目。
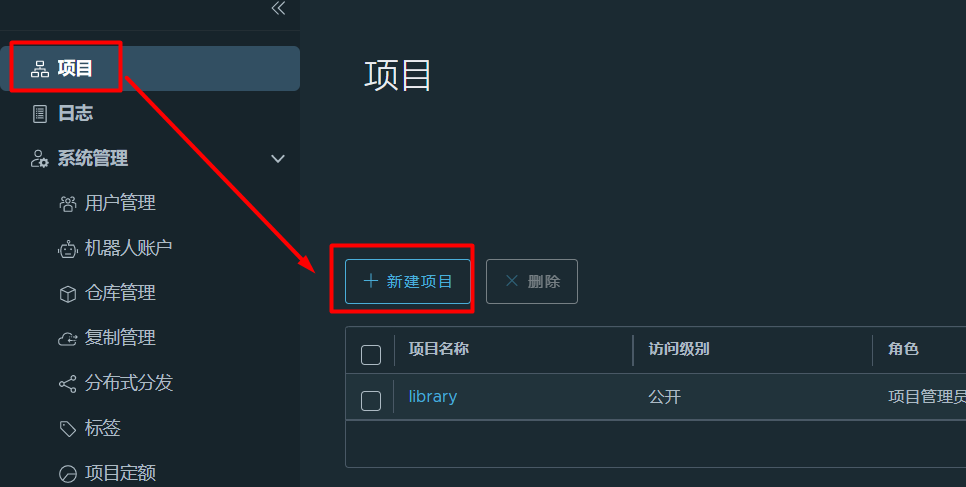
新建项目test,如果没勾选“公开”,则项目是私有项目,用户必须登录才能拉取镜像,如果勾选了“公开”,则项目是公开项目,用户可以匿名用户拉取镜像,"存储容量"为-1,表示容量无上限。
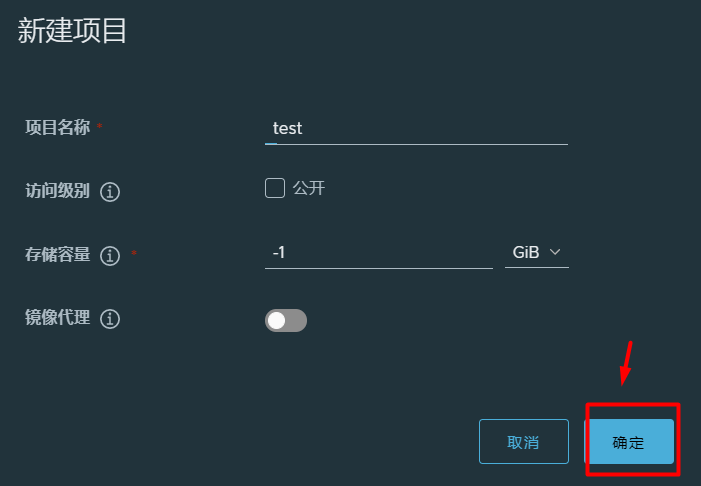
test私有项目就创建好了。

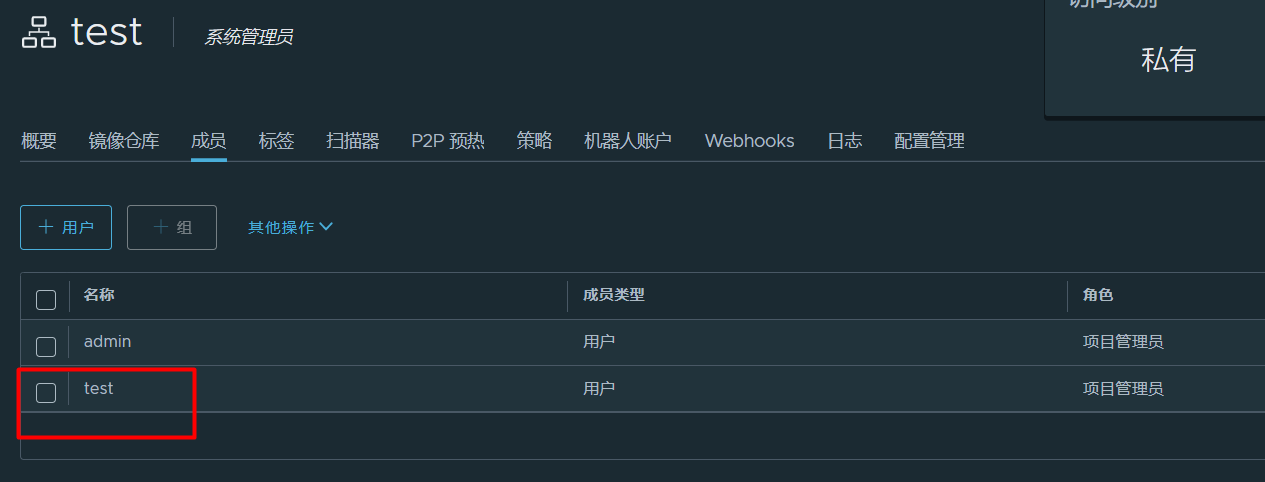
点击进入test项目,点击成员-->用户,把test用户添加进来。
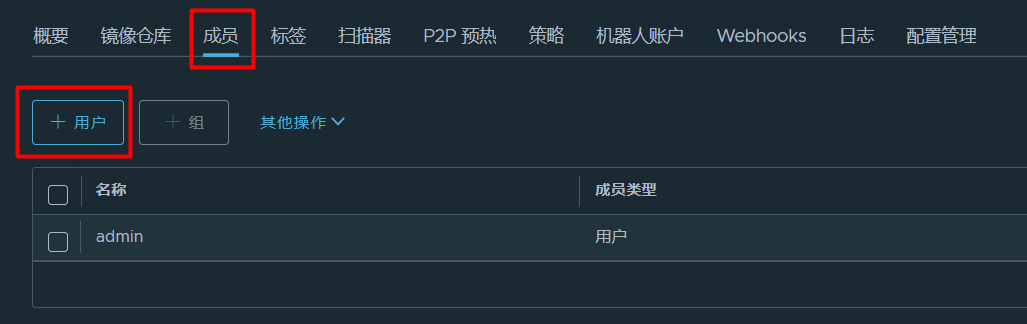
把刚才创建的test用户添加进去。
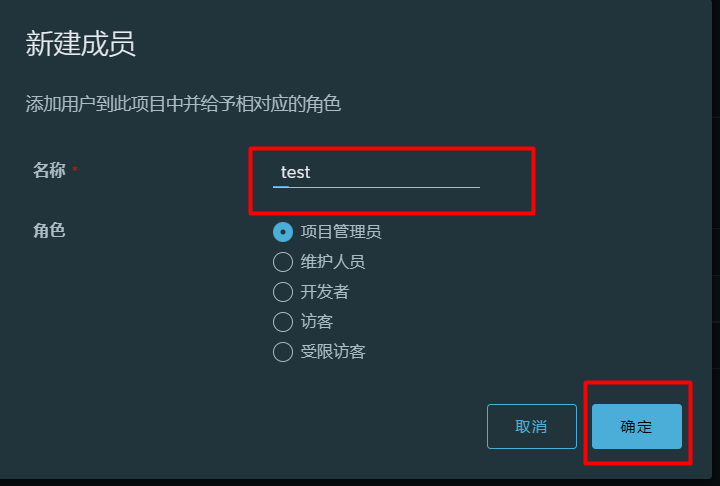
现在test用户就添加到test项目里来了。
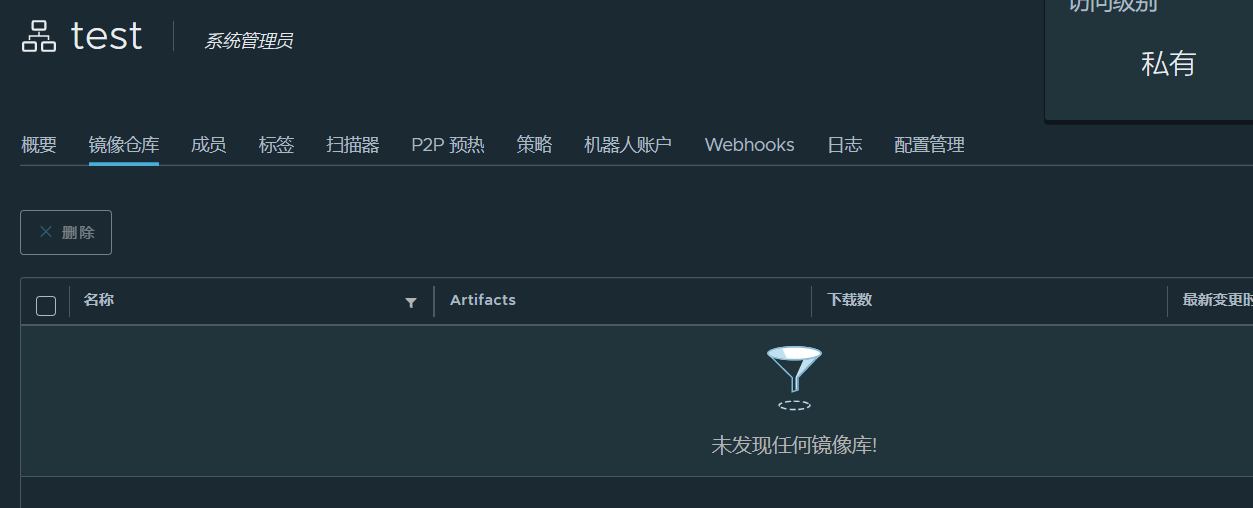
现在test项目里还没有任何镜像。
5.3 推送镜像到harbor镜像仓库
下面需要配置客户端推送镜像到harbor镜像仓库的test项目里。
etcd2机器先拉取一个镜像。
[root@etcd2 harbor]# docker pull busybox:latest

[root@etcd2 harbor]# docker images | grep busybox
busybox                         latest     ec3f0931a6e6   4 months ago   1.24MB
镜像重命名,命名格式:镜像仓库IP:端口/项目名/镜像名.
[root@etcd2 harbor]# docker tag busybox:latest 192.168.110.131/test/busybox:latest
因为harbor镜像仓库没有配置https,使用的是http,需要修改下配置,不然拉取镜像会报错,有两种修改方法:
- 方法一:修改/lib/systemd/system/docker.service的dockerd启动参数,ExecStart=/usr/bin/dockerd --insecure-registry 192.168.110.131:80 -H fd:// --containerd=/run/containerd/containerd.sock ,--insecure-registry用于指定不安全的镜像仓库;
- 方法二:修改 /etc/docker/daemon.json,添加参数"insecure-registries":["192.168.110.131:80"],insecure-registries 用于指定不安全的镜像仓库。
这次我们使用这第一种修改方法:
[root@etcd2 harbor]# vim /usr/lib/systemd/system/docker.service

#--insecure-registry 192.168.110.131 指定harbor镜像仓库
[root@etcd2 harbor]# grep ExecStart /usr/lib/systemd/system/docker.service
#ExecStart=/usr/bin/dockerd -H fd:// --containerd=/run/containerd/containerd.sock
ExecStart=/usr/bin/dockerd --insecure-registry 192.168.110.131 -H fd:// --containerd=/run/containerd/containerd.sock
重新加载配置文件,重启docker使配置生效。
[root@etcd2 harbor]# systemctl daemon-reload ;systemctl restart docker
现在使用docker login登录harbor仓库,输入刚才创建的test用户和密码。
[root@etcd2 harbor]# docker login 192.168.110.131
Username: test
Password:
WARNING! Your password will be stored unencrypted in /root/.docker/config.json.
Configure a credential helper to remove this warning. See
https://docs.docker.com/engine/reference/commandline/login/#credentials-store

Login Succeeded
登录harbor仓库之后,会多了一个/root/.docker/config.json文件。
[root@etcd2 harbor]# ls /root/.docker/config.json
/root/.docker/config.json
Docker 会将 token 存储在 ~/.docker/config.json 文件中,从而作为拉取私有镜像的凭证。
[root@etcd2 harbor]# cat /root/.docker/config.json
{
        "auths": {
                "192.168.110.131": {
                        "auth": "dGVzdDpIYXJib3IxMjM0NQ=="
                }
        }
}
现在推送镜像到harbor镜像仓库的test项目里。
[root@etcd2 harbor]# docker push 192.168.110.131/test/busybox:latest
The push refers to repository [192.168.110.131/test/busybox]
d31505fd5050: Pushed
latest: digest: sha256:b69959407d21e8a062e0416bf13405bb2b71ed7a84dde4158ebafacfa06f5578 size: 527
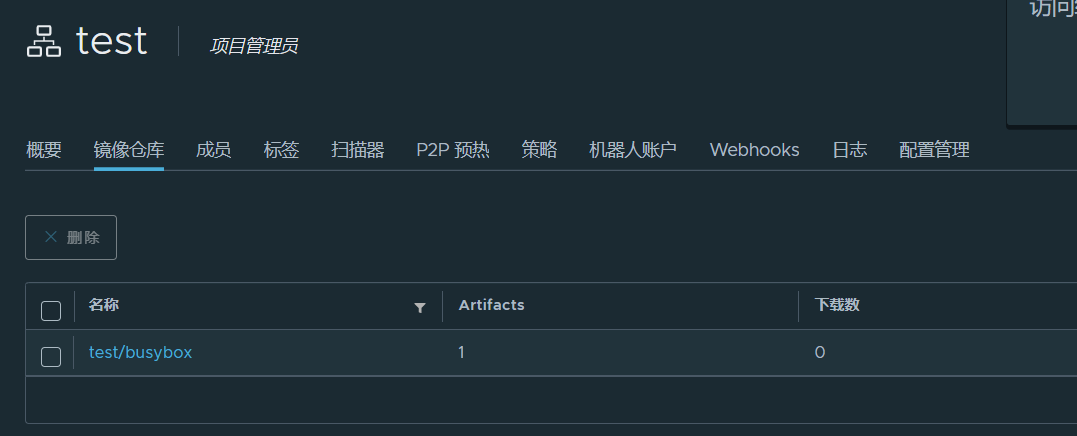
查看harbor web页面。可以看到镜像推送成功了。
下面测试拉取镜像到etcd2机器。
删除本地的192.168.110.131/test/busybox:latest镜像。
[root@etcd2 harbor]# docker rmi 192.168.110.131/test/busybox:latest
Untagged: 192.168.110.131/test/busybox:latest
Untagged: 192.168.110.131/test/busybox@sha256:b69959407d21e8a062e0416bf13405bb2b71ed7a84dde4158ebafacfa06f5578

[root@etcd2 harbor]# docker images | grep busy
busybox                         latest     ec3f0931a6e6   4 months ago   1.24MB
现在从harbor镜像仓库拉取镜像,镜像拉取成功。
[root@etcd2 harbor]# docker pull 192.168.110.131/test/busybox:latest
latest: Pulling from test/busybox
Digest: sha256:b69959407d21e8a062e0416bf13405bb2b71ed7a84dde4158ebafacfa06f5578
Status: Downloaded newer image for 192.168.110.131/test/busybox:latest
192.168.110.131/test/busybox:latest
删除凭证。
[root@etcd2 harbor]# rm -rf /root/.docker/config.json
退出登录镜像仓库。
[root@etcd2 harbor]# docker logout
Removing login credentials for https://index.docker.io/v1/
现在是拉取不了镜像的,192.168.110.131/test/busybox:latest是私有仓库的镜像,不登录是没方法拉取镜像的,因为项目是私有的,必须登录才能拉取镜像。
[root@etcd2 harbor]# docker pull 192.168.110.131/test/busybox:latest
Error response from daemon: unauthorized: unauthorized to access repository: test/busybox, action: pull: unauthorized to access repository: test/busybox, action: pull
六.使用secret保存harbor账号密码拉取私有仓库的镜像
本次在k8s集群的k8scludes3节点测试拉取私有镜像。
来到k8s集群的k8scludes3节点,编辑/lib/systemd/system/docker.service文件,--insecure-registry 192.168.110.131 指定harbor镜像仓库。
root@k8scludes3:~# vim /lib/systemd/system/docker.service

root@k8scludes3:~# grep ExecStart /lib/systemd/system/docker.service
#ExecStart=/usr/bin/dockerd -H fd:// --containerd=/run/containerd/containerd.sock
ExecStart=/usr/bin/dockerd --insecure-registry 192.168.110.131 -H fd:// --containerd=/run/containerd/containerd.sock
重启docker使配置文件生效。
root@k8scludes3:~# systemctl daemon-reload ; systemctl restart docker
拉取镜像,但是报错了,根据报错可知,是域名解析出问题了,需要配置/etc/hosts。
root@k8scludes3:~# docker pull 192.168.110.131/test/busybox:latest
Error response from daemon: Head "http://192.168.110.131/v2/test/busybox/manifests/latest": Get "http://etcd2/service/token?scope=repository%3Atest%2Fbusybox%3Apull&service=harbor-registry": dial tcp: lookup etcd2: Temporary failure in name resolution
添加harbor仓库所在机器的IP主机名映射:192.168.110.131 etcd2 。
root@k8scludes3:~# vim /etc/hosts

root@k8scludes3:~# cat /etc/hosts
127.0.0.1	localhost
127.0.1.1	tom
192.168.110.139 ubuntuk8sclient
192.168.110.128 k8scludes1
192.168.110.129 k8scludes2
192.168.110.130 k8scludes3
192.168.110.131 etcd2

# The following lines are desirable for IPv6 capable hosts
::1     localhost ip6-localhost ip6-loopback
ff02::1 ip6-allnodes
ff02::2 ip6-allrouters
重新拉取私有镜像。192.168.110.131/test/busybox:latest是私有仓库镜像,不登录是没方法拉取镜像的,必须登录才能拉取镜像
root@k8scludes3:~# docker pull 192.168.110.131/test/busybox:latest
Error response from daemon: unauthorized: unauthorized to access repository: test/busybox, action: pull: unauthorized to access repository: test/busybox, action: pull
下面使用私有仓库的镜像创建一个pod。
编辑pod配置文件,表示使用私有仓库的镜像192.168.110.131/test/busybox:latest创建pod。
root@k8scludes1:~# vim pod.yaml

root@k8scludes1:~# cat pod.yaml
apiVersion: v1
kind: Pod
metadata:
  creationTimestamp: null
  labels:
    run: podtest
  name: podtest
spec:
  #当需要关闭容器时,立即杀死容器而不等待默认的30秒优雅停机时长。
  terminationGracePeriodSeconds: 0
  #nodeName: k8scludes3 表示使pod运行在k8scludes3节点
  nodeName: k8scludes3
  containers:
  - image: 192.168.110.131/test/busybox:latest
    #imagePullPolicy: IfNotPresent:表示如果本地已经存在该镜像,则不重新下载;否则从远程 Docker Hub 下载该镜像
    imagePullPolicy: IfNotPresent
    #让容器运行sleep进程,一直处于睡眠状态
    command: ["sh","-c","sleep 100000"]
    name: podtest
    resources: {}
  dnsPolicy: ClusterFirst
  restartPolicy: Always
status: {}
创建pod。
root@k8scludes1:~# kubectl apply -f pod.yaml
pod/podtest created
pod创建失败。
root@k8scludes1:~# kubectl get pod
NAME      READY   STATUS             RESTARTS   AGE
podtest   0/1     ImagePullBackOff   0          6s
查看podtest描述,报错为:unauthorized to access repository: test/busybox,因为192.168.110.131/test/busybox:latest镜像是私有仓库里的,需要docker login登录,才能拉取镜像,现在不登录,肯定拉取镜像失败。
root@k8scludes1:~# kubectl describe pod podtest
Name:         podtest
Namespace:    admissioncontr
Priority:     0
Node:         k8scludes3/192.168.110.130
。。。。。。
Events:
  Type     Reason       Age                 From     Message
  ----     ------       ----                ----     -------
  Warning  FailedMount  2m9s                kubelet  MountVolume.SetUp failed for volume "kube-api-access-vtptj" : failed to sync configmap cache: timed out waiting for the condition
  Normal   Pulling      46s (x4 over 2m7s)  kubelet  Pulling image "192.168.110.131/test/busybox:latest"
  Warning  Failed       46s (x4 over 2m6s)  kubelet  Failed to pull image "192.168.110.131/test/busybox:latest": rpc error: code = Unknown desc = Error response from daemon: unauthorized: unauthorized to access repository: test/busybox, action: pull: unauthorized to access repository: test/busybox, action: pull
  Warning  Failed       46s (x4 over 2m6s)  kubelet  Error: ErrImagePull
  Normal   BackOff      31s (x6 over 2m6s)  kubelet  Back-off pulling image "192.168.110.131/test/busybox:latest"
  Warning  Failed       31s (x6 over 2m6s)  kubelet  Error: ImagePullBackOff
删除pod。
root@k8scludes1:~# kubectl delete pod podtest
pod "podtest" deleted
查看docker-registry类型的secret帮助。
root@k8scludes1:~# kubectl create secret docker-registry --help

root@k8scludes1:~# kubectl create secret docker-registry --help | grep server
  kubectl create secret docker-registry my-secret --docker-server=DOCKER_REGISTRY_SERVER --docker-username=DOCKER_USER --docker-password=DOCKER_PASSWORD --docker-email=DOCKER_EMAIL
      --docker-server='https://index.docker.io/v1/': Server location for Docker registry
      --dry-run='none': Must be "none", "server", or "client". If client strategy, only print the object that would be sent, without sending it. If server strategy, submit server-side request without persisting the resource.
  kubectl create secret docker-registry NAME --docker-username=user --docker-password=password --docker-email=email [--docker-server=string] [--from-file=[key=]source] [--dry-run=server|client|none] [options]
创建一个docker-registry类型的secret,--docker-server指定镜像仓库地址,--docker-username指定仓库用户名,--docker-password指定仓库密码。
root@k8scludes1:~# kubectl create secret docker-registry mysecret --docker-server=192.168.110.131 --docker-username=test --docker-password=Harbor12345
secret/mysecret created
查看secret,这个secret包含了登录harbor镜像仓库的密码。
root@k8scludes1:~# kubectl get secrets -o wide
NAME                  TYPE                                  DATA   AGE
default-token-lqfqc   kubernetes.io/service-account-token   3      6d9h
mysecret              kubernetes.io/dockerconfigjson        1      16s
再次编辑pod配置文件,imagePullSecrets 指定存储着镜像仓库密码的secret。
root@k8scludes1:~# vim pod.yaml

root@k8scludes1:~# cat pod.yaml
apiVersion: v1
kind: Pod
metadata:
  creationTimestamp: null
  labels:
    run: podtest
  name: podtest
spec:
  terminationGracePeriodSeconds: 0
  imagePullSecrets:
  - name: mysecret
  nodeName: k8scludes3
  containers:
  - image: 192.168.110.131/test/busybox:latest
    imagePullPolicy: IfNotPresent
    command: ["sh","-c","sleep 100000"]
    name: podtest
    resources: {}
  dnsPolicy: ClusterFirst
  restartPolicy: Always
status: {}
创建pod。
root@k8scludes1:~# kubectl apply -f pod.yaml
pod/podtest created
pod创建成功。
root@k8scludes1:~# kubectl get pod -o wide
NAME      READY   STATUS    RESTARTS   AGE   IP            NODE         NOMINATED NODE   READINESS GATES
podtest   1/1     Running   0          7s    10.244.1.68   k8scludes3   <none>           <none>
k8scludes3节点上也成功拉取了镜像。
root@k8scludes3:~# docker images | grep busybox
192.168.110.131/test/busybox                         latest    ec3f0931a6e6   4 months ago    1.24MB
yauritux/busybox-curl                                latest    69894251bd3c   5 years ago     21.3MB
删除pod。
root@k8scludes1:~# kubectl delete pod podtest
pod "podtest" deleted

root@k8scludes1:~# kubectl get pod -o wide
No resources found in admissioncontr namespace.
七.总结
通过配置Docker-Registry类型的Secret和Pod,我们可以使Pod能够拉取Harbor镜像仓库中的私有镜像。这种方式既安全又方便,可以帮助我们在Kubernetes集群中更好地管理和使用Harbor镜像仓库。


【推荐】编程新体验,更懂你的AI,立即体验豆包MarsCode编程助手
【推荐】凌霞软件回馈社区,博客园 & 1Panel & Halo 联合会员上线
【推荐】抖音旗下AI助手豆包,你的智能百科全书,全免费不限次数
【推荐】博客园社区专享云产品让利特惠,阿里云新客6.5折上折
【推荐】轻量又高性能的 SSH 工具 IShell:AI 加持,快人一步
· CSnakes vs Python.NET:高效嵌入与灵活互通的跨语言方案对比
· DeepSeek “源神”启动!「GitHub 热点速览」
· 我与微信审核的“相爱相杀”看个人小程序副业
· Plotly.NET 一个为 .NET 打造的强大开源交互式图表库
· 上周热点回顾(2.17-2.23)