Kubernetes集群中配置Ingress支持HTTPS访问(一):cfssl
一.系统环境
本文主要基于Kubernetes1.22.2和Linux操作系统Ubuntu 18.04。
| 服务器版本 | docker软件版本 | Kubernetes(k8s)集群版本 | kube-bench版本 | CPU架构 |
|---|---|---|---|---|
| Ubuntu 18.04.5 LTS | Docker version 20.10.14 | v1.22.2 | 0.6.7 | x86_64 |
Kubernetes集群架构:k8scludes1作为master节点,k8scludes2,k8scludes3作为worker节点。
| 服务器 | 操作系统版本 | CPU架构 | 进程 | 功能描述 |
|---|---|---|---|---|
| k8scludes1/192.168.110.128 | Ubuntu 18.04.5 LTS | x86_64 | docker,kube-apiserver,etcd,kube-scheduler,kube-controller-manager,kubelet,kube-proxy,coredns,calico | k8s master节点 |
| k8scludes2/192.168.110.129 | Ubuntu 18.04.5 LTS | x86_64 | docker,kubelet,kube-proxy,calico | k8s worker节点 |
| k8scludes3/192.168.110.130 | Ubuntu 18.04.5 LTS | x86_64 | docker,kubelet,kube-proxy,calico | k8s worker节点 |
二.前言
HTTPS是安全的HTTP协议,它通过SSL/TLS协议为客户端与服务器之间的通信提供加密。在Kubernetes集群中,Ingress资源管理集群外的访问,通过配置Ingress,我们可以为服务提供安全的HTTPS访问。
在Kubernetes集群中配置Ingress以支持HTTPS访问的前提是已经有一套可以正常运行的Kubernetes集群,关于Kubernetes(k8s)集群的安装部署,可以查看博客《Ubuntu 安装部署Kubernetes(k8s)集群》https://www.cnblogs.com/renshengdezheli/p/17632858.html。
三.对称加密和非对称加密简介
数据加密的类型有:
- 对称加密:使用相同的密钥进行加密和解密。优点是算法公开、计算量小、加密速度快、加密效率高,但密钥分发是一个挑战,如果密钥在协商过程中被泄露,那么密文就可能被破解。常见的对称加密算法有des,aes,des256,des512等
- 非对称加密:使用一对密钥,一个用于加密(公钥(可公开)),另一个用于解密(私钥(私有的))。优点是安全性高,即使密文被拦截、公钥被获取,由于无法获取到私钥,攻击者也无法破译密文。常见的非对称加密算法有RSA、DSA、ECC等。但是非对称加密的计算过程复杂,加解密效率相对较低,举个例子:A给B传输文件,A先使用B的公钥加密,然后把加密文件发送给B,B使用自己的私钥进行解密。
- 哈希函数:输入不定长的值,总能得到一个定长的值。
另外非对称加密除了可以用来做数据加密(公钥加密,私钥解密),还可以用来做数字签名(私钥加密,公钥解密),数字签名用来验证身份,举个例子:A要给B发送一个数据,A需要向B证明这数据就是A发送的,不是别人发送的。A对需要传输的文件生成一个哈希值,文件内容不发生变化,哈希值就不会发生变化,A使用私钥加密哈希值,然后把数据和加密后的哈希值发送给B, B使用A的公钥解密哈希值,B将收到的数据生成一个哈希值,如果文件在传输的过程中没有被修改,则两个哈希值应该是一样的 ,这样就可以验证数据是不是A发送的,以及数据有没有被修改过。
混合加密即对称加密和非对称加密的混合使用,有时会把文件先进行对称加密再非对称加密,再传输,这样对称加密的密钥传输过程就是安全的,但是存在中间人攻击,B把公钥发给A,途中被中间人C截获了,然后把C的公钥发给A,A自以为使用了“正确的B的公钥”,其实收到的是C伪装的公钥,A加密之后把加密文件发给B,C截获了加密文件,并使用C的私钥解密得到明文,最后使用正确的B公钥加密文件,把文件发给B,这就是中间人攻击。
解决中间人攻击的方法是使用CA,认证中心(CA)是一个权威的、受信任的第三方机构,其核心职能是发放和管理数字证书,用于证明和确认交易参与者的身份,保证电子商务交易过程中身份可认证性。举个例子:B发送csr(证书请求文件)给CA证书中心,CA审核通过之后,给B颁发证书,证书上有CA的盖章(数字签名),说明这个证书是CA认证过的没问题,B把证书发给A,A使用CA的公钥验证证书的数值签名,验证是不是CA颁发的证 书,浏览器里也存储着证书信息,确定这是CA给B颁发的证书之后,使用证书加密密钥,传输给B。
注意:证书的本质就是公钥。
总的来说,对称加密和非对称加密各有优缺点,具体使用哪种方式取决于实际需求和场景。
四.什么是HTTPS
HTTPS,全称Hypertext Transfer Protocol Secure,是超文本传输安全协议。它是一种通过计算机网络进行安全通信的传输协议,以安全为目标的 HTTP 通道。在HTTP的基础上,HTTPS通过传输加密和身份认证保证了传输过程的安全性。
HTTPS的诞生是为了解决HTTP通信使用明文的问题,验证通信方的身份,以及证明报文的完整性。在HTTP与TCP之间,HTTPS加入了SSL(Secure Sockets Layer)/TLS(Transport Layer Security)协议来为数据传输提供加密和身份验证。如果进行更具体的解释,可以将HTTPS理解为身披SSL/TLS协议这层外壳的HTTP,即https=http+tls/ssl,ssl是tls的前身。
HTTPS解决数据传输安全问题的方案就是使用加密算法,具体来说是混合加密算法,也就是对称加密和非对称加密的混合使用。
五.Ingress简介
Ingress是Kubernetes中的一个API对象,用于管理对集群内服务的外部访问。Ingress资源允许您定义如何路由外部HTTP(S)流量到集群中的不同服务。
kubernetes服务的发布方式有:NodePort,LoadBalancer,Ingress,关于使用NodePort或者LoadBalancer发布Kubernetes服务,详情请查看博客《Kubernetes(k8s)服务service:service的发现和service的发布》,Kubernetes(k8s)使用ingress发布服务,我们在博客《Kubernetes(k8s)使用ingress发布服务》中也做了详细介绍。但是之前使用ingress发布服务,使用的是http的方式,是以明文的方式访问的,这样不安全。
本文配置Ingress支持HTTPS访问,提高安全性,避免流量被劫持,提高搜索站点的权重。
六.配置ingress对外发布服务
6.1 安装NGINX ingress controller控制器
要使用Ingress,需要先安装一个Ingress控制器来处理Ingress对象。本次使用Nginx Ingress Controller控制器,Nginx Ingress Controller控制器本质上是一个nginx的反向代理(根据访问地址的不同,转发到不同的服务器)。Nginx Ingress Controller的官网为:https://kubernetes.github.io/ingress-nginx/deploy/。
下载ingress-nginx的部署yaml文件。
root@k8scludes1:~/TLS-ingress# wget https://raw.githubusercontent.com/kubernetes/ingress-nginx/controller-v1.1.1/deploy/static/provider/cloud/deploy.yaml
Connecting to raw.githubusercontent.com (raw.githubusercontent.com)|185.199.109.133|:443... connected.
HTTP request sent, awaiting response... 200 OK
Length: 19299 (19K) [text/plain]
Saving to: ‘deploy.yaml’

deploy.yaml                                          100%[====================================================================================================================>]  18.85K  35.5KB/s    in 0.5s

2022-04-20 15:09:22 (35.5 KB/s) - ‘deploy.yaml’ saved [19299/19299]
查看ingress-nginx所需的镜像。
root@k8scludes1:~/TLS-ingress# grep image deploy.yaml
          image: k8s.gcr.io/ingress-nginx/controller:v1.1.1@sha256:0bc88eb15f9e7f84e8e56c14fa5735aaa488b840983f87bd79b1054190e660de
          imagePullPolicy: IfNotPresent
          image: k8s.gcr.io/ingress-nginx/kube-webhook-certgen:v1.1.1@sha256:64d8c73dca984af206adf9d6d7e46aa550362b1d7a01f3a0a91b20cc67868660
          imagePullPolicy: IfNotPresent
          image: k8s.gcr.io/ingress-nginx/kube-webhook-certgen:v1.1.1@sha256:64d8c73dca984af206adf9d6d7e46aa550362b1d7a01f3a0a91b20cc67868660
          imagePullPolicy: IfNotPresent
因为k8s.gcr.io/ingress-nginx/controller:v1.1.1镜像下载不了,我们搜索可用的镜像。
root@k8scludes1:~# docker search controller:v1.1.1 --no-trunc
NAME                              DESCRIPTION                                  STARS     OFFICIAL   AUTOMATED
loging/ingress-nginx-controller   k8s.gcr.io/ingress-nginx/controller:v1.1.1   1
jhonsun777/controller             k8s.gcr.io/ingress-nginx/controller:v1.1.1   0

root@k8scludes1:~/TLS-ingress# docker search kube-webhook-certgen:v1.1.1 --no-trunc
NAME                                              DESCRIPTION                                                       STARS     OFFICIAL   AUTOMATED
lianyuxue1020/kube-webhook-certgen                new pull lianyuxue1020/kube-webhook-certgen:v1.1.1                1
xyz349925756/ingress-nginx-kube-webhook-certgen   k8s.gcr.io/ingress-nginx/kube-webhook-certgen:v1.1.1              0
freemankevin/kube-webhook-certgen                 correspond:k8s.gcr.io/ingress-nginx/kube-webhook-certgen:v1.1.1   0
longjianghu/ingress-nginx-kube-webhook-certgen    k8s.gcr.io/ingress-nginx/kube-webhook-certgen:v1.1.1原版镜像          0
caihy/ingress-nginx-kube-webhook-certgen          FROM k8s.gcr.io/ingress-nginx/kube-webhook-certgen:v1.1.1         0
在worker节点下载controller镜像和kube-webhook-certgen镜像。
root@k8scludes2:~# docker pull  willdockerhub/ingress-nginx-controller:v1.0.0
root@k8scludes2:~# docker pull  docker.io/liangjw/kube-webhook-certgen:v1.1.1

root@k8scludes3:~# docker pull  willdockerhub/ingress-nginx-controller:v1.0.0
root@k8scludes3:~# docker pull  docker.io/liangjw/kube-webhook-certgen:v1.1.1
把deploy.yaml文件里的镜像修改为我们下载好的镜像,注意ingress-nginx-controller和kube-webhook-certgen镜像的版本不要差太多,不然部署失败。
root@k8scludes1:~/TLS-ingress# grep image deploy.yaml
          image: willdockerhub/ingress-nginx-controller:v1.0.0
          imagePullPolicy: IfNotPresent
          image: docker.io/liangjw/kube-webhook-certgen:v1.1.1
          imagePullPolicy: IfNotPresent
          image: docker.io/liangjw/kube-webhook-certgen:v1.1.1
          imagePullPolicy: IfNotPresent
应用ingress-nginx-controller。
root@k8scludes1:~/TLS-ingress# kubectl apply -f deploy.yaml
namespace/ingress-nginx created
serviceaccount/ingress-nginx created
configmap/ingress-nginx-controller created
clusterrole.rbac.authorization.k8s.io/ingress-nginx created
clusterrolebinding.rbac.authorization.k8s.io/ingress-nginx created
role.rbac.authorization.k8s.io/ingress-nginx created
rolebinding.rbac.authorization.k8s.io/ingress-nginx created
service/ingress-nginx-controller-admission created
service/ingress-nginx-controller created
deployment.apps/ingress-nginx-controller created
ingressclass.networking.k8s.io/nginx created
validatingwebhookconfiguration.admissionregistration.k8s.io/ingress-nginx-admission created
serviceaccount/ingress-nginx-admission created
clusterrole.rbac.authorization.k8s.io/ingress-nginx-admission created
clusterrolebinding.rbac.authorization.k8s.io/ingress-nginx-admission created
role.rbac.authorization.k8s.io/ingress-nginx-admission created
rolebinding.rbac.authorization.k8s.io/ingress-nginx-admission created
job.batch/ingress-nginx-admission-create created
job.batch/ingress-nginx-admission-patch created
显示如下,则ingress-nginx-controller控制器部署成功。
root@k8scludes1:~/TLS-ingress# kubectl get pod -n ingress-nginx -o wide
NAME                                        READY   STATUS      RESTARTS   AGE   IP               NODE         NOMINATED NODE   READINESS GATES
ingress-nginx-admission-create--1-t5hqt     0/1     Completed   0          23s   10.244.218.147   k8scludes2   <none>           <none>
ingress-nginx-admission-patch--1-wzb6x      0/1     Completed   1          23s   10.244.218.146   k8scludes2   <none>           <none>
ingress-nginx-controller-6b64bc6f47-dgjdq   1/1     Running     0          23s   10.244.218.148   k8scludes2   <none>           <none>
注意deploy.yaml文件里- --watch-ingress-without-class=true参数加不加都没有影响。
root@k8scludes1:~/TLS-ingress# grep -A12 arg deploy.yaml
          args:
            - /nginx-ingress-controller
            - --election-id=ingress-controller-leader
            - --controller-class=k8s.io/ingress-nginx
            - --configmap=$(POD_NAMESPACE)/ingress-nginx-controller
            - --validating-webhook=:8443
            - --validating-webhook-certificate=/usr/local/certificates/cert
            - --validating-webhook-key=/usr/local/certificates/key
              #- --watch-ingress-without-class=true
6.2 创建pod
NGINX ingress controller控制器搭建成功之后创建pod。
在worker节点提前下载好nginx镜像。
root@k8scludes2:~# docker pull hub.c.163.com/library/nginx:latest
root@k8scludes3:~# docker pull hub.c.163.com/library/nginx:latest
pod配置文件如下,功能为使用Nginx镜像创建pod。
root@k8scludes1:~/TLS-ingress# vim pod.yaml

#使用nginx镜像创建pod
root@k8scludes1:~/TLS-ingress# cat pod.yaml
apiVersion: v1
kind: Pod
metadata:
  labels:
    test: podtest
  name: podtest
spec:
  #当需要关闭容器时,立即杀死容器而不等待默认的30秒优雅停机时长。
  terminationGracePeriodSeconds: 0
  containers:
  - name: nginx
    image: hub.c.163.com/library/nginx:latest
    #imagePullPolicy: IfNotPresent:表示如果本地已经存在该镜像,则不重新下载;否则从远程 Docker Hub 下载该镜像
    imagePullPolicy: IfNotPresent
生成三个pod用于ingress访问。
root@k8scludes1:~/TLS-ingress# sed 's/podtest/nginx1/' pod.yaml | kubectl apply -f -
pod/nginx1 created

root@k8scludes1:~/TLS-ingress# sed 's/podtest/nginx2/' pod.yaml | kubectl apply -f -
pod/nginx2 created

root@k8scludes1:~/TLS-ingress# sed 's/podtest/nginx3/' pod.yaml | kubectl apply -f -
pod/nginx3 created
查看pod。
root@k8scludes1:~/TLS-ingress# kubectl get pod -o wide
NAME     READY   STATUS    RESTARTS   AGE   IP               NODE         NOMINATED NODE   READINESS GATES
nginx1   1/1     Running   0          31s   10.244.218.149   k8scludes2   <none>           <none>
nginx2   1/1     Running   0          21s   10.244.218.150   k8scludes2   <none>           <none>
nginx3   1/1     Running   0          12s   10.244.1.81      k8scludes3   <none>           <none>
修改nginx的index.html文件,用于辨别每个pod。
root@k8scludes1:~/TLS-ingress# kubectl exec -it nginx1 -- sh -c "echo 111 >/usr/share/nginx/html/index.html"

root@k8scludes1:~/TLS-ingress# kubectl exec -it nginx2 -- sh -c "echo 222 >/usr/share/nginx/html/index.html"

root@k8scludes1:~/TLS-ingress# kubectl exec -it nginx3 -- sh -c "mkdir /usr/share/nginx/html/ingress; echo 333 >/usr/share/nginx/html/ingress/index.html"
6.3 为pod创建svc服务
给每个pod创建一个svc服务。
root@k8scludes1:~/TLS-ingress# kubectl expose --name=nginx1svc pod nginx1 --port=80
service/nginx1svc exposed

root@k8scludes1:~/TLS-ingress# kubectl expose --name=nginx2svc pod nginx2 --port=80
service/nginx2svc exposed

root@k8scludes1:~/TLS-ingress# kubectl expose --name=nginx3svc pod nginx3 --port=80
service/nginx3svc exposed
查看svc。
root@k8scludes1:~/TLS-ingress# kubectl get svc -o wide
NAME        TYPE        CLUSTER-IP      EXTERNAL-IP   PORT(S)   AGE   SELECTOR
nginx1svc   ClusterIP   10.98.119.83    <none>        80/TCP    24s   test=nginx1
nginx2svc   ClusterIP   10.106.4.10     <none>        80/TCP    17s   test=nginx2
nginx3svc   ClusterIP   10.101.154.93   <none>        80/TCP    9s    test=nginx3
访问svc。
root@k8scludes1:~/TLS-ingress# curl 10.98.119.83
111

root@k8scludes1:~/TLS-ingress# curl 10.106.4.10
222

root@k8scludes1:~/TLS-ingress# curl 10.101.154.93/ingress/index.html
333
6.4 使用ingress发布服务
创建ingress规则。
root@k8scludes1:~/TLS-ingress# vim ingress-rule.yaml

#注意在annotations中需要指定你的ingress是何种,此处使用的nginx-ingress所以是Nginx,否则无法通过配置的域名www.nginx13.com访问
#访问www.nginx13.com就相当于访问nginx1svc服务
root@k8scludes1:~/TLS-ingress# cat ingress-rule.yaml
apiVersion: networking.k8s.io/v1
kind: Ingress
metadata:
  name: my-ingress
  annotations:
    kubernetes.io/ingress.class: "nginx"
spec:
  rules:
  - host: www.nginx13.com
    http:
      paths:
      #访问网址目录
      - path: /
        pathType: Prefix
        backend:
          service:
            name: nginx1svc
            port:
              number: 80
      - path: /ingress
        pathType: Prefix
        backend:
          service:
            name: nginx3svc
            port:
              number: 80

  - host: www.nginx2.com
    http:
      paths:
      - path: /
        pathType: Prefix
        backend:
          service:
            name: nginx2svc
            port:
              number: 80
应用ingress规则。
root@k8scludes1:~/TLS-ingress# kubectl apply -f ingress-rule.yaml
ingress.networking.k8s.io/my-ingress created
查看ingress。
root@k8scludes1:~/TLS-ingress# kubectl get ingress -o wide
NAME         CLASS    HOSTS                            ADDRESS   PORTS   AGE
my-ingress   <none>   www.nginx13.com,www.nginx2.com             80      10s

root@k8scludes1:~/TLS-ingress# kubectl get ing -o wide
NAME         CLASS    HOSTS                            ADDRESS   PORTS   AGE
my-ingress   <none>   www.nginx13.com,www.nginx2.com             80      34s
可以发现svc的80端口被映射为32253端口。
root@k8scludes1:~/TLS-ingress# kubectl get svc -n ingress-nginx -o wide
NAME                                 TYPE        CLUSTER-IP      EXTERNAL-IP   PORT(S)                      AGE   SELECTOR
ingress-nginx-controller             NodePort    10.96.184.210   <none>        80:32253/TCP,443:30876/TCP   22m   app.kubernetes.io/component=controller,app.kubernetes.io/instance=ingress-nginx,app.kubernetes.io/name=ingress-nginx
ingress-nginx-controller-admission   ClusterIP   10.102.52.109   <none>        443/TCP                      22m   app.kubernetes.io/component=controller,app.kubernetes.io/instance=ingress-nginx,app.kubernetes.io/name=ingress-nginx
当在其他命名空间创建相同的ingress规则时,会提醒重复。
root@k8scludes1:~/TLS-ingress# kubectl apply -f ingress-rule.yaml -n default
Error from server (BadRequest): error when creating "ingress-rule.yaml": admission webhook "validate.nginx.ingress.kubernetes.io" denied the request: host "www.nginx13.com" and path "/" is already defined in ingress tls-ingress/my-ingress
6.5 访问服务
6.5.1 使用Linux客户端来访问服务
ingress规则创建之后,我们使用Linux客户端来访问服务。
我们使用etcd2机器作为客户端,因为ingress-nginx-controller控制器在k8scludes2上,k8scludes2的IP地址为192.168.110.129。
root@k8scludes1:~/TLS-ingress# kubectl get pod -o wide -n ingress-nginx
NAME                                        READY   STATUS      RESTARTS   AGE   IP               NODE         NOMINATED NODE   READINESS GATES
ingress-nginx-admission-create--1-t5hqt     0/1     Completed   0          23m   10.244.218.147   k8scludes2   <none>           <none>
ingress-nginx-admission-patch--1-wzb6x      0/1     Completed   1          23m   10.244.218.146   k8scludes2   <none>           <none>
ingress-nginx-controller-6b64bc6f47-dgjdq   1/1     Running     0          23m   10.244.218.148   k8scludes2   <none>           <none>
我们配置客户端etcd2机器的 /etc/hosts文件,ingress-nginx-controller控制器IP和域名的映射。
[root@etcd2 ~]# vim /etc/hosts

ingress-nginx-controller控制器IP和域名的映射
[root@etcd2 ~]# cat /etc/hosts
127.0.0.1   localhost localhost.localdomain localhost4 localhost4.localdomain4
::1         localhost localhost.localdomain localhost6 localhost6.localdomain6
192.168.110.133 etcd1
192.168.110.131 etcd2
192.168.110.132 etcd3
192.168.110.129 www.nginx13.com
192.168.110.129 www.nginx2.com
直接访问域名的80端口被拒绝了。
[root@etcd2 ~]# curl www.nginx13.com
curl: (7) Failed connect to www.nginx13.com:80; 拒绝连接

[root@etcd2 ~]# curl www.nginx2.com
curl: (7) Failed connect to www.nginx2.com:80; 拒绝连接
ingress-nginx-controller服务把80端口被映射为32253端口,所以外界需要访问32253端口。
root@k8scludes1:~/TLS-ingress# kubectl get svc -n ingress-nginx -o wide
NAME                                 TYPE        CLUSTER-IP      EXTERNAL-IP   PORT(S)                      AGE   SELECTOR
ingress-nginx-controller             NodePort    10.96.184.210   <none>        80:32253/TCP,443:30876/TCP   22m   app.kubernetes.io/component=controller,app.kubernetes.io/instance=ingress-nginx,app.kubernetes.io/name=ingress-nginx
ingress-nginx-controller-admission   ClusterIP   10.102.52.109   <none>        443/TCP                      22m   app.kubernetes.io/component=controller,app.kubernetes.io/instance=ingress-nginx,app.kubernetes.io/name=ingress-nginx
现在通过域名就可以访问nginx的不同服务了。
[root@etcd2 ~]# curl www.nginx13.com:32253
111

[root@etcd2 ~]# curl www.nginx2.com:32253/
222

[root@etcd2 ~]# curl www.nginx13.com:32253/ingress/index.html
333
6.5.2 使用Windows客户端访问服务
我们也可以使用Windows机器作为客户端访问服务。修改Windows机器的C:\Windows\System32\drivers\etc\HOSTS文件的IP域名映射。
192.168.110.129 www.nginx13.com
192.168.110.129 www.nginx2.com
然后使用浏览器通过域名访问nginx服务。


自此ingress对外发布服务成功,但是现在使用的是http://www.nginx13.com访问的,http是明文传输,不安全。
七.配置Ingress支持HTTPS访问
7.1 使用ingress-nginx-controller自带的证书
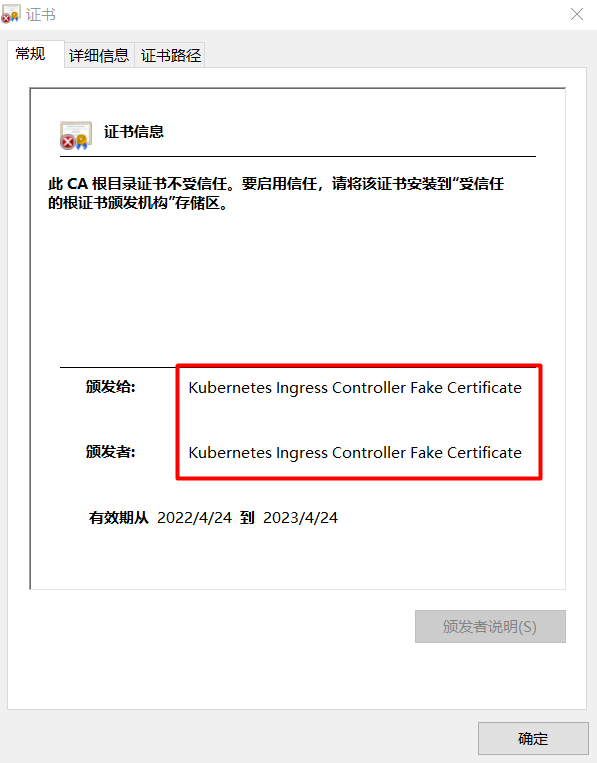
此时pod,svc没有做任何https配置,客户端使用https访问ingress-nginx-controller,浏览器会发出警告,这是因为ingress-nginx-controller也有证书,但是客户端一核实,不是CA颁发的证书,浏览器就报警了。
https端口为443,对应的端口为30876。
root@k8scludes1:~/TLS-ingress# kubectl get svc -n ingress-nginx -o wide
NAME                                 TYPE        CLUSTER-IP      EXTERNAL-IP   PORT(S)                      AGE   SELECTOR
ingress-nginx-controller             NodePort    10.96.184.210   <none>        80:32253/TCP,443:30876/TCP   22m   app.kubernetes.io/component=controller,app.kubernetes.io/instance=ingress-nginx,app.kubernetes.io/name=ingress-nginx
ingress-nginx-controller-admission   ClusterIP   10.102.52.109   <none>        443/TCP                      22m   app.kubernetes.io/component=controller,app.kubernetes.io/instance=ingress-nginx,app.kubernetes.io/name=ingress-nginx
浏览器访问https://www.nginx2.com:31473/,查看证书,点击证书无效。
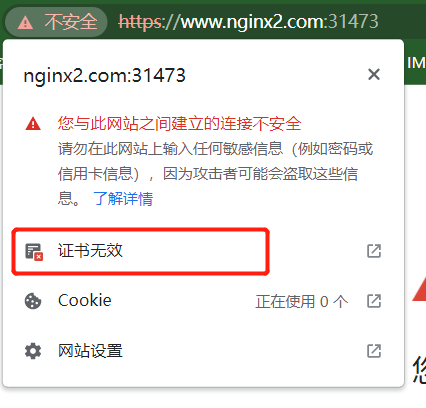
可以看到,证书为ingress自带的证书。
继续访问。
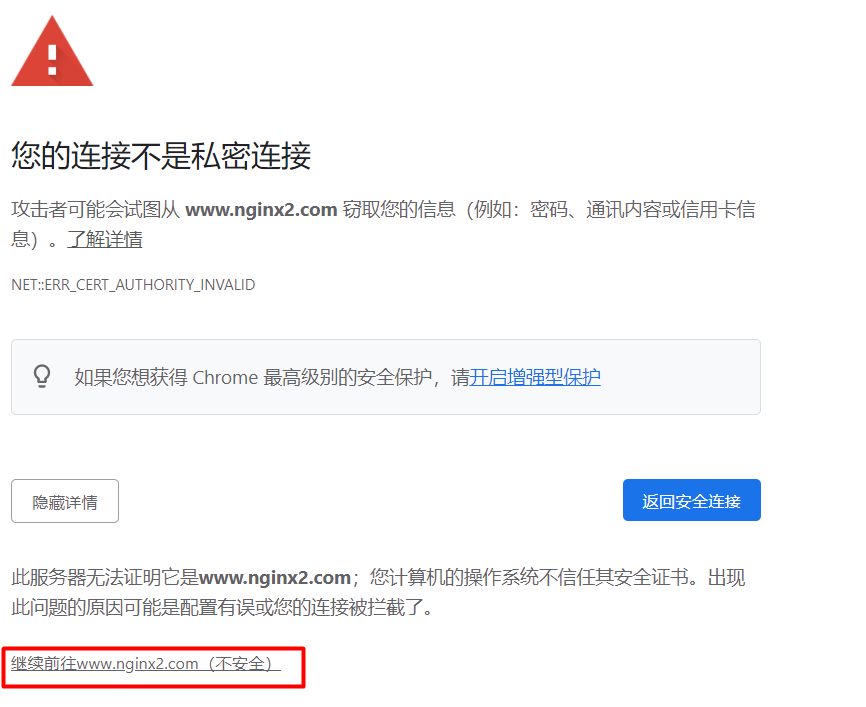
使用https可以访问服务,但是证书是ingress自带的证书。

ingress-nginx-controller给不同的域名提供域名解析服务,证书是各个域名共享的,即所有的站点共享这个证书。
7.2 使用cfssl工具生成证书
7.2.1 安装cfssl
现在我们想申请自己专属的证书,而不是ingress-nginx-controller共享的证书,可以使用cfssl工具自己生成一个证书。
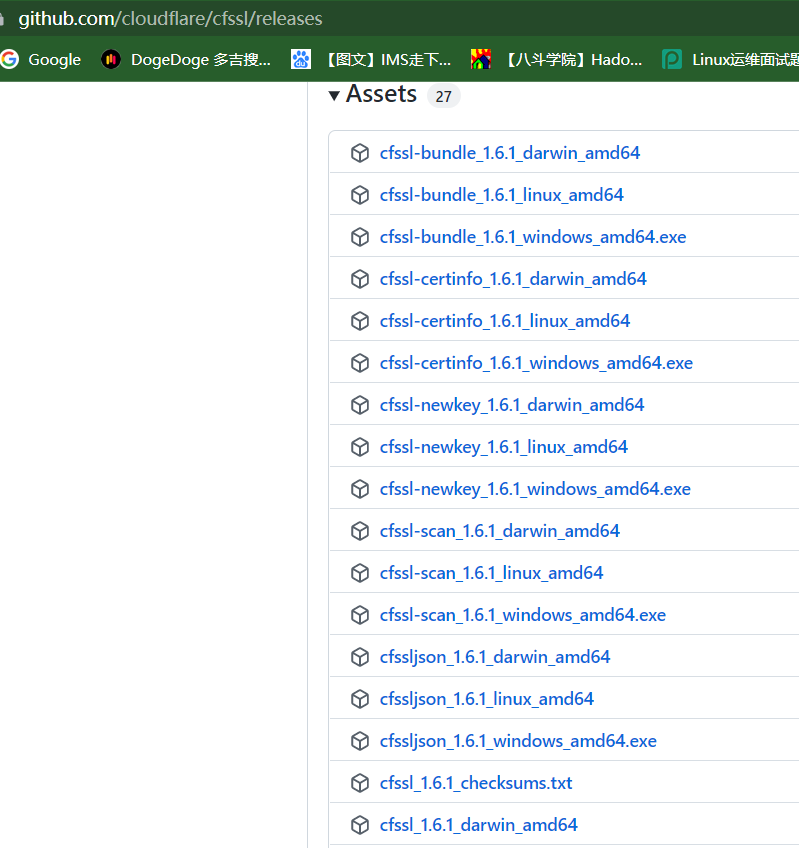
cfssl下载地址:https://github.com/cloudflare/cfssl/releases 。
下载这三个文件:cfssl_1.6.1_linux_amd64 , cfssl-certinfo_1.6.1_linux_amd64 , cfssljson_1.6.1_linux_amd64 。
把下载好的cfssl文件放到 /usr/local/bin/目录下。
root@k8scludes1:~/TLS-ingress# cd /usr/local/bin/

root@k8scludes1:/usr/local/bin# ls

root@k8scludes1:/usr/local/bin# pwd
/usr/local/bin

root@k8scludes1:/usr/local/bin# rz -E
rz waiting to receive.

root@k8scludes1:/usr/local/bin# ls
cfssl_1.6.1_linux_amd64  cfssl-certinfo_1.6.1_linux_amd64  cfssljson_1.6.1_linux_amd64
文件重命名。
root@k8scludes1:/usr/local/bin# mv cfssl_1.6.1_linux_amd64 cfssl

root@k8scludes1:/usr/local/bin# mv cfssl-certinfo_1.6.1_linux_amd64 cfssl-certinfo

root@k8scludes1:/usr/local/bin# mv cfssljson_1.6.1_linux_amd64 cfssljson

root@k8scludes1:/usr/local/bin# ll -h
total 40M
drwxr-xr-x  2 root root 4.0K Apr 21 19:45 ./
drwxr-xr-x 10 root root 4.0K Nov 27  2020 ../
-rw-r--r--  1 root root  16M Apr 21 17:39 cfssl
-rw-r--r--  1 root root  13M Apr 21 17:50 cfssl-certinfo
-rw-r--r--  1 root root  11M Apr 21 17:42 cfssljson
赋予可执行权限。
root@k8scludes1:/usr/local/bin# chmod +x ./*
7.2.2 生成CA
创建tls目录存放证书文件。
root@k8scludes1:/usr/local/bin# cd

root@k8scludes1:~/TLS-ingress# mkdir tls

root@k8scludes1:~/TLS-ingress# cd tls/

root@k8scludes1:~/TLS-ingress/tls# pwd
/root/TLS-ingress/tls
使用cfssl工具生成证书的原理是:自己模拟一套完整的环境,包括CA也是自己搭建,需要CA(ca公钥,ca私钥),我们自己的私钥和ca给我们颁发的证书,申请ca证书还需要证书请求文件csr。
生成CA配置文件。
- ca-config.json:可以定义多个 profiles,分别指定不同的过期时间、使用场景等参数;后续在签名证书时使用某个profile;www,client都是profile。
- signing:表示该证书可用于签名其它证书;生成的ca.pem证书中 CA=TRUE;
- server auth:表示client可以用该 CA 对server提供的证书进行验证;
- client auth:表示server可以用该CA对client提供的证书进行验证 ;
root@k8scludes1:~/TLS-ingress/tls# cfssl print-defaults config > ca-config.json

root@k8scludes1:~/TLS-ingress/tls# cat ca-config.json
{
    "signing": {
        "default": {
            "expiry": "168h"
        },
        "profiles": {
            "www": {
                "expiry": "8760h",
                "usages": [
                    "signing",
                    "key encipherment",
                    "server auth"
                ]
            },
            "client": {
                "expiry": "8760h",
                "usages": [
                    "signing",
                    "key encipherment",
                    "client auth"
                ]
            }
        }
    }
}
修改CA配置文件,这里只设置一个profiles:www。
root@k8scludes1:~/TLS-ingress/tls# vim ca-config.json

root@k8scludes1:~/TLS-ingress/tls# cat ca-config.json
{
    "signing": {
        "default": {
            "expiry": "1680h"
        },
        "profiles": {
            "www": {
                "expiry": "8760h",
                "usages": [
                    "signing",
                    "key encipherment",
                    "server auth"
                ]
            }
        }
    }
}
现在生成ca的证书请求文件csr。
- CN: Common Name,浏览器使用该字段验证网站是否合法,一般写的是域名;
- C: Country, 国家;
- L: Locality,地区,城市;
- O: Organization Name,组织名称,公司名称;
- OU: Organization Unit Name,组织单位名称,公司部门;
- ST: State,州,省。
root@k8scludes1:~/TLS-ingress/tls# cfssl print-defaults csr > ca-csr.json

root@k8scludes1:~/TLS-ingress/tls# cat ca-csr.json
{
    "CN": "example.net",
    "hosts": [
        "example.net",
        "www.example.net"
    ],
    "key": {
        "algo": "ecdsa",
        "size": 256
    },
    "names": [
        {
            "C": "US",
            "ST": "CA",
            "L": "San Francisco"
        }
    ]
}
ca的证书请求文件ca-csr.json,修改域名为nginxx.com,城市信息换成广州,algo表示加密算法,size表示算法长度。
root@k8scludes1:~/TLS-ingress/tls# vim ca-csr.json

root@k8scludes1:~/TLS-ingress/tls# cat ca-csr.json
{
    "CN": "nginxx.com",
    "key": {
        "algo": "ecdsa",
        "size": 256
    },
    "names": [
        {
            "C": "CN",
            "ST": "guangdon",
            "L": "guangzhou"
        }
    ]
}
下面生成CA权威机构。
root@k8scludes1:~/TLS-ingress/tls# cfssl gencert -initca ca-csr.json | cfssljson -bare ca
2022/04/22 15:42:54 [INFO] generating a new CA key and certificate from CSR
2022/04/22 15:42:54 [INFO] generate received request
2022/04/22 15:42:54 [INFO] received CSR
2022/04/22 15:42:54 [INFO] generating key: ecdsa-256
2022/04/22 15:42:54 [INFO] encoded CSR
2022/04/22 15:42:54 [INFO] signed certificate with serial number 361660789191812789469217914317150175823294603356
生成了一个自签名的证书,CA的证书(ca.pem),CA的私钥(ca-key.pem)。
root@k8scludes1:~/TLS-ingress/tls# ls
ca-config.json  ca.csr  ca-csr.json  ca-key.pem  ca.pem
7.2.3 生成用户证书
生成用户test的证书请求文件。
root@k8scludes1:~/TLS-ingress/tls# cfssl print-defaults csr >test-csr.json

root@k8scludes1:~/TLS-ingress/tls# cat test-csr.json
{
    "CN": "example.net",
    "hosts": [
        "example.net",
        "www.example.net"
    ],
    "key": {
        "algo": "ecdsa",
        "size": 256
    },
    "names": [
        {
            "C": "US",
            "ST": "CA",
            "L": "San Francisco"
        }
    ]
}
修改test-csr.json,"www.nginxx.com"表示申请的证书只给www.nginxx.com使用,hosts参数为空的话,便是所有的站点都可以使用该证书。
root@k8scludes1:~/TLS-ingress/tls# vim test-csr.json

root@k8scludes1:~/TLS-ingress/tls# cat test-csr.json
{
    "CN": "nginxx.com",
    "key": {
        "algo": "ecdsa",
        "size": 256
    },
    "hosts":[
          "www.nginxx.com"
    ],
    "names": [
        {
            "C": "CN",
            "ST": "guangdon",
            "L": "guangzhou"
        }
    ]
}

root@k8scludes1:~/TLS-ingress/tls# ls
ca-config.json  ca.csr  ca-csr.json  ca-key.pem  ca.pem  test-csr.json
把test用户的证书请求文件发给CA,让CA审批,ca.pem是ca公钥,ca-key.pem是ca私钥,ca-config.json是ca配置文件,profile指定为www,最后的用户名test是给用户颁发证书名字的前缀。
root@k8scludes1:~/TLS-ingress/tls# cfssl gencert -ca=ca.pem -ca-key=ca-key.pem -config=ca-config.json -profile=www test-csr.json | cfssljson -bare test
2022/04/22 16:05:02 [INFO] generate received request
2022/04/22 16:05:02 [INFO] received CSR
2022/04/22 16:05:02 [INFO] generating key: ecdsa-256
2022/04/22 16:05:02 [INFO] encoded CSR
2022/04/22 16:05:02 [INFO] signed certificate with serial number 468422675225780030350363273085193709570812230921

root@k8scludes1:~/TLS-ingress/tls# ls
ca-config.json  ca.csr  ca-csr.json  ca-key.pem  ca.pem  test.csr  test-csr.json  test-key.pem  test.pem
test-key.pem是test用户的私钥,test.pem是ca给test颁发的证书(也就是公钥)。
root@k8scludes1:~/TLS-ingress/tls# ls test*
test.csr  test-csr.json  test-key.pem  test.pem
7.2.4 使用自定义的证书
接下来要替换掉ingress-nginx-controller自带的证书,使用我们生成的证书。
查看secret。
root@k8scludes1:~/TLS-ingress/tls# kubectl get secrets
NAME                  TYPE                                  DATA   AGE
default-token-mxb4r   kubernetes.io/service-account-token   3      3d23h
创建一个tls类型的secret,里面包含test用户的私钥和证书,查看tls类型的secret的语法。
root@k8scludes1:~/TLS-ingress/tls# kubectl create secret tls --help
Create a TLS secret from the given public/private key pair.

 The public/private key pair must exist beforehand. The public key certificate must be .PEM encoded and match the given
private key.

Examples:
  # Create a new TLS secret named tls-secret with the given key pair
  kubectl create secret tls tls-secret --cert=path/to/tls.cert --key=path/to/tls.key

Options:
      --allow-missing-template-keys=true: If true, ignore any errors in templates when a field or map key is missing in
the template. Only applies to golang and jsonpath output formats.
      --append-hash=false: Append a hash of the secret to its name.
      --cert='': Path to PEM encoded public key certificate.
      --dry-run='none': Must be "none", "server", or "client". If client strategy, only print the object that would be
sent, without sending it. If server strategy, submit server-side request without persisting the resource.
      --field-manager='kubectl-create': Name of the manager used to track field ownership.
      --key='': Path to private key associated with given certificate.
  -o, --output='': Output format. One of:
json|yaml|name|go-template|go-template-file|template|templatefile|jsonpath|jsonpath-as-json|jsonpath-file.
      --save-config=false: If true, the configuration of current object will be saved in its annotation. Otherwise, the
annotation will be unchanged. This flag is useful when you want to perform kubectl apply on this object in the future.
      --show-managed-fields=false: If true, keep the managedFields when printing objects in JSON or YAML format.
      --template='': Template string or path to template file to use when -o=go-template, -o=go-template-file. The
template format is golang templates [http://golang.org/pkg/text/template/#pkg-overview].
      --validate=true: If true, use a schema to validate the input before sending it

Usage:
  kubectl create secret tls NAME --cert=path/to/cert/file --key=path/to/key/file [--dry-run=server|client|none]
[options]

Use "kubectl options" for a list of global command-line options (applies to all commands).
创建一个tls类型的secret,里面包含test用户的私钥和证书。
root@k8scludes1:~/TLS-ingress/tls# ls
ca-config.json  ca.csr  ca-csr.json  ca-key.pem  ca.pem  test.csr  test-csr.json  test-key.pem  test.pem

root@k8scludes1:~/TLS-ingress/tls# kubectl create secret tls test-tls-secret --cert=test.pem --key=test-key.pem
secret/test-tls-secret created
secrets创建成功。
root@k8scludes1:~/TLS-ingress/tls# kubectl get secrets
NAME                  TYPE                                  DATA   AGE
default-token-mxb4r   kubernetes.io/service-account-token   3      3d23h
test-tls-secret       kubernetes.io/tls                     2      8s
删除现有的ingress规则。
root@k8scludes1:~/TLS-ingress/tls# pwd
/root/TLS-ingress/tls

root@k8scludes1:~/TLS-ingress/tls# kubectl get ingress
NAME         CLASS    HOSTS                            ADDRESS           PORTS   AGE
my-ingress   <none>   www.nginx13.com,www.nginx2.com   192.168.110.129   80      46h

root@k8scludes1:~/TLS-ingress/tls# cd ../

root@k8scludes1:~/TLS-ingress# ls
bak  certgen15.tar  controller1.tar  deploy.yaml  deploy.yaml.1  deploy.yml  ingress-rule.yaml  pod.yaml  tls  vim

root@k8scludes1:~/TLS-ingress# kubectl delete -f ingress-rule.yaml
ingress.networking.k8s.io "my-ingress" deleted
root@k8scludes1:~/TLS-ingress# kubectl get ingress
No resources found in tls-ingress namespace.
修改ingress规则,ingress-rule.yaml里指定了tls的域名信息和secret,secret里包含了证书。
root@k8scludes1:~/TLS-ingress# vim ingress-rule.yaml

root@k8scludes1:~/TLS-ingress# cat ingress-rule.yaml
apiVersion: networking.k8s.io/v1
kind: Ingress
metadata:
  name: my-ingress
  annotations:
    kubernetes.io/ingress.class: "nginx"
spec:
  tls:
  - hosts:
    - www.nginxx.com
    secretName: test-tls-secret
  rules:
  - host: www.nginx13.com
    http:
      paths:
      #访问网址目录
      - path: /
        pathType: Prefix
        backend:
          service:
            name: nginx1svc
            port:
              number: 80
      - path: /ingress
        pathType: Prefix
        backend:
          service:
            name: nginx3svc
            port:
              number: 80

  - host: www.nginx2.com
    http:
      paths:
      - path: /
        pathType: Prefix
        backend:
          service:
            name: nginx2svc
            port:
              number: 80
应用ingress规则。
root@k8scludes1:~/TLS-ingress# kubectl apply -f ingress-rule.yaml
ingress.networking.k8s.io/my-ingress created
查看ingress规则,现在已经有443端口了,http对应80端口,https对应443端口。
root@k8scludes1:~/TLS-ingress# kubectl get ingress -o wide
NAME         CLASS    HOSTS                            ADDRESS   PORTS     AGE
my-ingress   <none>   www.nginx13.com,www.nginx2.com             80, 443   16s
443端口对应的是31473端口,因为secret里包含了证书,会自动覆盖ingress-nginx-control里面的证书。
root@k8scludes1:~/TLS-ingress# kubectl get svc -o wide -n ingress-nginx
NAME                                 TYPE        CLUSTER-IP      EXTERNAL-IP   PORT(S)                      AGE   SELECTOR
ingress-nginx-controller             NodePort    10.98.61.146    <none>        80:31853/TCP,443:31473/TCP   46h   app.kubernetes.io/component=controller,app.kubernetes.io/instance=ingress-nginx,app.kubernetes.io/name=ingress-nginx
ingress-nginx-controller-admission   ClusterIP   10.102.212.60   <none>        443/TCP                      46h   app.kubernetes.io/component=controller,app.kubernetes.io/instance=ingress-nginx,app.kubernetes.io/name=ingress-nginx
下面使用Linux客户端进行访问,客户端的/etc/hosts如下:
[root@etcd2 ~]# cat /etc/hosts
127.0.0.1   localhost localhost.localdomain localhost4 localhost4.localdomain4
::1         localhost localhost.localdomain localhost6 localhost6.localdomain6
192.168.110.133 etcd1
192.168.110.131 etcd2
192.168.110.132 etcd3
192.168.110.129 www.nginx13.com
192.168.110.129 www.nginx2.com
使用https访问,可以发现证书为ingress自带的证书:CN=Kubernetes Ingress Controller Fake Certificate。
[root@etcd2 ~]# curl -kv https://www.nginx13.com:31473/ingress/index.html
* About to connect() to www.nginx13.com port 31473 (#0)
*   Trying 192.168.110.129...
* Connected to www.nginx13.com (192.168.110.129) port 31473 (#0)
* Initializing NSS with certpath: sql:/etc/pki/nssdb
* skipping SSL peer certificate verification
* SSL connection using TLS_ECDHE_RSA_WITH_AES_128_GCM_SHA256
* Server certificate:
* 	subject: CN=Kubernetes Ingress Controller Fake Certificate,O=Acme Co
* 	start date: 4月 22 04:09:27 2022 GMT
* 	expire date: 4月 22 04:09:27 2023 GMT
* 	common name: Kubernetes Ingress Controller Fake Certificate
* 	issuer: CN=Kubernetes Ingress Controller Fake Certificate,O=Acme Co
> GET /ingress/index.html HTTP/1.1
> User-Agent: curl/7.29.0
> Host: www.nginx13.com:31473
> Accept: */*
>
< HTTP/1.1 200 OK
< Date: Fri, 22 Apr 2022 08:51:08 GMT
< Content-Type: text/html
< Content-Length: 4
< Connection: keep-alive
< Last-Modified: Fri, 22 Apr 2022 07:17:09 GMT
< ETag: "62625675-4"
< Accept-Ranges: bytes
< Strict-Transport-Security: max-age=15724800; includeSubDomains
<
333
* Connection #0 to host www.nginx13.com left intact
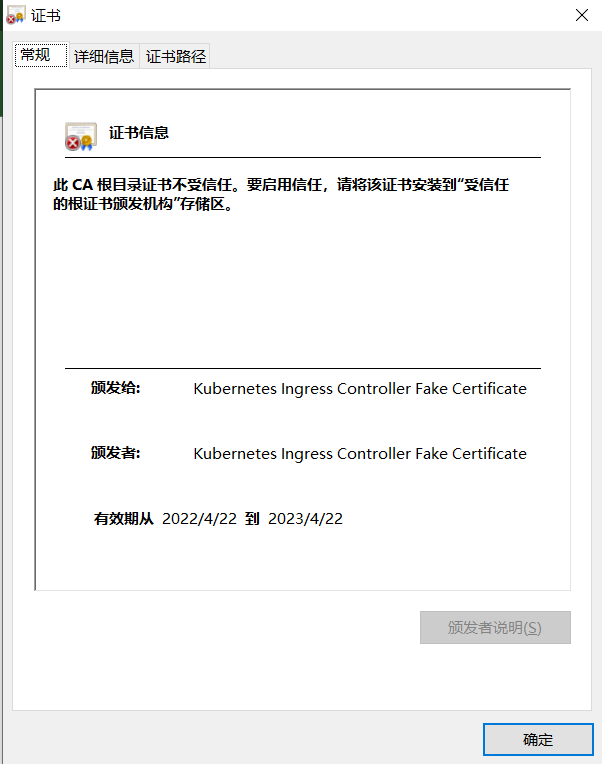
Windows客户端使用https访问服务,浏览器输入https://www.nginx13.com:31473/ingress/index.html,我们查看证书。
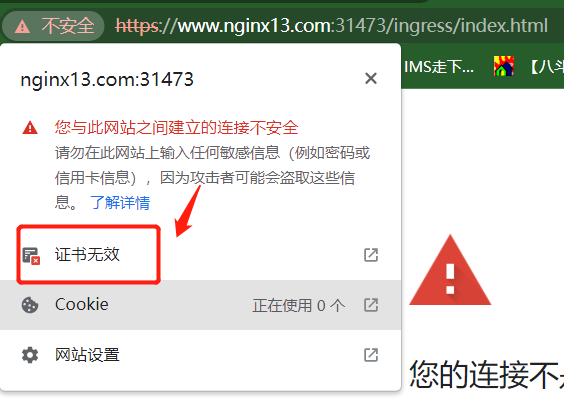
发现证书是ingress自带的证书。
继续访问。
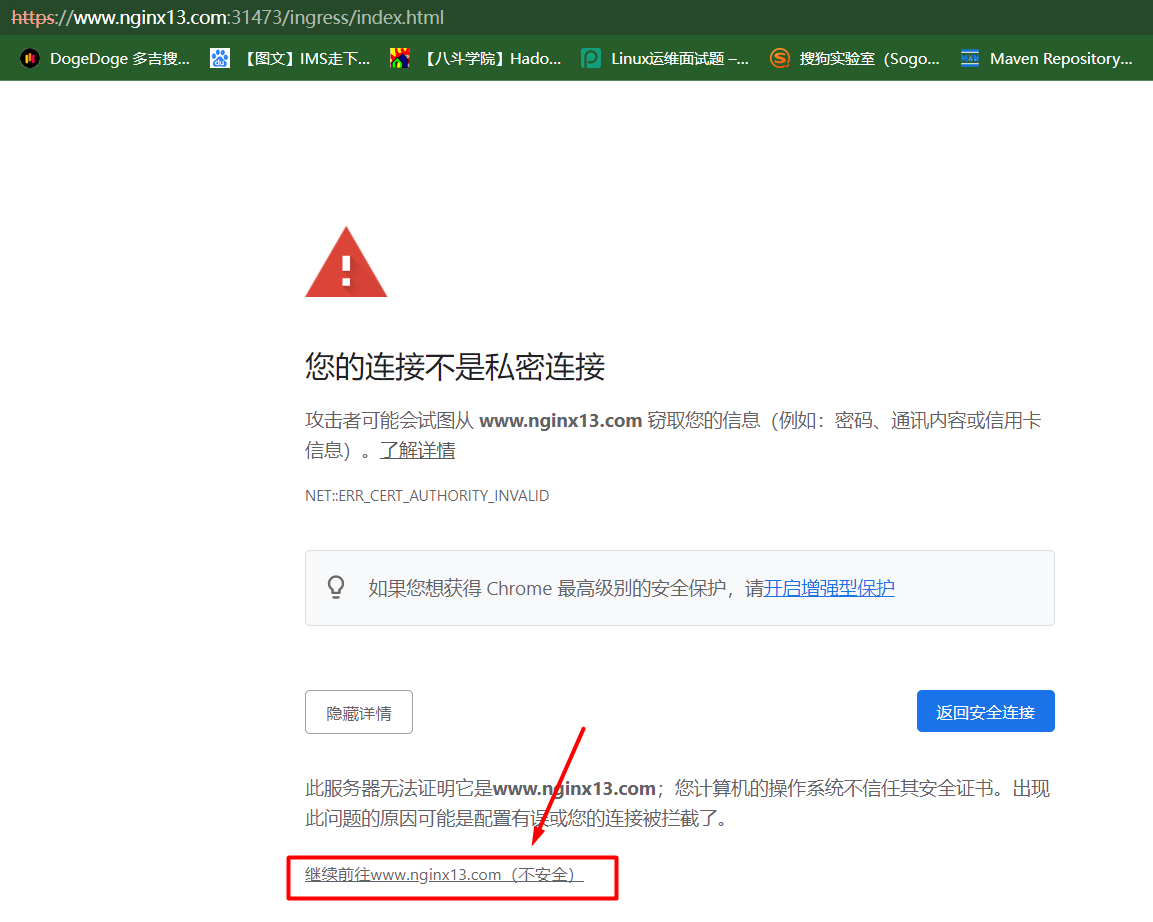
可以发现,现在可以https访问ingress了,但是证书不是我们自己生成的那个证书,而是ingress自带的证书,是因为我们自己生成的证书只给域名www.nginxx.com使用,其他域名访问只能使用ingress自带的证书。

现在修改ingress规则,使其使用我们自己生成的证书。
删除ingress规则。
root@k8scludes1:~/TLS-ingress# ls
bak  certgen15.tar  controller1.tar  deploy.yaml  deploy.yaml.1  deploy.yml  ingress-rule.yaml  pod.yaml  tls  vim

root@k8scludes1:~/TLS-ingress# kubectl delete -f ingress-rule.yaml
ingress.networking.k8s.io "my-ingress" deleted

root@k8scludes1:~/TLS-ingress# kubectl get ingress
No resources found in tls-ingress namespace.
修改ingress规则,host域名只有www.nginxx.com。
root@k8scludes1:~/TLS-ingress# vim ingress-rule.yaml

root@k8scludes1:~/TLS-ingress# cat ingress-rule.yaml
apiVersion: networking.k8s.io/v1
kind: Ingress
metadata:
  name: my-ingress
  annotations:
    kubernetes.io/ingress.class: "nginx"
spec:
  tls:
  - hosts:
    - www.nginxx.com
    secretName: test-tls-secret
  rules:
  - host: www.nginxx.com
    http:
      paths:
      #访问网址目录
      - path: /
        pathType: Prefix
        backend:
          service:
            name: nginx1svc
            port:
              number: 80
      - path: /ingress
        pathType: Prefix
        backend:
          service:
            name: nginx3svc
            port:
              number: 80
      - path: /n2
        pathType: Prefix
        backend:
          service:
            name: nginx2svc
            port:
              number: 80
应用ingress规则。
root@k8scludes1:~/TLS-ingress# kubectl apply -f ingress-rule.yaml
ingress.networking.k8s.io/my-ingress created

root@k8scludes1:~/TLS-ingress# kubectl get ingress -o wide
NAME         CLASS    HOSTS            ADDRESS           PORTS     AGE
my-ingress   <none>   www.nginxx.com   192.168.110.129   80, 443   2m6s

root@k8scludes1:~/TLS-ingress# kubectl get svc -o wide -n ingress-nginx
NAME                                 TYPE        CLUSTER-IP      EXTERNAL-IP   PORT(S)                      AGE   SELECTOR
ingress-nginx-controller             NodePort    10.98.61.146    <none>        80:31853/TCP,443:31473/TCP   47h   app.kubernetes.io/component=controller,app.kubernetes.io/instance=ingress-nginx,app.kubernetes.io/name=ingress-nginx
ingress-nginx-controller-admission   ClusterIP   10.102.212.60   <none>        443/TCP                      47h   app.kubernetes.io/component=controller,app.kubernetes.io/instance=ingress-nginx,app.kubernetes.io/name=ingress-nginx
首先修改Linux客户端的/etc/hosts,添加IP域名映射:192.168.110.129 www.nginxx.com。
[root@etcd2 ~]# vim /etc/hosts

[root@etcd2 ~]# cat /etc/hosts
127.0.0.1   localhost localhost.localdomain localhost4 localhost4.localdomain4
::1         localhost localhost.localdomain localhost6 localhost6.localdomain6
192.168.110.133 etcd1
192.168.110.131 etcd2
192.168.110.132 etcd3
192.168.110.129 www.nginx13.com
192.168.110.129 www.nginx2.com
192.168.110.129 www.nginxx.com
使用Linux客户端访问服务,使用https访问,发现证书变为我们自定义的nginxx.com。
[root@etcd2 ~]# curl -kv https://www.nginxx.com:31473/ingress/index.html
* About to connect() to www.nginxx.com port 31473 (#0)
*   Trying 192.168.110.129...
* Connected to www.nginxx.com (192.168.110.129) port 31473 (#0)
* Initializing NSS with certpath: sql:/etc/pki/nssdb
* skipping SSL peer certificate verification
* SSL connection using TLS_ECDHE_ECDSA_WITH_AES_128_GCM_SHA256
* Server certificate:
* 	subject: CN=nginxx.com,L=guangzhou,ST=guangdon,C=CN
* 	start date: 4月 22 08:00:00 2022 GMT
* 	expire date: 4月 22 08:00:00 2023 GMT
* 	common name: nginxx.com
* 	issuer: CN=nginxx.com,L=guangzhou,ST=guangdon,C=CN
> GET /ingress/index.html HTTP/1.1
> User-Agent: curl/7.29.0
> Host: www.nginxx.com:31473
> Accept: */*
>
< HTTP/1.1 200 OK
< Date: Fri, 22 Apr 2022 09:26:31 GMT
< Content-Type: text/html
< Content-Length: 4
< Connection: keep-alive
< Last-Modified: Fri, 22 Apr 2022 07:17:09 GMT
< ETag: "62625675-4"
< Accept-Ranges: bytes
< Strict-Transport-Security: max-age=15724800; includeSubDomains
<
333
* Connection #0 to host www.nginxx.com left intact
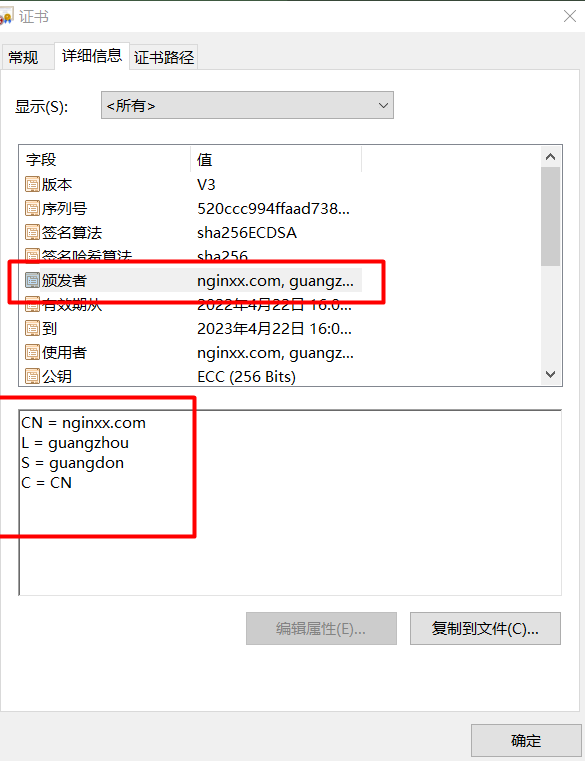
下面使用Windows客户端访问服务,查看证书。
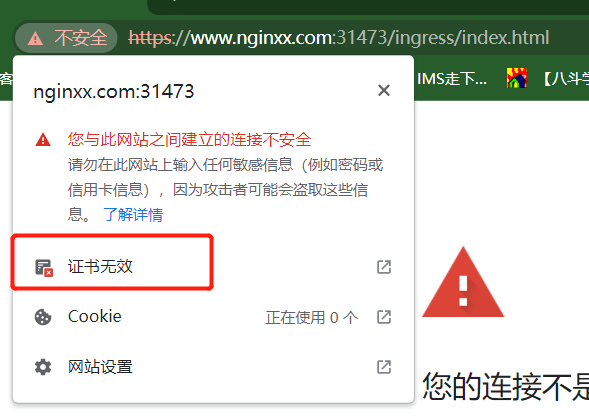
证书为我们自定义的证书。
继续访问。
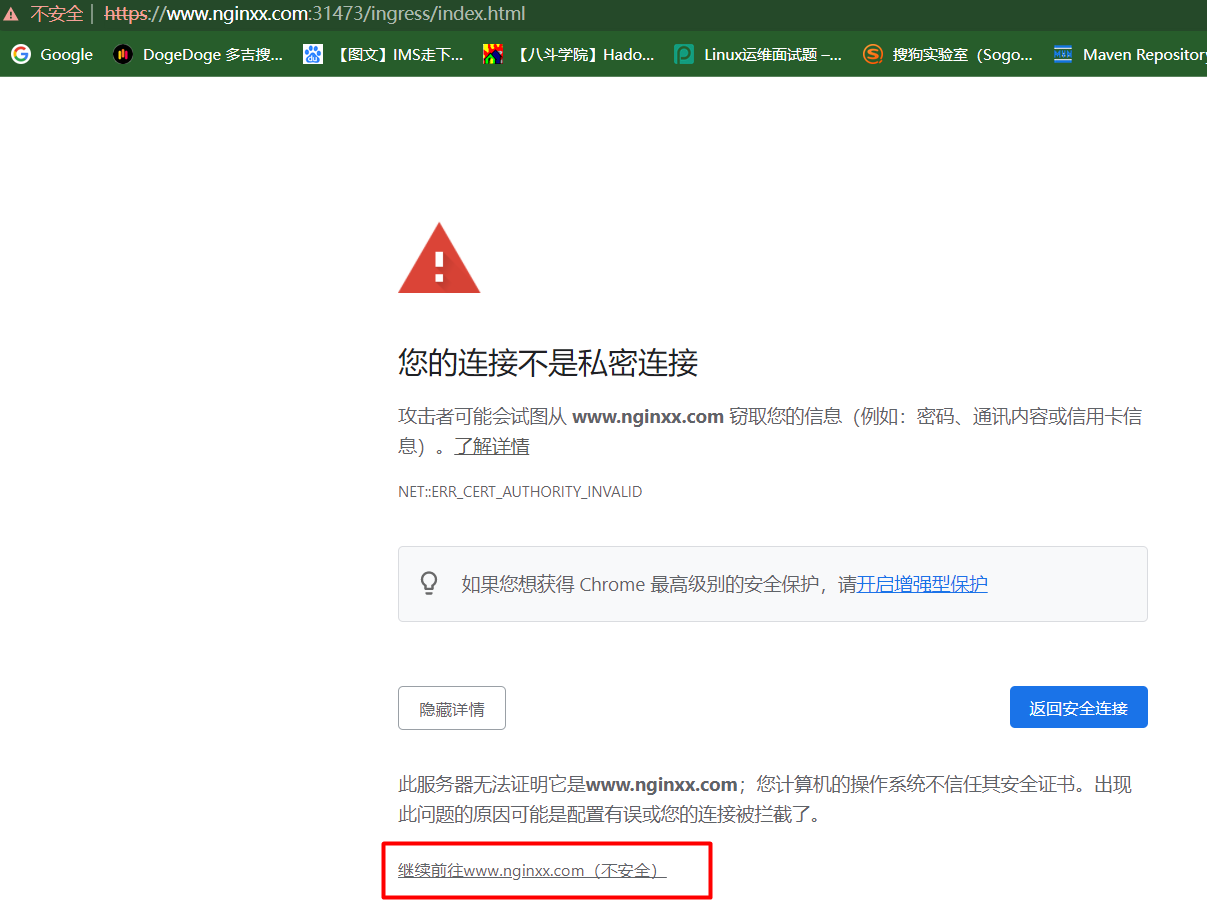

现在既可以使用https访问服务,又使用了我们自定义的证书了。
本文使用cfssl工具生成了证书,实现了https访问,但是那个证书是我们自定义的,不是权威机构颁发的证书,在浏览器里https访问还是有警告,要想申请权威证书,请查看博客《配置Ingress支持HTTPS访问(二):使用cert-manager申请证书》,使用cert-manager向Let’s Encrypt机构申请的证书,是权威证书,在浏览器里https访问是不会有警告的。
八.总结
通过本文,您应该了解了如何在Kubernetes集群中为Ingress配置HTTPS。通过使用TLS证书和适当的Ingress配置,您可以确保服务与客户端之间的通信是安全和加密的。


【推荐】国内首个AI IDE,深度理解中文开发场景,立即下载体验Trae
【推荐】编程新体验,更懂你的AI,立即体验豆包MarsCode编程助手
【推荐】抖音旗下AI助手豆包,你的智能百科全书,全免费不限次数
【推荐】轻量又高性能的 SSH 工具 IShell:AI 加持,快人一步
· 无需6万激活码!GitHub神秘组织3小时极速复刻Manus,手把手教你使用OpenManus搭建本
· C#/.NET/.NET Core优秀项目和框架2025年2月简报
· 什么是nginx的强缓存和协商缓存
· 一文读懂知识蒸馏
· Manus爆火,是硬核还是营销?