Winsows 服务器,PHP 开发环境搭建
本篇所有中间件选用最新版本。
Apache 2.4.41 + PHP7.4.3 + PgSQL12.2
服务器为 WindowsServer 2016
一、下载
分别取官网下载相应的包,注意选择 windows 版本,通常为 zip 包。
# apache
https://www.apachehaus.com/cgi-bin/download.plx

# pgsql
https://www.enterprisedb.com/downloads/postgres-postgresql-downloads

# PHP
https://windows.php.net/download/
二、Apache 安装
1、解压上面下载的安装包
2、解压目录下找到配置文件进行配置 /conf/httpd.conf
# Apache 安装位置
Define SRVROOT "C:\Tools\httpd-2.4.41"
ServerRoot "${SRVROOT}"

# oadModule 需要的模块打开

# 修改项目根目录为自己的真实目录
DocumentRoot "C:\Projects"

# 修改可重定向设置
<Directory "C:\Projects">
    Options Indexes FollowSymLinks
    AllowOverride All
    Require all granted
</Directory>

# 修改默认读取文件,添加 php 文件
<IfModule dir_module>
    DirectoryIndex index.html index.php index.htm
</IfModule>

# 打开域名配置文件(注释去掉)
Include conf/extra/httpd-vhosts.conf
3、把 Apache 安装为 Windows Service
# 以管理员身份运行 cmd
C:\>"Tools\httpd-2.4.41\bin\httpd.exe" -k install -n httpd
Installing the 'httpd' service
The 'httpd' service is successfully installed.
Testing httpd.conf....
Errors reported here must be corrected before the service can be started.

C:\>
4、配置域名,conf/extra/httpd-vhosts.conf
<VirtualHost *:80>
    ServerAdmin localhost
    DocumentRoot "C:/Projects"
    ServerName localhost
    ErrorLog "logs/localhost-error.log"
    CustomLog "logs/localhost-access.log" common
</VirtualHost>
5、设置自启动
# 打开服务管理器
# 找到上一步命名的 httpd 服务
# 点击启动,启动方式设置为自启动
6、测试
在项目根目录下创建 index 文件,
浏览器输入 localhost,显示 index 文件中的内容,则安装配置成功
三、PgSQL 安装
找到第一步下载的安装向导,按照提示一步步安装,
中途会设置 postgres 用户的密码,记住自己设置的密码,
安装完了页面,把两个勾选框都清空,安装完成。
会在以上安装的程序中找到 PgAdmin,是个界面化的 SQL 工具。
用 PgAdmin 连接数据库测试。
四、PHP 安装
1、解压第一步下载的 PHP 包文件
2、将 PHP 扩展加载到 apache 中
# httpd.conf 文件中添加
LoadModule php7_module "C:/Tools/php-7.4.3/php7apache2_4.dll"
AddType application/x-httpd-php .php .html .htm
3、配置 PHP
# 复制 php.ini-development 命名为 php.ini

# 设置扩展路径为绝对路径
; On windows:
extension_dir = "C:\Tools\php-7.4.3\ext"

# 开启需要的扩展

# 根据需求调整上传文件大小
upload_max_filesize = 10M

# 设置时区
date.timezone = Asia/Shanghai
4、测试
重启 apache,查看 phpinfo
五、安装包选择
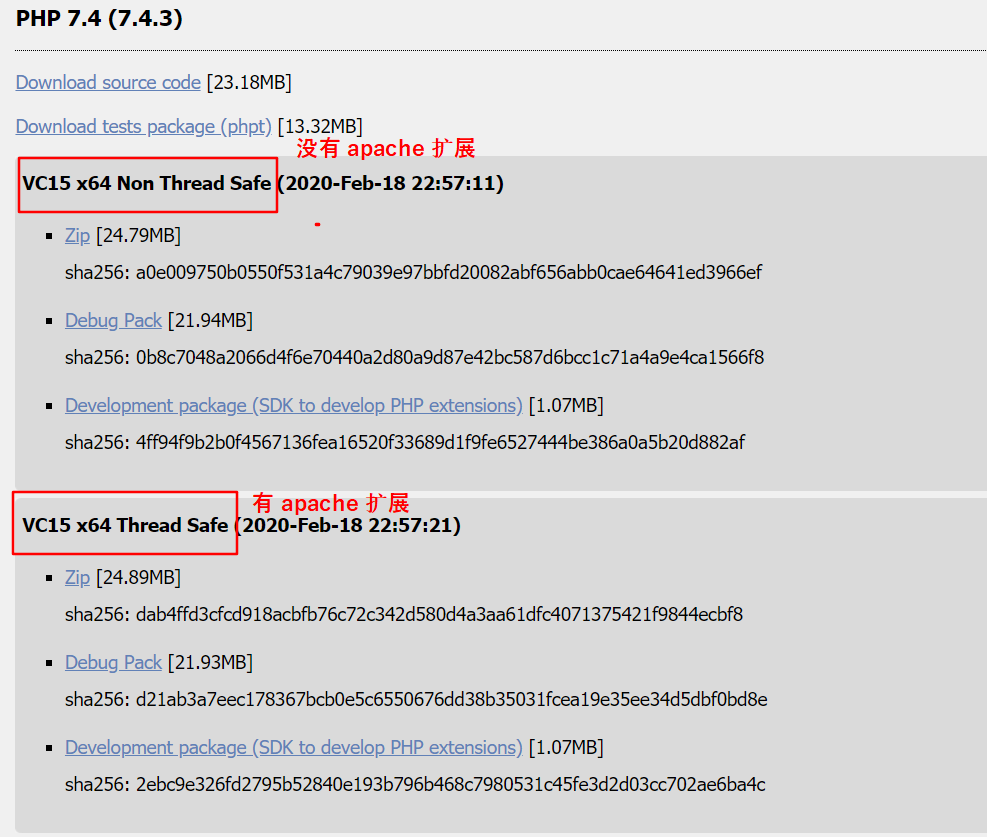
1、PHP,选择有 apache 扩展的

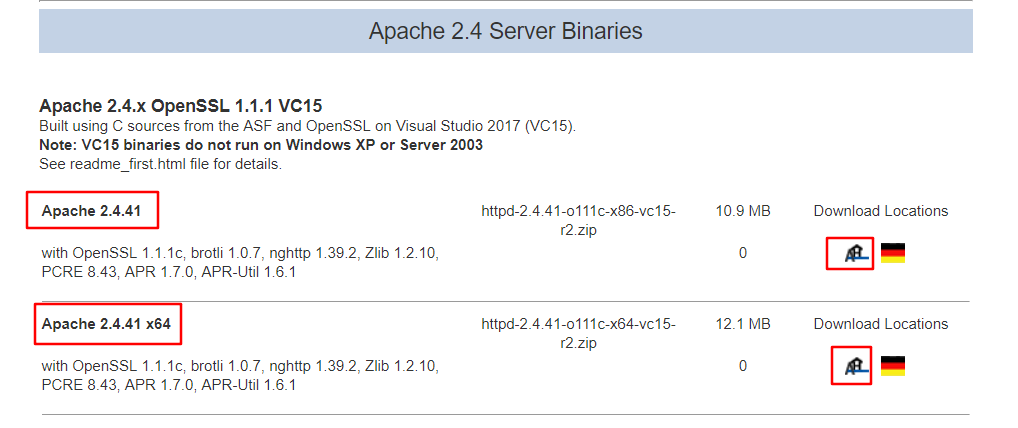
2、apache,根据系统选择相应的安装包


 浙公网安备 33010602011771号