elasticsearch5.0.1集群排错的几个思路总结
1.首先查看集群整体健康状态
# curl -XGET http://10.27.35.94:9200/_cluster/health?pretty
{
"cluster_name" : "yunva-es",
"status" : "red",
"timed_out" : false,
"number_of_nodes" : 7,
"number_of_data_nodes" : 6,
"active_primary_shards" : 85,
"active_shards" : 157,
"relocating_shards" : 0,
"initializing_shards" : 6,
"unassigned_shards" : 19,
"delayed_unassigned_shards" : 0,
"number_of_pending_tasks" : 0,
"number_of_in_flight_fetch" : 0,
"task_max_waiting_in_queue_millis" : 0,
"active_shards_percent_as_number" : 86.26373626373626
}
如果是red状态,说明有节点挂掉,找到挂掉的索引分片和节点
如下例子,可以看到 voice:live:logout 这个索引的0分片都没有分配说明挂掉了,我们可以查看之前正常的时候的分片情况(可以定期将分片的分配情况记录下来)
# curl 10.26.241.237:9200/_cat/shards
....
voice:live:logout 2 p STARTED 428 62.9kb 10.27.65.121 yunva_etl_es6
voice:live:logout 2 r STARTED 428 62.9kb 10.26.241.239 yunva_etl_es3
voice:live:logout 4 r STARTED 444 99.8kb 10.45.150.115 yunva_etl_es9
voice:live:logout 4 p STARTED 444 99.8kb 10.25.177.47 yunva_etl_es11
voice:live:logout 1 p STARTED 419 97.7kb 10.26.241.239 yunva_etl_es3
voice:live:logout 1 r STARTED 419 97.7kb 10.25.177.47 yunva_etl_es11
voice:live:logout 3 p STARTED 440 73.2kb 10.27.35.94 yunva_etl_es7
voice:live:logout 3 r STARTED 440 73.2kb 10.27.78.228 yunva_etl_es5
voice:live:logout 0 p UNASSIGNED
voice:live:logout 0 r UNASSIGNED
定期记录分片的脚本
# cat es_shard.sh
#!/bin/bash

echo $(date +"%Y-%m-%d %H:%M:%S") >> /data/es_shards.txt
curl -XGET http://10.26.241.237:9200/_cat/shards >> /data/es_shards.txt
2.依次查询节点的健康状态,如果哪个节点不返回,或者很慢,可能是内存溢出,需要直接重启该节点
# curl -XGET http://IP:9200/_cluster/health?pretty
内存溢出的典型特征会在elasticsearch/bin目录下产生类似如下文件:
hs_err_pid27186.log
java_pid1151.hprof
3.zabbix添加监控
①如果挂掉自动启动(注意不能是root用户)
自动启动elasticsearch脚本:
# cat /usr/local/zabbix-agent/scripts/start_es.sh

#!/bin/bash
# if elasticsearch process exists kill it
source /etc/profile

count_es=`ps -ef|grep elasticsearch|grep -v grep|wc -l`
if [ $count_es -gt 1 ];then
ps -ef|grep elasticsearch|grep -v grep|/bin/kill `awk '{print $2}'`
fi
rm -f /data/elasticsearch-5.0.1/bin/java_pid*.hprof
# start it
su yunva -c "cd /data/elasticsearch-5.0.1/bin && /bin/bash elasticsearch &"
②有hs_err*.log或者hprof文件删除文件然后重启该节点(可以直接触发start_es.sh脚本)
elasticsearch报错监控项:
UserParameter=es_debug,sudo /bin/find /data/elasticsearch-5.0.1/bin/ -name hs_err_pid*.log -o -name java_pid*.hprof|wc -l
java报错的监控项:
UserParameter=java_error,sudo /bin/find /home -name hs_err_pid*.log -o -name java_pid*.hprof -o -name jvm.log|wc -l
③curl -XGET http://IP:9200/_cluster/health?pretty 如果响应时间超过30S重启
for IP in 10.28.50.131 10.26.241.239 10.25.135.215 10.26.241.237 10.27.78.228 10.27.65.121 10.27.35.94 10.30.136.143 10.174.12.230 10.45.150.115 10.25.177.47
do
curl -XGET http://$IP:9200/_cluster/health?pretty
done
4.优化配置:
# 以下配置可以减少当es节点短时间宕机或重启时shards重新分布带来的磁盘io读写浪费
discovery.zen.fd.ping_timeout: 300s
discovery.zen.fd.ping_retries: 8
discovery.zen.fd.ping_interval: 30s
discovery.zen.ping_timeout: 300s
5.es集群状态检测
UserParameter=es_cluster_status,curl -sXGET http://10.11.117.18:9200/_cluster/health/?pretty | grep "status"|awk -F '[ "]+' '{print $4}'|grep -c 'green'
后续如果有其他方面的一些好的方法也会更新上来
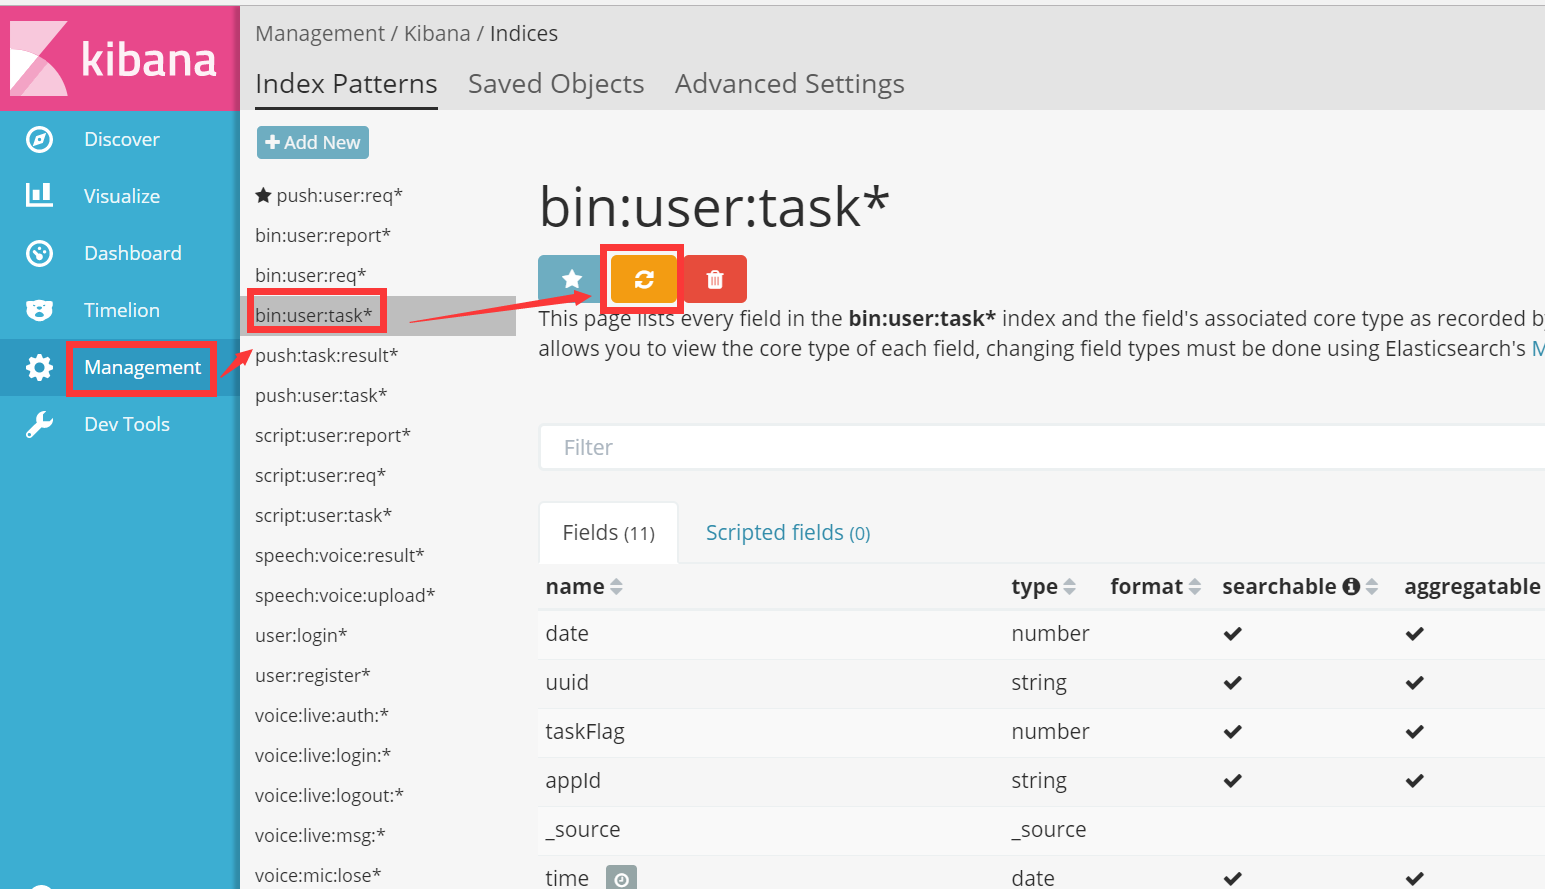
索引修改以后,需要刷新index表达式,否则无法正常识别


【推荐】国内首个AI IDE,深度理解中文开发场景,立即下载体验Trae
【推荐】编程新体验,更懂你的AI,立即体验豆包MarsCode编程助手
【推荐】抖音旗下AI助手豆包,你的智能百科全书,全免费不限次数
【推荐】轻量又高性能的 SSH 工具 IShell:AI 加持,快人一步
· 基于Microsoft.Extensions.AI核心库实现RAG应用
· Linux系列:如何用heaptrack跟踪.NET程序的非托管内存泄露
· 开发者必知的日志记录最佳实践
· SQL Server 2025 AI相关能力初探
· Linux系列:如何用 C#调用 C方法造成内存泄露
· 震惊!C++程序真的从main开始吗?99%的程序员都答错了
· 【硬核科普】Trae如何「偷看」你的代码?零基础破解AI编程运行原理
· 单元测试从入门到精通
· 上周热点回顾(3.3-3.9)
· winform 绘制太阳,地球,月球 运作规律