CentOS 7安装Zabbix3.0
服务端
CentOS 7
hostname:zabbix.topspeedsnail.com
IP:192.168.1.1
客户端
Ubuntu 16.04
IP:201.202.12.12
一、zabbix server安装
1.添加Zabbix仓库
# yum install epel-release
# rpm -ivh http://repo.zabbix.com/zabbix/3.0/rhel/7/x86_64/zabbix-release-3.0-1.el7.noarch.rpm
2. 安装软件
# yum install zabbix-server-mysql zabbix-web-mysql mysql mariadb-server httpd php              //安装Zabbix Server,MariaDB数据库, Web Server和PHP
# systemctl start mariadb                  //启动MariaDB数据库
# systemctl enable mariadb
# mysql_secure_installation            //运行MySQL安全设置脚本
3.创建数据库用户
创建一个名为zabbix_db的数据库和一个新用户my_zabbix
# mysql -u root -p
MariaDB [(none)]> create database zabbix_db;
MariaDB [(none)]> grant all privileges on zabbix_db.* to my_zabbix@localhost identified by 'test1234';
MariaDB [(none)]> flush privileges;
MariaDB [(none)]> exit

把数据导入到zabbix_db数据库
# cd /usr/share/doc/zabbix-server-mysql-3.0.1
# gunzip create.sql.gz
# mysql -u root -p zabbix_db < create.sql
4.编辑Zabbix配置文件
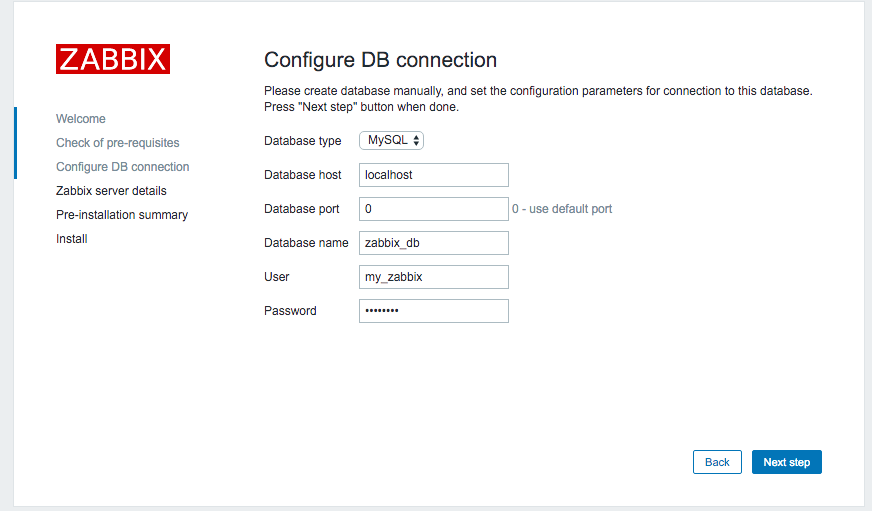
它的配置文件位于/etc/zabbix/zabbix_server.conf,配置数据库
# vim /etc/zabbix/zabbix_server.conf       //修改为如下参数
DBHost=localhost
DBName=zabbix_db
DBUser=my_zabbix
DBPassword=test1234                                   //my_zabbix用户密码
5.编辑PHP配置文件
# vim /etc/php.ini  修改为如下参数
max_execution_time = 600
max_input_time = 600
memory_limit = 256M
post_max_size = 32M
upload_max_filesize = 16M
date.timezone = Asia/Hong_Kong
6.配置防火墙
# firewall-cmd --permanent --add-port=10050/tcp
# firewall-cmd --permanent --add-port=10051/tcp
# firewall-cmd --permanent --add-port=80/tcp

# firewall-cmd --reload
# systemctl restart firewalld
7.启动各种服务程序
# systemctl start zabbix-server
# systemctl enable zabbix-server

# systemctl start httpd
# systemctl enable httpd
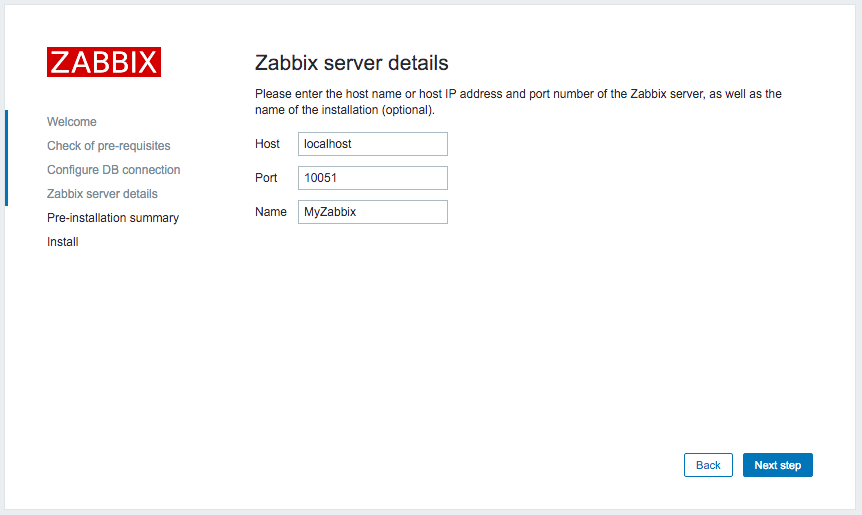
二、web配置
http://192.168.1.1/zabbix/ 使用浏览器访问Zabbix Web接口
1.配置数据库连接
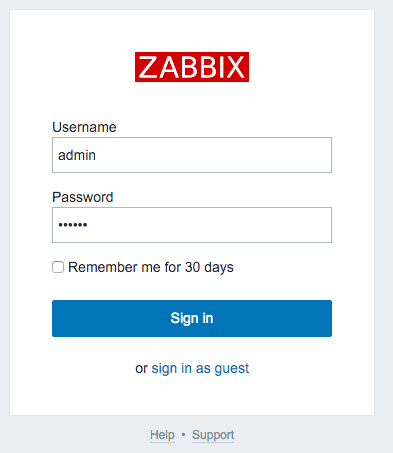
2.配置Zabbix
登录,默认用户名”admin”,密码”zabbix”
三、添加服务器节点
1.客户端上安装zabbix-agent
$ sudo apt-get install zabbix-agent

$ sudo vim /etc/zabbix/zabbix_agentd.conf
Server=192.168.1.1                //Zabbix服务器的IP
ServerActive=192.168.1.1          //Zabbix服务器的IP
Hostname=zabbix.topspeedsnail.com
2.启动zabbix-agent
$ sudo systemctl start zabbix-agent
$ sudo systemctl enable zabbix-agent
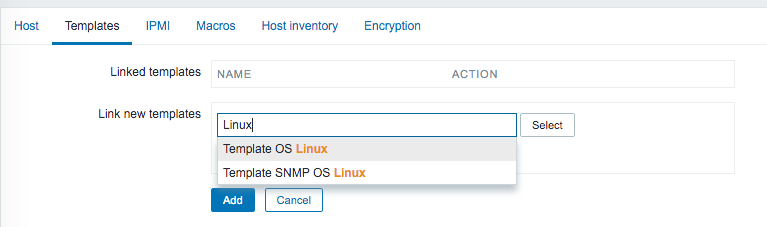
在Zabbix web接口中添加新节点
Configuration —> Hosts –> Create Host

填写节点的信息。选择Templates
Monitoring —> Triggers,查看监控的节点

 浙公网安备 33010602011771号