嵌入式linux集成selinux
背景:项目使用NXP IMX8MM CPU,rootfs使用yocto构建,yocto版本是sumo。
步骤:
1.clone selinux源码到sources路径
git clone git://git.yoctoproject.org/meta-selinux
理论上是应该用sumo分支的,但是实际上sumo分支编译不过。报以下错误:
NOTE: Running task 352 of 2707
(virtual:native:/sources/poky/meta/recipes-devtools/e2fsprogs/e2fsprogs_1.43.8.bb:do_patch)
NOTE: recipe e2fsprogs-native-1.43.8-r0: task do_patch: Started
NOTE: Running task 1413 of 2707
(/sources/poky/meta/recipes-devtools/e2fsprogs/e2fsprogs_1.43.8.bb:do_patch)
NOTE: recipe e2fsprogs-1.43.8-r0: task do_patch: Started
ERROR: e2fsprogs-native-1.43.8-r0 do_patch: Command Error: 'quilt --quiltrc
Applying patch misc_create_inode.c-label_rootfs.patch
patching file misc/create_inode.c
Hunk #1 FAILED at 979.
Hunk #2 FAILED at 987.
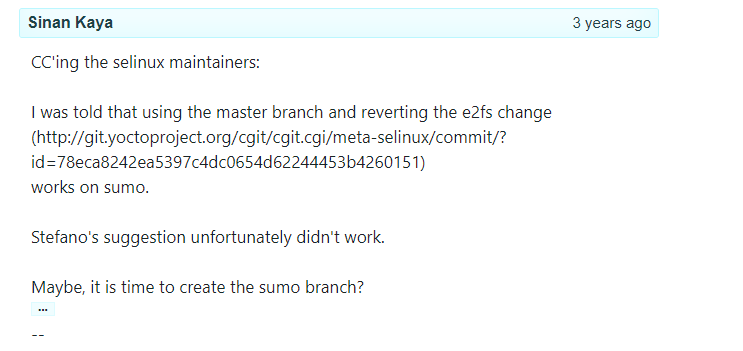
google搜到维护人员的回复,让使用主分支,commit id=78eca8242ea5397c4dc0654d62244453b4260151的版本。

2.切换到对应的commit id=8ecad12b2ccb612fdf4906392d26fa6bfae20460
git reset --hard 8ecad12b2ccb612fdf4906392d26fa6bfae20460
理论上讲要切换到78eca8242ea5397c4dc0654d62244453b4260151,这个维护人员建议的分支,但是实测还是报上述错误。
继续回退版本,发现8ecad12b2ccb612fdf4906392d26fa6bfae20460可用。
3.在build/conf/bblayers.conf结尾加入selinux层
BBLAYERS += " ${BSPDIR}/sources/meta-selinux "
4.在build/conf/local.conf结尾加入配置
DISTRO_FEATURES_append = "acl xattrs pam selinux"
PREFERRED_PROVIDER_virtual/refpolicy ?= "refpolicy-minimum"
PREFERRED_VERSION_refpolicy-minimum = "2.20170204"
PREFERRED_VERSION_refpolicy = "2.20170204"
DISTRO_FEATURES_remove = " sysvinit"
DISTRO_FEATURES_append = " systemd"
VIRTUAL-RUNTIME_init_manager = "systemd"
DISTRO_FEATURES_BACKFILL_CONSIDERED = ""
这些信息是在meta-selinx的README,FAQ文件中找到的。
5.修改生成image的bb或者bbapend文件,把selinux文件打包进镜像
可以通过find sources -name core-image-base*找到image相关的bb或者bbappend文件
其中sources为层所在的文件夹,core-image-base为要集成selinux的镜像的名称。

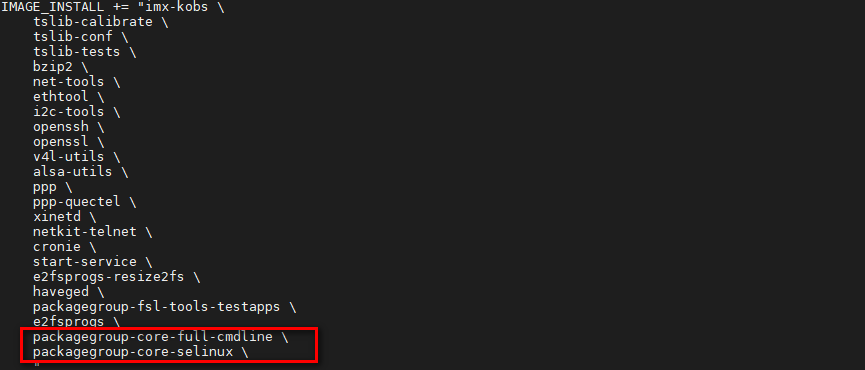
sources/meta-myir/meta-myir-bsp/recipes-myir/images/core-image-base.bbappend文件中增加如下2行
packagegroup-core-full-cmdline
packagegroup-core-selinux

sources/poky/meta/recipes-core/images/core-image-base.bb文件中增加 selinux-image

6.修改内核,在“General setup“ 和 ”Security options“ 中开启以下功能
CONFIG_AUDIT=y
CONFIG_SECURITYFS=y
CONFIG_SECURITY_NETWORK=y
CONFIG_SECURITY_SELINUX=y
CONFIG_SECURITY_SELINUX_BOOTPARAM=y
CONFIG_SECURITY_SELINUX_DISABLE=y
CONFIG_SECURITY_SELINUX_DEVELOP=y
CONFIG_SECURITY_SELINUX_AVC_STATS=y
CONFIG_SECURITY_SELINUX_CHECKREQPROT_VALUE=0
CONFIG_DEFAULT_SECURITY_SELINUX=y
CONFIG_EXT4_FS_SECURITY=y
实验发现CONFIG_EXT4_FS_SECURITY=y不打开,会报以下错误:
[ 17.955632] SELinux: (dev mmcblk0p26, type ext4) has no security xattr handler
selinux在初始化的时候执行/usr/bin/selinux-init.sh会导致系统shutdown
进一步分析发现脚本中执行/usr/bin/chcon system_u:object_r:root_t:s0 / 时报错
chcon: failed to change context of ‘/’ to ‘system_u:object_r:root_t:s0’: Operation not supported
7.将生成的镜像烧录进设备,启动系统,修改/etc/selinux/config,然后sync
默认selinux是未开启的,需要在selinux未开启前改为permissive模式,否则启动不了
myd-imx8mm:~# cat /etc/selinux/config
# This file controls the state of SELinux on the system.
# SELINUX= can take one of these three values:
# enforcing - SELinux security policy is enforced.
# permissive - SELinux prints warnings instead of enforcing.
# disabled - No SELinux policy is loaded.
SELINUX=permissive
# SELINUXTYPE= can take one of these values:
# minimum - Minimum Security protection.
# standard - Standard Security protection.
# mls - Multi Level Security protection.
# targeted - Targeted processes are protected.
# mcs - Multi Category Security protection.
SELINUXTYPE=minimum
8.重启,修改u-boot环境变量,启动参数中增加security=selinux selinux=1

然后saveenv,用boot命令启动系统,会看到selinx的输出信息

登陆系统,执行/usr/sbin/sestatus查看状态

至此selinux集成工作已经完成。


