Vue开发实战
1.第一个Vue程序
- 编写一个index.html页面如下
<html>
    <head>
            <meta http-equiv="Content-Type" Content="text/html;charset=utf8"/>
        <style>
            .item{
                color:red
            }
        </style>
    </head>
    <body>
        <!-- 开发环境版本,包含了有帮助的命令行警告 -->
        <script src="https://cdn.jsdelivr.net/npm/vue@2/dist/vue.js"></script>
        <div id="app">
            {{msg}}<br/>
            <input type="text" v-model="info"/>
            <button @click="addData">添加</button>
            <ul>
                <!-- <li v-for="item in list">{{item}}</li> -->
                <!-- 使用:绑定组件中props定义的属性,然后把值传给属性 -->
                <todo-item v-for="item in list" :zixin="item"></todo-item>
            </ul>
        </div>
        <script>
            Vue.component('todo-item', {
                props:['zixin'],//定义一个属性
                template:"<li class='item'>{{zixin}}</li>"//将props中定义的属性传进去
            })
            new Vue({
                el:'#app',
                data(){
                    return {
                        msg:'Hello Vue~',
                        info:'',
                        list:[]
                    }
                },
                methods:{
                    addData(){
                        console.log(this.info)
                        this.list.push(this.info)
                        this.info=''
                    }
                }
            })

        </script>
    </body>
</html>
-
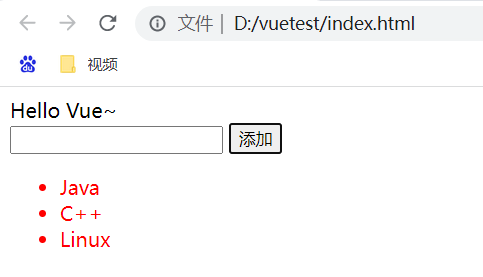
在浏览器运行index.html,在输入框中输入内容,点击“添加”按钮,把输入的内容添加到下面的
- 标签中,如下所示
-
程序中的Vue.component的缺点
-
全局定义:强制要求每个component中命名不得重复
-
字符串模板:缺乏语法高亮,在HTML有多行的时候,需要用到丑陋的\
-
不支持CSS:意味着当HTML和JavaScript组件化时,CSS明显被遗漏
-
没有构建步骤:限制只能使用HTML和ES5 JavaScript,而不是使用预处理,如Pug(formerly Jade)和Babel
-
2.初识单文件组件
-
前期准备
-
以管理员身份运行cmd,进入到命令行界面,
-
全局安装脚手架,执行
npm isntall -g @vue/cli,回车后报错如下
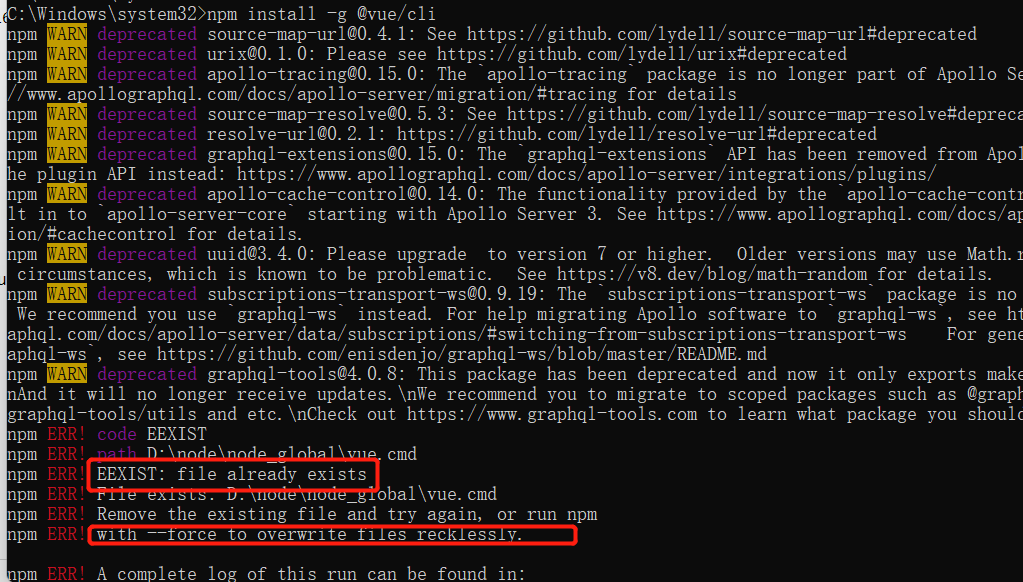
原因:已经安装过了
解决方法:取消安装或者覆盖原来的安装,我这里选择覆盖原来的,执行npm isntall -g @vue/cli --force命令即可,安装成功后如下所示
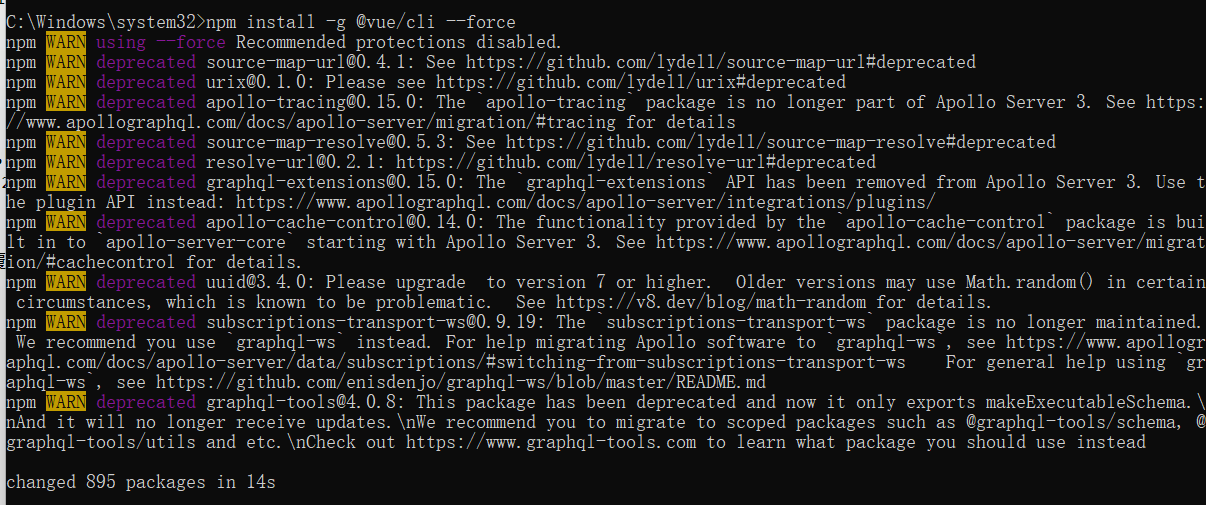
-
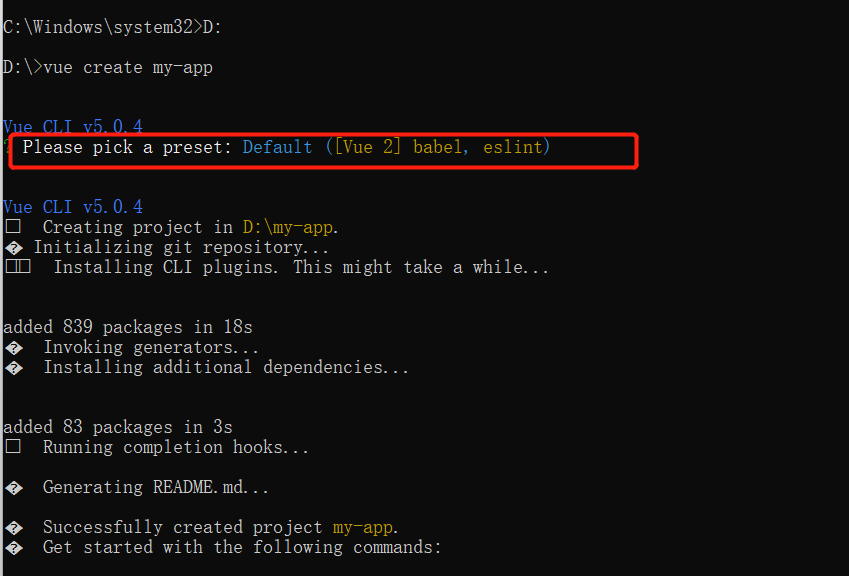
进入到你想要存放的目录中,我这里把项目放到
D:盘上,执行D:,回车,然后执行vue create my-app(说明my-app是项目名称,看自己需要起名字),回车后会让你选择语法规范以及Vue版本,我这里选择默认配置,其中Vue的版本为2
-
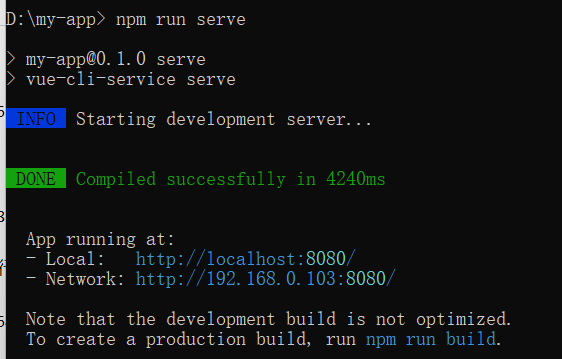
执行
npm run serve,运行项目,运行项目成功如下图
-
访问
http://localhost:8080/,得到如下页面

-
-
修改index.html的代码
-
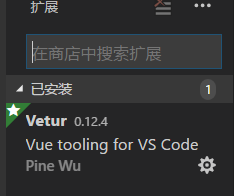
使用
VSCode打开my-app项目,第一次打开会让你安装Vetur插件,安装后代码会高亮显示,这里我已经安装上,如下所示
-
打开App.vue页面的代码如下所示
<template> <div id="app"> <img alt="Vue logo" src="./assets/logo.png"> <HelloWorld msg="Welcome to Your Vue.js App"/> </div> </template> <script> import HelloWorld from './components/HelloWorld.vue' export default { name: 'App', components: { HelloWorld } } </script> <style> #app { font-family: Avenir, Helvetica, Arial, sans-serif; -webkit-font-smoothing: antialiased; -moz-osx-font-smoothing: grayscale; text-align: center; color: #2c3e50; margin-top: 60px; } </style>-
将index.html中
<div id="app"></div>之间的代码替换到App.vue中对应的<div id="app"></div>上 -
发现
<todo-item>组件报错,是因为还没有添加这个组件,在components目录下添加一个组件TodoItem.vue,并把index.html页面中<todo-item>相应的代码放到这个组件中
<template> <!-- 将props中定义的属性传进去 --> <li class='item'>{{zixin}}</li> </template> <script> export default { name:'TodoItem', props:['zixin']//定义一个属性 } </script> <style scoped> .item{ color:red } </style>- 在
App.vue中引入TodoItem.vue组件,并在components中注册
import TodoItem from './components/TodoItem.vue' export default { components: { TodoItem } }- 将
index.html中data和methods的代码放到App.vue页面中export default{}中
data(){ return { msg:'Hello Vue~', info:'', list:[] } }, methods:{ addData(){ console.log(this.info) this.list.push(this.info) this.info='' } }-
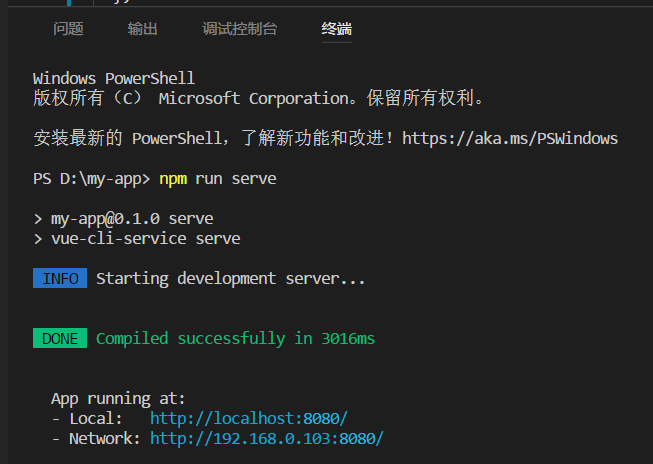
在VSCode中的终端处执行
npm run serve命令,回车,得到下图所示表示运行项目成功
-
在浏览器访问
http://localhost:8080/,发现报错,定位问题。发现此时<todo-item>组件爆红,如下所示,原因是少了key这个属性,加上去即可

<todo-item v-for="item in list" :key="item" :zixin="item"></todo-item>-
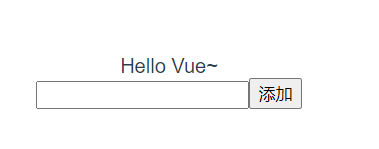
再次访问
http://localhost:8080/,在输入框中输入内容,点击“添加”按钮,内容成功添加到<li>标签中如下所示
-
在上一个步骤中发现运行后的页面原来的不太一样,这是因为使用了
App.vue页面的全局样式,把这些样式去掉即可 -
完整的
App.vue和TodoItem.vue页面的代码如下- App.vue
<template> <div id="app"> {{msg}}<br/> <input type="text" v-model="info"/> <button @click="addData">添加</button> <ul> <!-- <li v-for="item in list">{{item}}</li> --> <!-- 使用:绑定组件中props定义的属性,然后把值传给属性 --> <todo-item v-for="item in list" :key="item" :zixin="item"></todo-item> </ul> </div> </template> <script> import TodoItem from './components/TodoItem.vue' export default { name: 'App', components: { TodoItem }, data(){ return { msg:'Hello Vue~', info:'', list:[] } }, methods:{ addData(){ console.log(this.info) this.list.push(this.info) this.info='' } } } </script> <style> </style>- TodoItem.vue
  <template>
    <div class="item">
      <!-- 将props中定义的属性传进去 -->
      <li class='item'>{{zixin}}</li>
    </div>
  </template>

  <script>
  export default {
      name:'TodoItem',
      props:['zixin']//定义一个属性
  }
  </script>
  <style scoped>
      .item{
          color:red
      }
  </style>
-
-
使用插槽改进
<todo-item>的代码-
将
TodoItem.vue页面中<li class='item'>{{zixin}}</li>修改为<slot></slot> -
在
App.vue页面中<todo-item></todo-item>标签中添加一个<span>标签来装<li>标签中的内容
<todo-item v-for="item in list" :key="item" :zixin="item"> <span>{{item}}</span> </todo-item>- 重新运行,发现效果跟之前的一样
-
-
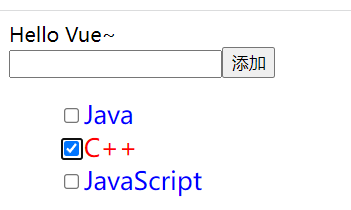
在
<li>标签前面添加checkbox,并在选中时<li>的内容显示红色,否则显示蓝色- 修改TodoItem.vue页面代码
<template> <div class="item"> <!-- 将props中定义的属性传进去 --> <!-- <li class='item'>{{zixin}}</li> --> <input type="checkbox" v-model="checked"/> <slot name="item" v-bind="{checked}"></slot> </div> </template> <script> export default { name:'TodoItem', props:['zixin'],//定义一个属性 data(){ return { checked:false } } } </script> <style scoped> .item{ color:red } </style>- 修改App.vue页面代码如下:
<template> <div id="app"> {{msg}}<br/> <input type="text" v-model="info"/> <button @click="addData">添加</button> <ul> <!-- <li v-for="item in list">{{item}}</li> --> <!-- 使用:绑定组件中props定义的属性,然后把值传给属性 --> <todo-item v-for="item in list" :key="item"> <!-- test为TodoItem页面中v-bind="{checked}"的 checked--> <template v-slot:item="test"> <span :style="{fontSize:'20px',color: test.checked?'red':'blue'}">{{item}}</span> </template> </todo-item> </ul> </div> </template> <script> import TodoItem from './components/TodoItem.vue' export default { name: 'App', components: { TodoItem }, data(){ return { msg:'Hello Vue~', info:'', list:[] } }, methods:{ addData(){ console.log(this.info) this.list.push(this.info) this.info='' } } } </script> <style> </style>- 重新访问
http://localhost:8080/,可以达到效果
3. Vuex
3.1Vuex的核心概念和底层原理
-
核心概念
-
State-----this.$store.state 取值
-
Getter----this.$store.getters.xxx 取值
-
Mutation----this.$store.commit("xxx") 赋值
-
Action----this.$store.dispatch("xxx") 赋值
-
Module
-
-
底层原理
-
State:提供一个响应式数据
-
Getter:借助Vue的计算属性computed来实现缓存
-
Mutation:更改state方法
-
Action:触发mutation方法
-
Module:Vue.set动态添加state到响应式数据中
-
3.2Vuex实战
-
Vuex实战案例一
-
创建一个新的项目vuex-demo,并用VSCode打开
-
安装vuex依赖
npm install vuex- 在
main.js中引入vuex,然后创建一个store,并把store注册到Vue实例中,main.js的代码如下
import Vue from 'vue' import App from './App.vue' import Vuex from 'vuex'//引入vuex Vue.use(Vuex) Vue.config.productionTip = false const store = new Vuex.Store({ state:{ count:0 } }) new Vue({ store,//注册vuex render: h => h(App), }).$mount('#app')- 在
App.vue中通过计算属性获取到store.state中的count,然后显示在页面中,代码如下
<template> <div id="app"> {{count}} </div> </template> <script> export default { name: 'App', //计算属性 computed:{ count(){ return this.$store.state.count } } } </script> <style> </style>- 在终端执行
npm run serve,然后访问http://localhost:8080/,页面没东西显示,打开浏览器控制台,发现报错如下
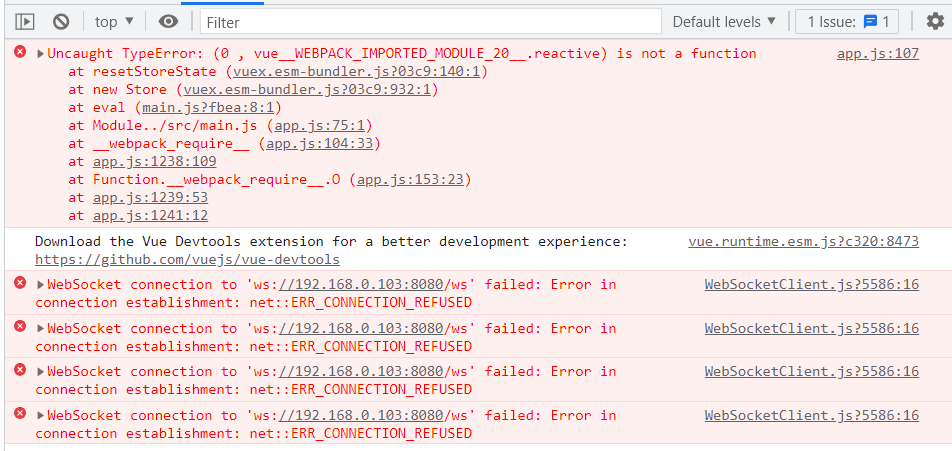
原因:vuex版本过高导致报错
解决方法:使用管理员身份进入到cmd终端,执行npm uninstall vuex卸载原来的vuex,再输入npm install vuex@3安装低版本vuex,再重新运行-
在VSCode终端重新运行,发现报下面的错误
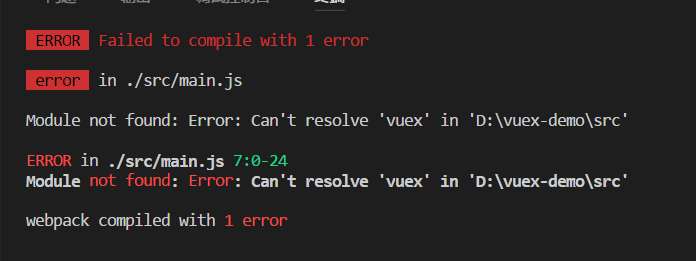
原因:当前项目没有vuex这个依赖
解决方法:使用管理员身份进入到cmd终端,切换到项目目录下,输入npm install vuex@3安装低版本vuex,安装成功后,问题得以解决 -
再重新运行,访问
http://localhost:8080/,可以看到页面中显示0,与预期一样
-
-
对Vuex实战一进行改进,使用mutations的方式实现count++
- 在
App.vue中添加一个按钮,并添加一个点击事件,在点击事件中commit一个事件
<button @click="$store.commit('increment')">count++</button>- 在
main.js中的store中添加下面代码
mutations:{ increment(state){//更改state中的count的值 state.count++ } },-
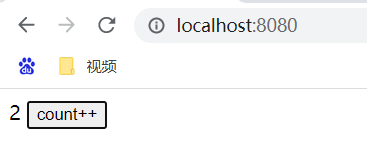
重新运行,访问
http://localhost:8080/,点击count++按钮,可以使count的数量增加,下面是点击两次count++后的结果
-
在
count++点击事件中commit一个事件的时候添加一个参数2
<button @click="$store.commit('increment', 2)">count++</button>- 在
main.js中的store中的mutations的increment方法做出修改
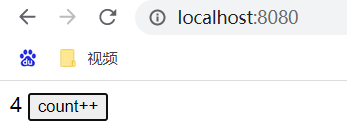
mutations:{ increment(state, n){//更改state中的count的值 state.count += n } },- 重新运行,访问
http://localhost:8080/,点击count++按钮,可以使count的数量在原本数量的基础上加2,下面是点击两次count++后的结果
- 在
-
对Vuex实战一进行改进,使用actions的方式实现count+3
- 在
App.vue中添加一个按钮,并添加一个点击事件,在点击事件中commit一个事件,同时传一个参数进去
<button @click="$store.dispatch('increment3', 3)">count+3</button>- 在
main.js中的store中添加下面代码
actions:{ increment3({state}, m){ state.count += m } },- 重新运行,访问
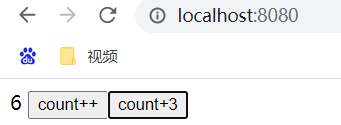
http://localhost:8080/,点击count+3按钮,可以使count的数量在原本数量的基础上加3,下面是点击两次count+3后的结果
- 在
-
对Vuex实战一进行改进,使用getters的方式实现count*2
- 在
main.js中的store中添加下面代码
getters:{ doubleCount(state){ return state.count*2 } }- 在
App.vue中添加下面代码
{{$store.getters.doubleCount}} - 在
4.Vue Router
4.1Vue Router作用与使用方式
-
Vue Router的作用
-
监听URL的变化,并在变化前后执行相应的逻辑
-
不同的URL对应不同的组件
-
提供多种方式改变URL的API(URL的改变不能导致浏览器刷新)
-
-
Vue Router使用方式
-
提供一个路由配置表,不同的URL对应不同组件的配置
-
初始化路由实例new VueRouter()
-
挂在到Vue实例上
-
提供一个路由占位,用来挂在URL匹配到的组件
-
4.2Vue Router实战
- 创建一个新的项目router-demo
vue create router-demo
- 安装vue-router依赖
npm install vue-router
- 在src目录下创建一个
routes.js文件,作为一个路由配置表
  import RouterDemo from './components/RouterDemo'
  import RouterChildrenDemo from './components/RouterChildrenDemo'

  const routes = [
    { path: '/foo', component: RouterDemo, name: '1'},
    { path: '/bar', component: RouterDemo, name: '2'},

    //当/user/:id匹配成功
    //RouterDemo会被渲染在RouterrrDemo的<router-view/>中
    {
      path: '/user/:id',
      component: RouterDemo,
      name: '3',
      props:true,
      children:[
        {
          //当/user/:id/profile匹配成功
          //RouterChildrenDemo回避渲染在RouterDemo的<router-virew>中
          path: 'profile',
          component: RouterChildrenDemo,
          name: '3-1'
        },
        {
          //当/user/:id/posts匹配成功
          //RouterChildrenDemo回避渲染在RouterDemo的<router-virew>中
          path: 'posts',
          component: RouterChildrenDemo,
        }
      ]
    },
    {path: '/a', redirect: '/bar'},
    {path: '*', component:RouterDemo, name: '404' }

  ]

  export default routes
- 在
main.js文件中引入VueRouter,初始化路由实例new VueRouter(),并把router挂载到Vue实例中
    import Vue from 'vue'
    import App from './App.vue'
    import VueRouter from 'vue-router'//引入vue-router
    import routes from './routes.js'


    //在Vue中使用VueRouter
    Vue.use(VueRouter)
    Vue.config.productionTip = false

    //初始化路由实例
    const router = new VueRouter({
      routes
    })

    new Vue({
      router,//将router注册到Vue实例中
      render: h => h(App),
    }).$mount('#app')
- 在
App.vue中提供一个路由占位<router-view></router-view>,用来挂在URL匹配到的组件
  <template>
    <div id="app">
      <router-view></router-view>
    </div>
  </template>

  <script>

  export default {
    name: 'App',
    components: {

    }
  }
  </script>

  <style>
  #app {
    font-family: Avenir, Helvetica, Arial, sans-serif;
    -webkit-font-smoothing: antialiased;
    -moz-osx-font-smoothing: grayscale;
    text-align: center;
    color: #2c3e50;
    margin-top: 60px;
  }
  </style>
RouterDemo.vue组件代码
  <template>
    <div>
      <router-link to="/foo">Go to Foo</router-link>
      <br/>
      <router-link to="/user/12">Go to /user/12</router-link>
      <br/>
      <router-link to="/user/12/profile">Go to /user/12/profile</router-link>
      <br/>
      <router-link to="/other">Go to 404</router-link>
      <br/>
      <router-link to="/a">Go to a重定向到bar</router-link>
      <br/>
      <a href="#/foo">Go to Foo</a>
      <br/>
      <button @click="$router.push('foo')">Go to Foo</button>
      <p>id:{{id}}</p>
      <p>{{routerInfo}}</p>
      <router-view></router-view>
    </div>
  </template>
  <script>
  export default {
      props:['id'],
      computed:{
        routerInfo(){
          const {fullPath, path, name, params, query, meta} = this.$route
          return {
            fullPath, path, name, params, query, meta
          }
        }
      }
  }
  </script>
  <style>

  </style>
RouterChildrenDemo.vue组件代码
  <template>
    <div>
      {{routerInfo}}
    </div>
  </template>
  <script>
  export default {
    computed:{
        routerInfo(){
          const {fullPath, path, name, params, query, meta} = this.$route
          return {
            fullPath, path, name, params, query, meta
          }
        }
      }
  }
  </script>
  <style>

  </style>
- 运行项目,访问
http://localhost:8080/,发现页面空白,打开浏览器控制台,发现如下报错
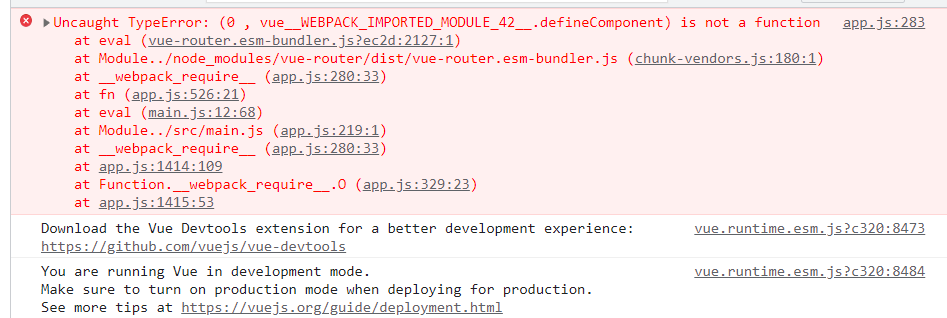
原因:vue-router版本过高导致报错
解决方法:安装低一点的版本vue-router3.2.0即可,使用管理员身份进入到cmd终端,切换到项目目录下,输入npm install vue-router3.2.0安装低版本vue-router,安装成功后,问题得以解决
- 重新运行,访问
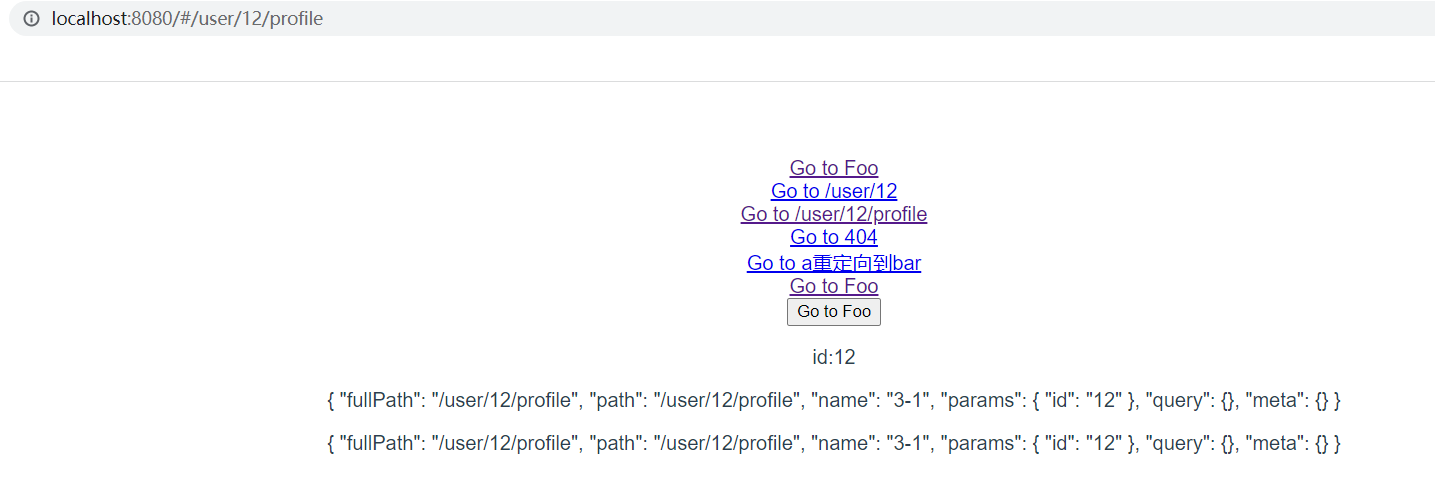
http://localhost:8080/,可以看到页面的相关内容以及点击链接时底部内容以及路径的变化
4.3路由类型
-
Hash模式:丑,无法使用描点定位
-
History模式:需要后端配合,IE9不兼容(可使用强制刷新处理)
5.Ant Design Pro
5.1使用Cli构建项目
-
选用自定义的方式选择配置,整个项目的配置如下图所示

-
等待构建项目完成,使用VSCode打开项目
-
删除
HomeView.vue和App.vue中不需要的内容,删除后的代码如下所示HomeView.vue<template> <div class="home"> </div> </template> <script> export default { name: "HomeView", components: { }, }; </script>App.vue<template> <div id="app"> <nav> <router-link to="/">Home</router-link> | <router-link to="/about">About</router-link> </nav> <router-view /> </div> </template> <style lang="less"> </style>
-
在终端执行
npm run serve回车,发现报如下错误
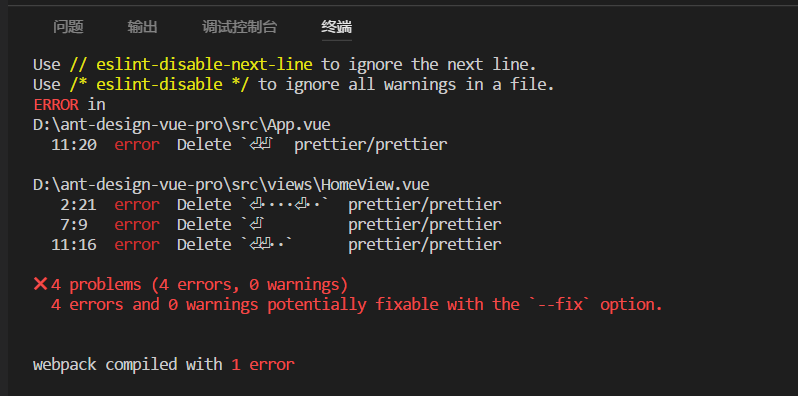
原因:与创建项目eslint设置有问题
解决方法:把原来删除后的代码空格去掉,以及一些标签之间没内容的把它合成一行即可 -
把
HomeView.vue和App.vue中导致错误的空格去掉后的代码如下HomeView.vue<template> <div class="home"></div> </template> <script> export default { name: "HomeView", components: {}, }; </script>App.vue<template> <div id="app"> <nav> <router-link to="/">Home</router-link> | <router-link to="/about">About</router-link> </nav> <router-view /> </div> </template> <style lang="less"></style>
-
安装
ant-design-vue组件,执行npm install ant-design-vue --save,发现出现下面错误
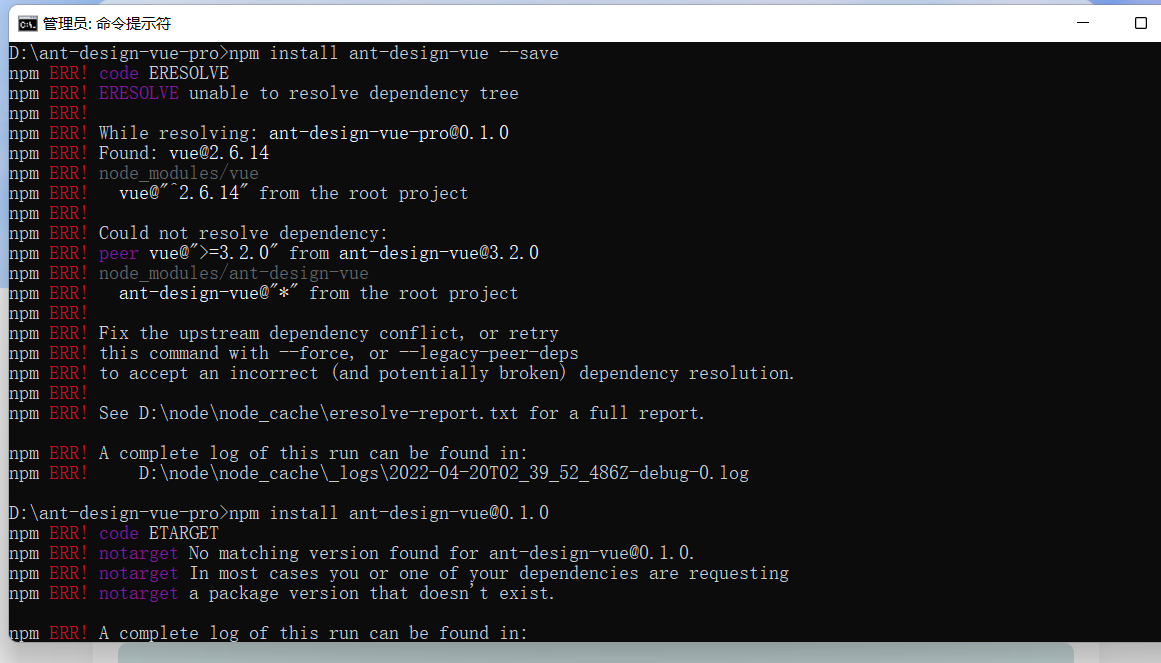
原因:ant-design-vue和vue的版本冲突
解决方法:由于我安装的vue版本是2.x的,查看ant-design-vue官网,可以看到下图中的Vue2版本对应的ant-design-vue版本为1.x
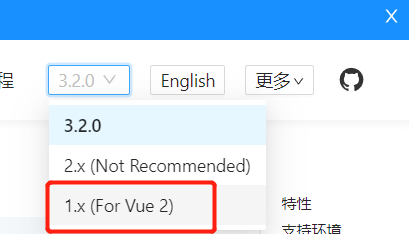
点击上图中的1.x(For Vue2),就可以看到下图的信息,可知Vue2版本对应ant-design-vue的稳定版本是1.7.8
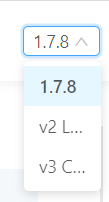
在终端中执行npm install ant-design-vue@1.7.8 --save,安装成功如下

- 在
main.js中引入ant-design-vue并全局注册
    import Vue from "vue";
    import App from "./App.vue";
    import router from "./router";
    import store from "./store";
    import Antd from "ant-design-vue";

    Vue.config.productionTip = false;
    Vue.use(Antd);

    new Vue({
      router,
      store,
      render: (h) => h(App),
    }).$mount("#app");
- 在
App.vue中添加一个按钮
<a-button>按钮</a-button>
-
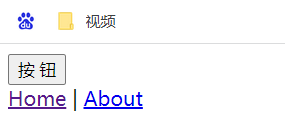
重新运行,可以看到浏览器中有对应的按钮出现
-
此时新添加的按钮还没有样式,需要在
main.js中引入ant-design-vue的样式
import "ant-design-vue/dist/antd.css";
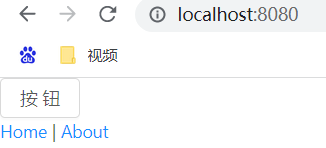
- 重新运行,可以看到"按钮"有样式了
5.2自定义webpack和babel配置
5.2.1自定义webpack
- 由于后面需要自定义主题,需要的是
ant-design-vue的less格式的样式而不是css,将'main.js'中原本引入的ant-design-vue样式修改为如下
import "ant-design-vue/dist/antd.less";
-
重新运行,发现控制台和浏览器报了一样的错误,如下所示

原因:没有打开javascriptEnabled的配置
解决方法:在项目目录下创建一个
vue.config.js文件,并在该文件中配置信息如下所示module.exports = { css: { loaderOptions: { less: { lessOptions:{ javascriptEnabled: true, } } } } } -
重新运行,又出现下面的错误

原因: less在第7版本改变了原有的出阿飞运算,所以无法识别
解决方法:移除高版本的less-loader,指定安装less-loader6版本,得以解决

5.2.2按需引入ant-design-vue的配置,自定义babel配置
-
安装
babel-plugin-import组件

-
在
ant-design-vue官网中找到babel的对应配置,把它复制到项目中的babel.config.js文件中
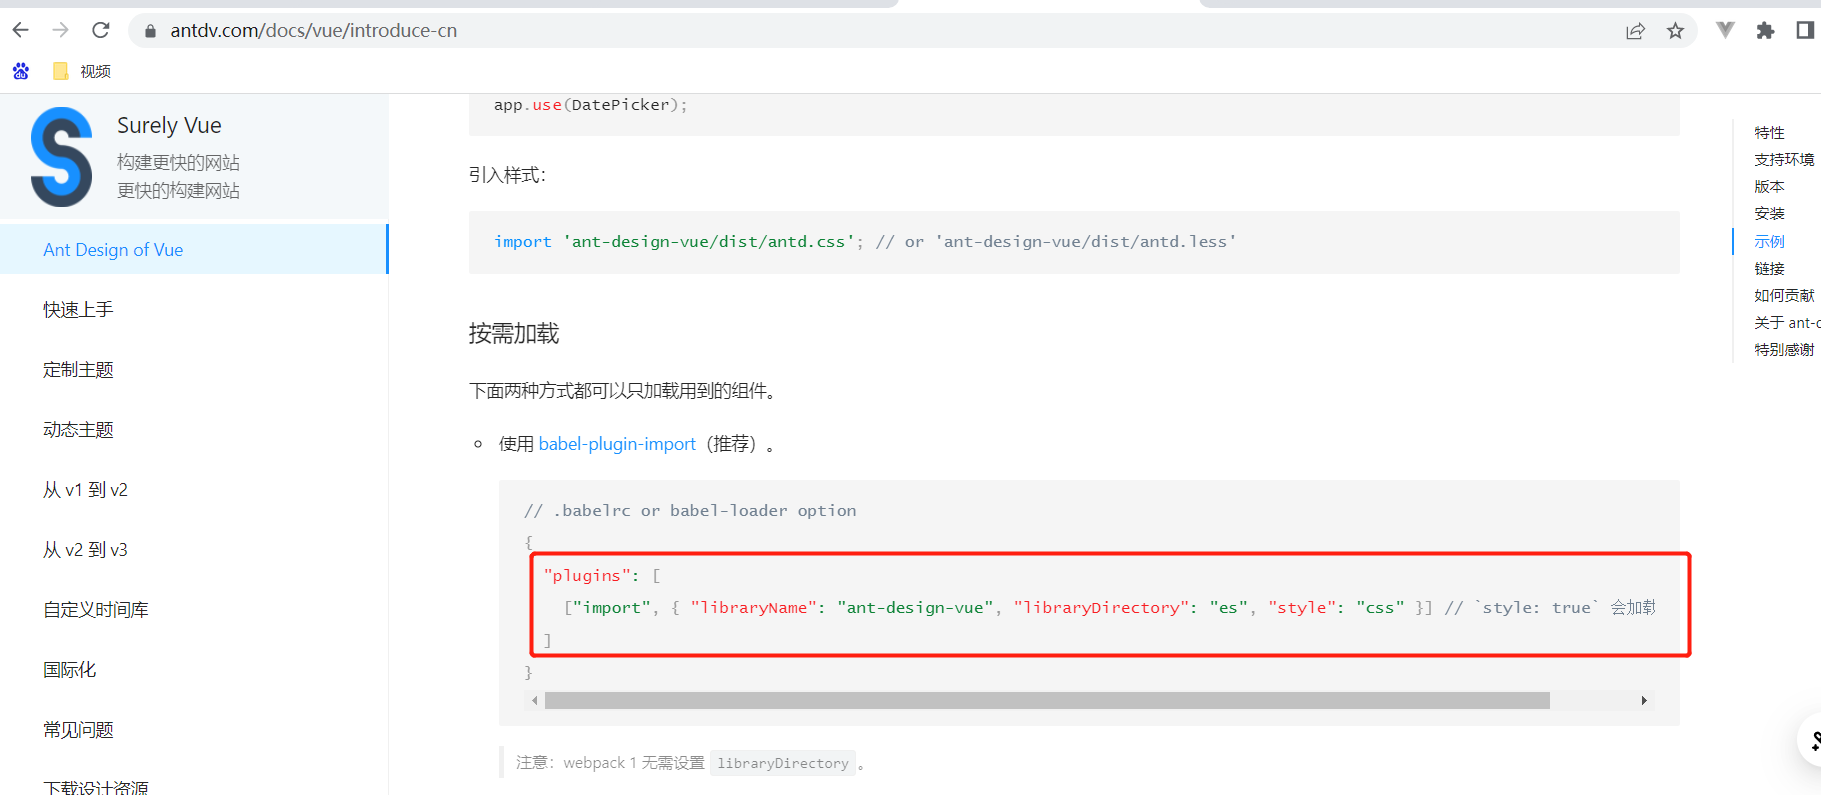
  module.exports = {
    presets: ["@vue/cli-plugin-babel/preset"],
    "plugins": [
      ["import", { "libraryName": "ant-design-vue", "libraryDirectory": "es", "style": true }] // `style: true` 会加载 less 文件
    ]
  };
- 修改
main.js文件代码为如下
  import Vue from "vue";
  import App from "./App.vue";
  import router from "./router";
  import store from "./store";
  // import Antd from "ant-design-vue";
  // import "ant-design-vue/dist/antd.less";
  import { Button } from "ant-design-vue";
  import "ant-design-vue/lib/button/style";

  Vue.config.productionTip = false;
  Vue.use(Button);

  new Vue({
    router,
    store,
    render: (h) => h(App),
  }).$mount("#app");
5.3设计整个项目的路由
5.3.1登录注册的路由
-
在views文件夹下创建user文件夹,并在该文件夹中创建两个组件
Login.vue和Register.vue- Login.vue
<template> <div>登录页</div> </template> <script> export default { name: "Login", }; </script> <style scoped> </style>- Register.vue
<template> <div>注册页</div> </template> <script> export default { name: "Register", }; </script> <style scoped> </style> -
在routes目录下的index.js配置路由配置表
import Vue from "vue"; import VueRouter from "vue-router"; import HomeView from "../views/HomeView.vue"; Vue.use(VueRouter); const routes = [ { path: "/user", component: {render: (h) => h("router-view")}, children:[ { path:"/user/login", name:"login", component: () => import(/* webpackChunkName: "login" */ "../views/user/Login.vue"), }, { path:"/user/register", name:"register", component: () => import(/* webpackChunkName: "register" */ "../views/user/Register.vue"), } ] }, { path: "/", name: "home", component: HomeView, }, { path: "/about", name: "about", // route level code-splitting // this generates a separate chunk (about.[hash].js) for this route // which is lazy-loaded when the route is visited. component: () => import(/* webpackChunkName: "about" */ "../views/AboutView.vue"), }, ]; const router = new VueRouter({ mode: "history", base: process.env.BASE_URL, routes, }); export default router; -
运行,发现页面报错如下
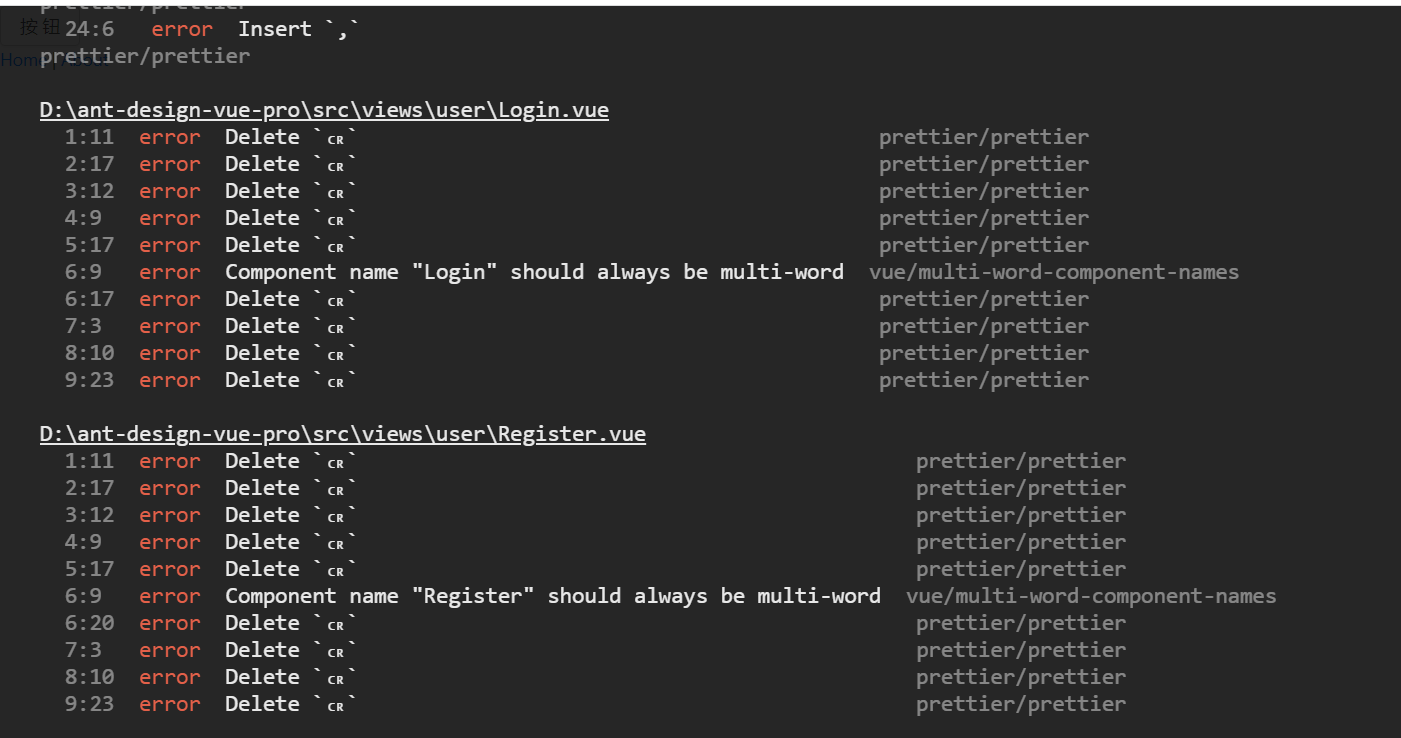
原因:组件命名不规范,应该是有多个单词组成的组件名,使用驼峰命名
解决方法:在
vue.config.js文件中加入下面一行代码,重新运行即可解决lintOnSave: false, -
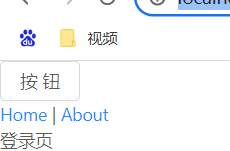
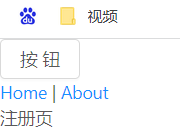
重新运行,分别访问
http://localhost:8080/user/login、http://localhost:8080/user/register,页面效果如下所示
-
在src下创建一个layouts文件夹,并在该文件夹中创建一个
UserLayout.vue,用于存放user相关的布局页面
  <template>
    <div>
      <div>Ant Design Vue Pro</div>
      <router-view/>
    </div>
  </template>
  <script>
  export default {
    name: "UserLayout",
  };
  </script>
  <style scoped>
  </style>
- routes/index.js中user的component改成如下代码
  component: () =>
          import(/* webpackChunkName: "userlayout" */ "../layouts/UserLayout.vue"),
-
重新运行,分别访问
http://localhost:8080/user/login、http://localhost:8080/user/register,页面效果如下所示


-
为了让访问
http://localhost:8080/user重定向到登录页面,在routes/index.js中的user路由配置表的children中添加下面代码
  {
    path:"/user",
    redirect:"/user/login"
  }
5.3.2Dashboard和表单的路由
- 在routes/index.js中加入Dashboard和表单的路由
  {
    path: "/",
    component: () =>
          import(/* webpackChunkName: "basiclayout" */ "../layouts/BasicLayout.vue"),
    children:[
      {
        path:"/",
        redirect:"/dashboard/analysis"
      },
      {
        path:"/dashboard",
        name:"dashboard",
        component:{render: (h) => h("router-view")},
        children: [{
          path: "/dashboard/analysis",
          name: "analysis",
          component: () =>
          import(/* webpackChunkName: "register" */ "../views/dashboard/Analysis.vue"),
        }]
      },
      {
        path:"/form",
        name:"form",
        component: {render: (h) => h("router-view")},
        children: [
          {
            path:"/form/basic-form",
            name:"basicform",
            component: () =>
              import(/* webpackChunkName: "form" */ "../views/forms/BasicForm.vue"),
          },
          {
            path:"/form/step-form",
            name:"stepform",
            component: () =>
              import(/* webpackChunkName: "form" */ "../views/forms/StepForm.vue"),
            children: [
              {
                path:"/form/step-form",
                redirect:"/form/step-form/info"
              },
              {
                path:"/form/step-form/info",
                name:"info",
                component: () =>
                  import(/* webpackChunkName: "form" */ "../views/forms/stepform/Step1.vue"),
              },
              {
                path:"/form/step-form/confirm",
                name:"confirm",
                component: () =>
                  import(/* webpackChunkName: "form" */ "../views/forms/stepform/Step2.vue"),
              },
              {
                path:"/form/step-form/result",
                name:"result",
                component: () =>
                  import(/* webpackChunkName: "form" */ "../views/forms/stepform/Step3.vue"),
              }
            ]
          },
        ]
      }
    ]
  },
-
编写首页布局页面
- Header.vue
<template> <div> Header </div> </template> <script> export default { name: "Header", }; </script> <style scoped> </style>- SiderMenu.vue
<template> <div> 菜单 </div> </template> <script> export default { name: "SiderMenu", }; </script> <style scoped> </style>- Footer.vue
<template> <div> Footer </div> </template> <script> export default { name: "Footer", }; </script> <style scoped> </style> -
根据路由编写对应的组件
- BasicLayout.vue
<template> <div> <Header/> <SiderMenu/> <router-view/> <Footer/> </div> </template> <script> import Header from "./Header.vue"; import Footer from "./Footer.vue"; import SiderMenu from "./SiderMenu.vue"; export default { name: "BasicLayout", components: { Header, Footer, SiderMenu } }; </script> <style scoped> </style>- Analysis.vue
<template> <div> 分析页 </div> </template> <script> export default { name: "AnalysisLayout", }; </script> <style scoped> </style>- BasicForm.vue
<template> <div> 基础表单页 </div> </template> <script> export default { name: "BasicForm", }; </script> <style scoped> </style>- StepForm.vue
<template> <div> 表单页 </div> </template> <script> export default { name: "StepForm", }; </script> <style scoped> </style>- Step1.vue
<template> <div> 步骤一 </div> </template> <script> export default { name: "Step1", }; </script> <style scoped> </style>- Step2.vue
<template> <div> 步骤二 </div> </template> <script> export default { name: "Step2", }; </script> <style scoped> </style>- Step3.vue
<template> <div> 步骤三 </div> </template> <script> export default { name: "Step3", }; </script> <style scoped> </style> -
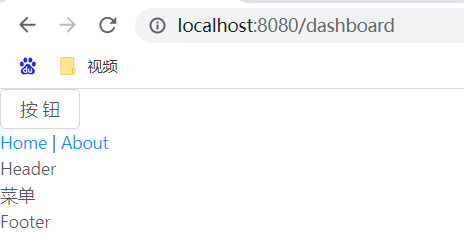
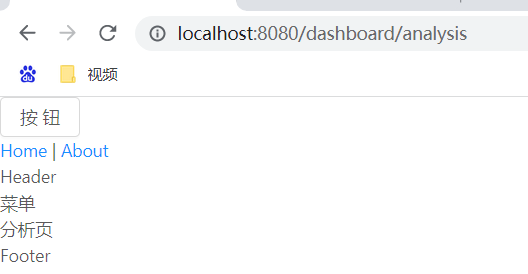
重新运行,分别访问
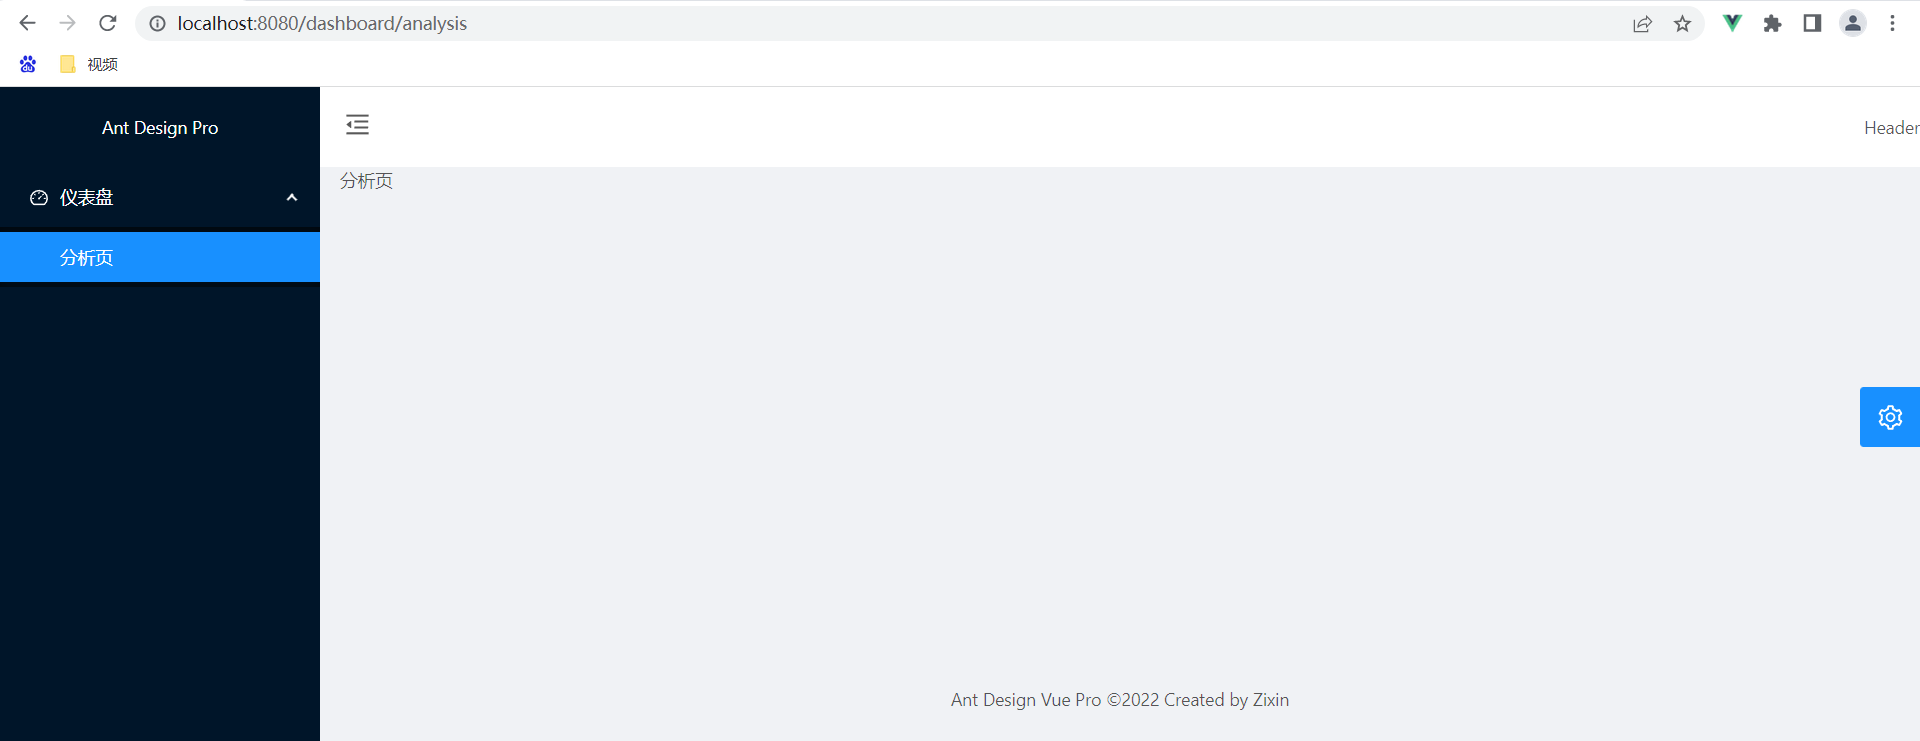
http://localhost:8080/dashboard和http://localhost:8080/dashboard/analysis,都可以访问到对应的信息,如下面所示
-
在views目录下添加
404.vue页面
  <template>
    <div>
      404
    </div>
  </template>
  <script>
  export default {
    name: "404",
  };
  </script>
  <style scoped>
  </style>
- 在routes/index.js中添加404.vue相应的路由信息
  {
    path: "*",
    name: "404",
    component: NotFound,
  }
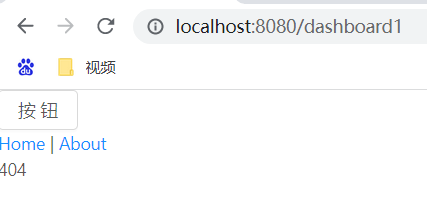
- 重新运行,访问不存在的路由
http://localhost:8080/dashboard1,会跳转到404页面,如下图所示
5.4全局前置守卫
-
安装nprogress

-
在routes/index.js中引入nprogress以及编写全局前置守卫相应的代码
//引入nprogress import Nprogress from "nprogress"; import "nprogress/nprogress.css"; //路由前置守卫 router.beforeEach((to, from, next)=>{ Nprogress.start(); next(); }); router.afterEach(()=>{ Nprogress.done(); }) -
修改
App.vue中的代码<template> <div id="app"> <nav> <router-link to="/dashboard/analysis">dashboard</router-link> | <router-link to="/form/step-form">form</router-link> </nav> <router-view/> </div> </template> <style lang="less"></style> -
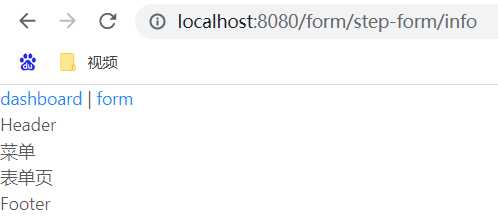
重新运行项目,访问
http://localhost:8080/,直接跳转到如下图一,点击dashboard也跳转到如下图一,点击form链接跳转到如下图二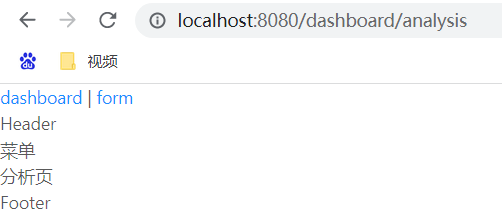
5.5项目整体页面布局
5.5.1首页基本布局
-
把
App.vue中的两个链接删掉 -
去
ant-design-vue管网中找合适Layout模板,放到BasicLayout.vue中,并把之前引入的那几个组件放到刚才引入的代码中对应的位置上<template> <div> <a-layout style="min-height: 100vh"> <a-layout-sider v-model:collapsed="collapsed" collapsible> <div class="logo" /> <SiderMenu/> </a-layout-sider> <a-layout> <a-layout-header style="background: #fff; padding: 0"> <Header/> </a-layout-header> <a-layout-content style="margin: 0 16px"> <router-view/> </a-layout-content> <a-layout-footer style="text-align: center"> <Footer/> </a-layout-footer> </a-layout> </a-layout> </div> </template> <script> import Header from "./Header.vue"; import Footer from "./Footer.vue"; import SiderMenu from "./SiderMenu.vue"; export default { name: "BasicLayout", data() { return { collapsed: false, }; }, components: { Header, Footer, SiderMenu } }; </script> <style scoped> </style> -
由于刚才引入的Layout模板没有引入到项目中,还无法使用,需要在
main.js中引入import { Button, Layout } from "ant-design-vue"; Vue.use(Layout) -
运行项目,可以看到效果

5.5.2自定义触发器
-
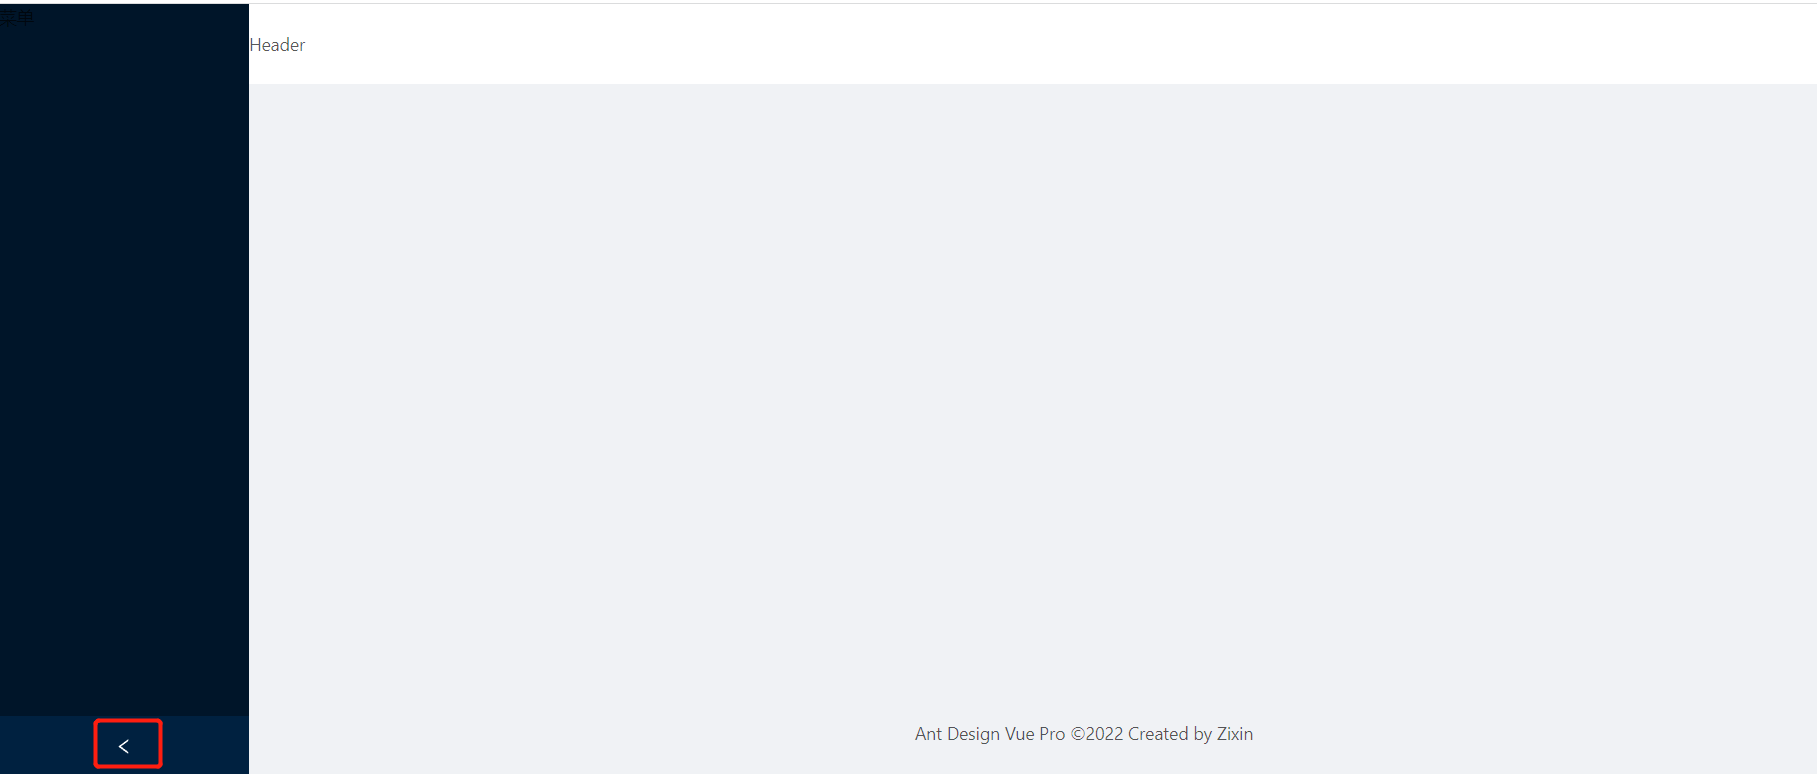
将原来页面中的箭头(如下图红框所示)隐藏掉,在
BasicLayout.vue中的<a-layout-sider>标签中添加:trigger="null"即可
-
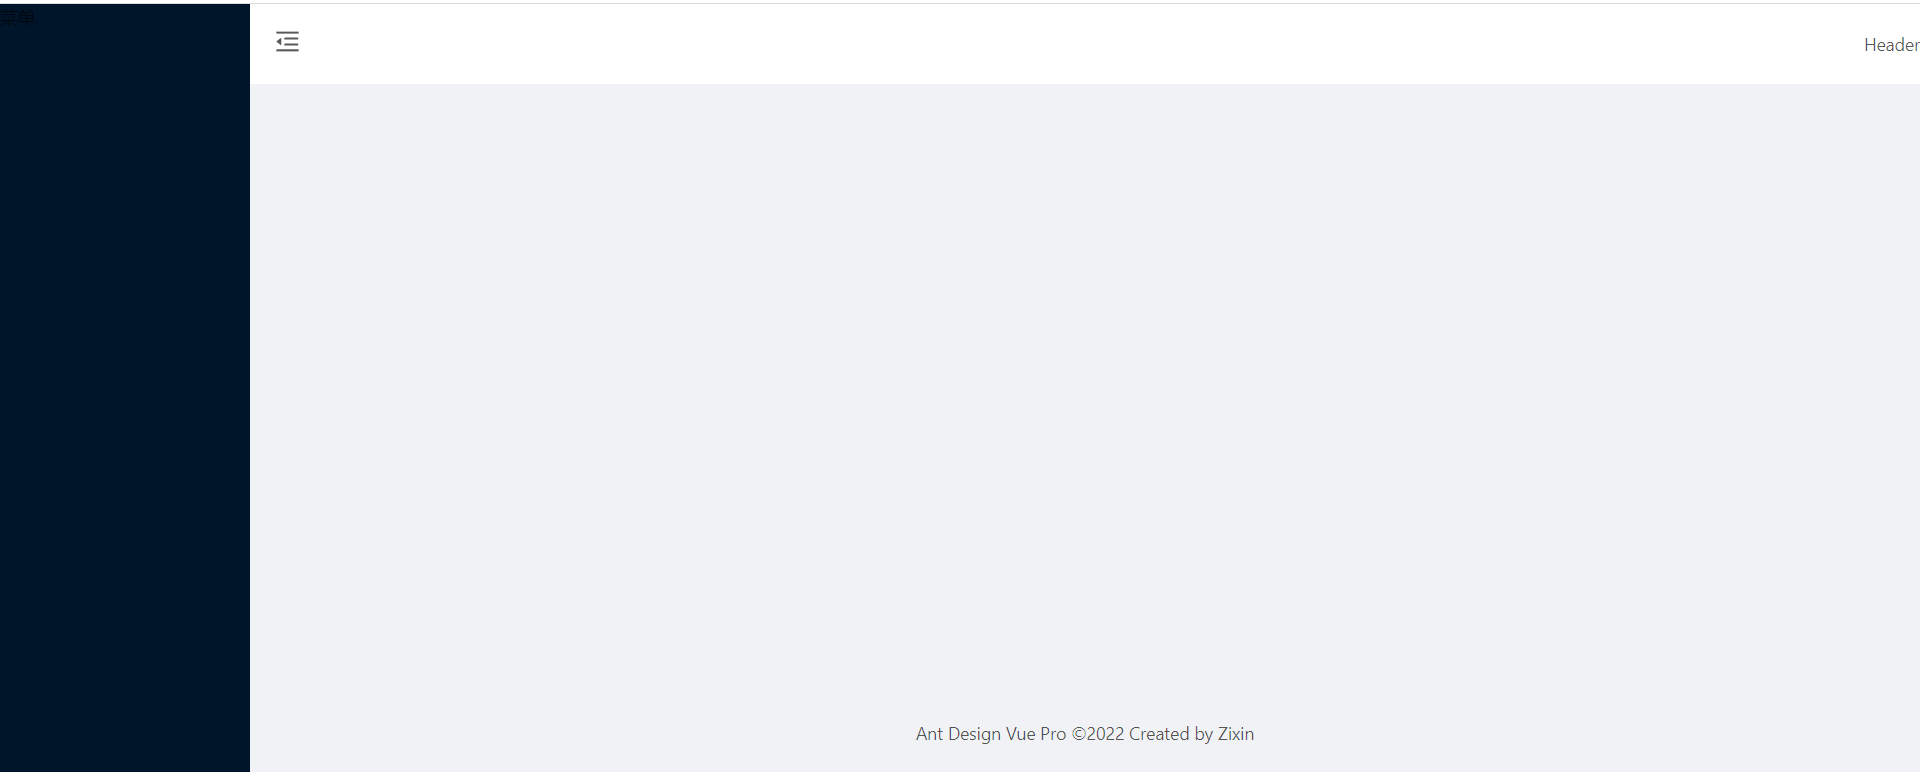
在
BasicLayout.vue中的<a-layout-header></a-layout-header>标签之间添加一个图标,并给该图标添加样式<a-icon class="trigger" type="menu" :type="collapsed ? 'menu-unfold' : 'menu-fold'" @click="collapsed = !collapsed"> </a-icon>.trigger{ padding: 0 20px; line-height: 46px; font-size: 20px; } .trigger:hover{ background: #eeeeee; } -
在
main.js中引入Iconimport { Button, Layout, Icon } from "ant-design-vue"; Vue.use(Icon) -
修改
Header.vue中Header的样式,让它向右浮动<template> <div class="header"> Header </div> </template> <script> export default { name: "Header", }; </script> <style scoped> .header{ float: right; } </style> -
重新运行,页面基本布局出来了
5.5.3动态改变页面布局
-
在components文件夹中添加一个文件夹settingdrawer,并在该文件夹中创建
index.vue,去ant-design-vue官网中找drawer相关的模板,复制到index.vue中<template> <div> <a-button type="primary" @click="showDrawer"> Open </a-button> <a-drawer title="Basic Drawer" placement="right" :closable="false" :visible="visible" :after-visible-change="afterVisibleChange" @close="onClose" > <p>Some contents...</p> <p>Some contents...</p> <p>Some contents...</p> </a-drawer> </div> </template> <script> export default { data() { return { visible: false, }; }, methods: { afterVisibleChange(val) { console.log('visible', val); }, showDrawer() { this.visible = true; }, onClose() { this.visible = false; }, }, }; </script> -
在
BasicLayout.vue中引入该组件,并在页面中使用<template> <div> <a-layout style="min-height: 100vh"> <a-layout-sider :trigger="null" v-model:collapsed="collapsed" collapsible> <div class="logo" /> <SiderMenu/> </a-layout-sider> <a-layout> <a-layout-header style="background: #fff; padding: 0"> <a-icon class="trigger" type="menu" :type="collapsed ? 'menu-unfold' : 'menu-fold'" @click="collapsed = !collapsed"> </a-icon> <Header/> </a-layout-header> <a-layout-content style="margin: 0 16px"> <router-view/> </a-layout-content> <a-layout-footer style="text-align: center"> <Footer/> </a-layout-footer> </a-layout> </a-layout> <SettingDrawer/> </div> </template> <script> import Header from "./Header.vue"; import Footer from "./Footer.vue"; import SiderMenu from "./SiderMenu.vue"; import SettingDrawer from "../components/settingdrawer/index.vue" export default { name: "BasicLayout", data() { return { collapsed: false, }; }, components: { Header, Footer, SiderMenu, SettingDrawer } }; </script> <style scoped> .trigger{ padding: 0 20px; line-height: 46px; font-size: 20px; } .trigger:hover{ background: #eeeeee; } </style> -
在
main.js中注册Drawerimport { Button, Layout, Icon, Drawer } from "ant-design-vue"; Vue.use(Drawer) -
重新运行,可以看到效果,点击open按钮打开drawer,再次点击就会关闭

-
优化settingdrawer目录下的
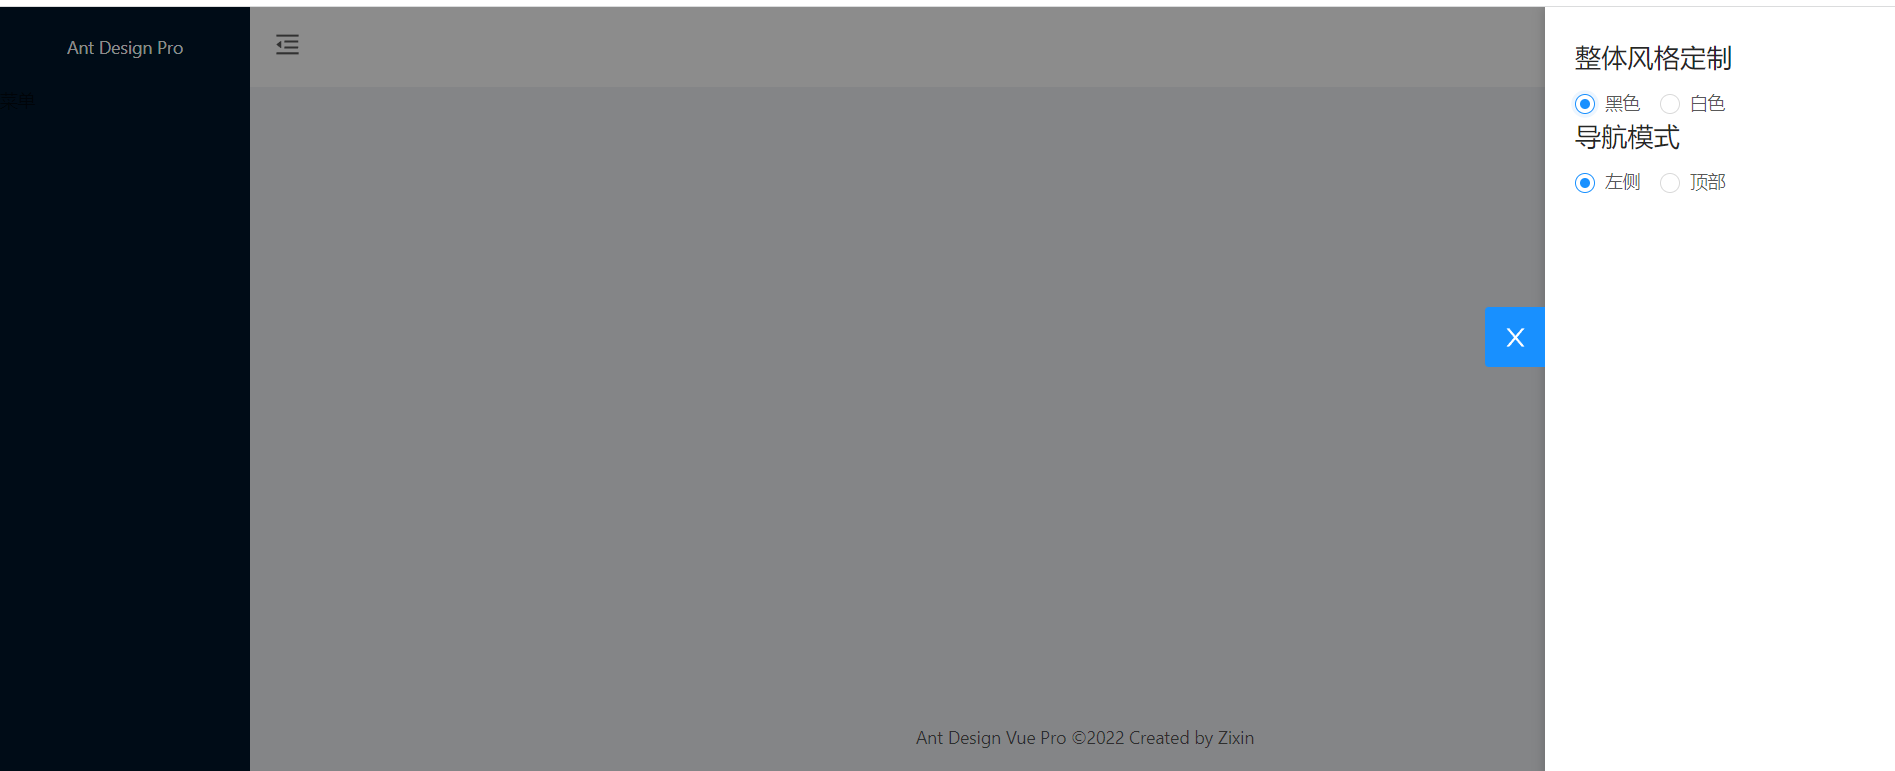
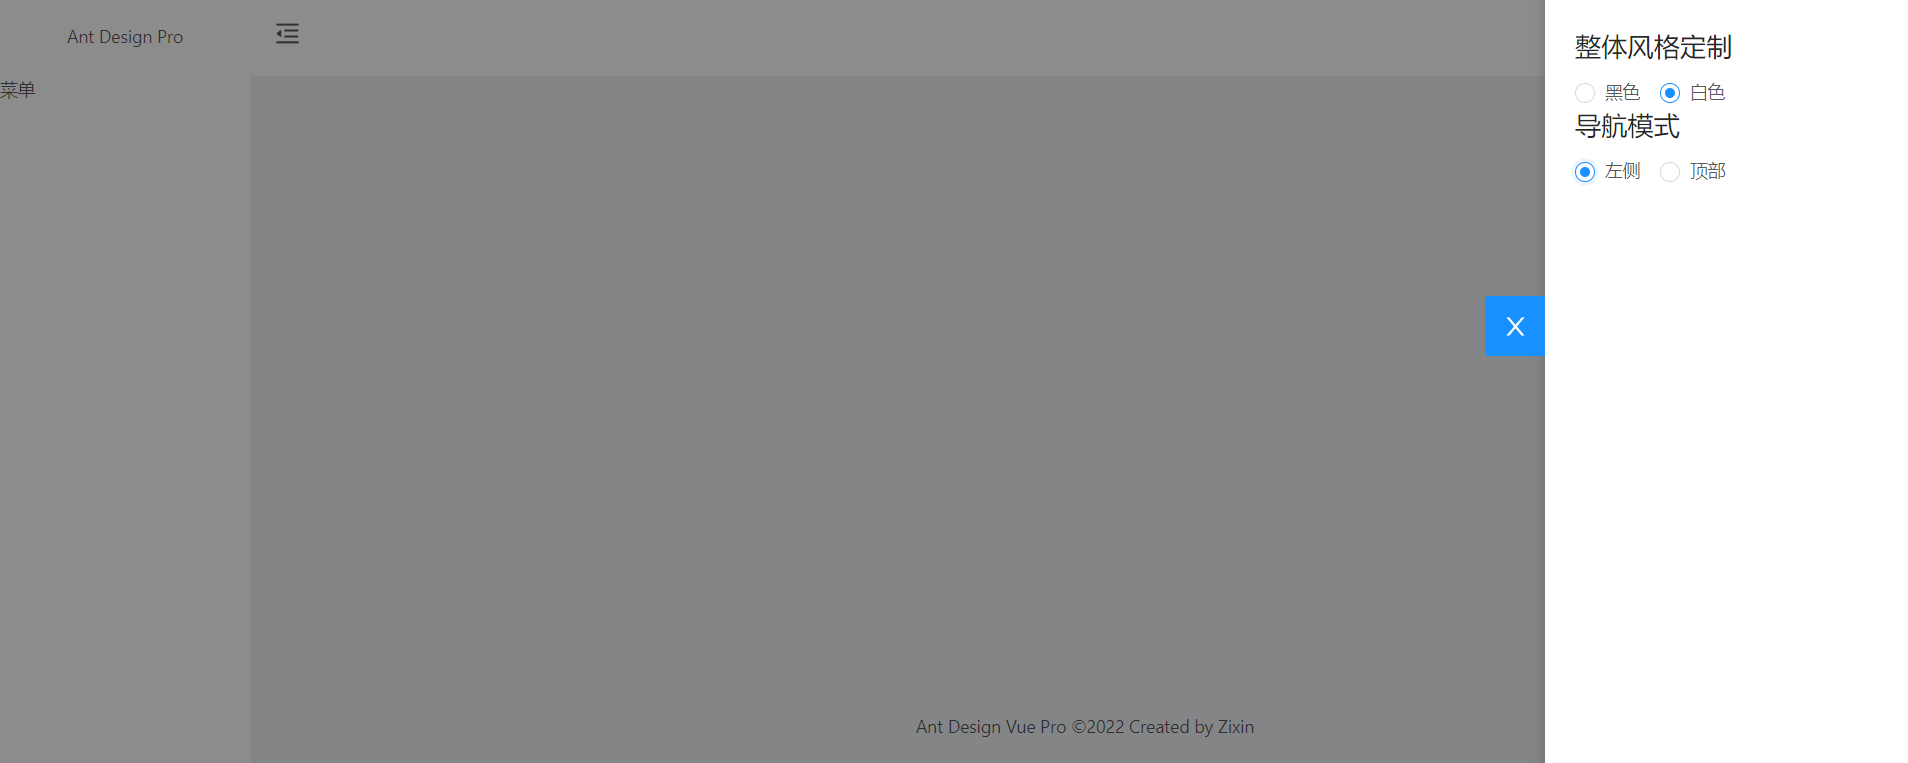
index.vue的代码<template> <div> <a-drawer placement="right" :closable="false" :visible="visible" @close="onClose" width="300px" > <template v-slot:handle> <div class="handle" @click="visible = !visible"> <a-icon :type="visible ? 'close' : 'setting'"></a-icon> </div> </template> <div> <h2>整体风格定制</h2> <a-radio-group @change="e => handleSettingDrawer('navTheme', e.target.value)" :value="$route.query.navTheme || 'dark'"> <a-radio value="dark">黑色</a-radio> <a-radio value="light">白色</a-radio> </a-radio-group> <h2>导航模式</h2> <a-radio-group @change="e => handleSettingDrawer('navLayout', e.target.value)" :value="$route.query.navLayout || 'left'"> <a-radio value="left">左侧</a-radio> <a-radio value="top">顶部</a-radio> </a-radio-group> </div> </a-drawer> </div> </template> <script> export default { data() { return { visible: false, }; }, methods: { showDrawer() { this.visible = true; }, onClose() { this.visible = false; }, handleSettingDrawer(type, value){ this.$router.push({query:{...this.$route.query, [type]:value}}) } }, }; </script> <style scoped> .handle{ position: absolute; top: 240px; right: 300px; width:48px; height: 48px; background: #1890ff; color: #fff; font-size: 20px; text-align: center; line-height: 48px; border-radius: 3px 0 0 3px; } </style> -
BasicLayout.vue根据优化后的settingdrawer目录下的index.vue进行修改<template> <div :class="[`nav-theme-${navTheme}`, `nav-layout-${navLayout}`]"> <a-layout style="min-height: 100vh"> <a-layout-sider v-if="navLayout == 'left'" :theme="navTheme" :trigger="null" v-model:collapsed="collapsed" collapsible> <div class="logo">Ant Design Pro</div> <SiderMenu/> </a-layout-sider> <a-layout> <a-layout-header style="background: #fff; padding: 0"> <a-icon class="trigger" type="menu" :type="collapsed ? 'menu-unfold' : 'menu-fold'" @click="collapsed = !collapsed"> </a-icon> <Header/> </a-layout-header> <a-layout-content style="margin: 0 16px"> <router-view/> </a-layout-content> <a-layout-footer style="text-align: center"> <Footer/> </a-layout-footer> </a-layout> </a-layout> <SettingDrawer/> </div> </template> <script> import Header from "./Header.vue"; import Footer from "./Footer.vue"; import SiderMenu from "./SiderMenu.vue"; import SettingDrawer from "../components/settingdrawer/index.vue" export default { name: "BasicLayout", data() { return { collapsed: false, }; }, components: { Header, Footer, SiderMenu, SettingDrawer }, computed:{ navTheme(){ return this.$route.query.navTheme || "dark"; }, navLayout(){ return this.$route.query.navLayout || "left"; } } }; </script> <style scoped> .trigger{ padding: 0 20px; line-height: 46px; font-size: 20px; } .trigger:hover{ background: #eeeeee; } .logo{ height: 64px; line-height: 64px; text-align: center; overflow: hidden; } /* 主题为黑色时,logo为白色 */ .nav-theme-dark >>>.logo{ color: #ffffff; } </style> -
routes目录下的
index.js中的router.beforeEach逻辑修改为如下//路由前置守卫 router.beforeEach((to, from, next)=>{ if(to.path !== from.path){ Nprogress.start(); } next(); }); -
在
main.js中注册Radioimport { Button, Layout, Icon, Drawer, Radio } from "ant-design-vue"; Vue.use(Radio) -
重新运行,可以看到对应效果如下
5.5.4将路由和菜单结合
-
去
ant-design-vue官网中找菜单模板,复制到SiderMenu.vue中并作出对应修改<template> <div style="width: 256px"> <a-menu :default-selected-keys="['1']" :default-open-keys="['2']" mode="inline" theme="dark" :inline-collapsed="collapsed" > <template v-for="item in list"> <a-menu-item v-if="!item.children" :key="item.key"> <a-icon type="pie-chart" /> <span>{{ item.title }}</span> </a-menu-item> <sub-menu v-else :key="item.key" :menu-info="item" /> </template> </a-menu> </div> </template> <script> import SubMenu from "./SubMenu.vue" export default { components: { 'sub-menu': SubMenu, }, data() { return { collapsed: false, list: [ { key: '1', title: 'Option 1', }, { key: '2', title: 'Navigation 2', children: [ { key: '2.1', title: 'Navigation 3', children: [{ key: '2.1.1', title: 'Option 2.1.1' }], }, ], }, ], }; }, methods: { toggleCollapsed() { this.collapsed = !this.collapsed; }, }, }; </script> -
把
SiderMenu.vue中引入的组件SubMenu,单独编写一个组件SubMenu.vue存放<template functional> <a-sub-menu :key="props.menuInfo.key"> <span slot="title"> <a-icon type="mail" /><span>{{ props.menuInfo.title }}</span> </span> <template v-for="item in props.menuInfo.children"> <a-menu-item v-if="!item.children" :key="item.key"> <a-icon type="pie-chart" /> <span>{{ item.title }}</span> </a-menu-item> <sub-menu v-else :key="item.key" :menu-info="item" /> </template> </a-sub-menu> </template> <script> export default { props: ['menuInfo'], }; </script> -
在
BasicLayout.vue的<a-layout-sider>标签中设置width="256px",才能让引入的导航菜单与左侧栏同宽 -
在
main.js中注册Radioimport { Button, Layout, Icon, Drawer, Radio, Menu } from "ant-design-vue"; Vue.use(Menu ) -
运行,修改整体风格布局为白色,发现导航菜单背景颜色还是没有改变
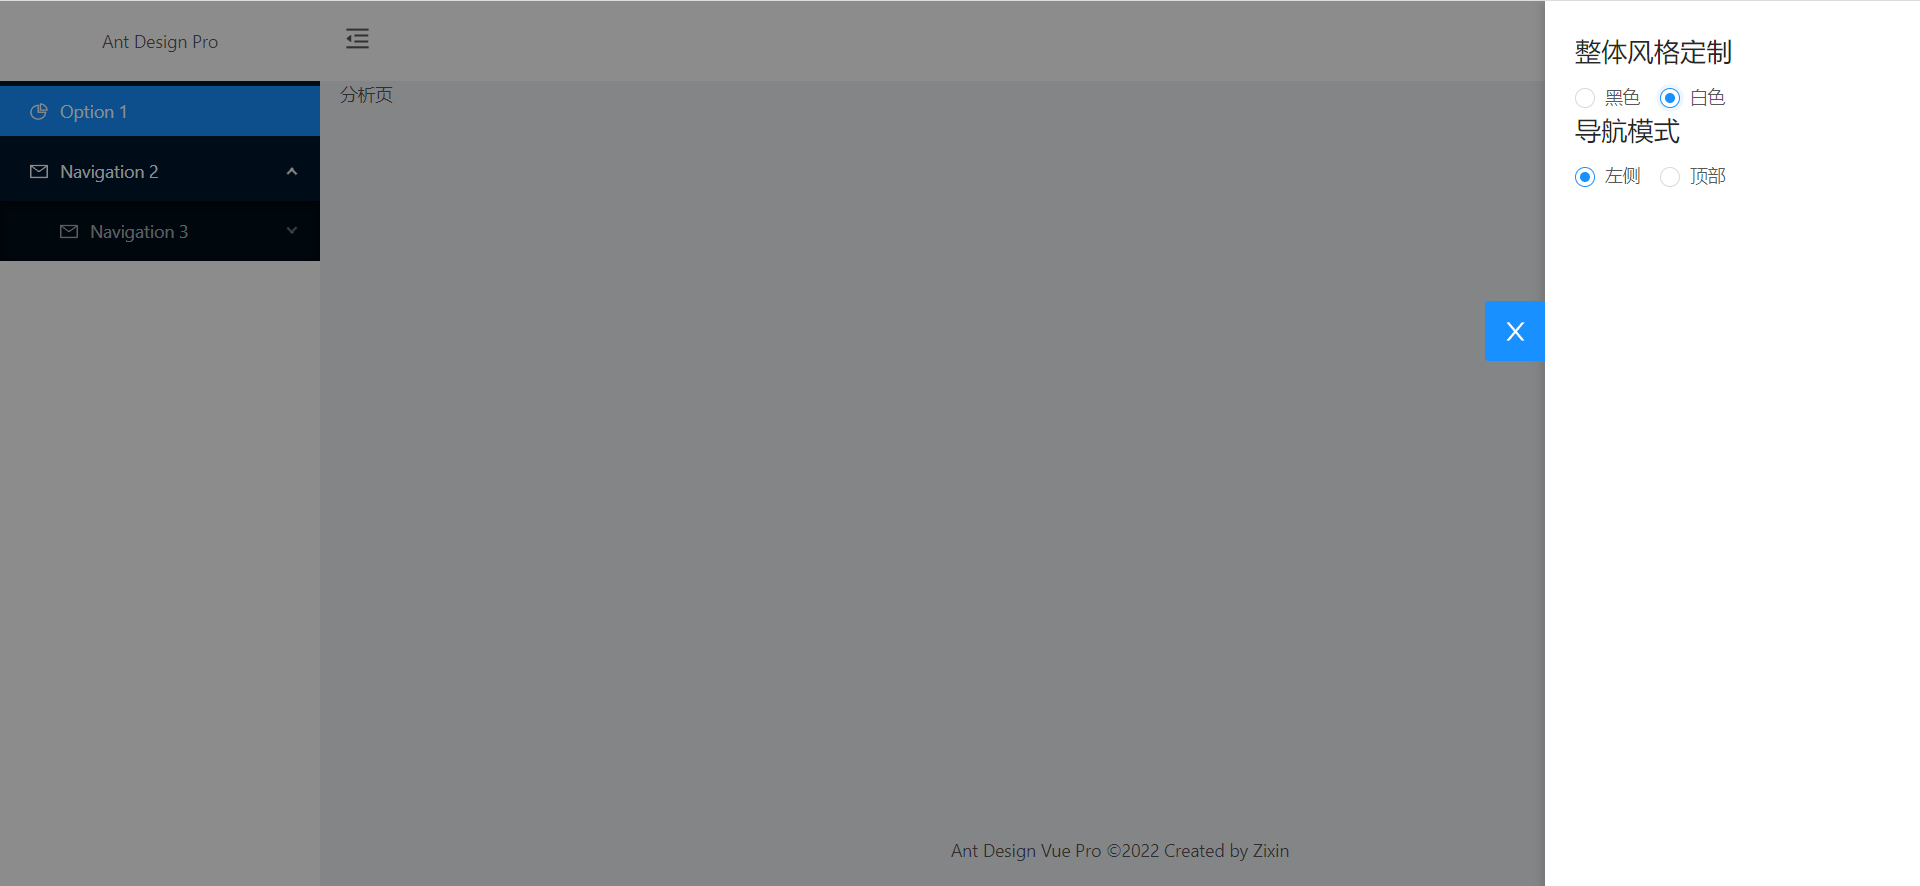
-
在
SiderMenu.vue中的export default{}中添加props属性props:{ theme:{ type: String, default: "dark" } }, -
在
SiderMenu.vue中的<a-menu>标签中修改theme="dark"为:theme="theme" -
在
BasicLayout.vue的<SiderMenu>标签添加:theme="navTheme",添加后变成<SiderMenu :theme="navTheme"/> -
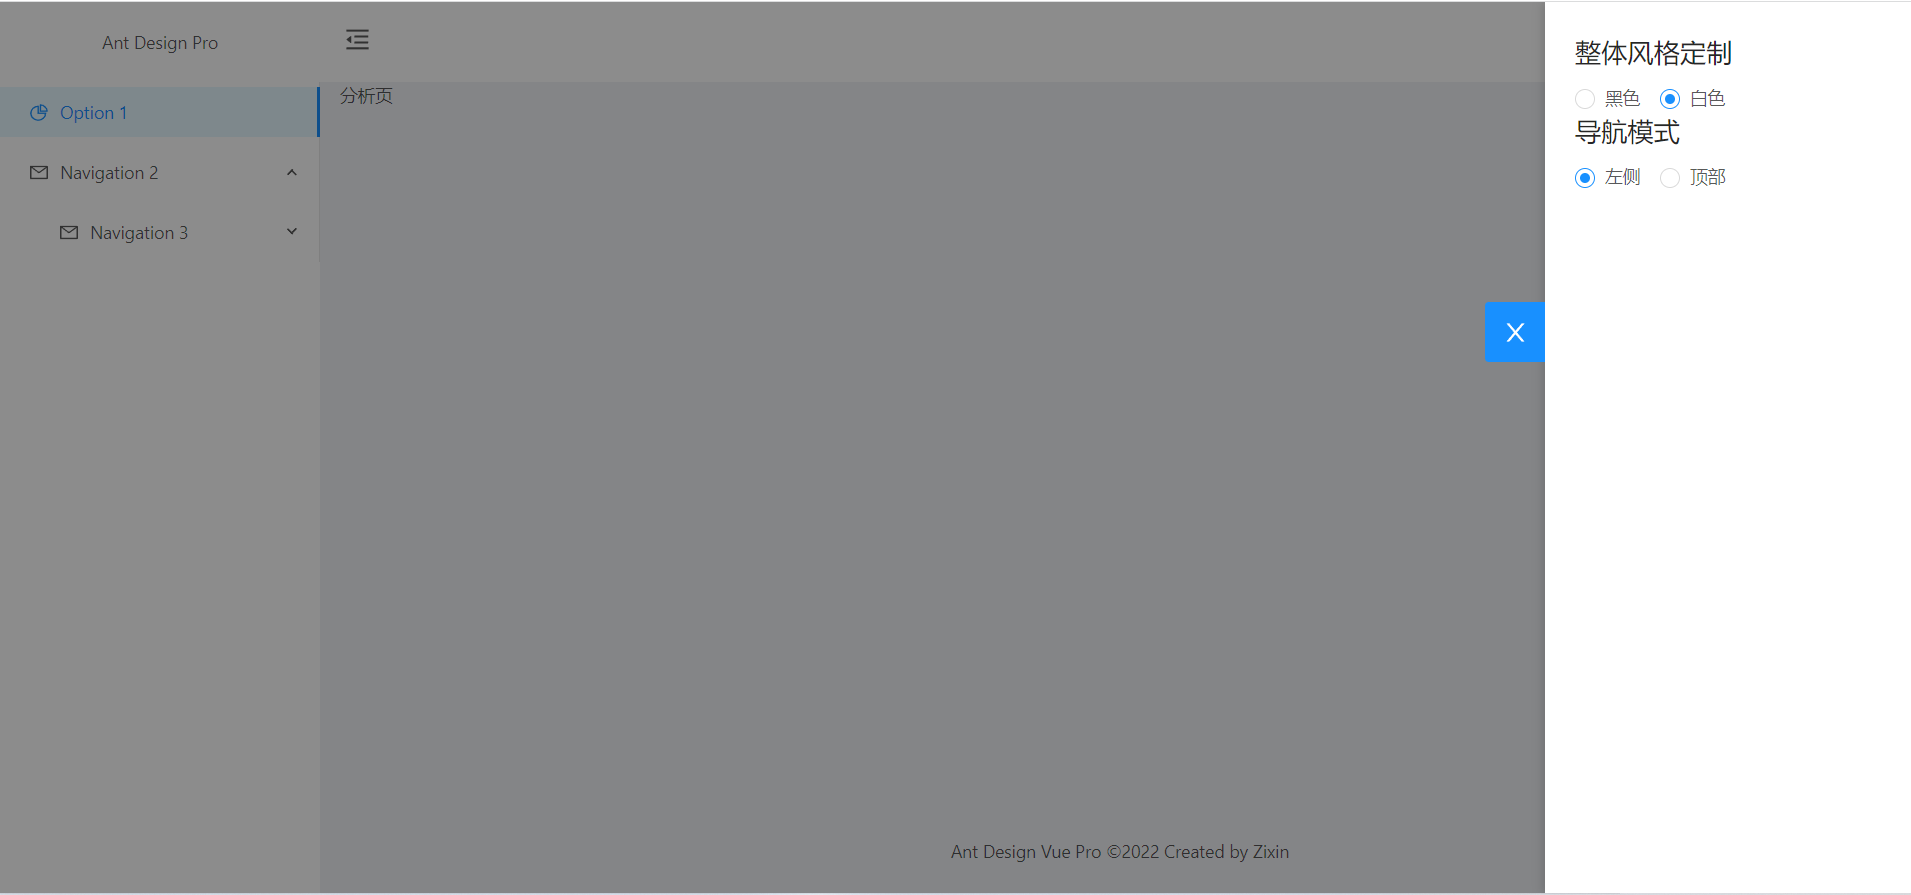
运行,修改整体风格布局,发现导航菜单背景颜色跟着改变
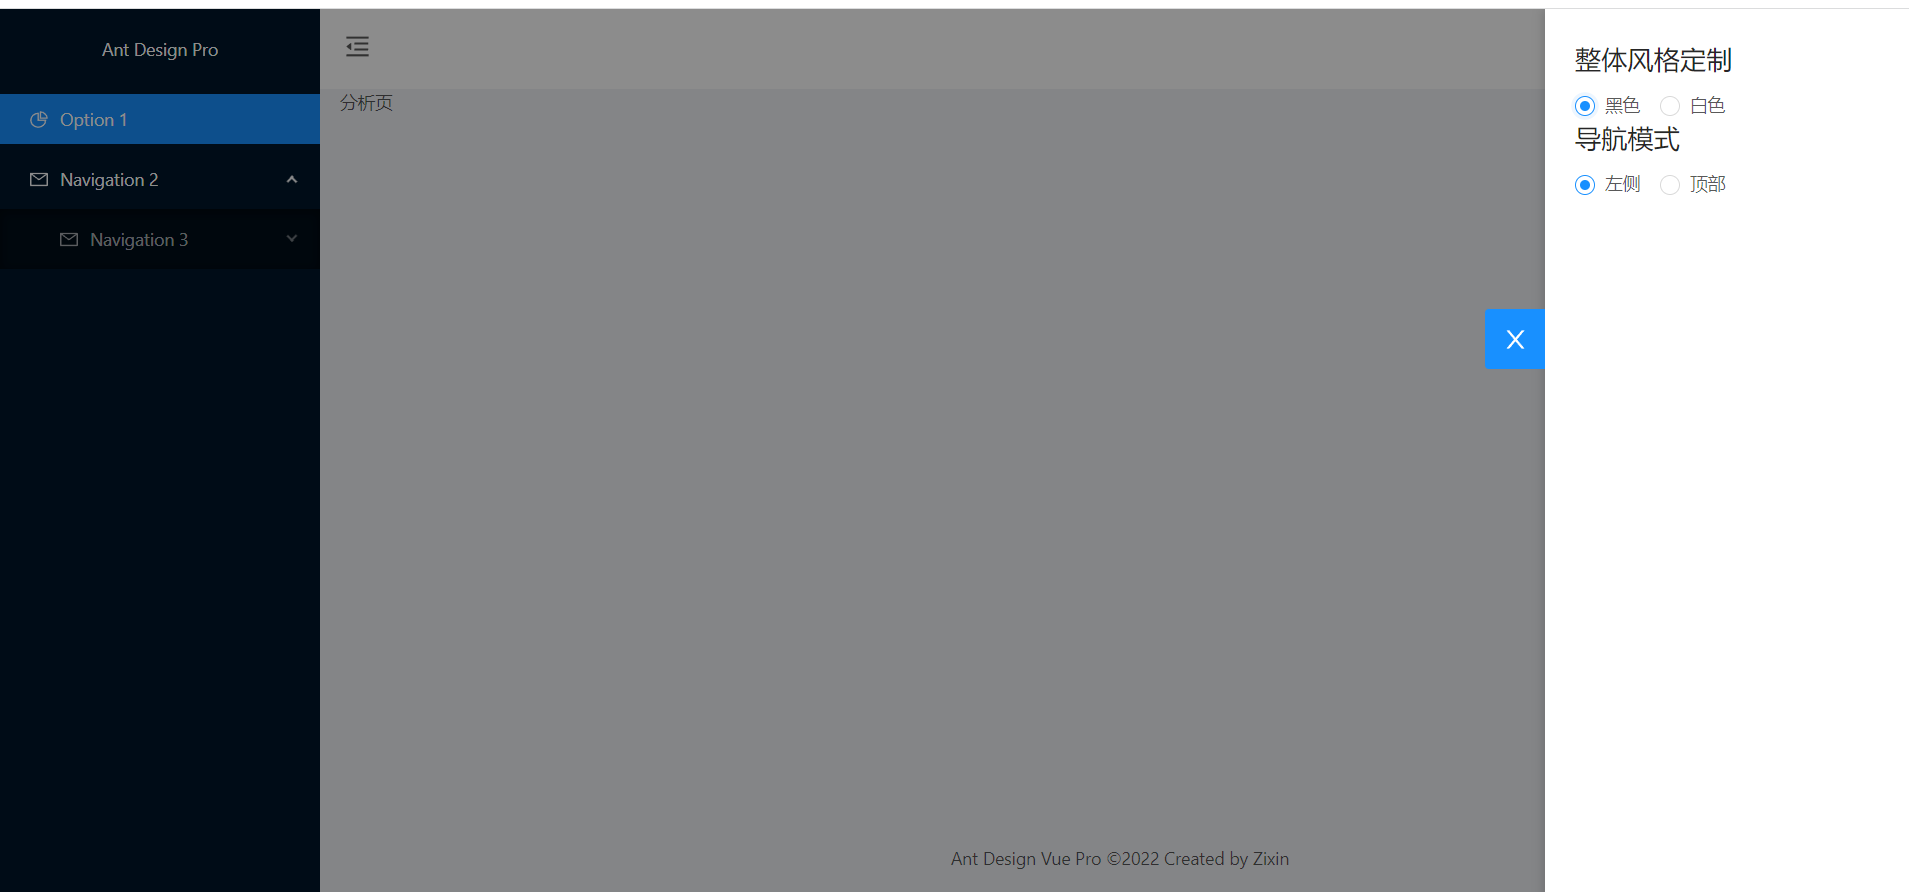
5.5.5将路由的数据动态显示在菜单中
-
将routes目录下的
index.js文件中的每个路由项进行调整,将不需要显示的父级路由隐藏,添加hideMenu: true,,隐藏子路由添加hideChildrenMenu: true,import Vue from "vue"; import VueRouter from "vue-router"; import HomeView from "../views/HomeView.vue"; import NotFound from "../views/404.vue"; //引入nprogress import Nprogress from "nprogress"; import "nprogress/nprogress.css"; Vue.use(VueRouter); const routes = [ { path: "/user", component: () => import(/* webpackChunkName: "userlayout" */ "../layouts/UserLayout.vue"), hideMenu: true, children:[ { path:"/user", redirect:"/user/login" }, { path:"/user/login", name:"login", component: () => import(/* webpackChunkName: "login" */ "../views/user/Login.vue"), }, { path:"/user/register", name:"register", component: () => import(/* webpackChunkName: "register" */ "../views/user/Register.vue"), } ] }, { path: "/", component: () => import(/* webpackChunkName: "basiclayout" */ "../layouts/BasicLayout.vue"), children:[ { path:"/", redirect:"/dashboard/analysis" }, { path:"/dashboard", name:"dashboard", meta: {icon: "dashboard", title: "仪表盘"}, component:{render: (h) => h("router-view")}, children: [{ path: "/dashboard/analysis", name: "analysis", meta: {title: "分析页"}, component: () => import(/* webpackChunkName: "register" */ "../views/dashboard/Analysis.vue"), }] }, { path:"/form", name:"form", meta: {icon: "form", title: "表单"}, component: {render: (h) => h("router-view")}, children: [ { path:"/form/basic-form", name:"basicform", meta: {title: "基础表单"}, component: () => import(/* webpackChunkName: "form" */ "../views/forms/BasicForm.vue"), }, { path:"/form/step-form", name:"stepform", meta: {title: "分布表单"}, component: () => import(/* webpackChunkName: "form" */ "../views/forms/StepForm.vue"), hideChildrenMenu: true, children: [ { path:"/form/step-form", redirect:"/form/step-form/info" }, { path:"/form/step-form/info", name:"info", component: () => import(/* webpackChunkName: "form" */ "../views/forms/stepform/Step1.vue"), }, { path:"/form/step-form/confirm", name:"confirm", component: () => import(/* webpackChunkName: "form" */ "../views/forms/stepform/Step2.vue"), }, { path:"/form/step-form/result", name:"result", component: () => import(/* webpackChunkName: "form" */ "../views/forms/stepform/Step3.vue"), } ] }, ] } ] }, { path: "*", name: "404", hideMenu: true, component: NotFound, } ]; const router = new VueRouter({ mode: "history", base: process.env.BASE_URL, routes, }); //路由前置守卫 router.beforeEach((to, from, next)=>{ if(to.path !== from.path){ Nprogress.start(); } next(); }); router.afterEach(()=>{ Nprogress.done(); }) export default router; -
修改
SiderMenu.vue代码<template> <div style="width: 256px"> <a-menu :default-selected-keys="['1']" :default-open-keys="['2']" mode="inline" :theme="theme" :inline-collapsed="collapsed" > <template v-for="item in menuData"> <a-menu-item v-if="!item.children" :key="item.path"> <a-icon v-if="item.meta.icon" :type="item.meta.icon" /> <span>{{ item.meta.title }}</span> </a-menu-item> <sub-menu v-else :key="item.path" :menu-info="item" /> </template> </a-menu> </div> </template> <script> import SubMenu from "./SubMenu.vue" export default { props:{ theme:{ type: String, default: "dark" } }, components: { 'sub-menu': SubMenu, }, data() { const menuData = this.getMenuData(this.$router.options.routes); return { collapsed: false, menuData }; }, methods: { toggleCollapsed() { this.collapsed = !this.collapsed; }, //获取菜单数据 getMenuData(routes){ const menuData = []; routes.forEach(item => { console.log("item:",item); //如果当前的路由对象有name属性且没有hideMenu if(item.name && !item.hideMenu){ const newItem = { ...item }; delete newItem.children; if(item.children && !item.hideChildrenMenu){ newItem.children = this.getMenuData(item.children) } menuData.push(newItem); }else if(!item.hideMenu && !item.hideChildrenMenu && item.children){//如果当前的路由对象且没有hideMenu和没有hideChildrenMenu但有子节点的 menuData.push(...this.getMenuData(item.children)); } }); return menuData; } }, }; </script> -
修改
SubMenu.vue代码<template functional> <a-sub-menu :key="props.menuInfo.path"> <span slot="title"> <a-icon v-if="props.menuInfo.meta.icon" :type="props.menuInfo.meta.icon" /><span>{{ props.menuInfo.meta.title }}</span> </span> <template v-for="item in props.menuInfo.children"> <a-menu-item v-if="!item.children" :key="item.path"> <a-icon v-if="item.meta.icon" :type="item.meta.icon" /> <span>{{ item.meta.title }}</span> </a-menu-item> <sub-menu v-else :key="item.path" :menu-info="item" /> </template> </a-sub-menu> </template> <script> export default { props: ['menuInfo'], }; </script> -
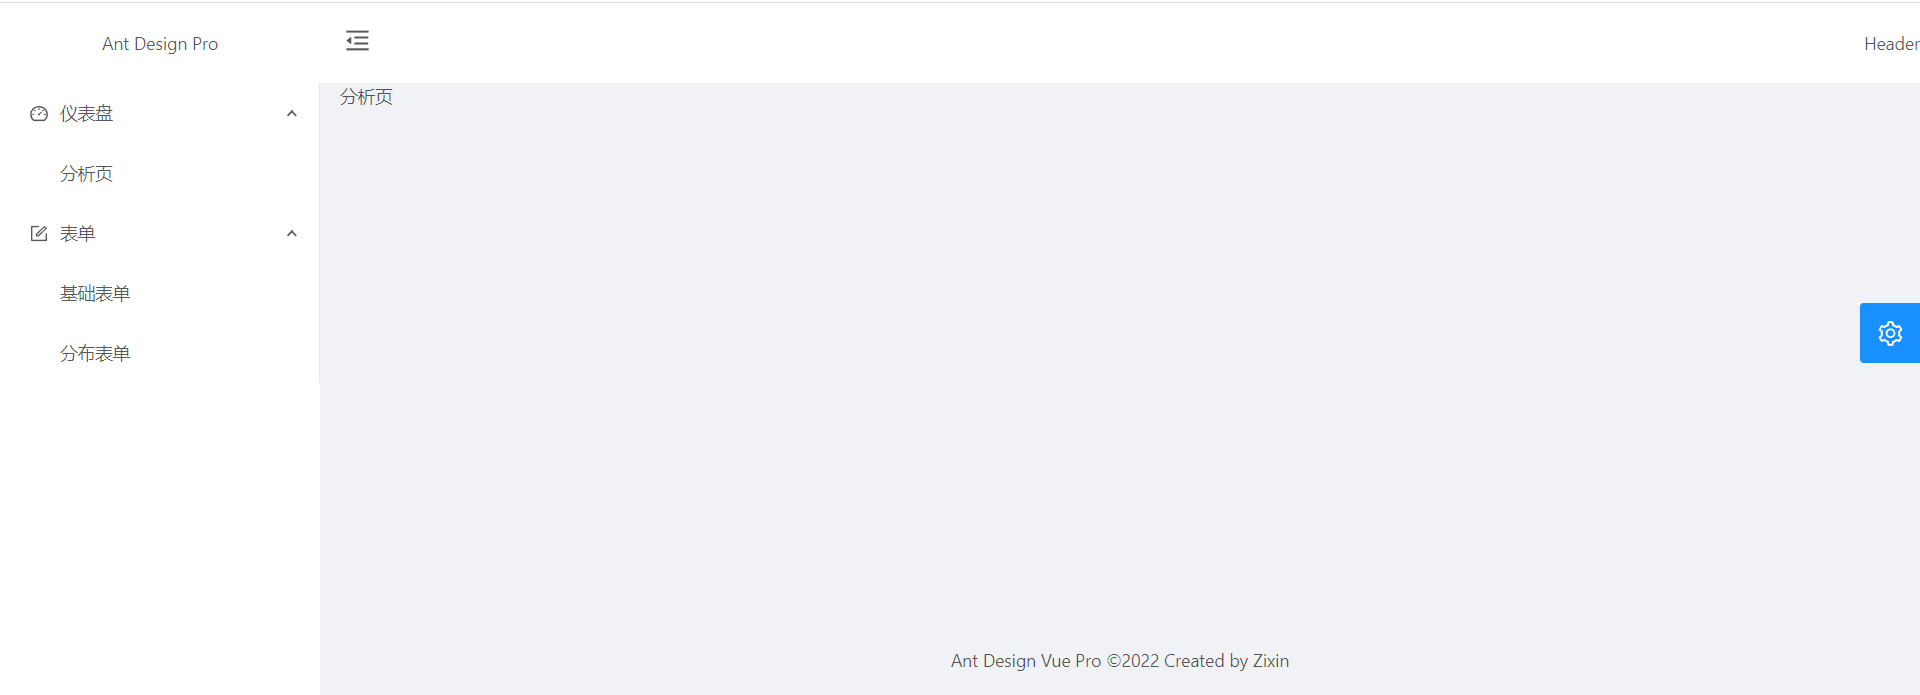
重新运行,可以看到左侧菜单栏的数据显示出来了
5.5.6自定义菜单项<a-menu>标签中:selectedKeys和openKeys
-
修改
SiderMenu.vue代码<template> <div style="width: 256px"> <a-menu :selectedKeys="selectedKeys" :openKeys.sync="openKeys" mode="inline" :theme="theme" > <template v-for="item in menuData"> <!-- --> <a-menu-item v-if="!item.children" :key="item.path" @click="selectedMenu(item)"> <a-icon v-if="item.meta.icon" :type="item.meta.icon" /> <span>{{ item.meta.title }}</span> </a-menu-item> <sub-menu v-else :key="item.path" :menu-info="item" /> </template> </a-menu> </div> </template> <script> import SubMenu from "./SubMenu.vue" export default { props:{ theme:{ type: String, default: "dark" } }, components: { 'sub-menu': SubMenu, }, watch:{//监听路由路径 "$route.path": function(val) { this.selectedKeys = this.selectedKeysMap[val]; this.openKeys = this.collapsed ? [] : this.openKeysMap[val]; } }, data() { this.selectedKeysMap = {}; this.openKeysMap = {}; const menuData = this.getMenuData(this.$router.options.routes); return { collapsed: false, menuData, selectedKeys: this.selectedKeysMap[this.$route.path], openKeys: this.collapsed ? [] : this.openKeysMap[this.$route.path] }; }, methods: { toggleCollapsed() { this.collapsed = !this.collapsed; }, //获取菜单数据 getMenuData(routes = [], parentKeys = [], selectedKey){ const menuData = []; routes.forEach(item => { // console.log("item:",item); //如果当前的路由对象有name属性且没有hideMenu if(item.name && !item.hideMenu){ this.openKeysMap[item.path] = parentKeys; this.selectedKeysMap[item.path] = [selectedKey || item.path]; const newItem = { ...item }; delete newItem.children; if(item.children && !item.hideChildrenMenu){ newItem.children = this.getMenuData(item.children, [...parentKeys, item.path]) }else{ this.getMenuData(item.children, selectedKey ? parentKeys : [...parentKeys, item.path], selectedKey || item.path); } menuData.push(newItem); }else if(!item.hideMenu && !item.hideChildrenMenu && item.children){//如果当前的路由对象且没有hideMenu和没有hideChildrenMenu但有子节点的 menuData.push(...this.getMenuData(item.children, [...parentKeys, item.path])); } }); return menuData; }, selectedMenu(item){ this.$router.push({path: item.path, query: this.$route.query}) } }, }; </script> -
修改
SubMenu.vue代码<template functional> <a-sub-menu :key="props.menuInfo.path"> <span slot="title"> <a-icon v-if="props.menuInfo.meta.icon" :type="props.menuInfo.meta.icon" /><span>{{ props.menuInfo.meta.title }}</span> </span> <template v-for="item in props.menuInfo.children"> <a-menu-item v-if="!item.children" :key="item.path" @click="parent.selectMenu(item) "> <a-icon v-if="item.meta.icon" :type="item.meta.icon" /> <span>{{ item.meta.title }}</span> </a-menu-item> <sub-menu v-else :key="item.path" :menu-info="item" /> </template> </a-sub-menu> </template> <script> export default { props: ['menuInfo'], }; </script> -
重新运行,出现下面错误

原因:连续点击两次同一个菜单项
解决方法:在SiderMenu.vue中的selectedMenu做判断,如果上一次的路径跟这一次的路径一样就不做跳转
  selectedMenu(item){
     // console.log(this.$route.path)
     // console.log("item.path",item.path)
    if(this.$route.path === item.path){
      return
    }
    this.$router.push({path: item.path, query: this.$route.query})
  }
- 再次运行,即可得到预期的效果

5.6使用路由管理用户权限
-
在src目录下创建一个utils文件夹,并在该文件夹中创建一个存放权限逻辑的
auth.jsexport function getCurrentAuthority(){ return ["admin"]; } export function check(authority){ const current = getCurrentAuthority(); return current.some(item => authority.includes(item)); } export function isLogin(){ const current = getCurrentAuthority(); return current && current[0] !="guest"; } -
在routes目录下的
index.js中name分别为dashboard和form的meta中添加authority,并分别赋予对应的权限,guest用户只拥有dashboard权限,admin同时拥有form和dashboard权限meta: {icon: "dashboard", title: "仪表盘", authority: ["admin", "guest"]}, meta: {icon: "form", title: "表单", authority: ["admin"]}, -
安装
lodash工具

-
在routes目录下的
index.js中引入lodash以及在utils/auth.js中的check和isLogin//引入lodash工具 import findLast from "lodash/findLast"; //引入auth中的check,isLogin方法 import { check, isLogin} from "../utils/auth.js"; -
修改routes目录下的
index.js中router.beforeEach的逻辑//路由前置守卫 router.beforeEach((to, from, next)=>{ if(to.path !== from.path){ Nprogress.start(); } //遍历路由,返回路由中meta标记的authrity值 const record = findLast(to.matched, record => record.meta.authority); if(record && !check(record.meta.authority)){ if(!isLogin() && to.path != "/user/login"){ next({ path: "user/login" }); }else if(to.path != "/403"){ next({ path: "/403" }); } Nprogress.done(); } next(); }); -
在src/views目录下创建一个
403.vue页面<template> <div> 403 </div> </template> <script> export default { name: "403", }; </script> <style scoped> </style> -
在routes目录下的
index.js中引入403.vue,并添加对应的路由import Forbidden from "../views/403.vue"; { path: "/403", name: "403", hideMenu: true, component: Forbidden, } -
在``SiderMenu.vue
中引入utils/auth.js中的check和isLogin,同时修改getMenuData`方法中的forEach为for的方式,并添加一个判断//获取菜单数据 getMenuData(routes = [], parentKeys = [], selectedKey){ const menuData = []; for(let item of routes){ if(item.meta && item.meta.authority && !check(item.meta.authority)){ break; } // console.log("item:",item); //如果当前的路由对象有name属性且没有hideMenu if(item.name && !item.hideMenu){ this.openKeysMap[item.path] = parentKeys; this.selectedKeysMap[item.path] = [selectedKey || item.path]; const newItem = { ...item }; delete newItem.children; if(item.children && !item.hideChildrenMenu){ newItem.children = this.getMenuData(item.children, [...parentKeys, item.path]) }else{ this.getMenuData(item.children, selectedKey ? parentKeys : [...parentKeys, item.path], selectedKey || item.path); } menuData.push(newItem); }else if(!item.hideMenu && !item.hideChildrenMenu && item.children){//如果当前的路由对象且没有hideMenu和没有hideChildrenMenu但有子节点的 menuData.push(...this.getMenuData(item.children, [...parentKeys, item.path])); } } return menuData; }, -
重新运行,可以看到所有菜单,修改
utils/auth.js的getCurrentAuthority方法的返回用户为userexport function getCurrentAuthority(){ return ["user"]; } -
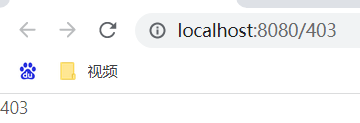
重新运行,只看到一个403的的页面,因为没有这个用户
-
在routes目录下的
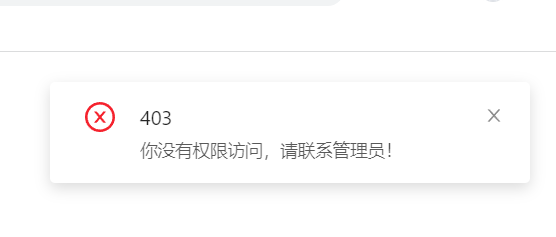
index.js中引入notification,并在router.beforeEach使用import { notification } from "ant-design-vue";router.beforeEach((to, from, next)=>{ if(to.path !== from.path){ Nprogress.start(); } //遍历路由,返回路由中meta标记的authrity值 const record = findLast(to.matched, record => record.meta.authority); if(record && !check(record.meta.authority)){ if(!isLogin() && to.path != "/user/login"){ next({ path: "user/login" }); }else if(to.path != "/403"){ notification.error({ message: '403', description:'你没有权限访问,请联系管理员!', }); next({ path: "/403" }); } Nprogress.done(); } next(); }); -
重新运行,右上角可以看到对应的提示信息
-
修改
utils/auth.js的getCurrentAuthority方法的返回用户为guest,重新运行,只能看到仪表盘的菜单
5.7精细权限
5.7.1权限组件
-
在
src/components目录下创建一个权限组件Authorized.vue<script> import { check } from "../utils/auth.js"; export default { name: "Authorized", functional: true,//表示这是一个函数式组件 props: { authority: { type: Array, required: true } }, render(h, context){ const { props, scopedSlots } = context return check(props.authority) ? scopedSlots.default() : null; } }; </script> <style scoped> </style> -
在
main.js中引入Authorized.vue组件并注册,方便全局使用import Authorized from "./components/Authorized.vue"; Vue.component("Authorized", Authorized); -
在
BasicLayout.vue的抽屉中使用,让抽屉只有在admin用户下才能显示<Authorized :authority="['admin']"> <SettingDrawer/> </Authorized> -
修改
utils/auth.js的getCurrentAuthority方法的返回用户为guest,重新运行,可以看到页面中不显示抽屉的按钮了

5.7.2权限指令(有弊端,删除了就用不了了)
-
在src目录下创建一个directives文件夹,并在该文件夹中创建
auth.js,用于自定义权限指令,这里自定义了一个v-auth指令import { check } from "../utils/auth"; //自定义权限指令 function install(Vue, options = {}){ Vue.directive(options.name || "auth", { inserted(el, binding){ if(!check(binding.value)){ el.parentNode && el.parentNode.removeChild(el); } } }); } export default { install }; -
在
main.js中全局注册//引入自定义权限指令 import Auth from "./directives/auth"; Vue.use(Auth); -
在
BasicLayout.vue的左侧缩放图标中使用<!-- v-auth="['admin']":让左侧缩放的按钮只有admin用户下才显示 --> <a-icon v-auth="['admin']" class="trigger" type="menu" :type="collapsed ? 'menu-unfold' : 'menu-fold'" @click="collapsed = !collapsed"> </a-icon> -
修改
utils/auth.js的getCurrentAuthority方法的返回用户为guest,重新运行,可以看到左右缩放的图标消失了

5.8在组件中使用echarts第三方插件
-
安装echarts插件

-
在
main.js中全局引入echarts并挂载到vue中//全局引入echarts import echarts from "echarts"; //需要挂载到Vue原型上,通过Vue.prototype将echarts保存为全局变量 Vue.prototype.$echarts = echarts -
在src/components文件夹下创建
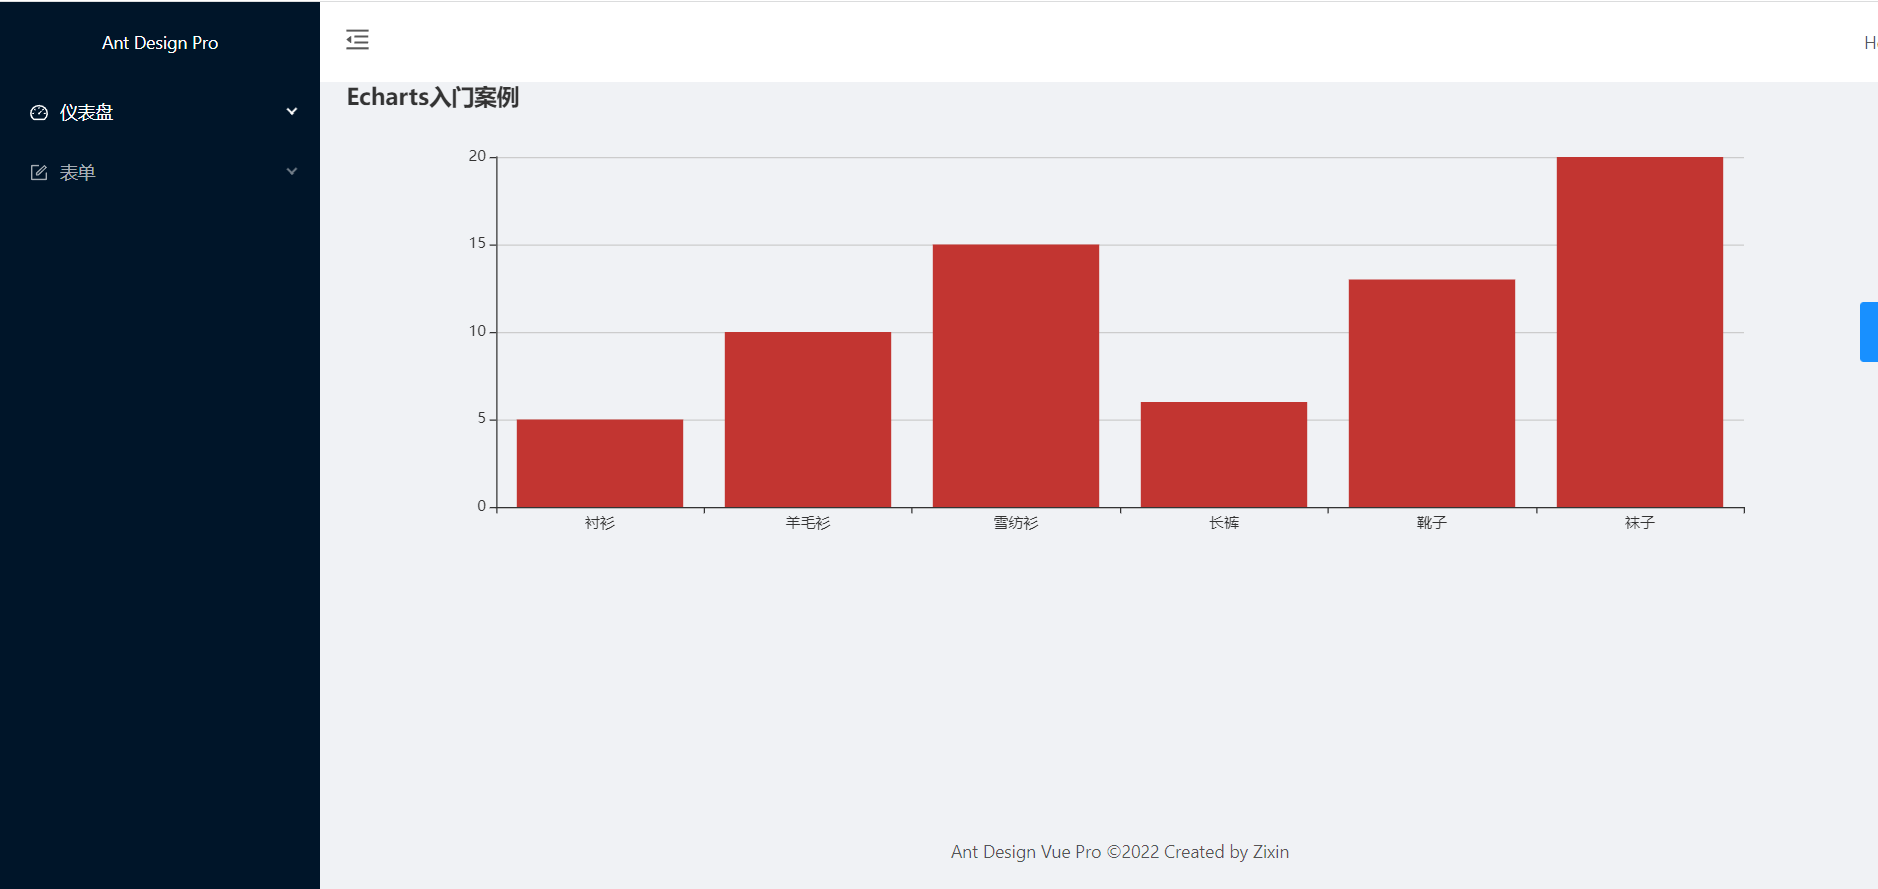
Chart.vue<template> <div ref="charDom" style="height:400px;"></div> </template> <script> export default { name: "Chart", mounted(){ //基于准备好的dom,初始化echarts实例 var myChart = this.$echarts.init(this.$refs.charDom); //绘制图案 myChart.setOption({ title: { text: "Echarts入门案例" }, tooltip:{}, xAxis: { data: ["衬衫", "羊毛衫", "雪纺衫", "长裤", "靴子", "袜子"] }, yAxis: {}, series: [{ name: "销量", type: "bar", data: [5, 10, 15, 6, 13, 20] }] }); } }; </script> <style scoped> </style> -
在
AnalysisLayout.vue中引入组件Chart.vue<template> <div> <chart></chart> </div> </template> <script> import chart from "@/components/Chart.vue"; export default { name: "AnalysisLayout", components: { chart } }; </script> <style scoped> </style> -
运行后发现浏览器控制台出现下面错误
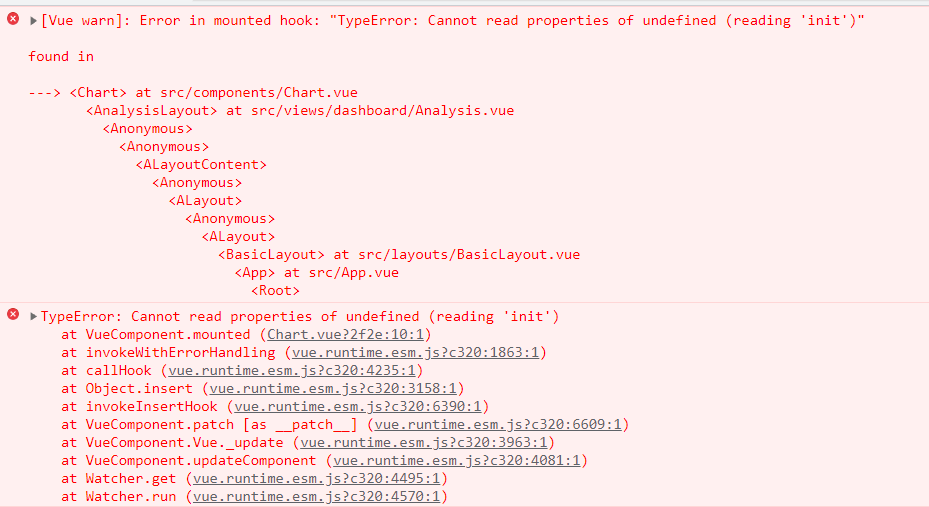
原因: 查阅文档发现可能是下载了Echarts的最新版本
解决方法: 下载4.8.0版本的echarts即可

-
重新运行,访问
http://localhost:8080/dashboard/analysis,可以看到对应的echarts图
-
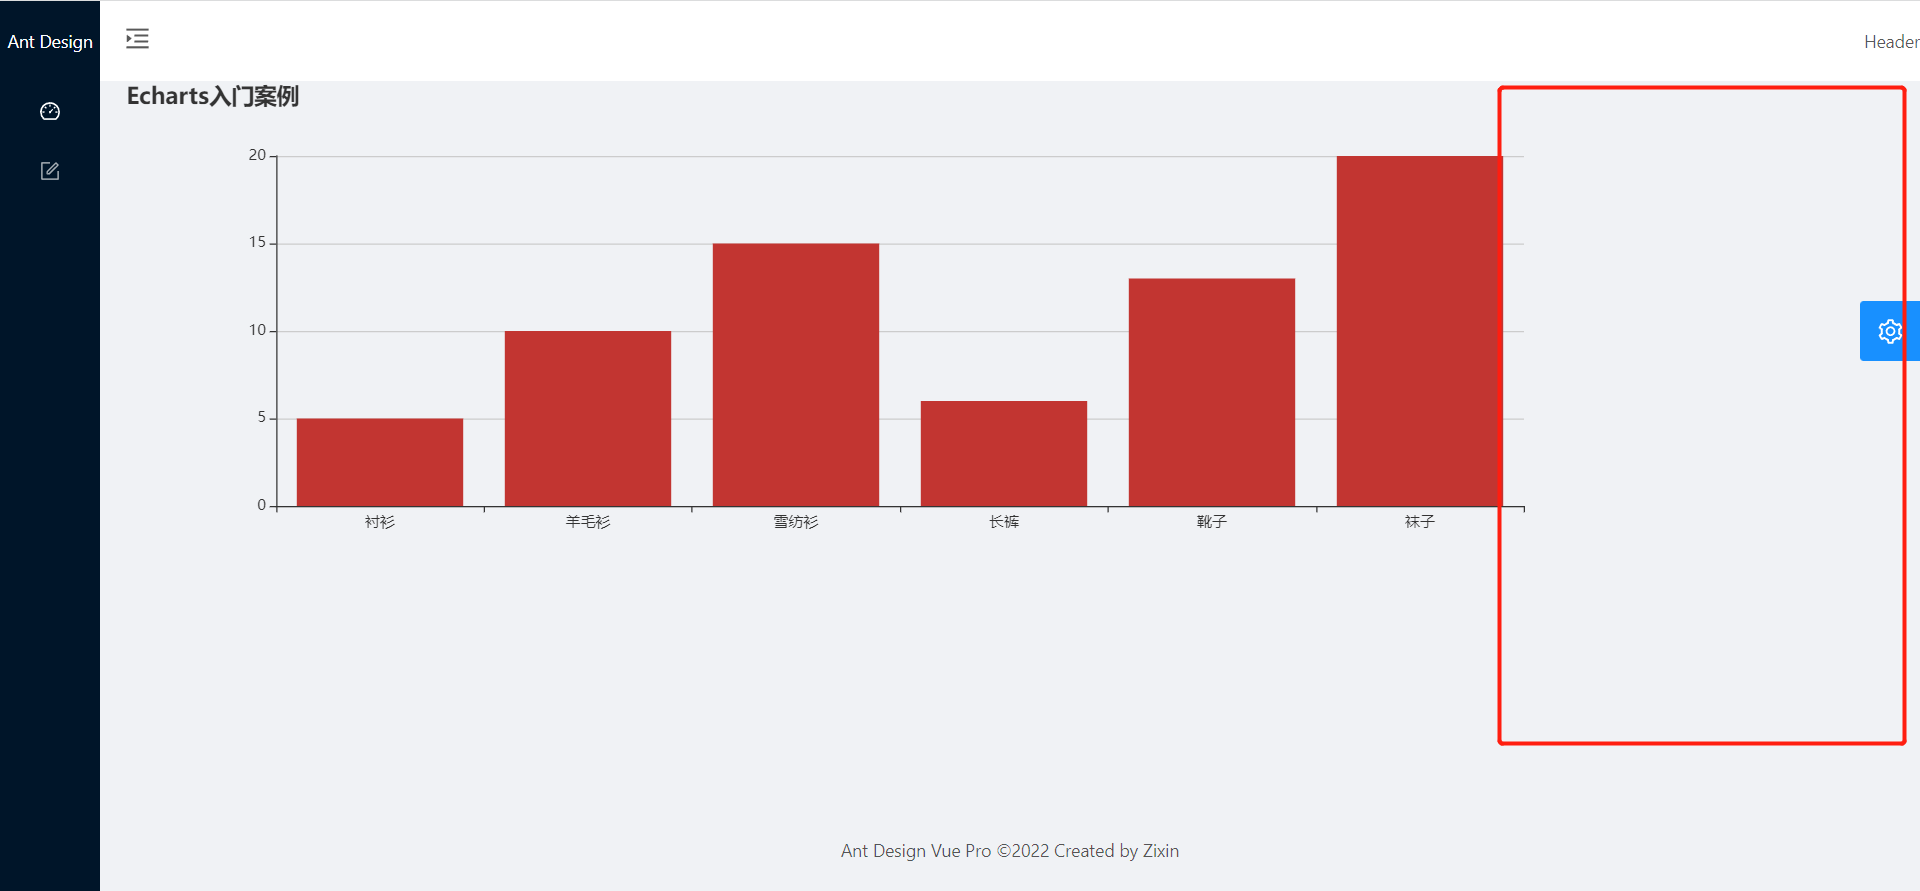
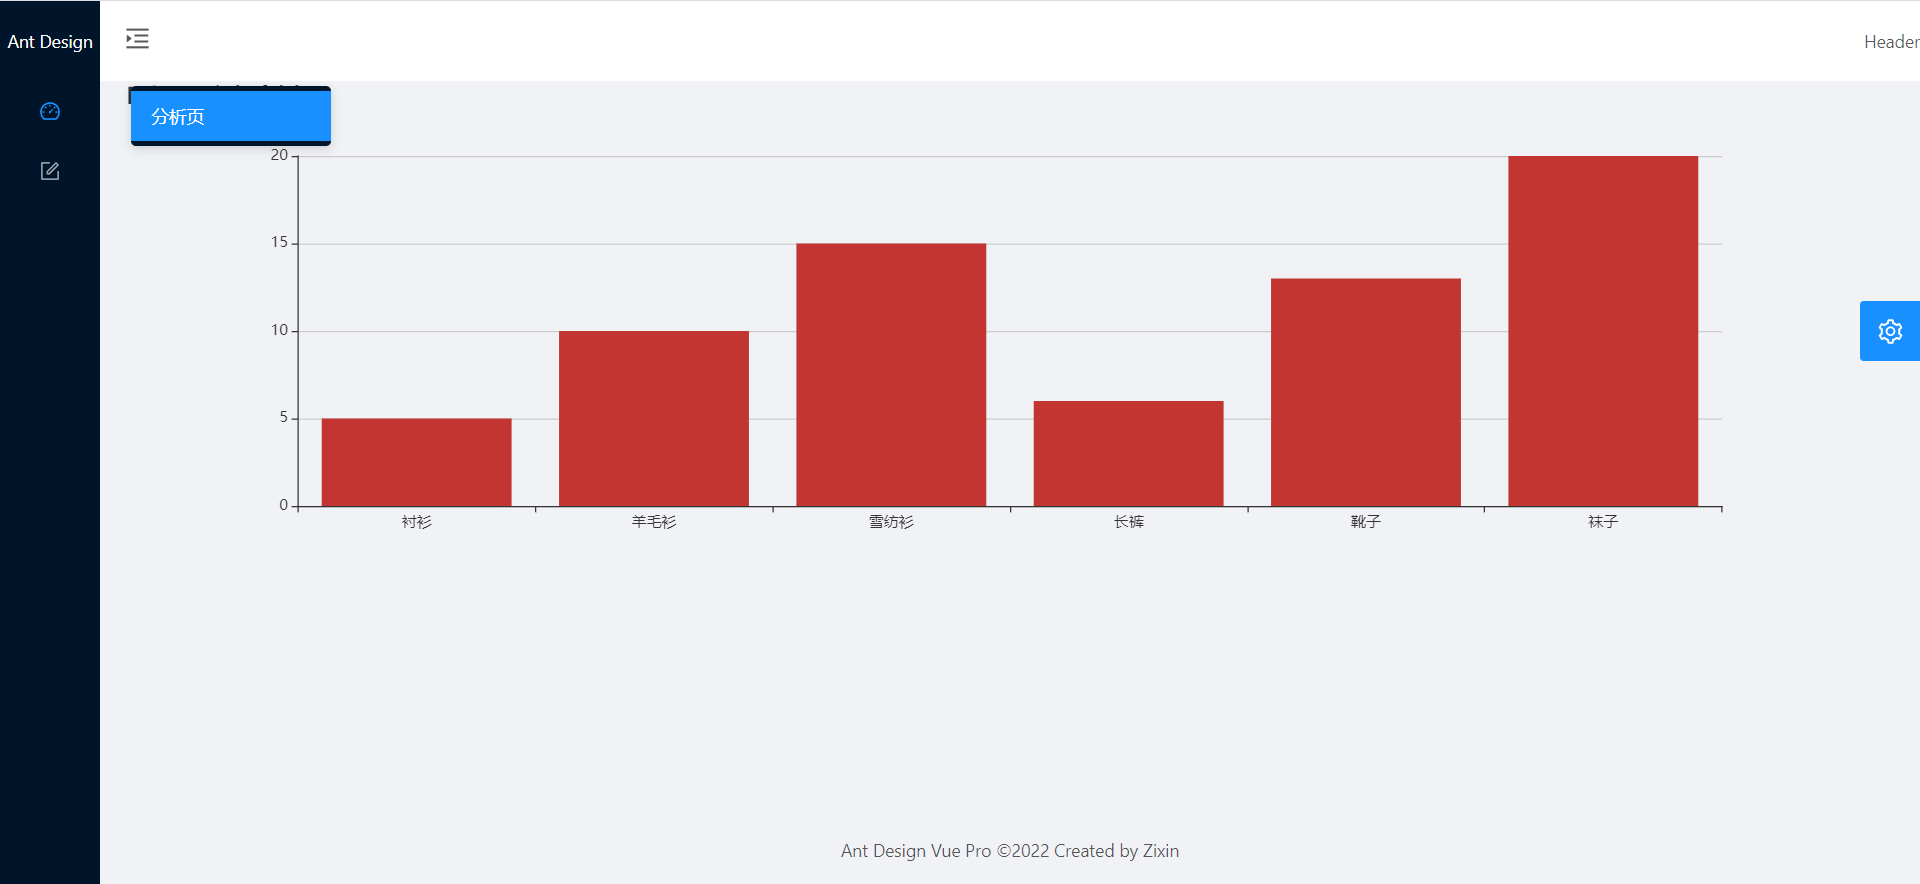
切换左侧菜单展示效果的时候,右侧内容会对应变宽(如下图一所示),但此时的echarts并不能执行自适应效果,使用element-resize-detector监听元素宽度变化,安装
resize-detector

-
在
Chart.vue组件中引入resize-detector的addListener和removeListener组件,并在对应位置使用<template> <div ref="charDom" style="height:400px;"></div> </template> <script> import { addListener, removeListener } from "resize-detector"; export default { name: "Chart", mounted(){ //基于准备好的dom,初始化echarts实例 this.Chart = this.$echarts.init(this.$refs.charDom); addListener(this.$refs.charDom, this.resize); //绘制图案 this.Chart.setOption({ title: { text: "Echarts入门案例" }, tooltip:{}, xAxis: { data: ["衬衫", "羊毛衫", "雪纺衫", "长裤", "靴子", "袜子"] }, yAxis: {}, series: [{ name: "销量", type: "bar", data: [5, 10, 15, 6, 13, 20] }] }); }, beforeDestory(){//销毁组件时把监听器以及echarts图一并删除 removeListener(this.$refs.charDom, this.resize); this.chart.dispose(); this.chart = null; }, methods: { resize(){//使echarts尺寸重置 this.Chart.resize(); } } }; </script> <style scoped> </style> -
重新运行,访问
http://localhost:8080/dashboard/analysis,可以看到切换左侧菜单展示效果的时候,右侧内容对应变宽的问题得以解决
-
在
Chart.vue中的resize方法中添加控制台输出console.log("resize");,运行,访问http://localhost:8080/dashboard/analysis,打开浏览器控制台,可以看到每次切换左侧菜单展示效果的时候,下面都会输出很多条resize,这是很影响性能的,此时我们可以使用debounce来防抖,在Chart.vue中引入debounce并在created中使用import debounce from "lodash/debounce"; created(){ this.resize = debounce(this.resize, 300); }, -
再次运行,访问
http://localhost:8080/dashboard/analysis,打开浏览器控制台,可以看到每次切换左侧菜单展示效果时,控制台只输出一次resize,达到防抖的效果 -
在
Chart.vue中将初始化echarts放到一个方法renderChart中,option从父组件中传过来,在props中创建一个option,并把它丢进this.chart.setOption(this.option);,把option相关的数据以及存放图标的dom的高度放到Analysis.vue中设置,同时在Chart.vue中监听option的变化,Analysis.vue中设置每三秒数据变化一次并把最新的数据放到chartOption中传到Chart.vue中的props中,以便每次数据变化都能监听到Chart.vue
 <template>
   <div ref="charDom"></div>
 </template>
 <script>
 import { addListener, removeListener } from "resize-detector";
 import debounce from "lodash/debounce";
 export default {
   name: "Chart",
   props: {
     option: {
       type: Object,
       default: ()=>{}
     }
   },
   watch: {
     option(val){
       this.chart.setOption(val);
     }
     //只有一个值变化的时候,是监听不到的,此时需要使用深度监听(耗性能)
     // option: {
     //   handle(val){
     //     this.chart.setOption(val);
     //   }
     //   deep: true
     // }

   },
   created(){
     this.resize = debounce(this.resize, 300);
   },
   mounted(){
     this.renderChart();
     //监听echarts图的宽度变化
     addListener(this.$refs.charDom, this.resize);
   },
   beforeDestory(){//销毁组件时把监听器以及echarts图一并删除
     removeListener(this.$refs.charDom, this.resize);
     this.chart.dispose();
     this.chart = null;
   },
   methods: {
     resize(){//使echarts尺寸重置
       console.log("resize");
       this.chart.resize();
     },
     renderChart(){
       //基于准备好的dom,初始化echarts实例
       this.chart = this.$echarts.init(this.$refs.charDom);
       //option是从父组件传过来的
       this.chart.setOption(this.option);
     }
   }
 };
 </script>
 <style scoped>
 </style>
Analysis.vue
<template> <div> <chart :option="chartOption" style="height:400px;"></chart> </div> </template> <script> import chart from "@/components/Chart.vue"; import random from "lodash/random"; export default { name: "AnalysisLayout", components: { chart }, data(){ return { chartOption: { title: { text: "Echarts入门案例" }, tooltip:{}, xAxis: { data: ["衬衫", "羊毛衫", "雪纺衫", "长裤", "靴子", "袜子"] }, yAxis: {}, series: [{ name: "销量", type: "bar", data: [5, 10, 15, 6, 13, 20] }] } } }, mounted(){//每三秒数据变化一次 this.interval = setInterval(()=>{ this.chartOption.series[0].data = this.chartOption.series[0].data.map(() => random(100)); this.chartOption = { ...this.chartOption };//为了每次数据变化都能监听到 }, 3000); }, beforeDestory(){//销毁之前要把计时器销毁掉 clearInterval(this.interval); } }; </script> <style scoped> </style> -
重新运行,访问
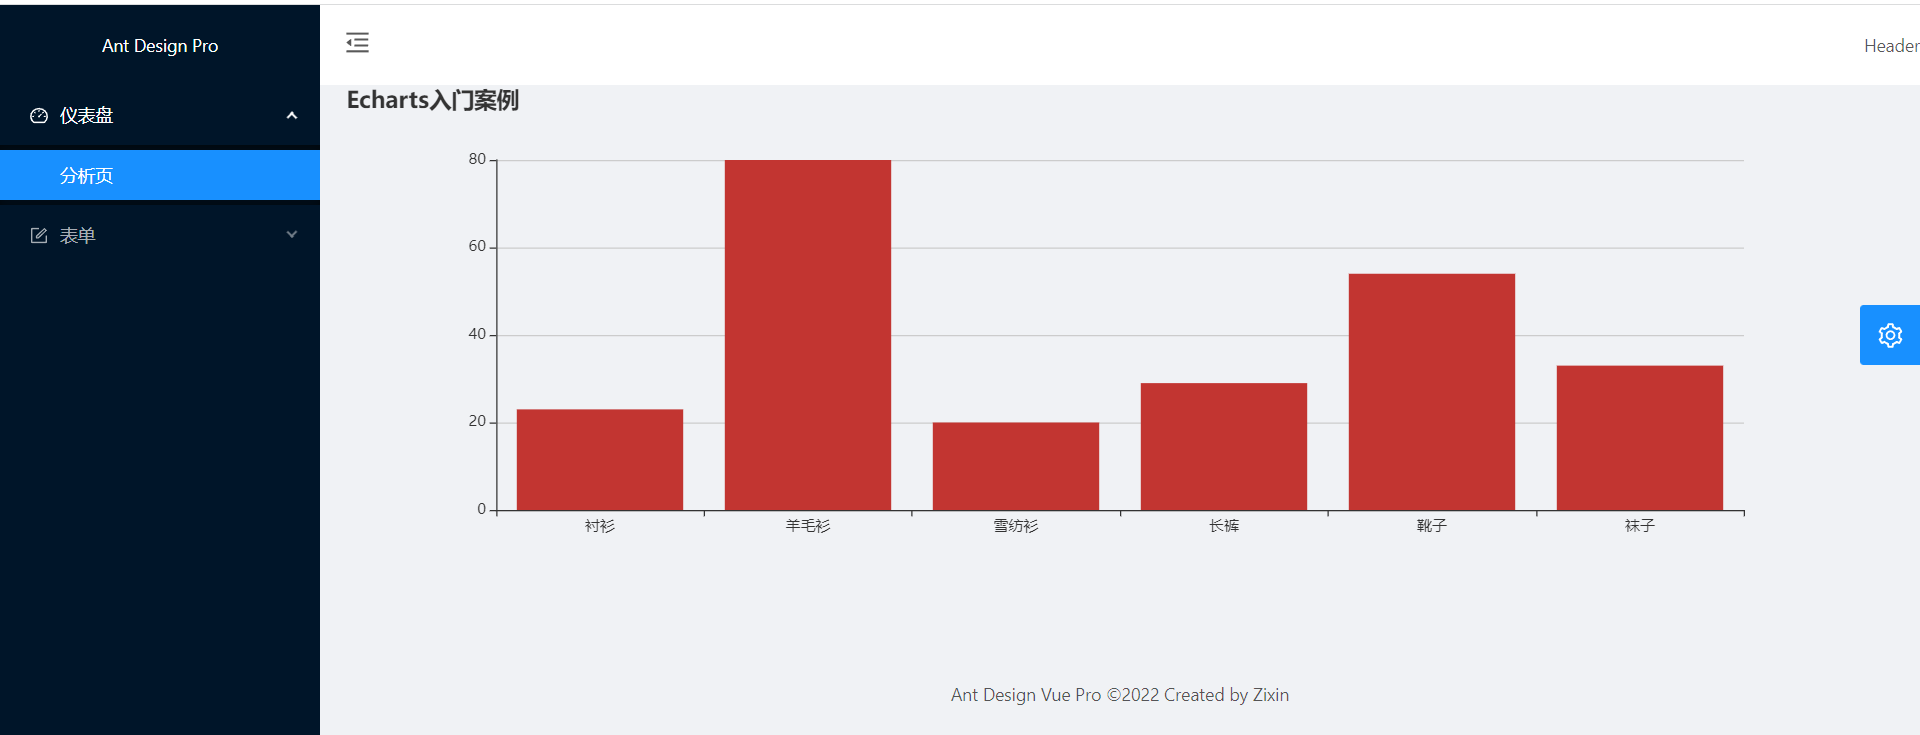
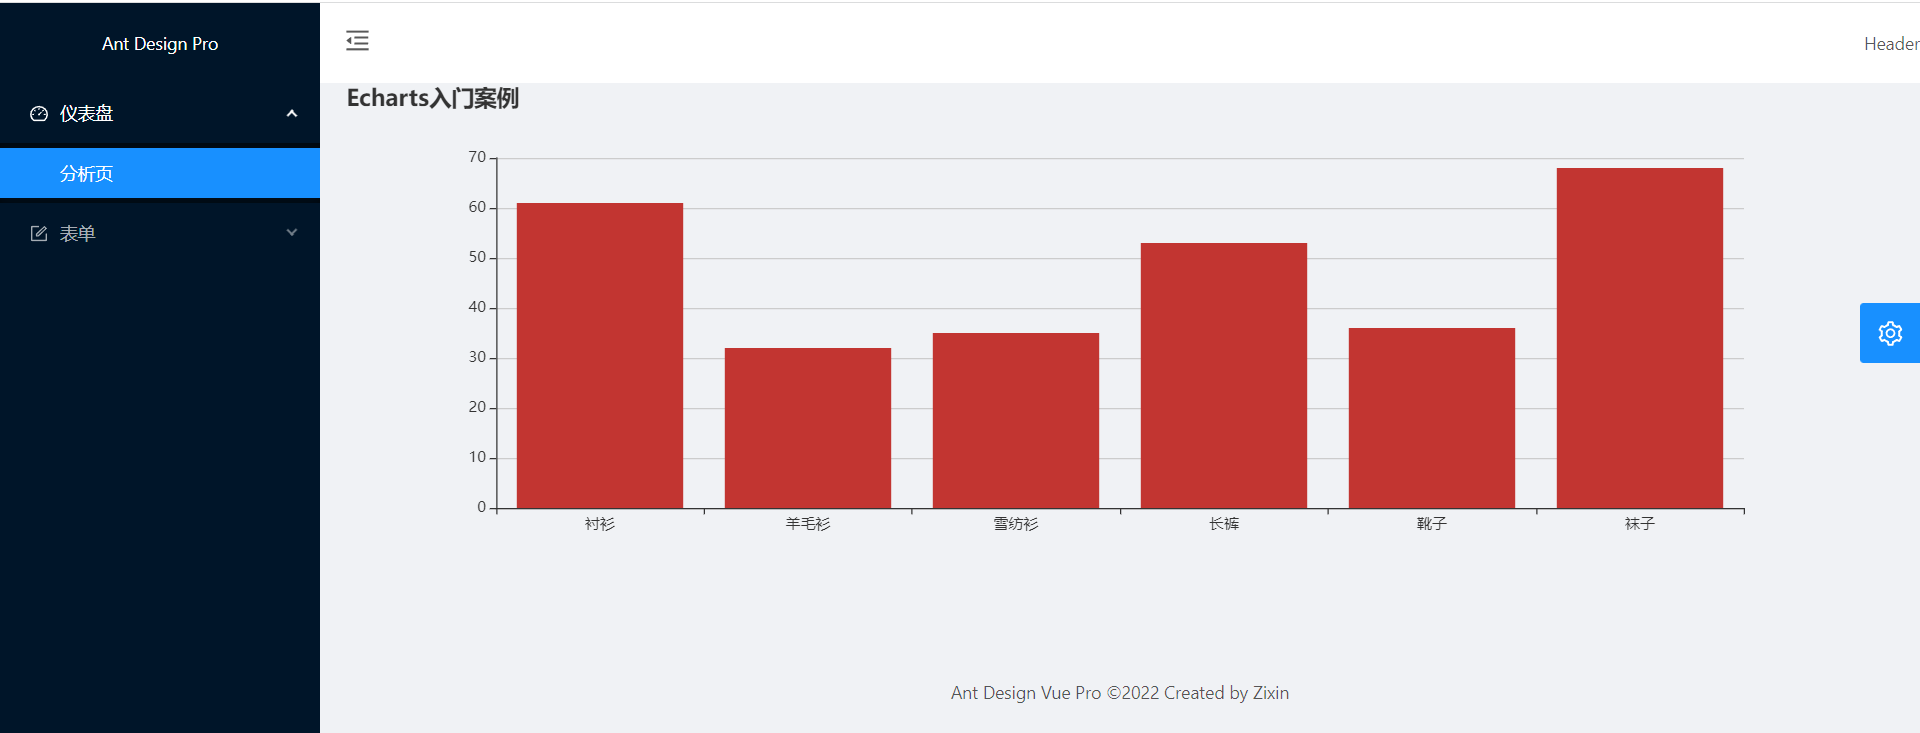
http://localhost:8080/dashboard/analysis,可以看到图表数据每三秒变化一次,这里只给出两次的数据变化
5.9使用Mock数据进行开发
-
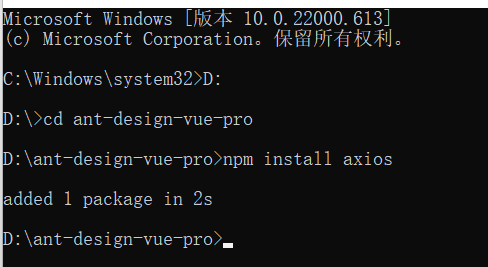
安装
axios
-
在
Analysis.vue中引入axios,并添加一个方法getChartData(该方法是通过axios的方式获取echarts图数据),并在mounted中的对应位置调用getChartData<template> <div> <chart :option="chartOption" style="height:400px;"></chart> </div> </template> <script> import chart from "@/components/Chart.vue"; import random from "lodash/random"; import axios from "axios"; export default { name: "Analysis", components: { chart }, data(){ return { chartOption: {} } }, mounted(){//每三秒数据变化一次 this.getChartData(); this.interval = setInterval(()=>{ // this.chartOption.series[0].data = this.chartOption.series[0].data.map(() => random(100)); // this.chartOption = { ...this.chartOption };//为了每次数据变化都能监听到 this.getChartData(); }, 3000); }, beforeDestory(){//销毁之前要把计时器销毁掉 clearInterval(this.interval); }, methods: { getChartData(){//通过axios的方式获取echarts图数据 axios .get("/api/dashboard/chart", {params: {ID: "123456"}}) .then(response => { this.chartOption= { title: { text: "Echarts入门案例" }, tooltip:{}, xAxis: { data: ["衬衫", "羊毛衫", "雪纺衫", "长裤", "靴子", "袜子"] }, yAxis: {}, series: [{ name: "销量", type: "bar", data: response.data }] } }) } } }; </script> <style scoped> </style> -
在项目目录下创建一个文件夹mock,并在该文件夹中创建一个文件
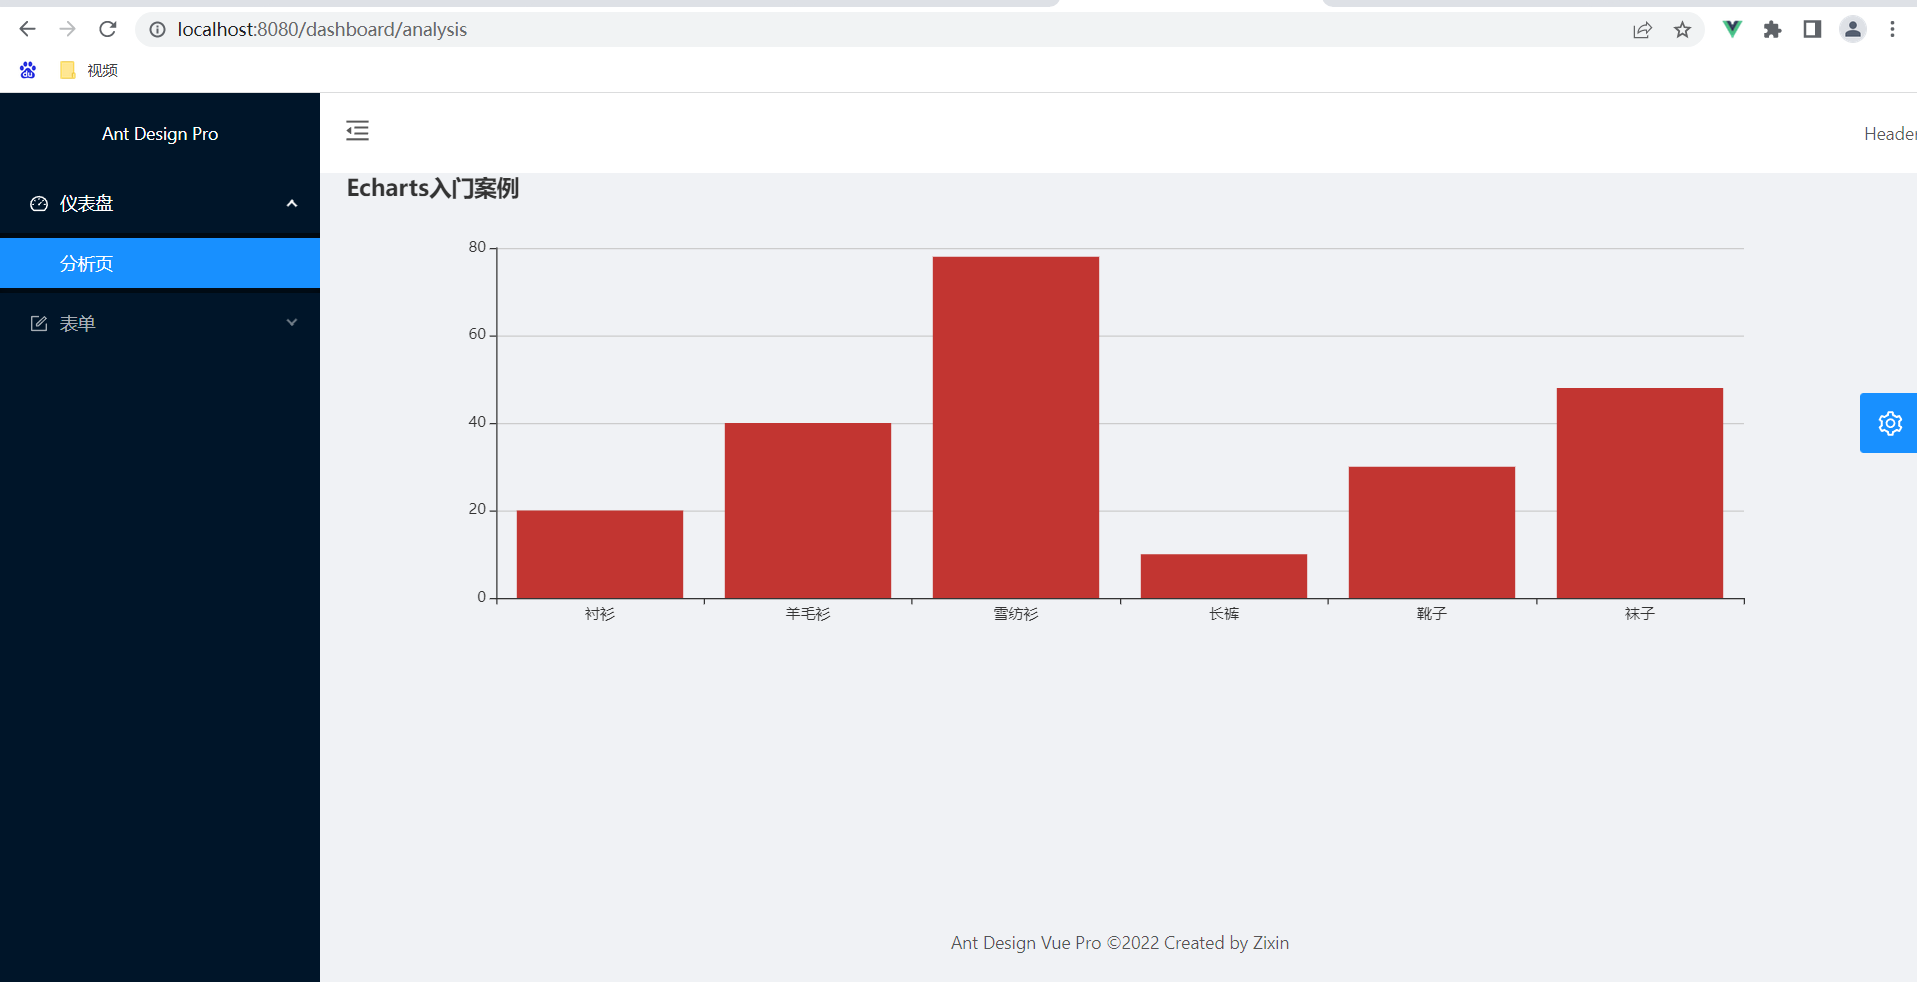
dashboard_chart.js,在该文件中编写Analysis.vue中getChartData方法执行后返回数据的逻辑function chart(method){ let res = null; switch (method) { case "GET": res = [20, 40, 78, 10, 30, 48]; break; default: res = null; } return res; } module.exports = chart; -
在
vue.config.js中使用devServer.proxy代理请求devServer:{ proxy:{ '/api':{ target: 'http://localhost:3000',//代理地址,这里设置的地址会代替axios中设置的baseURL bypass: function(req, resp){ if(req.headers.accept.indexOf("htmlS") != -1){ console.log("Skipping proxy for browerser request"); return "index.html"; }else { // console.log("req.path:", req.path); // console.log("split[1]:",req.path.split("/api/")[1]); //把请求路径"/api/dashboard/chart"分割成dashboard_chart const apiSplit = req.path.split("/api/")[1]; if(!apiSplit){ return; } // console.log("split2:", apiSplit.split("/")); const name = apiSplit.split("/").join("_"); const mock = require(`./mock/${name}`); const result = mock(req.method); //清除缓存 delete require.cache[require.resolve(`./mock/${name}`)]; return resp.send(result); } } }} }, -
重新执行
npm run serve,发现终端报错如下
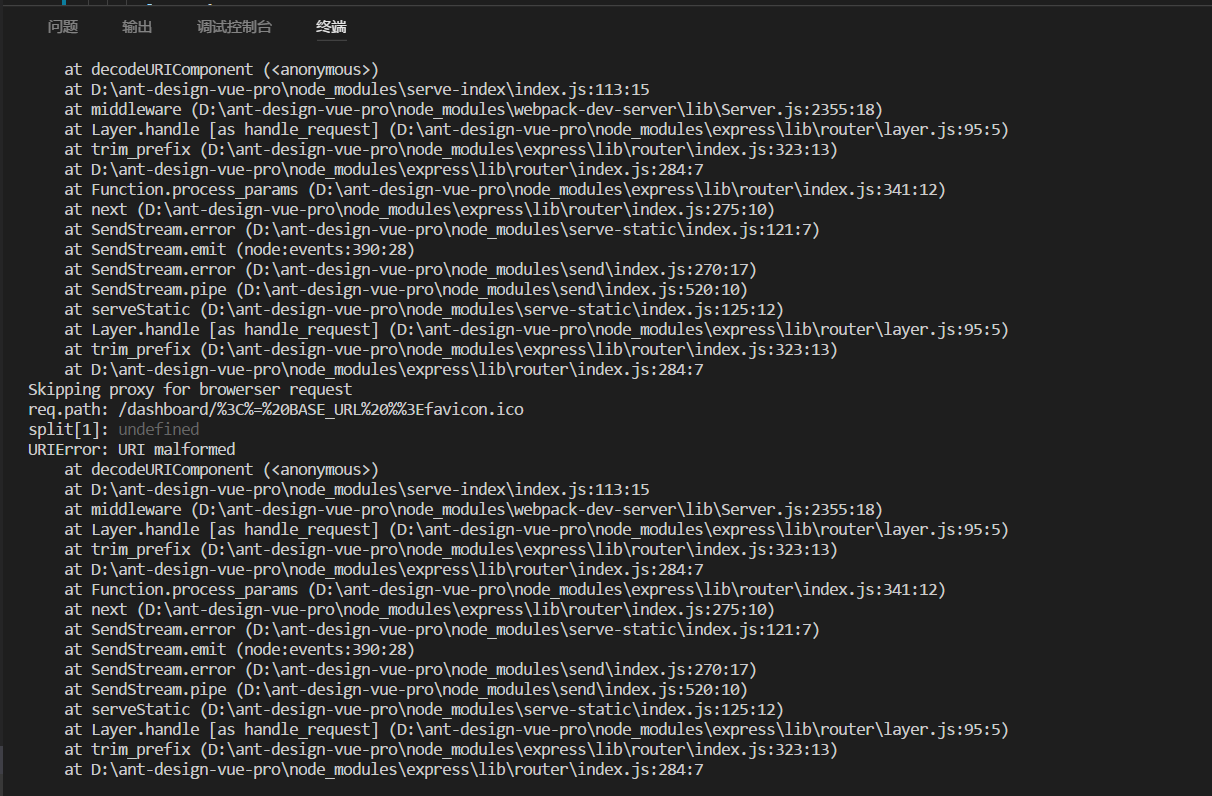
原因:一切包含"/api"的html,css,js以及图片资源等,都会通过代理
解决方法:使用通配符匹配路径,即将'/api'修改为'@(/api)'
官方文档有说明:
-
查看http-proxy-middlware中的Context matching 78
- 通配符路径匹配:对于细粒度控制,您可以使用通配符匹配。全局模式匹配是通过微匹配完成的。访问 micromatch 或glob 26更多的例子。
-
查看glob中的 Glob Primer
- 匹配单个路径部分中的 0 个或多个字符
- ? 匹配 1 个字符
- [...] 匹配一系列字符,类似于 RegExp 范围。如果范围的第一个字符是 ! 或 ^ 然后它匹配不在范围内的任何字符。
- !(pattern|pattern|pattern) 匹配与所提供的任何模式不匹配的任何内容。
- ?(pattern|pattern|pattern) 匹配所提供模式的零次或一次出现。
- +(pattern|pattern|pattern) 匹配提供的模式的一次或多次出现。
- *(a|b|c) 匹配所提供模式的零次或多次出现
- @(pattern|pat*|pat?erN)完全匹配提供的模式之一
- 如果“globstar”在路径部分中单独存在,则它匹配零个或多个目录和搜索匹配项的子目录。它不会爬取符号链接的目录
-
重新运行,访问
http://localhost:8080/dashboard/analysis,可以看到对应的echarts图
-
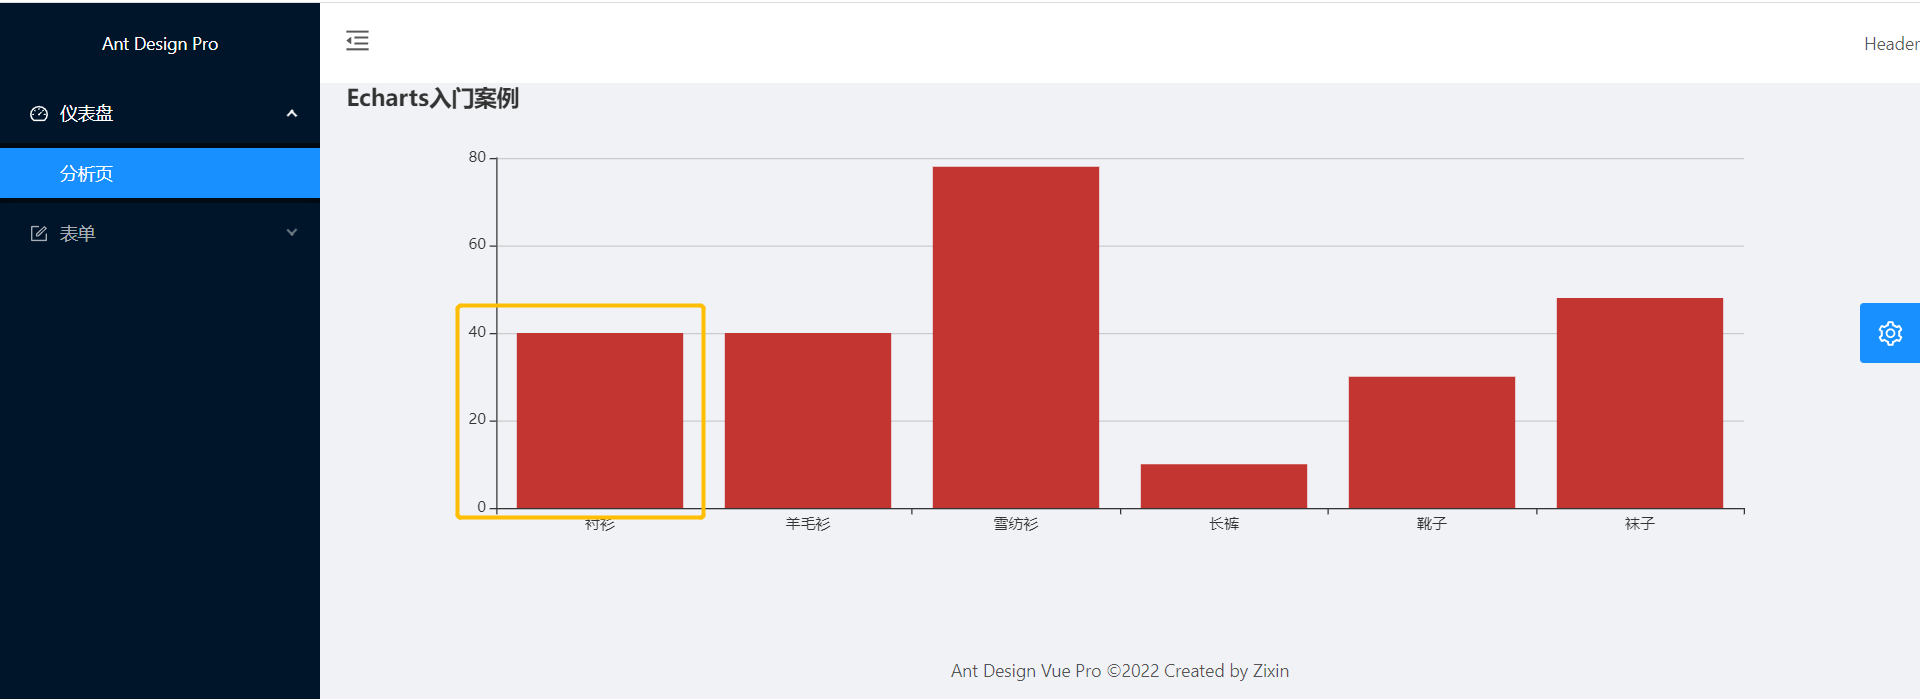
修改
dashboard_chart.js中返回的数据为res = [40, 40, 78, 10, 30, 48](第一列的数据为40);可以看到对应的echarts图中的第一列数据的变化
5.10二次封装axios请求
-
在utils包下创建
request.js,二次封装axios请求import axios from "axios"; import { notification } from "ant-design-vue"; function request(options){ return axios(options).then(resp => { return resp; }).catch(error => { const { response: {status, statusText } } = error; notification.error({ message: status, description: statusText, }); return Promise.reject(error); }) } export default request; -
在
Analysis.vue中引入request,并把原来的getChartData方法里面的请求换成request的方式getChartData(){//通过axios的方式获取echarts图数据 request({ url: "/api/dashboard/chart", methods: "get", params: {ID: "123456"} }).then(response => { this.chartOption= { title: { text: "Echarts入门案例" }, tooltip:{}, xAxis: { data: ["衬衫", "羊毛衫", "雪纺衫", "长裤", "靴子", "袜子"] }, yAxis: {}, series: [{ name: "销量", type: "bar", data: response.data }] } }) }, -
重新执行
npm run serve,发现终端报错
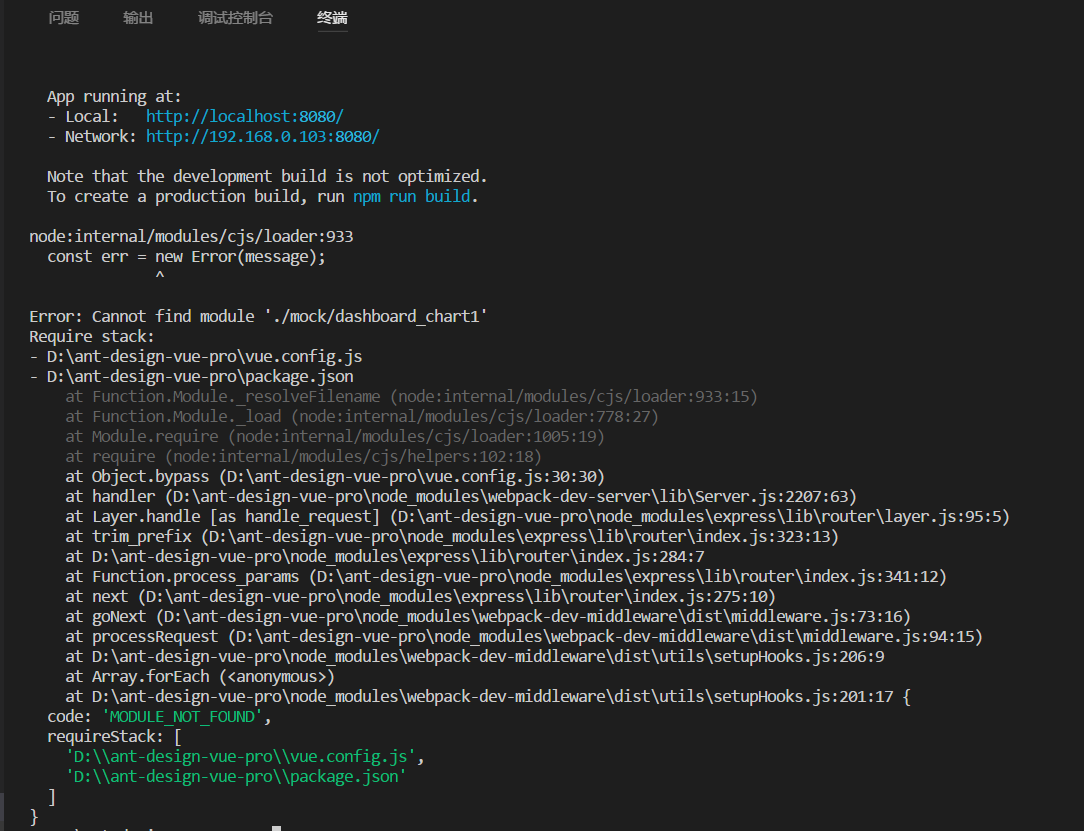
原因:原来的页面没有关掉,而getChartData方法在项目启动渲染的时候就调用了
解决方法:启动前先把原来的页面关掉再启动即可 -
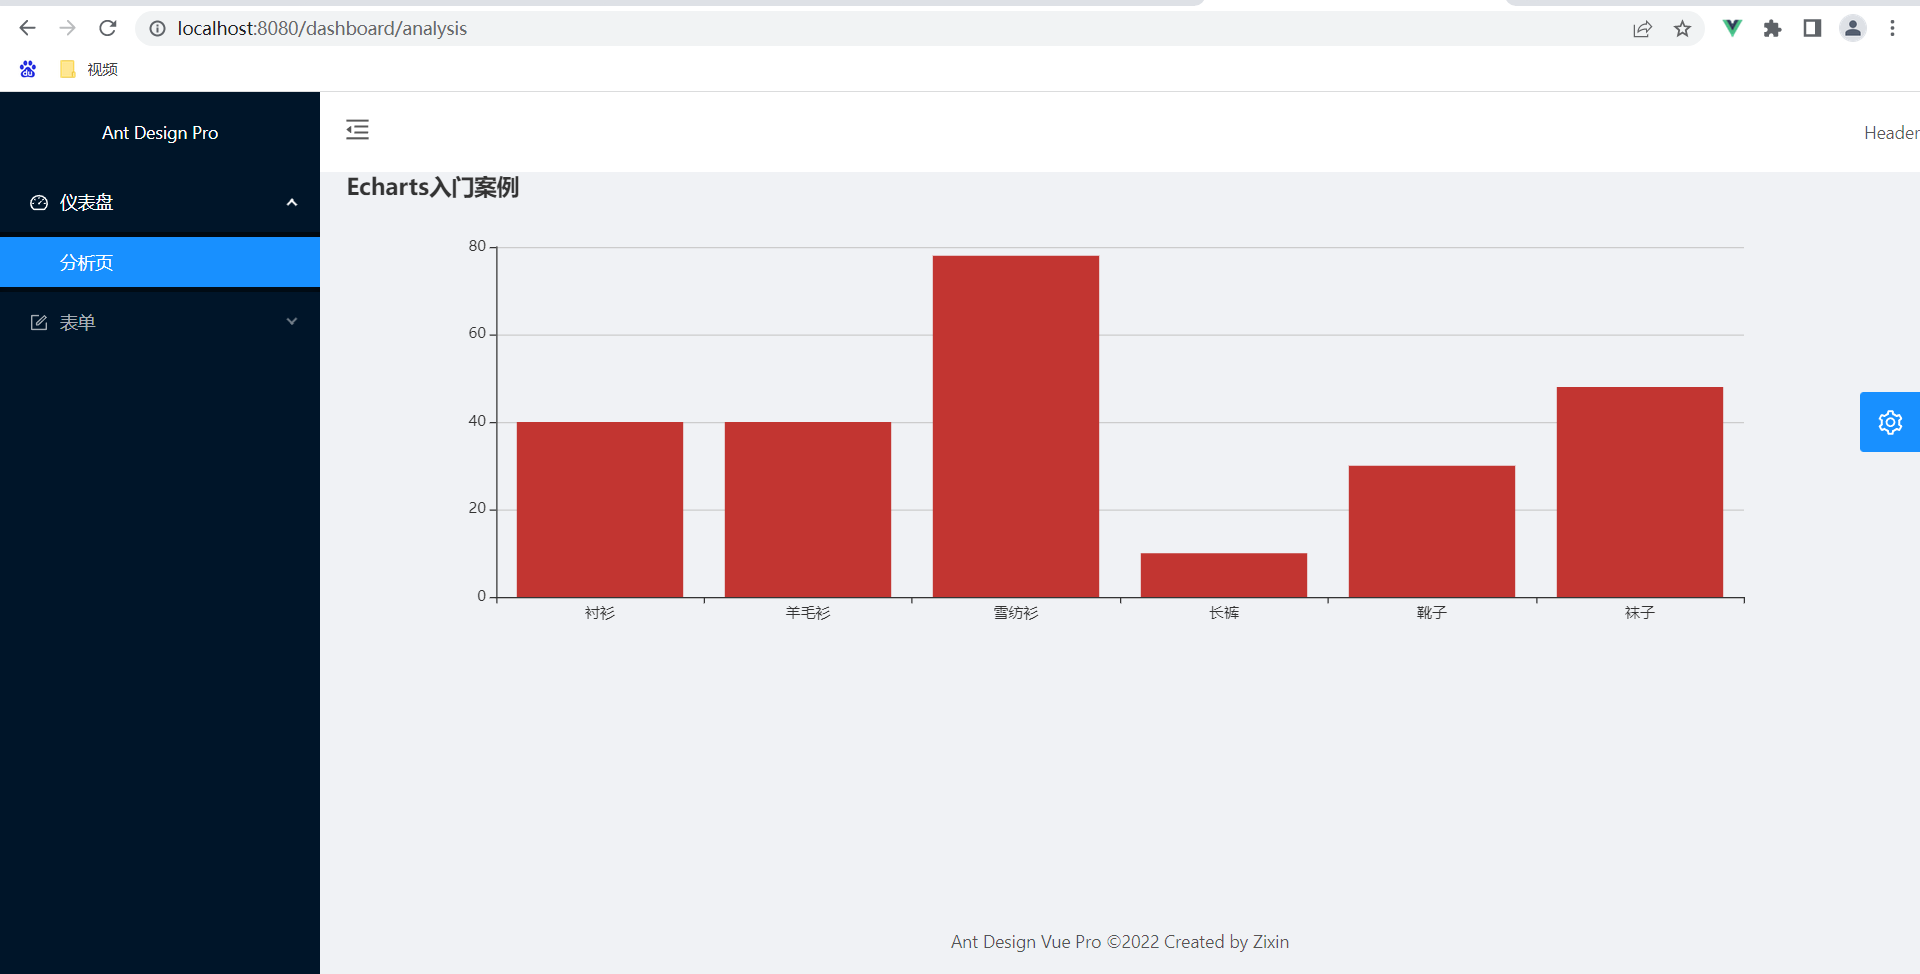
重新启动,访问
http://localhost:8080/dashboard/analysis,即可得到echart图
-
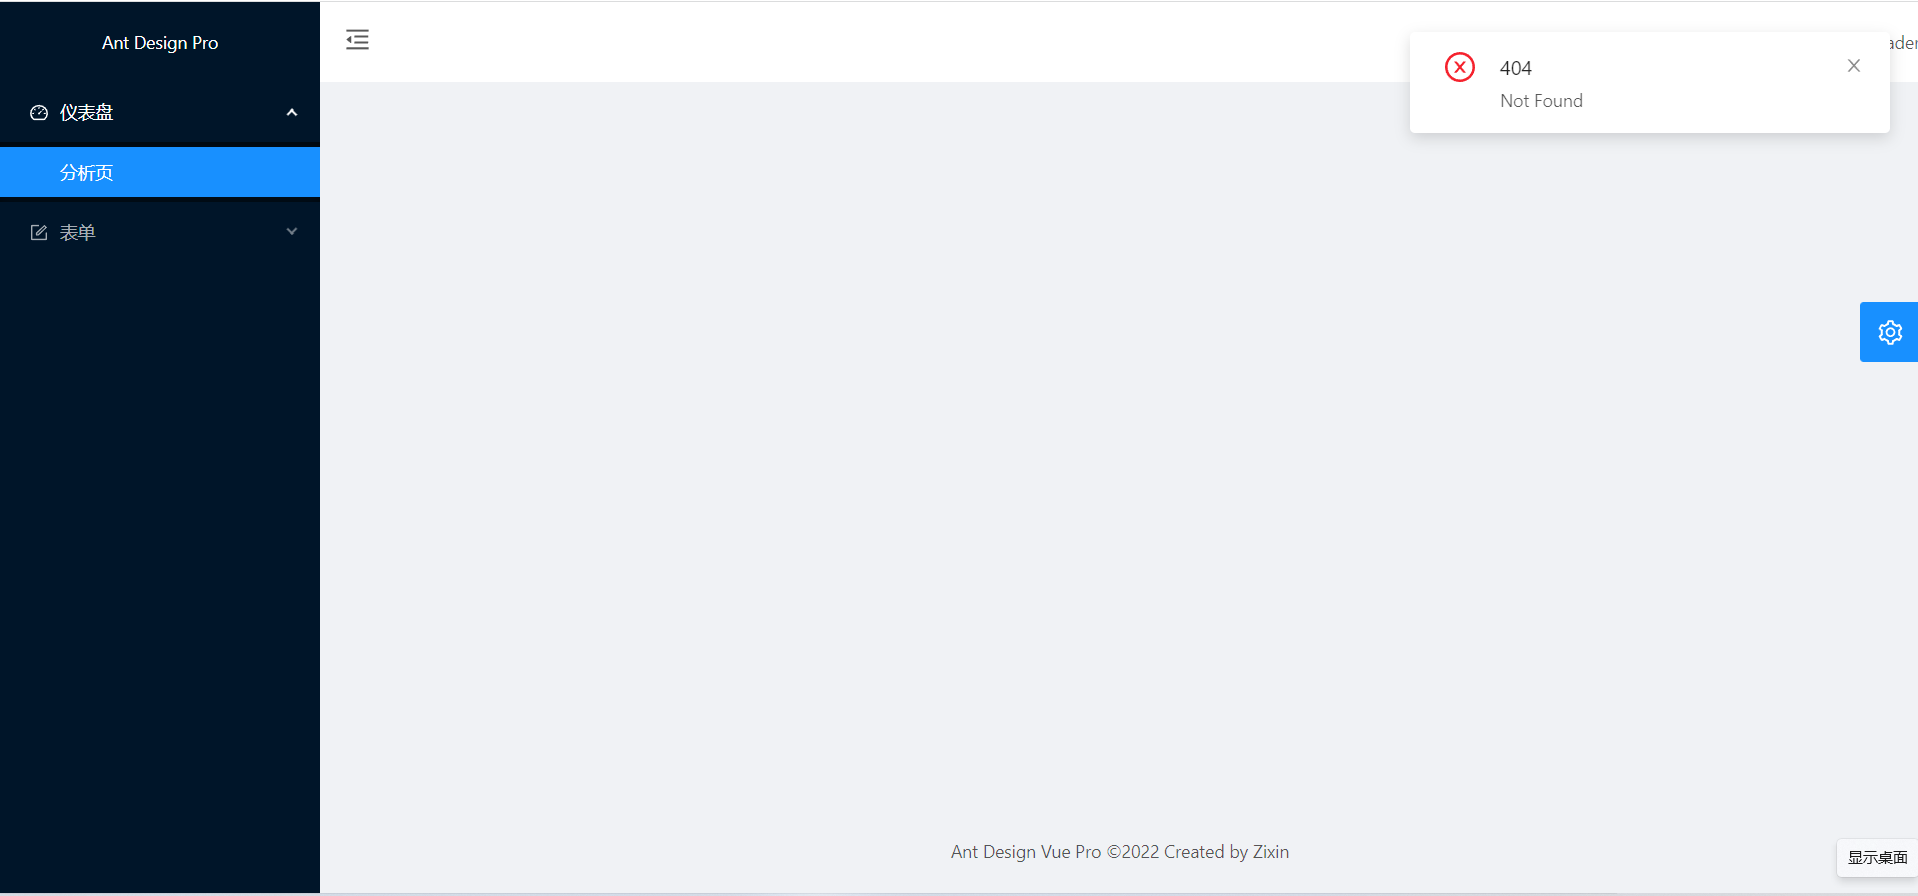
将
getChartData方法复制一份,将新复制的那一份的url改成url: "/dashboard/chart"(这个请求不存在),重新运行,可以看到页面报404错误
-
为了让vue支持jsx语法,这里安装
@vue/babel-preset-jsx和@vue/babel-helper-vue-jsx-merge-props

-
在
babe.config.js中加入"@vue/babel-preset-jsx"

-
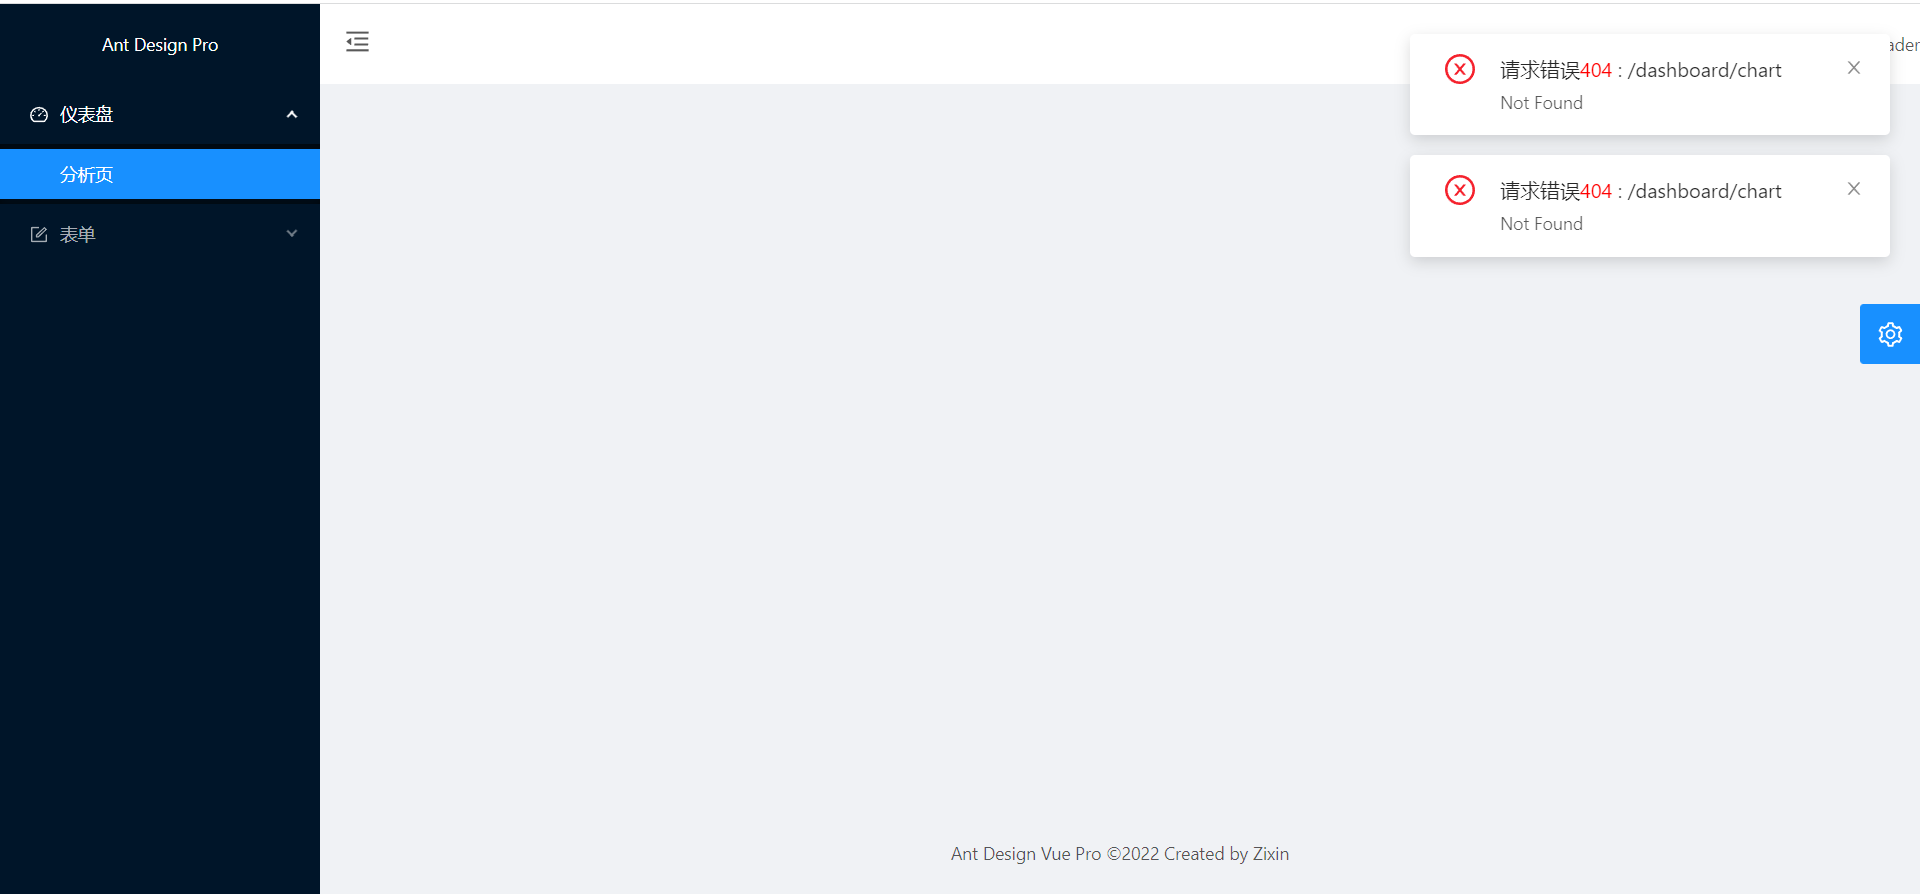
修改
request.js中请求错误是message的写法,将status标红,并返回urlimport axios from "axios"; import { notification } from "ant-design-vue"; function request(options){ return axios(options).then(resp => { return resp; }).catch(error => { const { response: {status, statusText } } = error; notification.error({ message: h => ( <div> 请求错误<span style="color:red">{status}</span> : {options.url} </div> ), description: statusText, }); return Promise.reject(error); }) } export default request; -
打开url为
/dashboard/chart的getChartData方法,重新运行,可以看到弹出的错误框中的信息跟预期结果一样
5.11在表单页面使用ant-design-vue模板
5.11.1简单使用表单模板
- 在
main.js中引入Form和Input并注册import { Button, Layout, Icon, Drawer, Radio, Menu, Form, Input } from "ant-design-vue"; Vue.use(Form); Vue.use(Input); - 去
ant-design-vue官网中找Form模板,复制到BasicForm.vue<template> <a-form :layout="formLayout"> <a-form-item label="Form Layout" :label-col="formItemLayout.labelCol" :wrapper-col="formItemLayout.wrapperCol" > <a-radio-group default-value="horizontal" @change="handleFormLayoutChange"> <a-radio-button value="horizontal"> Horizontal </a-radio-button> <a-radio-button value="vertical"> Vertical </a-radio-button> <a-radio-button value="inline"> Inline </a-radio-button> </a-radio-group> </a-form-item> <a-form-item label="Field A" :label-col="formItemLayout.labelCol" :wrapper-col="formItemLayout.wrapperCol" > <a-input placeholder="input placeholder" /> </a-form-item> <a-form-item label="Field B" :label-col="formItemLayout.labelCol" :wrapper-col="formItemLayout.wrapperCol" > <a-input placeholder="input placeholder" /> </a-form-item> <a-form-item :wrapper-col="buttonItemLayout.wrapperCol"> <a-button type="primary"> Submit </a-button> </a-form-item> </a-form> </template> <script> export default { data() { return { formLayout: 'horizontal', }; }, computed: { formItemLayout() { const { formLayout } = this; return formLayout === 'horizontal' ? { labelCol: { span: 4 }, wrapperCol: { span: 14 }, } : {}; }, buttonItemLayout() { const { formLayout } = this; return formLayout === 'horizontal' ? { wrapperCol: { span: 14, offset: 4 }, } : {}; }, }, methods: { handleFormLayoutChange(e) { this.formLayout = e.target.value; }, }, }; </script> - 在
BasicForm.vue的第一个输入框中添加v-model="fieldA",然后再它上面的的<a-form-item>标签中添加:validate-status="validateAStatus"和:help="helpA",在第二个输入框中添加v-model="fieldB",并把这些数据在data中定义,然后监听fieldA的变化,当fieldA长度小于等于5个字符就会报错误信息,否则就把错误信息置空,并在提交按钮中添加点击事件handlerForm,该事件处理逻辑是当fieldA长度小于等于5个字符就会报错误信息,否则就输出fieldA和fieldB的信息,全部代码如下所示<template> <a-form :layout="formLayout"> <a-form-item label="Form Layout" :label-col="formItemLayout.labelCol" :wrapper-col="formItemLayout.wrapperCol" > <a-radio-group default-value="horizontal" @change="handleFormLayoutChange"> <a-radio-button value="horizontal"> Horizontal </a-radio-button> <a-radio-button value="vertical"> Vertical </a-radio-button> <a-radio-button value="inline"> Inline </a-radio-button> </a-radio-group> </a-form-item> <a-form-item label="Field A" :label-col="formItemLayout.labelCol" :wrapper-col="formItemLayout.wrapperCol" :validate-status="validateAStatus" :help="helpA" > <a-input v-model="fieldA" placeholder="input placeholder" /> </a-form-item> <a-form-item label="Field B" :label-col="formItemLayout.labelCol" :wrapper-col="formItemLayout.wrapperCol" > <a-input v-model="fieldB" placeholder="input placeholder" /> </a-form-item> <a-form-item :wrapper-col="buttonItemLayout.wrapperCol"> <a-button type="primary" @click="handlerForm()"> Submit </a-button> </a-form-item> </a-form> </template> <script> export default { data() { return { formLayout: 'horizontal', fieldA: "", fieldB:"", validateAStatus: "", helpA: "", }; }, watch:{ fieldA(val){ if(this.fieldA.length <= 5){ this.validateAStatus = "error"; this.helpA = "必须大于5个字符"; }else{ this.validateAStatus = ""; this.helpA = ""; } } }, computed: { formItemLayout() { const { formLayout } = this; return formLayout === 'horizontal' ? { labelCol: { span: 4 }, wrapperCol: { span: 14 }, } : {}; }, buttonItemLayout() { const { formLayout } = this; return formLayout === 'horizontal' ? { wrapperCol: { span: 14, offset: 4 }, } : {}; }, }, methods: { handleFormLayoutChange(e) { this.formLayout = e.target.value; }, handlerForm(){ if(this.fieldA.length <= 5){ this.validateAStatus = "error"; this.helpA = "必须大于5个字符"; }else{ console.log("fieldA:"+this.fieldA,"fieldB:"+this.fieldB); } } }, }; </script>
5.11.2初始数据,自动校验,动态赋值(全部都在BasicForm.vue页面进行修改)
-
在data中的fieldA中添加初始化值
hello,添加下面代码,用于初始化表单数据this.form = this.$form.createForm(this); -
在
<a-form>标签中使用:form="form"绑定form的数据,`` -
在FieldA输入框中添加如下代码,用于自定义校验
v-decorator="[ 'fieldA', { initialValue: fieldA, rules: [{requied: true, min: 5, message: '必须大于5个字符'}] } ]" -
修改
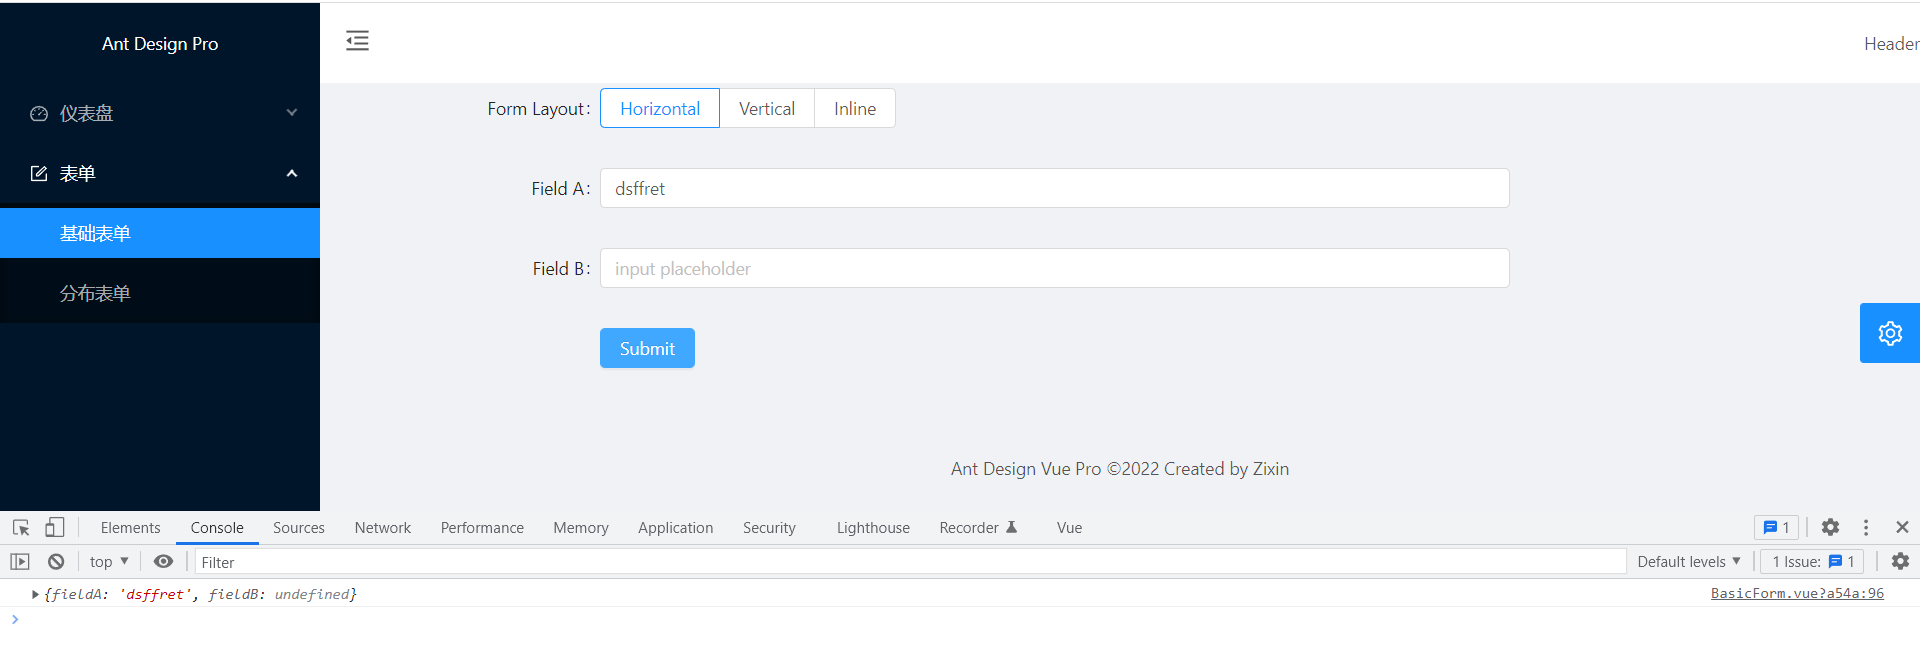
handlerForm方法的代码handlerForm(){ // if(this.fieldA.length <= 5){ // this.validateAStatus = "error"; // this.helpA = "必须大于5个字符"; // }else{ // console.log("fieldA:"+this.fieldA,"fieldB:"+this.fieldB); // } this.form.validateFields((err, values) => { if(!err){ console.log(values); Object.assign(this, values); } }); } -
重新运行,访问
http://localhost:8080/form/basic-form,可以看到fieldA的初始值为hello

重新输入内容也会校验

验证通过后提交,控制台有对应的输出内容
-
如果想要修改输入框的初始值,可以在mounted中进行设置,并且通过
this.form.setFieldsValue的方式,这里修改fieldA的初始值为field A,并且设置3秒后国企setTimeout(() => { this.form.setFieldsValue({ fieldA: 'field A' }); }, 3000); `` -
重新运行,访问
http://localhost:8080/form/basic-form,可以看到fieldA的初始值为field A,3秒后FieldA的值又恢复为hello

5.11.3分布表单
-
在store文件夹中创建一个modules文件夹,并在该文件夹中传概念一个
form.js文件import router from "@/router"; import request from "@/utils/request"; const state = { step: { payAccount: "123456" } }; const actions = { async submitStepForm({ commit }, { payload }){ await request({ url: "/api/form", method: "POST", data: payload }); commit("saveStepFormData", payload); router.push("/form/step-form/result") } }; const mutations = { saveStepFormData(state, {payload}){ state.step = { ...state.step, ...payload }; } }; export default { namespaced: true, state, actions, mutations } -
在
store/index.js中引入modules/form.js文件,并把form加到mudules中import Vue from "vue"; import Vuex from "vuex"; import form from "./modules/form"; Vue.use(Vuex); export default new Vuex.Store({ state: {}, getters: {}, mutations: {}, actions: {}, modules: { form }, }); -
在mock文件夹中创建一个
form.js文件,把dashboard_chart.js中的代码复制过来,修改method和数据,代码如下面所示function chart(method){ let res = null; switch (method) { case "POST": res = {message: "OK"}; break; default: res = null; } return res; } module.exports = chart; -
修改
StepForm.vue代码中的表单页为<router-view/><template> <div> <router-view/> </div> </template> <script> export default { name: "StepForm", }; </script> <style scoped> </style> `` -
修改
routes/index.js中的name为"stepform"的component: () =>import(/* webpackChunkName: "form" */ "../views/forms/BasicForm.vue"),为component:{render: (h) => h("router-view")},,并添加redirect:"/form/step-form/info", -
修改
Step1.vue<template> <div> <a-form layout="horizontal" :form="form"> <a-form-item label="付款账户" :label-col="formItemLayout.labelCol" :wrapper-col="formItemLayout.wrapperCol" > <a-input v-decorator="[ 'payAccount', { initialValue: step.payAccount, rules: [{required: true, message: '请输入付款账号'}] } ]" placeholder="请输入付款账号" /> </a-form-item> <a-form-item> <a-button type="primary" @click="handleSubmit()">下一步</a-button> </a-form-item> </a-form> </div> </template> <script> export default { name: "Step1", data(){ this.form = this.$form.createForm(this); return { formItemLayout: { labelCol: {span: 4}, wrapperCol: {span: 14} } } }, computed: { step(){ return this.$store.state.form.step; } }, methods: { handleSubmit(){ const { form, $router, $store} = this; form.validateFields((err, values) => { if(!err){ $store.commit({ type: "form/saveStepFormData", payload: values }); $router.push("/form/step-form/confirm"); } }); } } }; </script> <style scoped> </style> -
修改
Step2.vue<template> <div> <a-form layout="horizontal" :form="form"> <a-form-item label="付款账户" :label-col="formItemLayout.labelCol" :wrapper-col="formItemLayout.wrapperCol" > {{ step.payAccount }} </a-form-item> <a-form-item label="密码" :label-col="formItemLayout.labelCol" :wrapper-col="formItemLayout.wrapperCol" > <a-input v-decorator="[ 'password', { initialValue: step.payAccount, rules: [{required: true, message: '请输入密码'}] } ]" type="password" placeholder="请输入付款账号" /> </a-form-item> <a-form-item> <a-button style="margin-left: 8px;" @click="onPrev()">上一步</a-button> <a-button type="primary" @click="handleSubmit()">提交</a-button> </a-form-item> </a-form> </div> </template> <script> export default { name: "Step1", data(){ this.form = this.$form.createForm(this); return { formItemLayout: { labelCol: {span: 4}, wrapperCol: {span: 14} } } }, computed: { step(){ return this.$store.state.form.step; } }, methods: { handleSubmit(){ const { form, $store, step} = this; form.validateFields((err, values) => { if(!err){ $store.dispatch({ type: "form/submitStepForm", payload: { ...step, ...values} }); } }); }, onPrev(){ this.$router.push("/form/step-form/info") } } }; </script> <style scoped> </style> -
修改
Step3.vue<template> <div> 操作成功,预计两小时到账! </div> </template> <script> export default { name: "Step3", }; </script> <style scoped> </style> -
运行,访问
http://localhost:8080/form/step-form/info,可以看到第一步的页面

点击下一步后的页面

点击提交按钮后的页面

5.11.4自己封装一个支持自动校验的表单项
- 在
main.js中引入Select并注册import { Button, Layout, Icon, Drawer, Radio, Menu, Form, Input, Select } from "ant-design-vue"; Vue.use(Select); - 在components文件夹中创建一个自定义的校验表单项
ReceiverAccount.vue<template> <a-input-group compact> <a-select v-model="type" style="width: 130px;" @change="handleTypeChange()"> <a-select-option value="alipay"> 支付宝 </a-select-option> <a-select-option value="bank"> 银行账户 </a-select-option> </a-select> <a-input style="width: calc(100% - 130px)" v-model="number" @change="handleNumberChange()"/> </a-input-group> </template> <script> export default { name: "ReceiverAccount", props: { value:{ type: Object } }, watch: { value(val){ Object.assign(this, val); } }, data(){ const { type, number } = this.value || {}; return { type: type || "alipay", number: number || "" } }, methods: { handleTypeChange(val){ this.$emit('change', { ...this.value, type: val }); }, handleNumberChange(e){ this.$emit('change', { ...this.value, number: e.target.value }); } } } </script> <style> </style> - 在
Step1.vue中引入ReceiverAccount.vue组件并注册使用,同时添加校验规则<template> <div> <a-form layout="horizontal" :form="form"> <a-form-item label="付款账户" :label-col="formItemLayout.labelCol" :wrapper-col="formItemLayout.wrapperCol" > <a-input v-decorator="[ 'payAccount', { initialValue: step.payAccount, rules: [{required: true, message: '请输入付款账号'}] } ]" placeholder="请输入付款账号" /> </a-form-item> <a-form-item label="收款账户" :label-col="formItemLayout.labelCol" :wrapper-col="formItemLayout.wrapperCol" > <ReceiverAccount v-decorator="[ 'receiverAccount', { initialValue: step.receiverAccount, rules: [ { required: true, message: '请输入收款账号', validator: (rule, value, callback) => { if(value && value.number){ callback(); }else{ callback(false); } } } ] } ]" /> </a-form-item> <a-form-item> <a-button type="primary" @click="handleSubmit()">下一步</a-button> </a-form-item> </a-form> </div> </template> <script> import ReceiverAccount from "@/components/ReceiverAccount"; export default { name: "Step1", components: { ReceiverAccount }, data(){ this.form = this.$form.createForm(this); return { formItemLayout: { labelCol: {span: 4}, wrapperCol: {span: 14} } } }, computed: { step(){ return this.$store.state.form.step; } }, methods: { handleSubmit(){ const { form, $router, $store} = this; form.validateFields((err, values) => { if(!err){ $store.commit({ type: "form/saveStepFormData", payload: values }); $router.push("/form/step-form/confirm"); } }); } } }; </script> <style scoped> </style> - 运行,访问
http://localhost:8080/form/step-form/info,可以看到自定义的表单项,不输入内容,直接下一步,自定义的表单项下面会有对应的提示信息,校验通过后就会跳转到下一步的页面

5.12在系统中使用图标
5.12.1使用网上的图标
-
图标网址:阿里巴巴矢量图标库官网
-
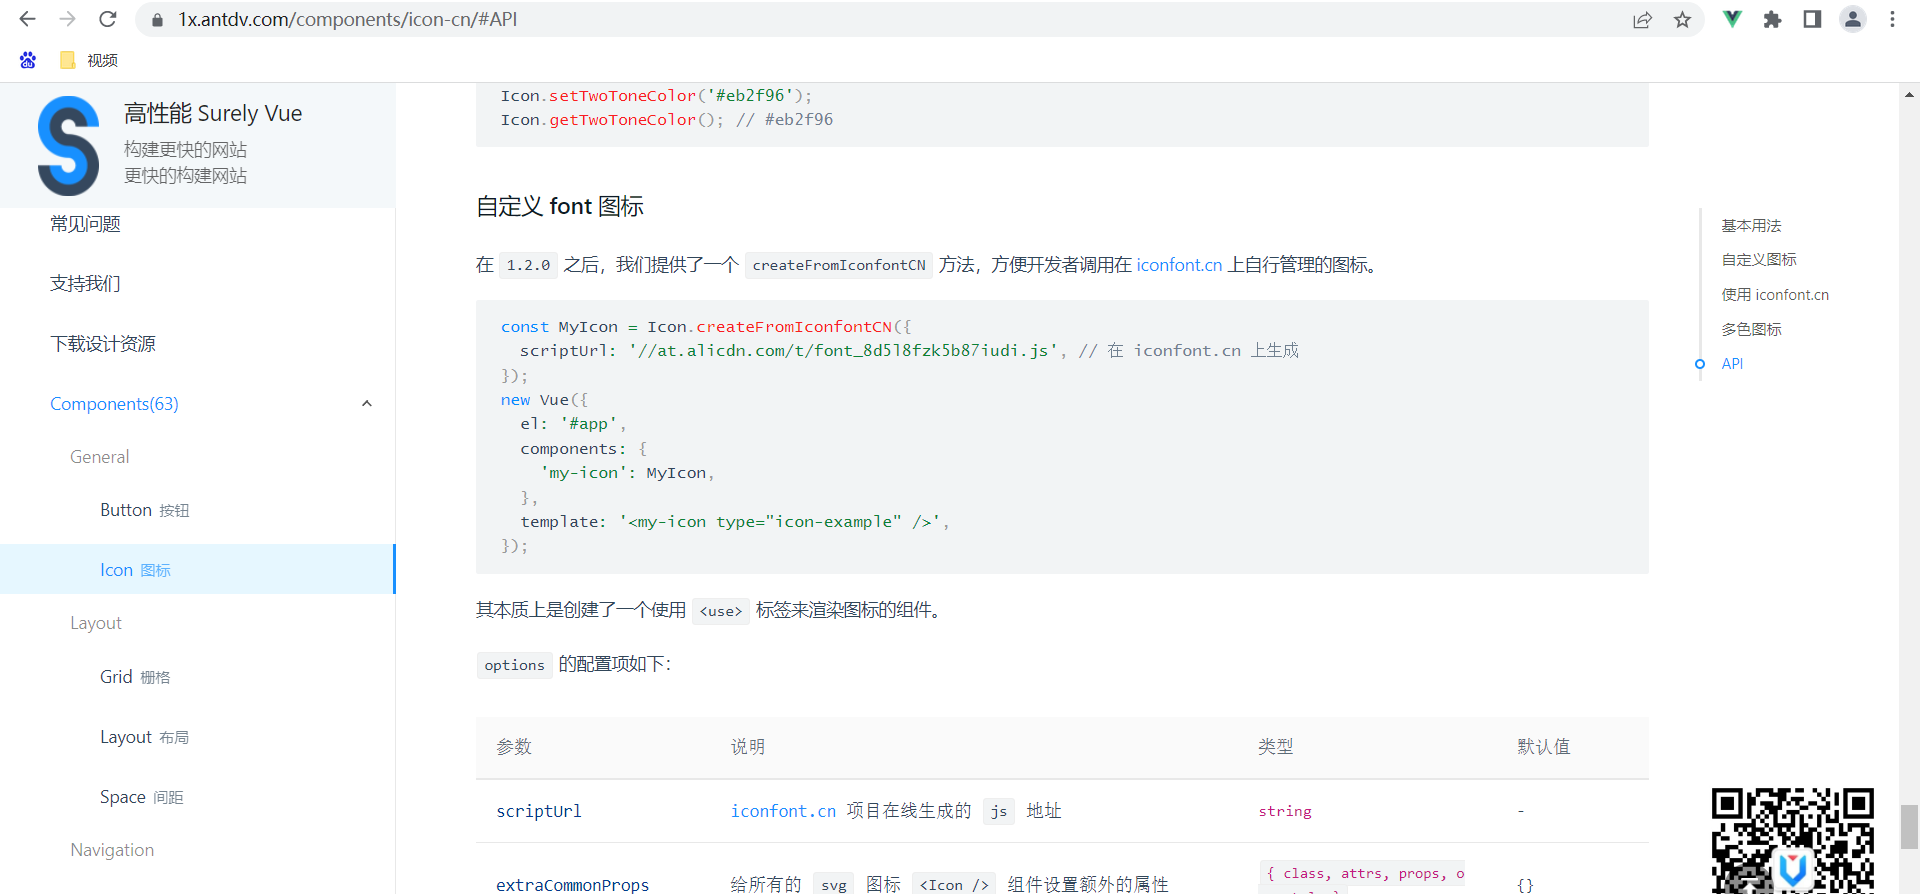
查看
ant-design-vue官网中自定义图标的使用教程
-
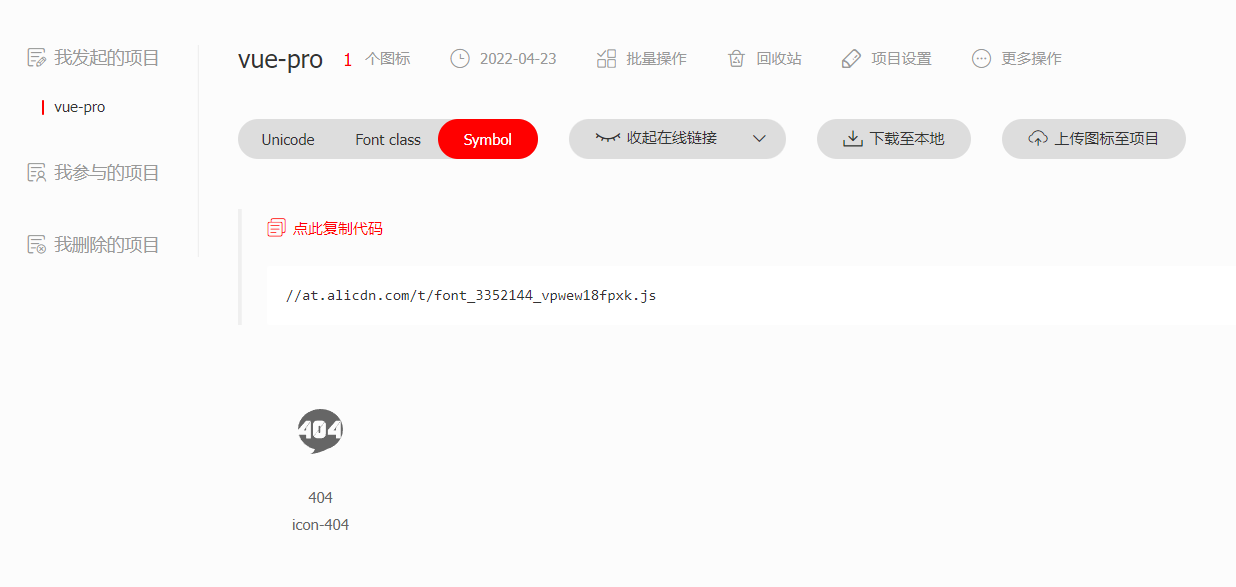
把需要的404图标在 iconfont.cn 上生成
-
在
main.js中引热议icon并全局注册const IconFont = Icon.createFromIconfontCN({ scriptUrl: '//at.alicdn.com/t/font_3352144_vpwew18fpxk.js', // 在 iconfont.cn 上生成 }); Vue.component("IconFont", IconFont); -
在
404.vue中使用IconFont组件<template> <div style="text-align:center;"> <IconFont type="icon-404" style="font-size: 100px;"/> </div> </template> <script> export default { name: "404", }; </script> <style scoped> </style>
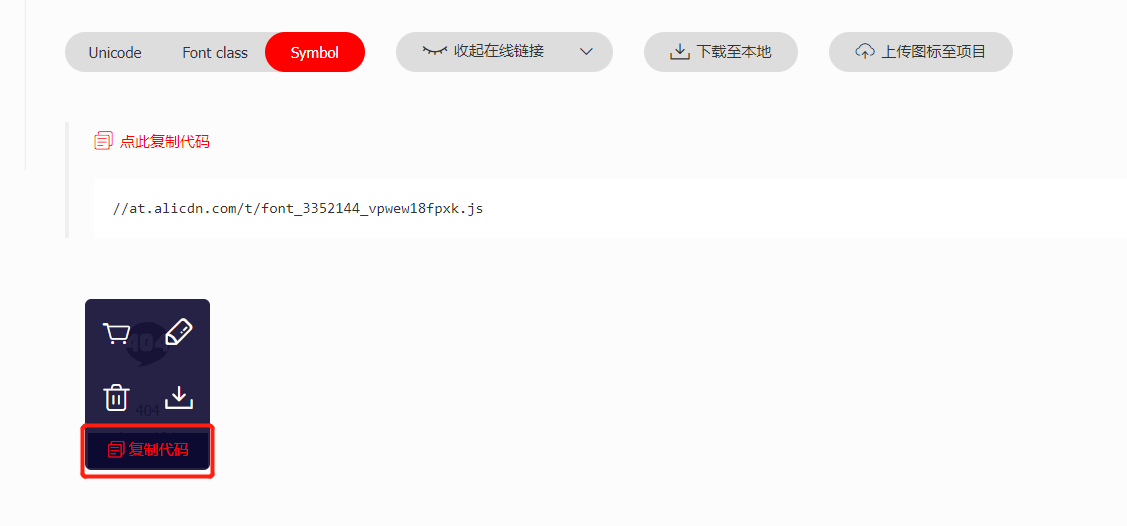
说明:
组件中的type是在iconfont.cn 上的图标上面复制过来的
- 重新运行,访问一个不存在的请求路径,可以看到对应的404页面

5.12.2使用自己设计的图标
-
截取
vue图标并命名为logo.png,然后放到项目中的assets目录下 -
在
404.vue中引入并使用<template> <div style="text-align:center;"> <IconFont type="icon-404" style="font-size: 100px;"/> <img :src="logo" alt=""/> </div> </template> <script> import logo from "@/assets/logo.png"; export default { name: "404", data(){ return { logo } } }; </script> <style scoped> </style> -
重新运行,访问一个不存在的请求路径,可以看到404页面中新添加的图标

5.12.3使用组件的方式引入svg图标
-
网上下载一个svg图标并命名为Smile.svg,然后放到项目中的assets目录下
-
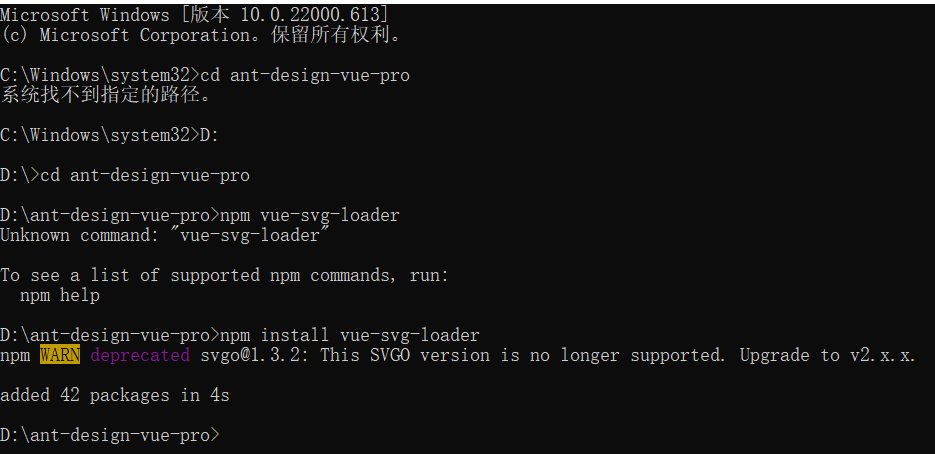
安装
vue-svg-loader插件
-
在Vue CLI官网中找到这一段代码,把它复制到项目中的
vue.config.js文件中
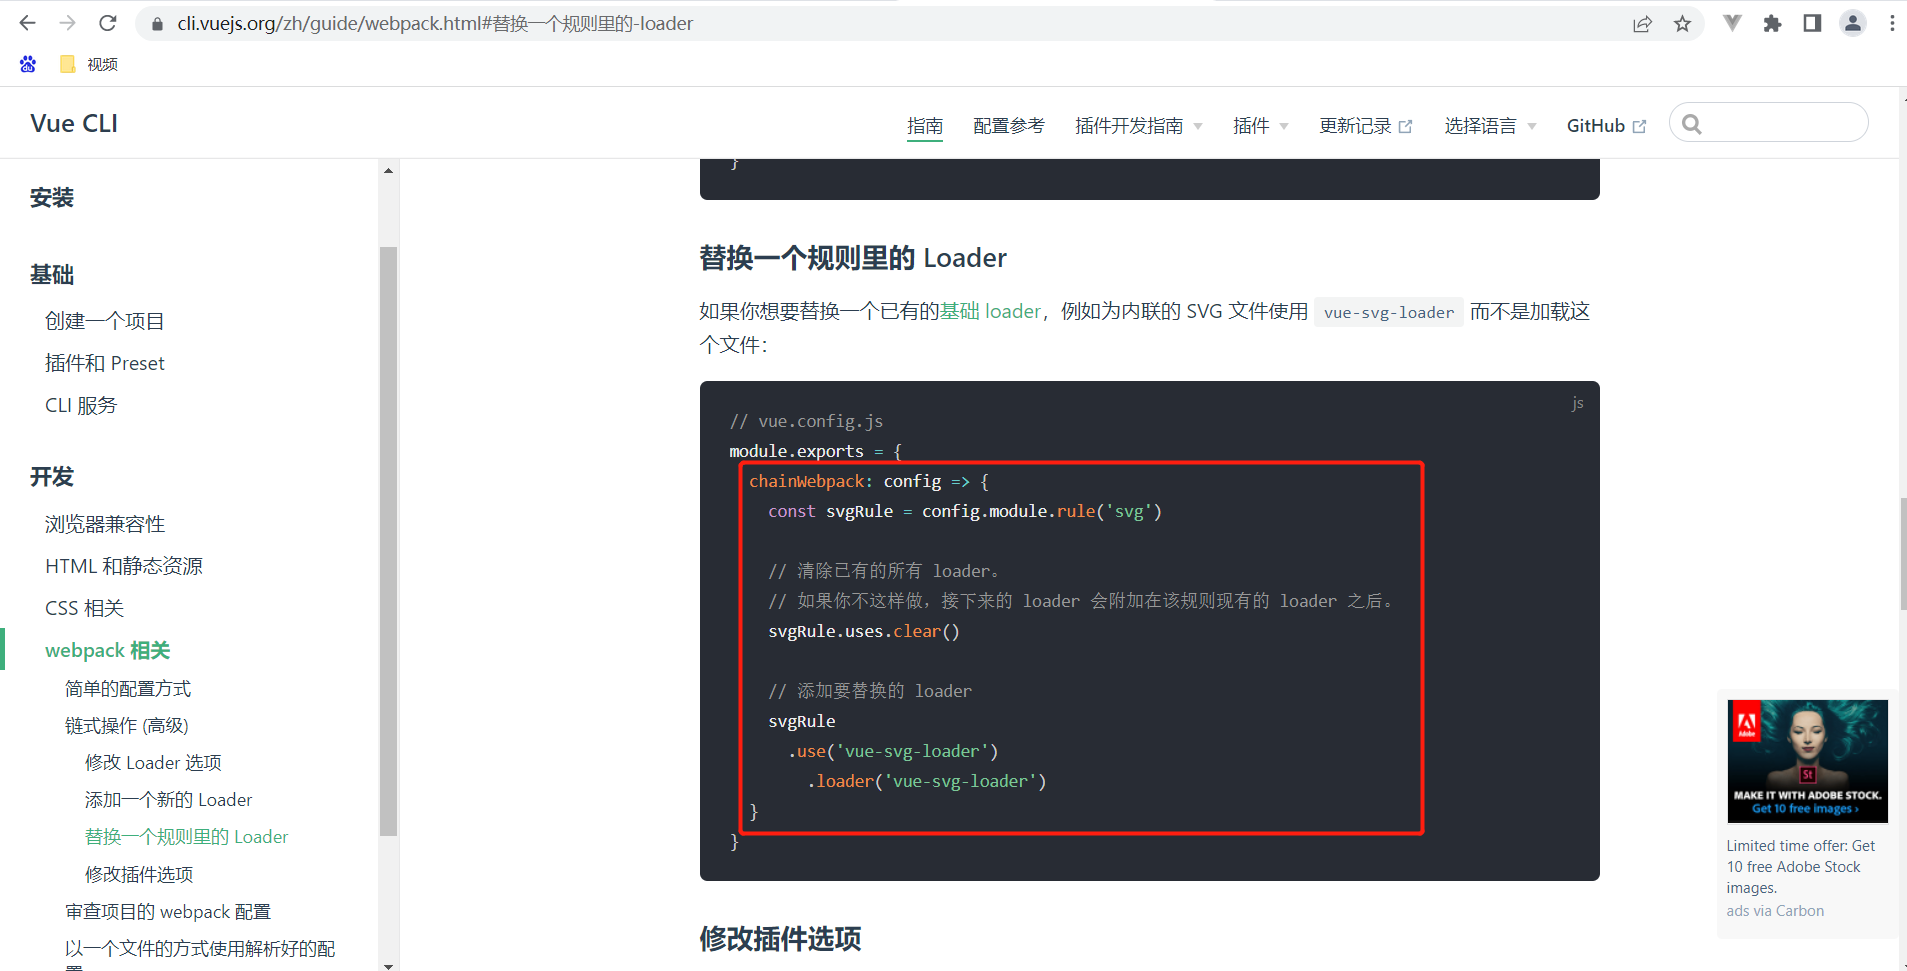
-
在
404.vue中引入Smile.svg组件并注册和使用<template> <div style="text-align:center;"> <IconFont type="icon-404" style="font-size: 100px;"/> <img :src="logo" alt=""/> <Smile/> </div> </template> <script> import logo from "@/assets/logo.png"; import Smile from "@/assets/Smile.svg"; export default { name: "404", data(){ return { logo } }, components: { Smile } }; </script> <style scoped> </style> -
重新运行,访问一个不存在的请求路径,发现新添加的图标没显示,浏览器控制台报错

原因:vue.config.js中引入的配置是Vue CLI3的配置,我这里安装的是Vue CLI2
解决方法:修改vue.config.js原来引入的配置为如下即可//1.需先删除默认配置中处理的svg chainWebpack:(config) => { config.module.rules.delete("svg"); }, //2.配置Loader configureWebpack: { module: { rules: [ { test: /\.svg$/, loader: "vue-svg-loader", } ] } }, -
重新运行,访问一个不存在的请求路径,可以看到404页面中新添加的图标
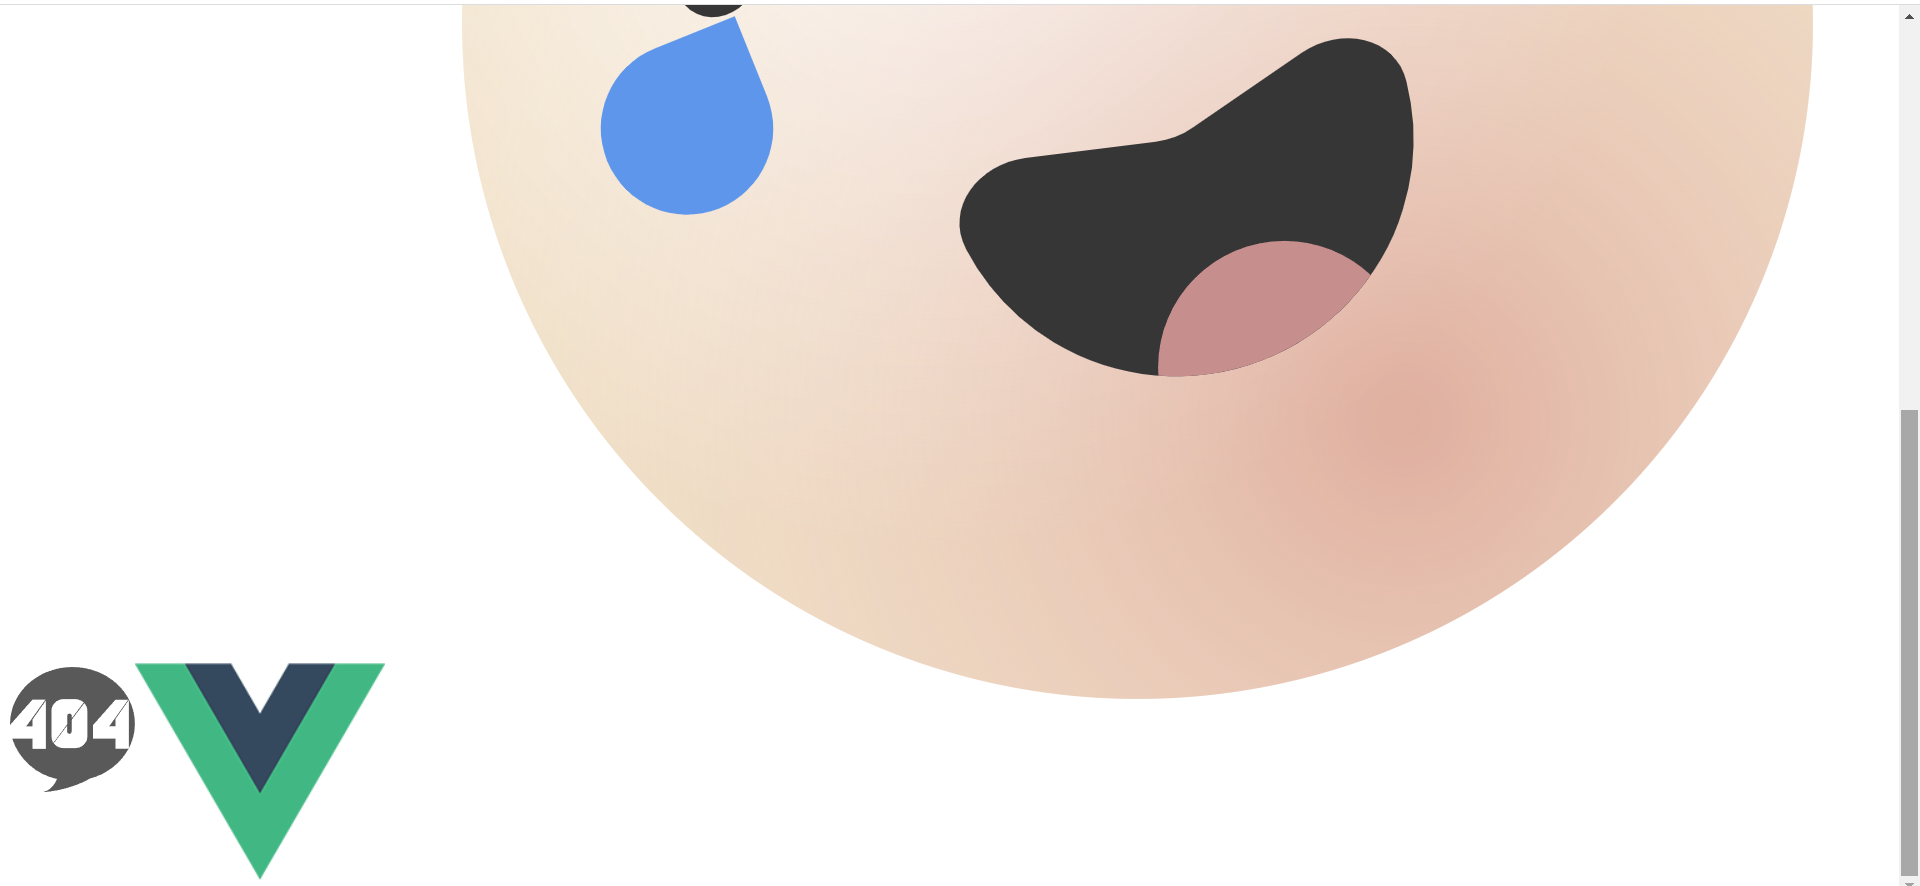
5.13定制主题与动态切换主题
5.13.1定制主题
-
由于这个项目使用Vue CLi2,查看
ant-design-vue官网定制主题相关内容,可以知道按如下页面配置即可
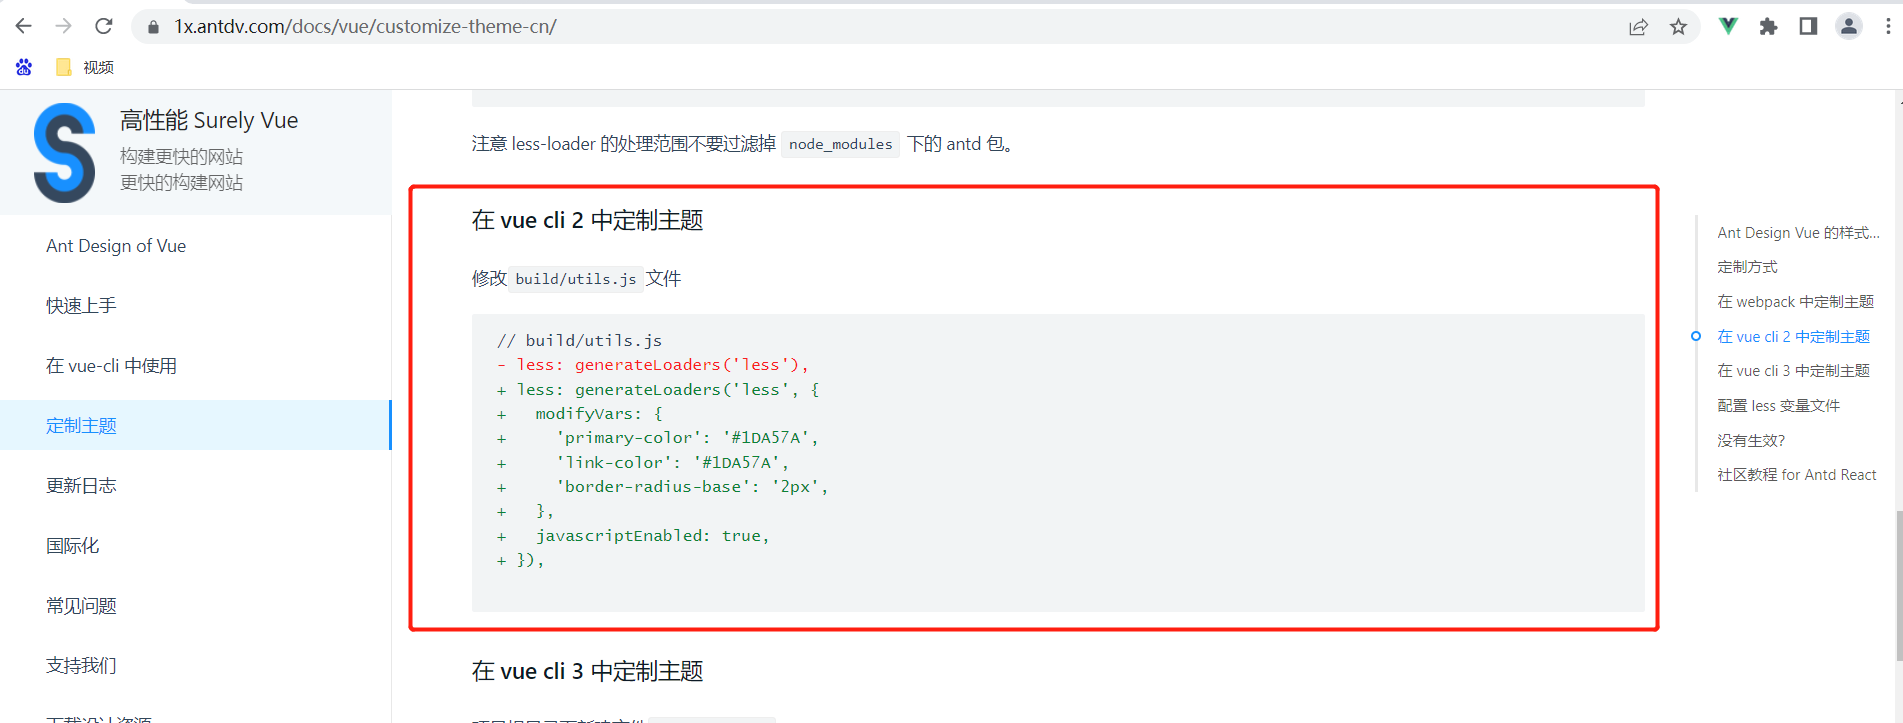
-
在
vue.config.js中的less配置中添加对应配置css: { loaderOptions: { less: { lessOptions:{ javascriptEnabled: true, modifyVars: {//定制主题设置 'primary-color': '#1DA57A', } }, } } }, -
重新运行,访问
http://localhost:8080/form/step-form/info,可以看到菜单项选中的颜色以及右边页面的按钮颜色变成了绿色
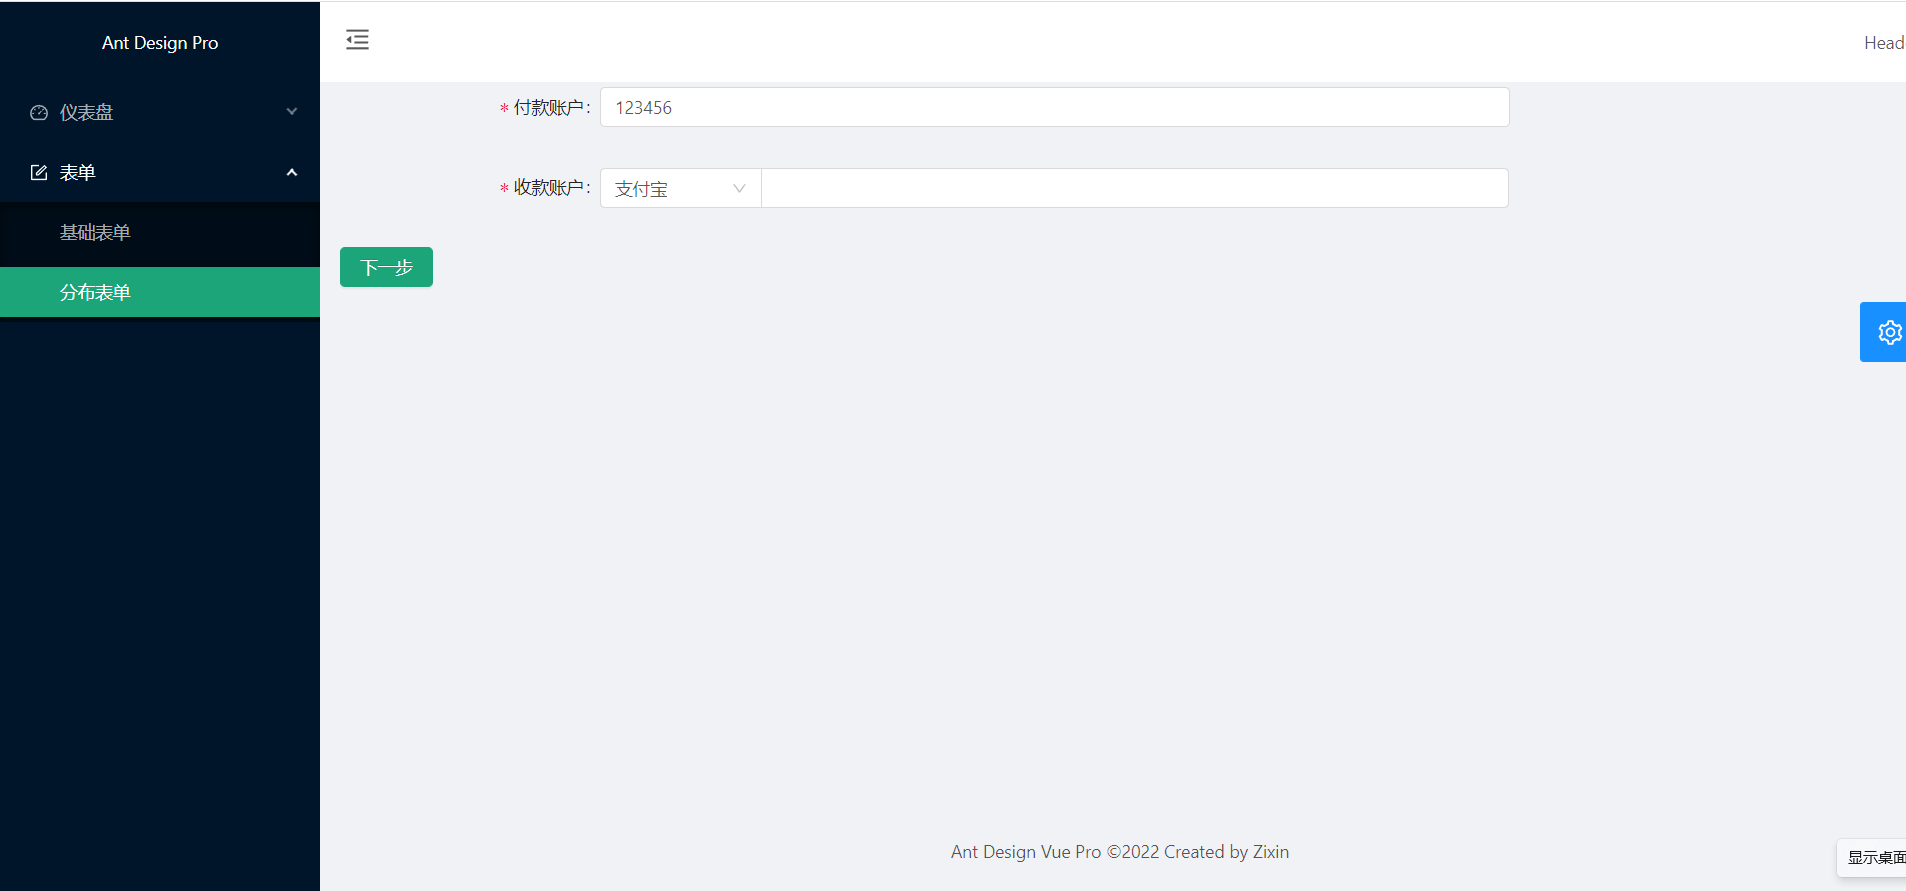
5.13.2动态切换主题
-
安装
antd-theme-webpack-plugin插件

-
在
vue.config.js中添加如下配置const path = require("path"); const AntDesignThemePlugin = require('antd-theme-webpack-plugin'); const options = { antDir: path.join(__dirname, './node_modules/ant-design-vue'), stylesDir: path.join(__dirname, './src'), varFile: path.join(__dirname, './node_modules/ant-design-vue/lib/style/themes/default.less'), mainLessFile: "", themeVariables: ["@primary-color"], generateOnce: false } const themePlugin = new AntDesignThemePlugin(options); module.exports = { configureWebpack: { plugins: [themePlugin] } } }, -
然后在public文件夹下面de
index.html文件添加如下代码<link rel="stylesheet/less" type="text/css" href="/color.less"/> <script> window.less = { async: false, env: 'production', javascriptEnabled: true, modifyVars: {//定制主题设置 'primary-color': '#1DA57A', } } </script> <script type="text/javascript" src="https://cdnjs.cloudflare.com/ajax/libs/less.js/2.7.2/less.min.js"></script> -
修改抽屉图标的主题,在
components/settingdrawer目录下创建index.less,将抽屉按钮的样式放进该文件中,将背景颜色改为@primary-color,并引入theme的默认less文件,index.less的全部代码如下@import "~ant-design-vue/lib/style/themes/default.less"; .setting-drawer-handle{ position: absolute; top: 240px; right: 300px; width:48px; height: 48px; background: @primary-color; color: #fff; font-size: 20px; text-align: center; line-height: 48px; border-radius: 3px 0 0 3px; } -
components/settingdrawer/index.vue的抽屉图标的class修改为setting-drawer-handle,并在style引入index.less<style lange="less" src="./index.less"> </style> -
重新运行,报如下错误
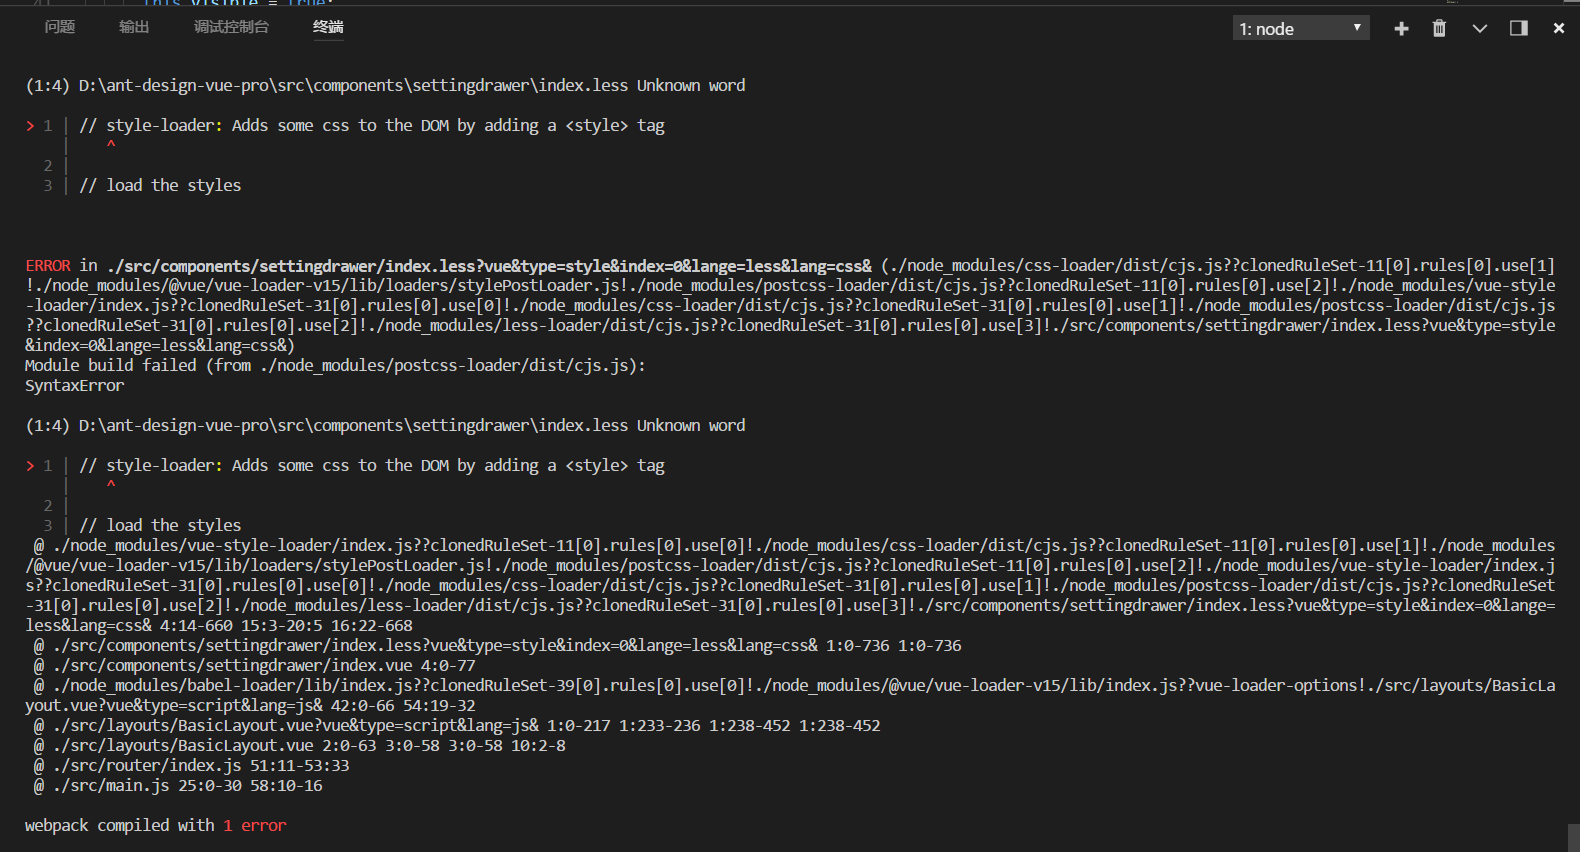
原因:components/settingdrawer/index.vue中的<style>标签引入less时的lang写成了lange,导致加载不到index.less文件
解决方法:将components/settingdrawer/index.vue中的<style>标签引入less时的lange写成了lang<style lang="less" src="./index.less"> </style> -
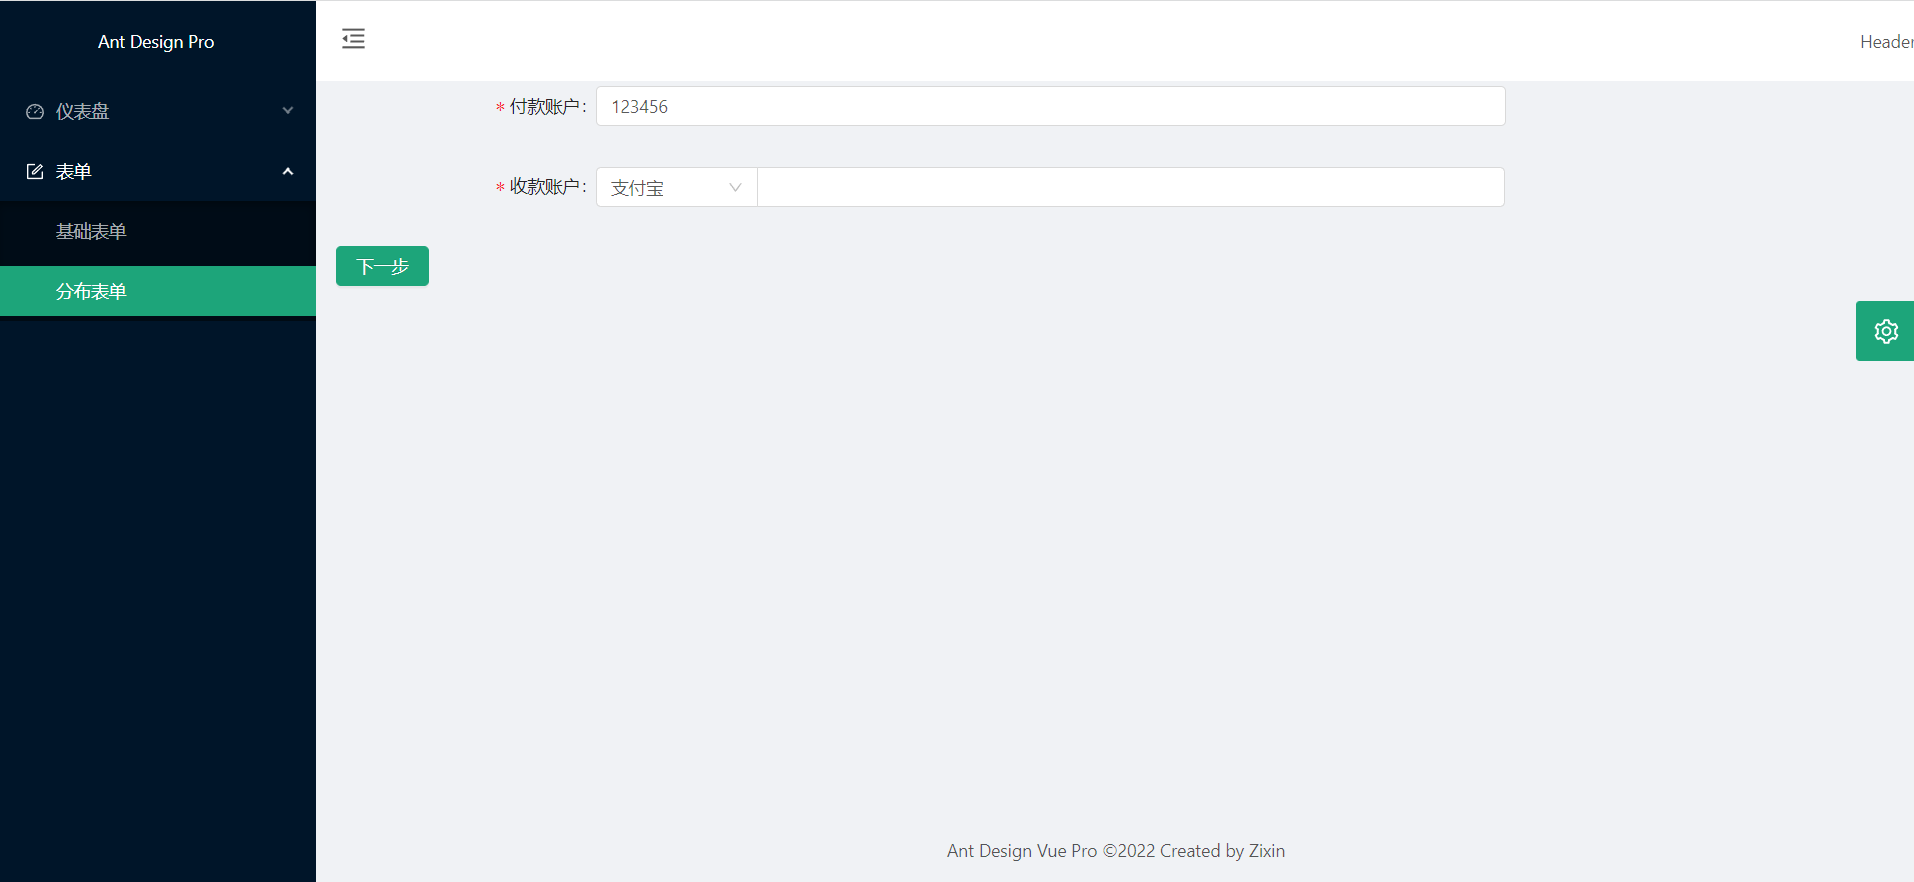
重新运行,访问
ocalhost:8080/form/step-form/info,可以看到抽屉图标的样式也变成绿色了
5.14使用ant-design-vue和moment库进行国际化
-
根据
ant-design-vue官网中国际化的使用方式进行使用 -
在
main.js中引入LocaleProvider并注册import { Button, Layout, Icon, Drawer, Radio, Menu, Form, Input, Select, LocaleProvider } from "ant-design-vue"; Vue.use(LocaleProvider); -
修改
App.vue的代码<template> <div id="app"> <a-locale-provider :locale="locale"> <router-view/> </a-locale-provider> </div> </template> <script> //引入中文包和英文包 import zhCN from 'ant-design-vue/lib/locale-provider/zh_CN'; import enUS from 'ant-design-vue/lib/locale-provider/en_US'; import moment from "moment"; export default { data(){ return { locale: zhCN } }, watch: { "$route.query.locale": function(val) { this.locale = val === "enUS" ? enUS : zhCN; moment.locale(val === "enUS" ? "en-uS" : "zh-cN"); } } } </script> <style lang="less"></style> -
在
main.js中引入Dropdown并注册import { Button, Layout, Icon, Drawer, Radio, Menu, Form, Input, Select, LocaleProvider, Dropdown } from "ant-design-vue"; Vue.use(Dropdown); -
在
Header.vue中使用Dropdown组件<template> <div class="header"> <a-dropdown> <a-icon type="global" /> <a-menu slot="overlay" @click="localeChange" :selectedKeys="[$route.query.locale || 'zhCN']"> <a-menu-item key="zhCN"> 中文 </a-menu-item> <a-menu-item key="enUS"> English </a-menu-item> </a-menu> </a-dropdown> </div> </template> <script> export default { name: "Header", methods: { localeChange({ key }){ console.log(key) this.$router.push({ query: { ...this.$route.query, locale: key }}); } } }; </script> <style scoped> .header{ float: right; margin-right: 30px; } </style> -
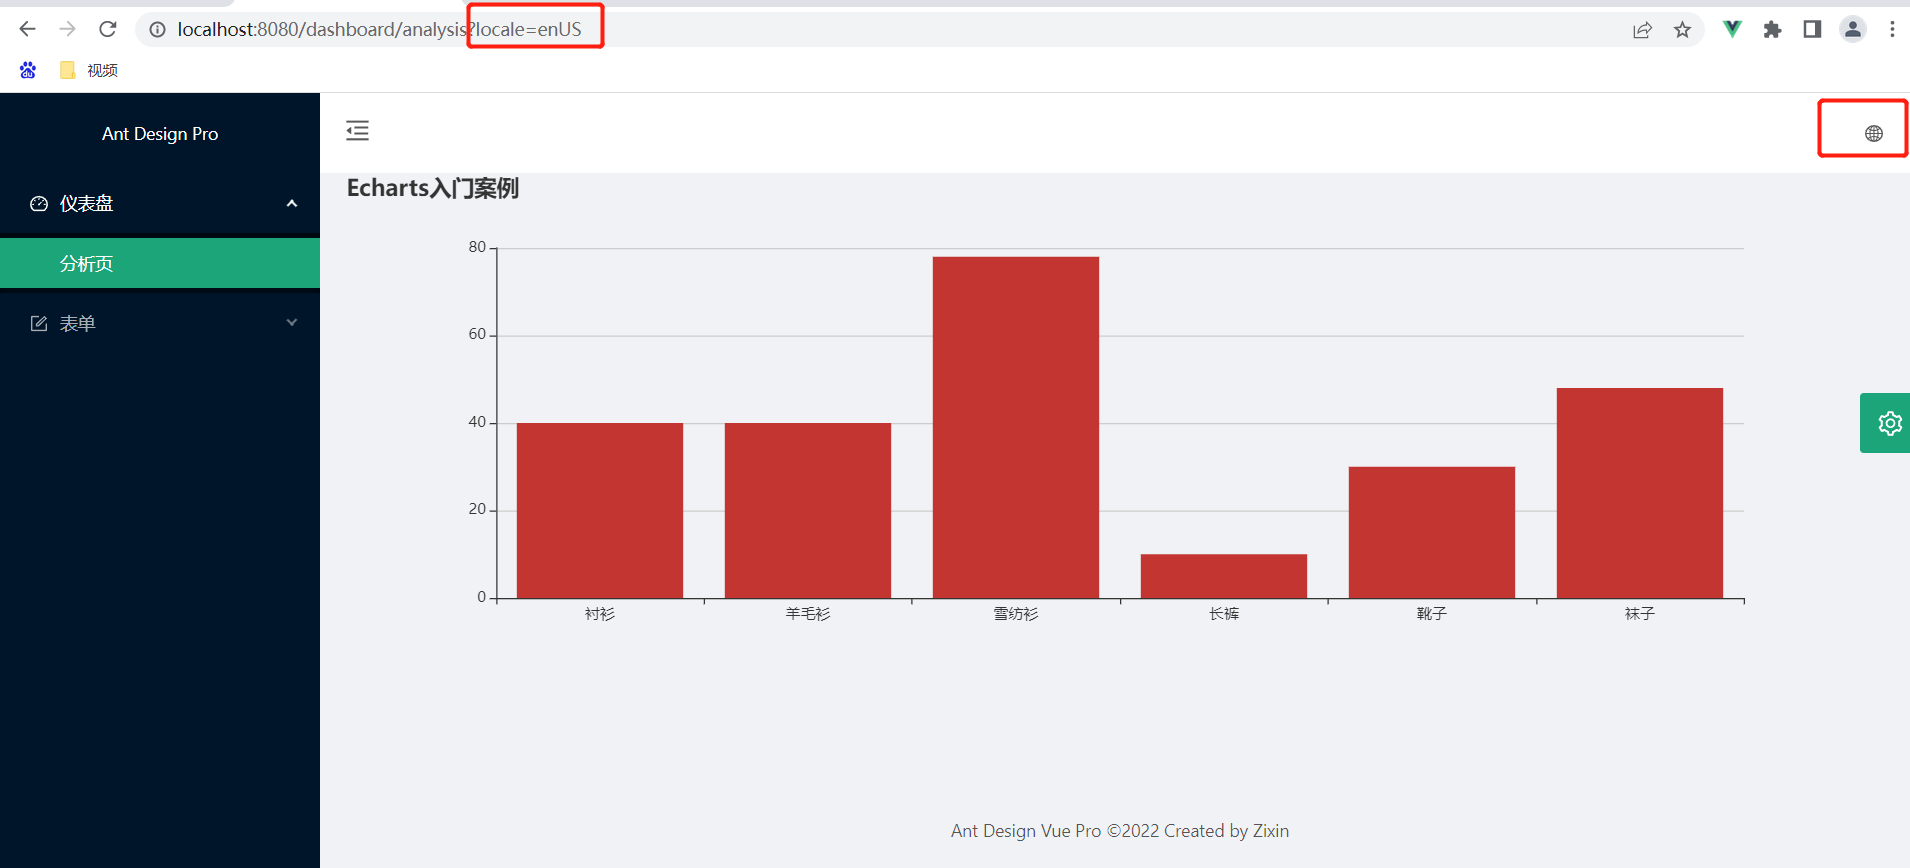
重新运行,访问
http://localhost:8080/dashboard/analysis,可以看到页面右上角有个国际化的图标,切换语言,可以看到url上的locale参数
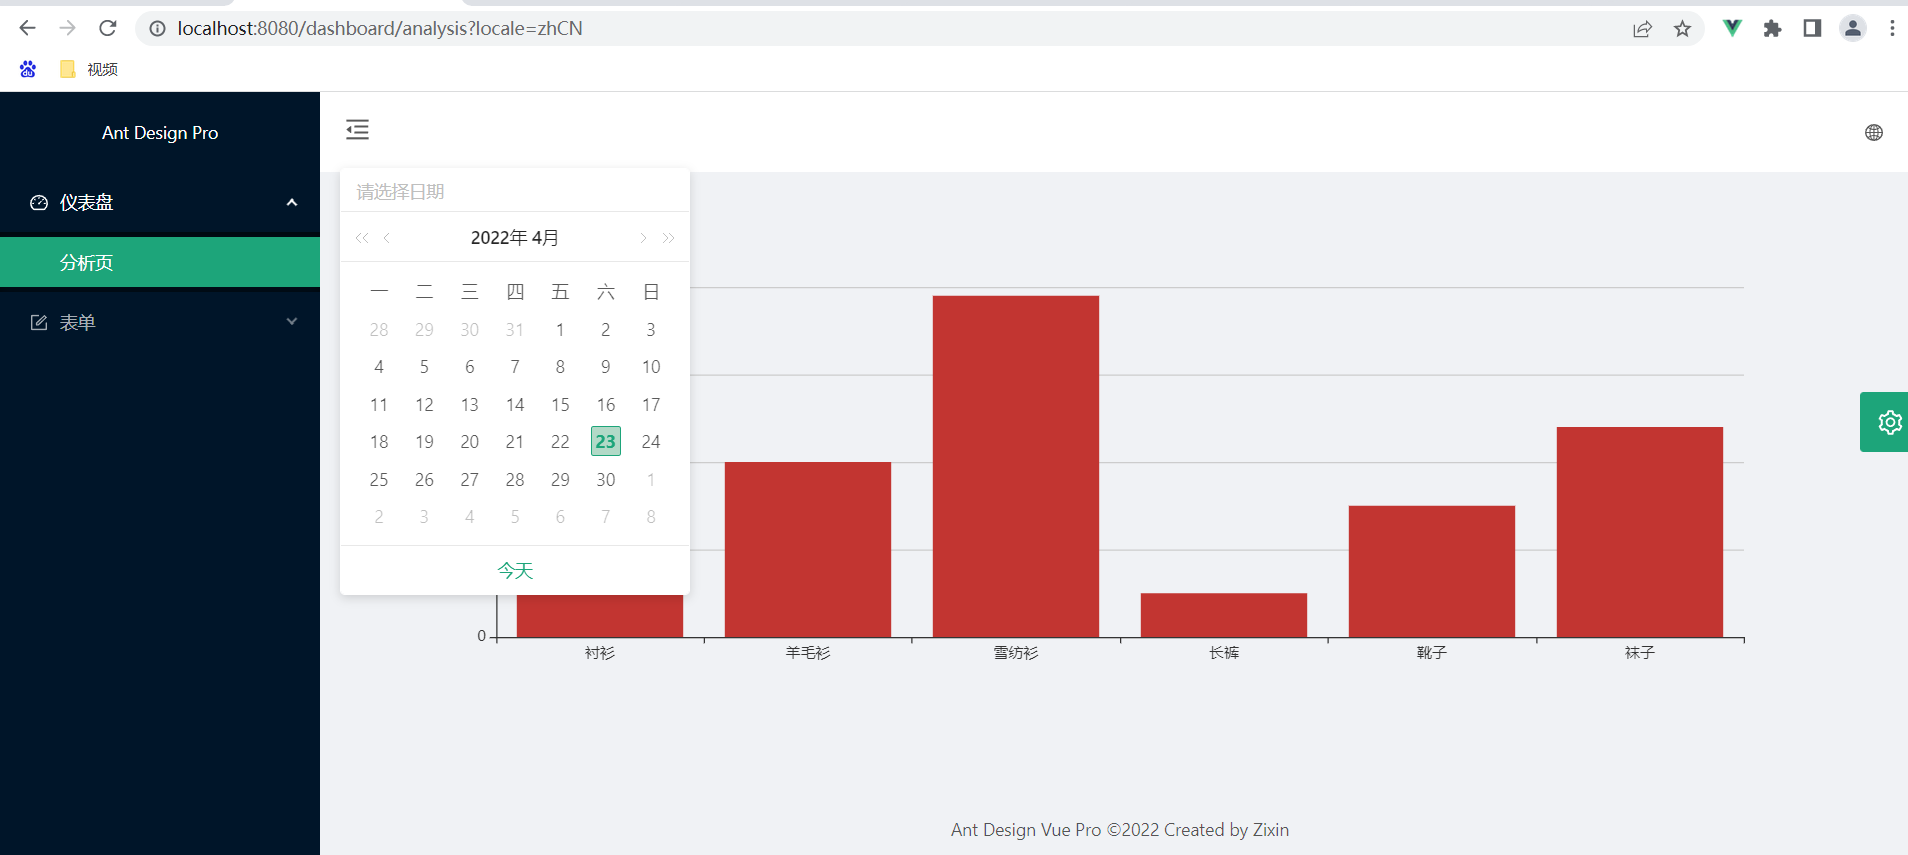
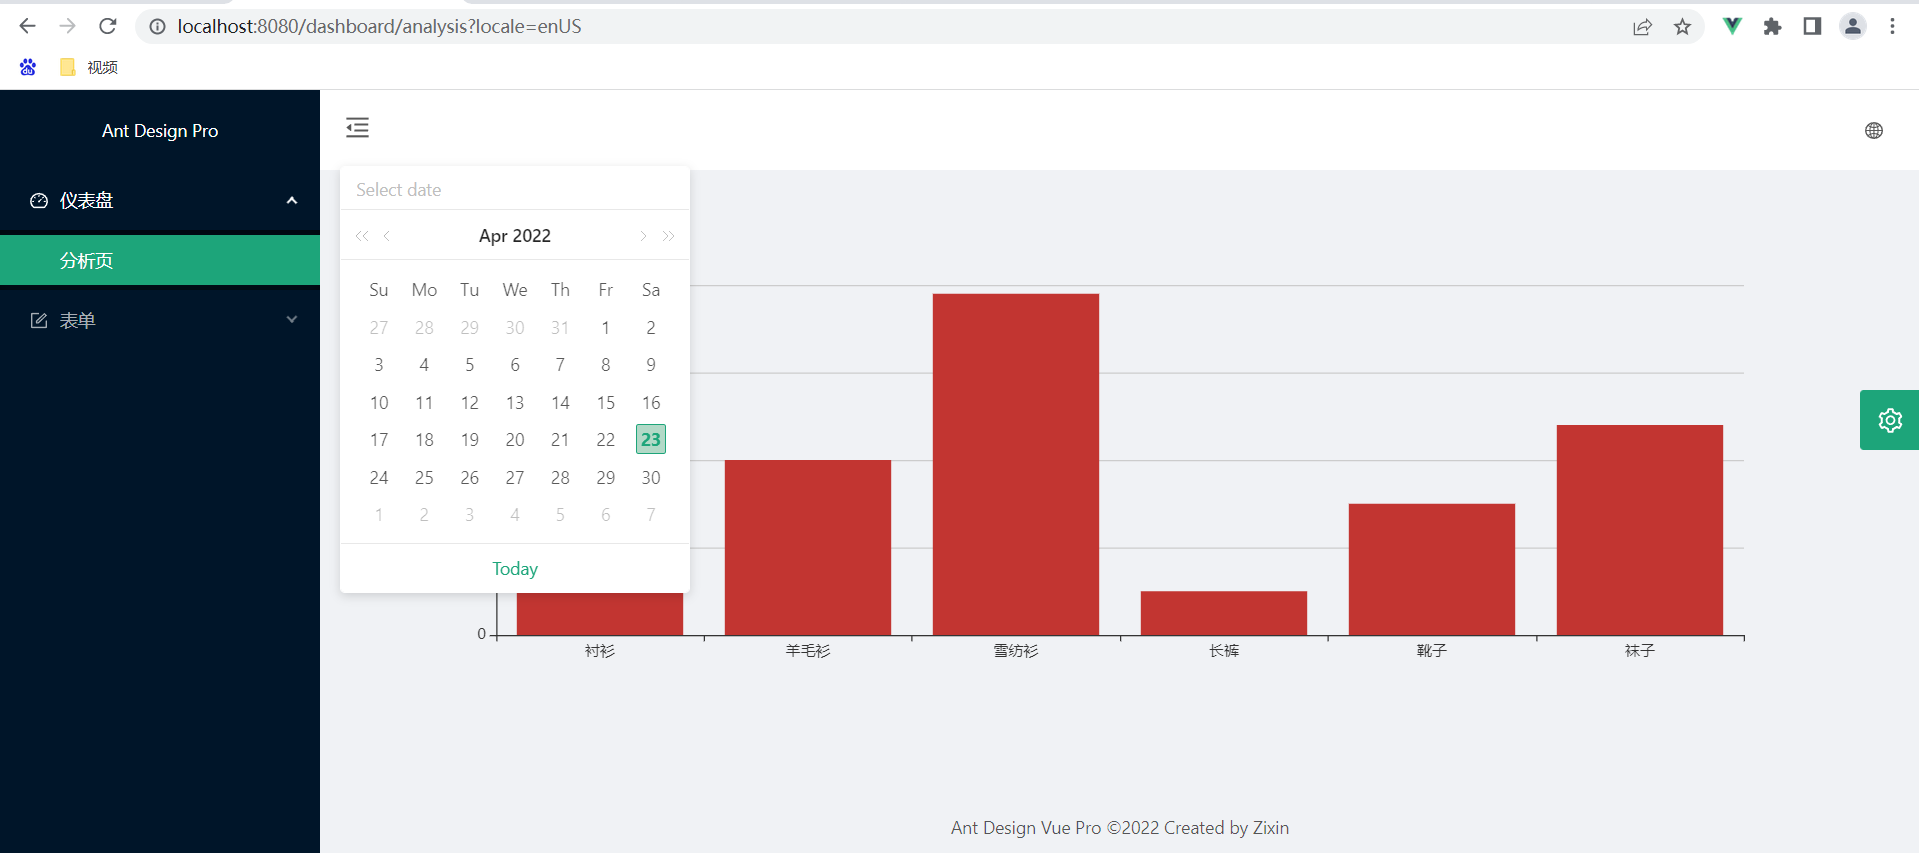
-
在
main.js中引入DatePicker并注册import { Button, Layout, Icon, Drawer, Radio, Menu, Form, Input, Select, LocaleProvider, Dropdown, DatePicker } from "ant-design-vue"; Vue.use(DatePicker); -
在
Analysis.vue中使用DatePicker组件(这是moment库下的)<a-date-picker></a-date-picker> -
重新运行,访问
http://localhost:8080/dashboard/analysis,切换语言,可以看到日期中的语言也跟着变化,但这仅仅只是针对moment库下的组件起作用,其他的则无效果
