SpringCloudStarterSleuth搭建&使用
是什么
Spring Cloud Sleuth是Spring Cloud生态系统中的一个分布式跟踪解决方案,可以用于跟踪微服务应用程序中的请求链路。它通过在请求中添加唯一标识符(Trace ID)和调用标识符(Span ID),来跟踪整个请求在分布式系统中的调用过程。Sleuth还支持将跟踪信息导出到Zipkin等跟踪系统中,以便更好地分析和监控微服务应用程序的性能和运行状况。
核心的概念
Trace(跟踪)
跟踪是一次请求的完整路径,由多个Span(调用)组成。跟踪ID是整个跟踪的唯一标识符,可以跨越多个微服务应用程序。在Sleuth中,跟踪ID是通过生成一个随机的64位数字来实现的。
Span(调用)
Span是跟踪中的一个节点,表示一次服务调用或一次操作。它包括Span ID(调用标识符)、Parent ID(父调用标识符)等信息。
Trace Context
Trace Context是一个全局上下文,包括Trace ID、Span ID、Parent ID等信息。Sleuth通过在请求中添加Trace Context,来跟踪整个请求在分布式系统中的调用过程。
Exporter(导出器)
Sleuth支持将跟踪信息导出到Zipkin等跟踪系统中,以便更好地分析和监控微服务应用程序的性能和运行状况。Sleuth提供了一系列导出器,可以方便地将跟踪信息导出到不同的跟踪系统中。
服务搭建
下载ZipKin Server
根据不同环境使用不同的方式,下载地址
运行ZipKin Server
-
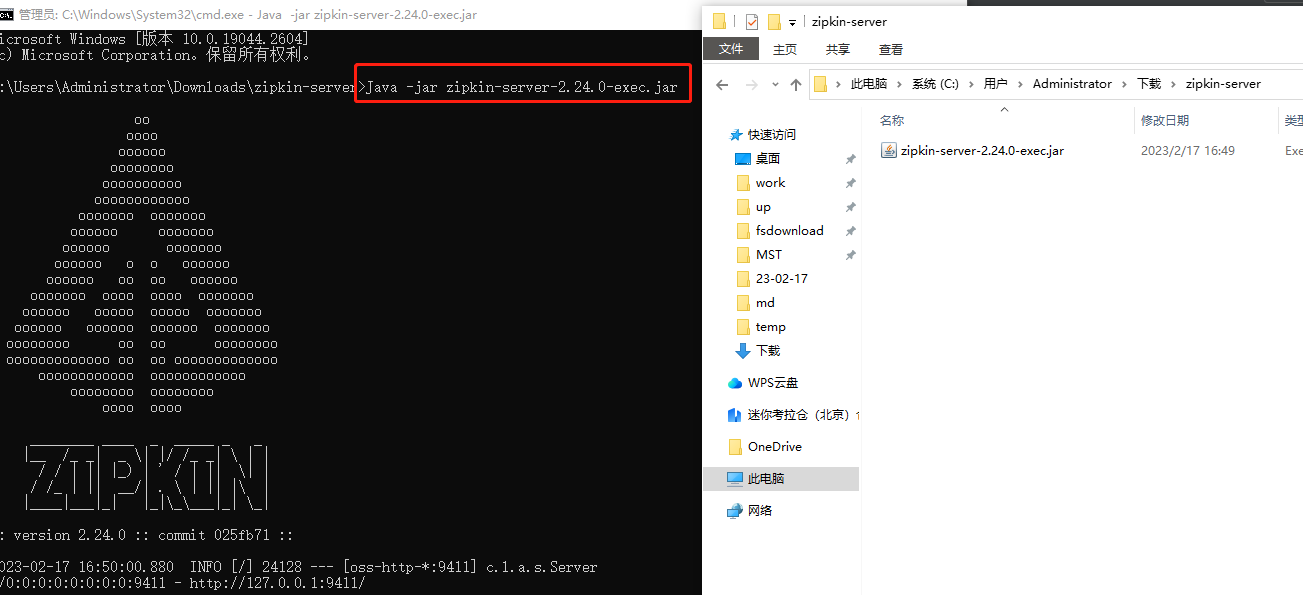
在下载的jar包目录执行cmd,见下图
Java -jar zipkin-server-2.24.0-exec.jar

-
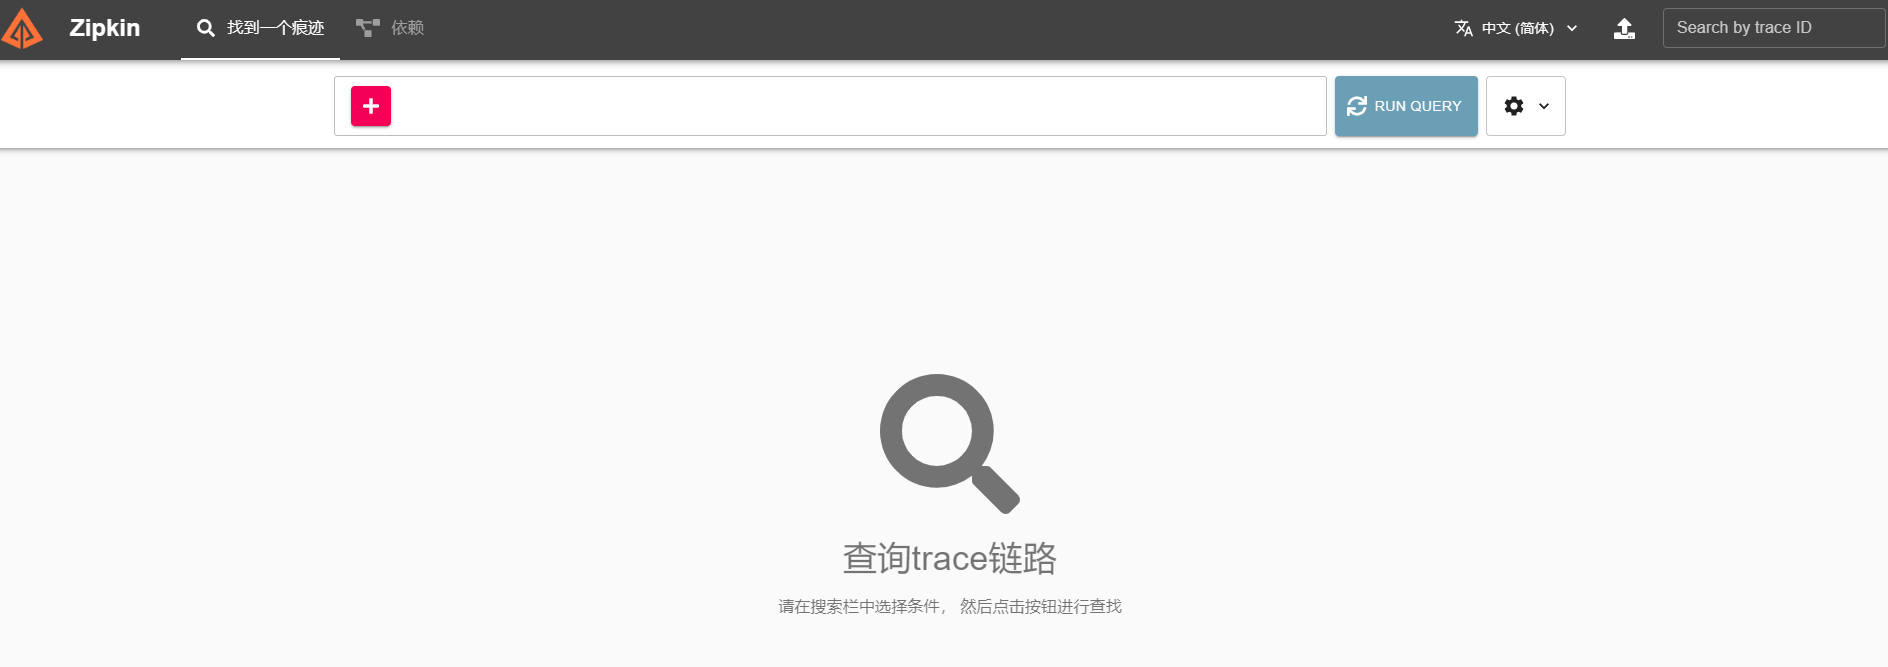
浏览器访问看看是否启动
127.0.0.1:9411

项目配置
用三个项目之间连续调用来测试,注册中心使用的consul
firstProject->secondProject->thirdProject
三个项目的POM
都引入下面GAV
<dependencies>
        <dependency>
            <groupId>org.springframework.boot</groupId>
            <artifactId>spring-boot-starter-web</artifactId>
        </dependency>
        <!-- https://mvnrepository.com/artifact/org.springframework.cloud/spring-cloud-starter-consul-discovery -->
        <dependency>
            <groupId>org.springframework.cloud</groupId>
            <artifactId>spring-cloud-starter-consul-discovery</artifactId>
            <version>2.2.8.RELEASE</version>
        </dependency>
        <!-- https://mvnrepository.com/artifact/org.springframework.boot/spring-boot-starter-actuator -->
        <dependency>
            <groupId>org.springframework.boot</groupId>
            <artifactId>spring-boot-starter-actuator</artifactId>
            <version>3.0.2</version>
        </dependency>
        <!-- https://mvnrepository.com/artifact/org.springframework.cloud/spring-cloud-starter-zipkin -->
        <dependency>
            <groupId>org.springframework.cloud</groupId>
            <artifactId>spring-cloud-starter-zipkin</artifactId>
            <version>2.2.8.RELEASE</version>
        </dependency>
        <!-- https://mvnrepository.com/artifact/org.springframework.cloud/spring-cloud-starter-sleuth -->
        <dependency>
            <groupId>org.springframework.cloud</groupId>
            <artifactId>spring-cloud-starter-sleuth</artifactId>
            <version>2.2.8.RELEASE</version>
        </dependency>

    </dependencies>
三个项目的Yml
#firstProject的Yml---------------------------
server:
  port: 5001
spring:
  application:
    name: firstProject #注册到zk的消费者名称
  zipkin:
    base-url: http://10.20.30.94:9411
  sleuth:
    sampler:
      #采样率值介于 0 到 1 之间,1 则表示全部采集
      probability: 1
  cloud:
    consul:
      host: 10.20.30.94:8500
      port: 8500
      discovery:
        service-name: ${spring.application.name}

#secondProject的Yml---------------------------
server:
  port: 5002
spring:
  application:
    name: secondProject #注册到zk的消费者名称
  zipkin:
    base-url: http://10.20.30.94:9411
  sleuth:
    sampler:
      #采样率值介于 0 到 1 之间,1 则表示全部采集
      probability: 1
  cloud:
    consul:
      host: 10.20.30.94:8500
      port: 8500
      discovery:
        service-name: ${spring.application.name}

#thirdProject的Yml---------------------------
server:
  port: 5003
spring:
  application:
    name: thirdProject #注册到zk的消费者名称
  zipkin:
    base-url: http://10.20.30.94:9411
  sleuth:
    sampler:
      #采样率值介于 0 到 1 之间,1 则表示全部采集
      probability: 1
  cloud:
    consul:
      host: 10.20.30.94:8500
      port: 8500
      discovery:
        service-name: ${spring.application.name}
三个项目的启动类
//firstProject的---------------------------
package com.rb;

import org.springframework.boot.SpringApplication;
import org.springframework.boot.autoconfigure.SpringBootApplication;

@SpringBootApplication
public class FirstProjectApplication {
    public static void main(String[] args) {
        SpringApplication.run(FirstProjectApplication.class,args);
    }
}

//secondProject的---------------------------
package com.rb;

import org.springframework.boot.SpringApplication;
import org.springframework.boot.autoconfigure.SpringBootApplication;
import org.springframework.cloud.client.discovery.EnableDiscoveryClient;

@SpringBootApplication
@EnableDiscoveryClient
public class SecondProjectApplication {
    public static void main(String[] args) {
        SpringApplication.run(SecondProjectApplication.class,args);
    }
}

//thirdProject的---------------------------
package com.rb;

import org.springframework.boot.SpringApplication;
import org.springframework.boot.autoconfigure.SpringBootApplication;
import org.springframework.cloud.client.discovery.EnableDiscoveryClient;

@SpringBootApplication
@EnableDiscoveryClient
public class ThirdProjectApplication {
    public static void main(String[] args) {
        SpringApplication.run(ThirdProjectApplication.class,args);
    }
}
三个项目的配置类
package com.rb.config;

import org.springframework.cloud.client.loadbalancer.LoadBalanced;
import org.springframework.context.annotation.Bean;
import org.springframework.context.annotation.Configuration;
import org.springframework.web.client.RestTemplate;

@Configuration
public class ApplicationContextBean
{
    @Bean
    @LoadBalanced
    public RestTemplate getRestTemplate()
    {
        return new RestTemplate();
    }
}
三个项目的Controller
//firstProject的---------------------------
package com.rb.controller;

import brave.Tracer;
import org.springframework.beans.factory.annotation.Autowired;
import org.springframework.web.bind.annotation.GetMapping;
import org.springframework.web.bind.annotation.RestController;
import org.springframework.web.client.RestTemplate;

@RestController
public class FirstController {
    public static final String URL = "http://secondProject";
    @Autowired
    private RestTemplate restTemplate;
    @Autowired
    private Tracer tracer;

    @GetMapping("/first/getMethod")
    public String getMethod(String val){
        String result = restTemplate.getForObject(URL+"/second/getMethod?val="+val, String.class);
        return result;
    }
}
//secondProject的---------------------------
package com.rb.controller;

import brave.Tracer;
import org.springframework.beans.factory.annotation.Autowired;
import org.springframework.web.bind.annotation.GetMapping;
import org.springframework.web.bind.annotation.RestController;
import org.springframework.web.client.RestTemplate;

@RestController
public class SecondController {
    public static final String URL = "http://thirdProject";
    @Autowired
    private RestTemplate restTemplate;
    @Autowired
    private Tracer tracer;

    @GetMapping("/second/getMethod")
    public String getMethod(String val){
        String result = restTemplate.getForObject(URL+"/third/getMethod?val="+val, String.class);
        return result;
    }
}
//thirdProject的---------------------------
package com.rb.controller;

import brave.Tracer;
import org.springframework.beans.factory.annotation.Autowired;
import org.springframework.web.bind.annotation.GetMapping;
import org.springframework.web.bind.annotation.RestController;

@RestController
public class ThirdController {
    @Autowired
    private Tracer tracer;
    @GetMapping("/third/getMethod")
    public String getMethod(String val){
        return val;
    }
}
测试
- 启动三个项目,然后访问firstProject
127.0.0.1:5001/first/getMethod?val=customer1234
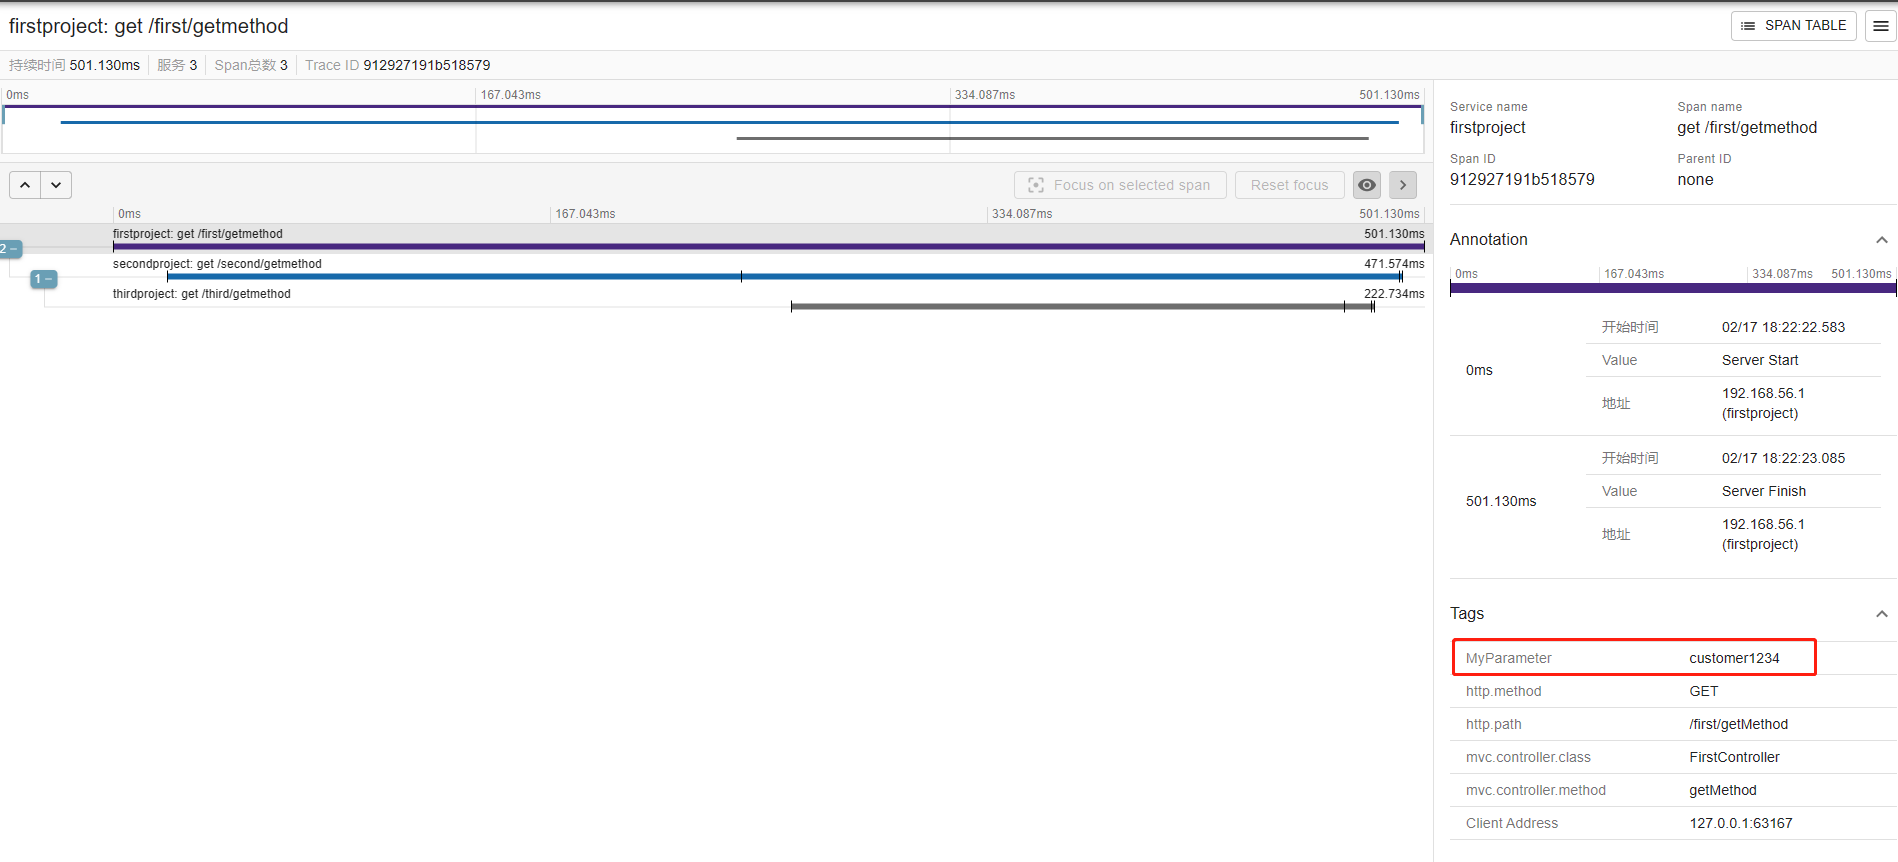
- 打开ZipKin,即可查到对应的调用链路
其他
通过代码中注入Tracer类,可获得调用Span ID或Trace ID
    @Autowired
    private Tracer tracer;

    @GetMapping("/first/getMethod")
    public String getMethod(String val){
        Span span = tracer.currentSpan();
        String traceId = span.context().traceIdString();//获得traceId
        String spanId = span.context().spanIdString();//获得spanId
        span.tag("MyParameter",val);//将入参传入,可通过ZipKin查看
        String result = restTemplate.getForObject(URL+"/second/getMethod?val="+val, String.class);
        return result;
    }
在ZipKin查看自定义的参数
上面代码自定义了一个“MyParameter”,发起请求后,打开Zipkin,找到对应链路后在此处查看


【推荐】国内首个AI IDE,深度理解中文开发场景,立即下载体验Trae
【推荐】编程新体验,更懂你的AI,立即体验豆包MarsCode编程助手
【推荐】抖音旗下AI助手豆包,你的智能百科全书,全免费不限次数
【推荐】轻量又高性能的 SSH 工具 IShell:AI 加持,快人一步
· 被坑几百块钱后,我竟然真的恢复了删除的微信聊天记录!
· 没有Manus邀请码?试试免邀请码的MGX或者开源的OpenManus吧
· 【自荐】一款简洁、开源的在线白板工具 Drawnix
· 园子的第一款AI主题卫衣上架——"HELLO! HOW CAN I ASSIST YOU TODAY
· Docker 太简单,K8s 太复杂?w7panel 让容器管理更轻松!