服务端&客户端注册进Eureka
目录
服务端(接口提供方)
创建项目
注意:springboot版本推荐使用2.3.3
导入Eureka客户端POM
        <dependency>
            <groupId>org.springframework.cloud</groupId>
            <artifactId>spring-cloud-starter-netflix-eureka-client</artifactId>
            <version>2.2.5.RELEASE</version>
        </dependency>
        # 注意此处导入的是spring-cloud-starter-netflix-eureka-client客户端
启动类添加注解
package com.project.eureka;

import org.springframework.boot.SpringApplication;
import org.springframework.boot.autoconfigure.SpringBootApplication;
import org.springframework.cloud.netflix.eureka.server.EnableEurekaServer;

@SpringBootApplication
@EnableEurekaServer //这个
public class EurekaApplication {

    public static void main(String[] args) {
        SpringApplication.run(EurekaApplication.class, args);
    }

}
配置YML
server:
  port: 8080
spring:
  application:
    name: service-project #对外暴露的名字,集群务必保证多实例名称一致,不可使用下划线
eureka:
  client:
    #表示是否将自己注册进EurekaServer默认为true
    register-with-eureka: true
    #是否从EurekaServer抓取已有的注册消息,默认为true,集群必须设置为true才能配合ribbon使用负载均衡
    fetch-registry: true
    serviceUrl:
      defaultZone: http://192.168.1.2:8761/eureka/,http://192.168.1.111:8761/eureka/
      # 有几台Eureka就写几个地址
  instance: #此处选配
    instance-id: consume.2 #注册后在Eureka管理页面中显示的名字
    prefer-ip-address: true #是否在Eureka管理页面显示ip
暴漏接口
将上面Yml中的名称返回
@RestController
public class DemoController {
    @Value("${eureka.instance.instance-id}")
    private String instanceId;

    @GetMapping("getInstanceId")
    public String getInstanceId(){
        return instanceId;
    }
}
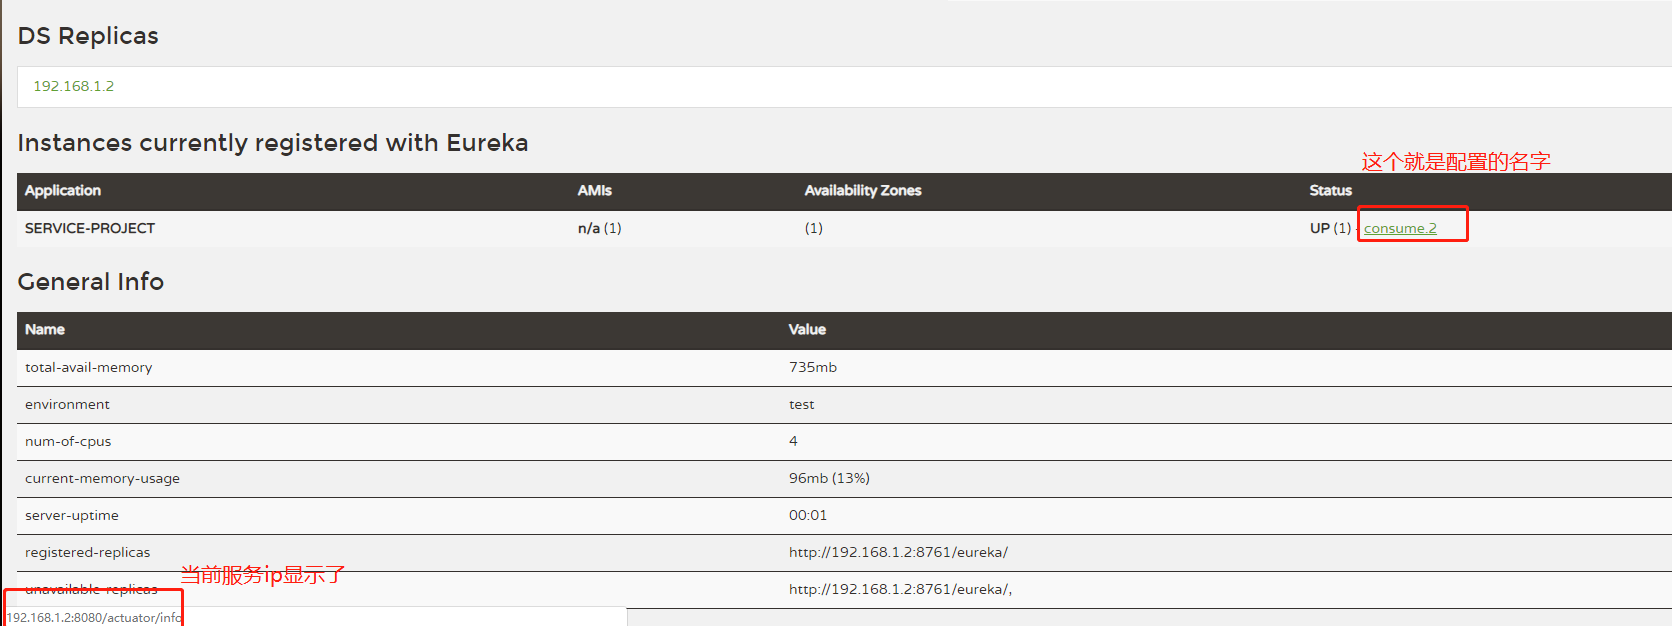
启动服务
如看见下图则配置正常

集群
为方便区分,将yml中eureka.instance.instance-id名称修改(可不修改)
server:
  port: 8080
spring:
  application:
    name: service-project #对外暴露的名字,集群务必保证多实例名称一致,不可使用下划线
eureka:
  client:
    #表示是否将自己注册进EurekaServer默认为true
    register-with-eureka: true
    #是否从EurekaServer抓取已有的注册消息,默认为true,集群必须设置为true才能配合ribbon使用负载均衡
    fetch-registry: true
    serviceUrl:
      defaultZone: http://192.168.1.2:8761/eureka/,http://192.168.1.111:8761/eureka/
      # 有几台Eureka就写几个地址
  instance: #此处选配
    instance-id: consume.111 #注册后在Eureka管理页面中显示的名字
    prefer-ip-address: true #是否在Eureka管理页面显示ip
配置成功后页面如下

客户端(接口调用方)
整体创建流程与服务端一致,差异如下
修改Yml文件
修改点:
- spring.application.name
- eureka.instance.instance.id (可不修改)
- server.port
server:
  port: 80
spring:
  application:
    name: client-project #不可使用下划线
eureka:
  client:
    #表示是否将自己注册进EurekaServer默认为true
    register-with-eureka: true
    #是否从EurekaServer抓取已有的注册消息,默认为true,集群必须设置为true才能配合ribbon使用负载均衡
    fetch-registry: true
    serviceUrl:
      defaultZone: http://192.168.1.2:8761/eureka/,http://192.168.1.111:8761/eureka/
  instance:
    instance-id: client.2
    prefer-ip-address: true
配置类
配置restTemplate
package com.project.client.conf;

import org.springframework.context.annotation.Bean;
import org.springframework.context.annotation.Configuration;
import org.springframework.web.client.RestTemplate;

@Configuration
public class RestTemplateConf {
    @Bean
    @LoadBalanced //添加此注解默认开启默认轮训访问,例如Eureka服务端注册了三个服务ABC,在调用的时候会依次循环调用
    public RestTemplate getRestTemplate() {
        return  new RestTemplate();
    }
}
启动类添加注解
package com.project.client;

import org.springframework.boot.SpringApplication;
import org.springframework.boot.autoconfigure.SpringBootApplication;
import org.springframework.cloud.netflix.eureka.EnableEurekaClient;

@SpringBootApplication
@EnableEurekaClient //这个
public class ClientApplication {

    public static void main(String[] args) {
        SpringApplication.run(ClientApplication.class, args);
    }

}
服务端接口调用
此处请求地址是SERVICE-PROJECT,即上面服务端yml中配置的spring.application.name
package com.project.client.controller;

import org.springframework.beans.factory.annotation.Autowired;
import org.springframework.web.bind.annotation.GetMapping;
import org.springframework.web.bind.annotation.RestController;
import org.springframework.web.client.RestTemplate;

@RestController
public class DemoController {
    @Autowired
    private RestTemplate restTemplate;

    @GetMapping("getInstance")
    public String getInstance(){
        return restTemplate.getForObject("http://SERVICE-PROJECT/getInstanceId",String.class);
    }
}
集群
为方便区分,将yml中eureka.instance.instance-id名称修改(可不修改)
server:
  port: 80
spring:
  application:
    name: client-project #不可使用下划线
eureka:
  client:
    #表示是否将自己注册进EurekaServer默认为true
    register-with-eureka: true
    #是否从EurekaServer抓取已有的注册消息,默认为true,集群必须设置为true才能配合ribbon使用负载均衡
    fetch-registry: true
    serviceUrl:
      defaultZone: http://192.168.1.2:8761/eureka/,http://192.168.1.111:8761/eureka/
  instance:
    instance-id: client.111
    prefer-ip-address: true
配置成功后页面如下

测试
访问客户端地址192.168.1.2/getInstance,正常会出现
consume.2->consume.111->consume.2....轮询输出


 浙公网安备 33010602011771号