
PHP02 PHPStrom2018.X与WAMPServer3.0.6的集成
脚本运行环境设置:设置PHPStorm中的脚本在PHP解析器上运行
1.进入Filie>>>setting>>languages and FrameWorks
选择php language level 为相应版本和选择CLI Interpreter为wamp按照目录下bin目录中的php。
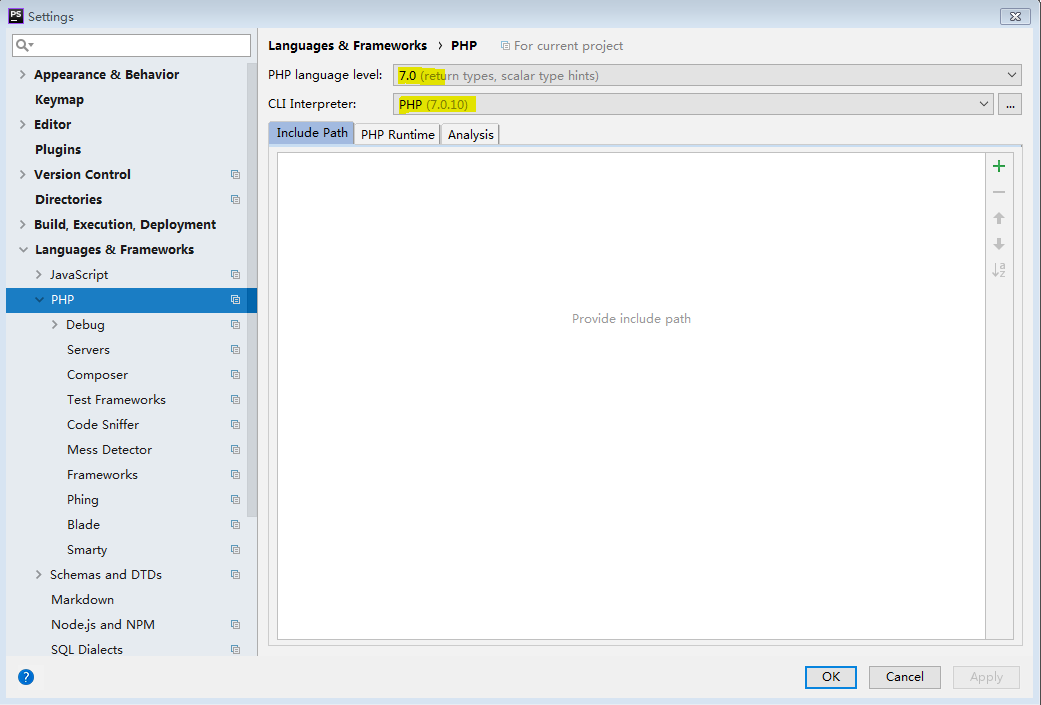
2.Include Path、PHP Runtime、Analysis使用默认设置。
点击ok,即可在phpstorm中直接运行php脚本。
在浏览器中运行PHP文件
1.在IDE中编写的PHP源码,如果使用浏览器运行调试,需要做的第一步工作是把编写的文件放在apache服务器目录中,才能进行请求/响应方式调试服务器端PHP文件。
2.wamp的服务器目录位于(根据wamp的安装位置)D:\wamp64\www。
3.在www目录下创建代码工作空间MyPHP,PHPStorm打开该工作空间
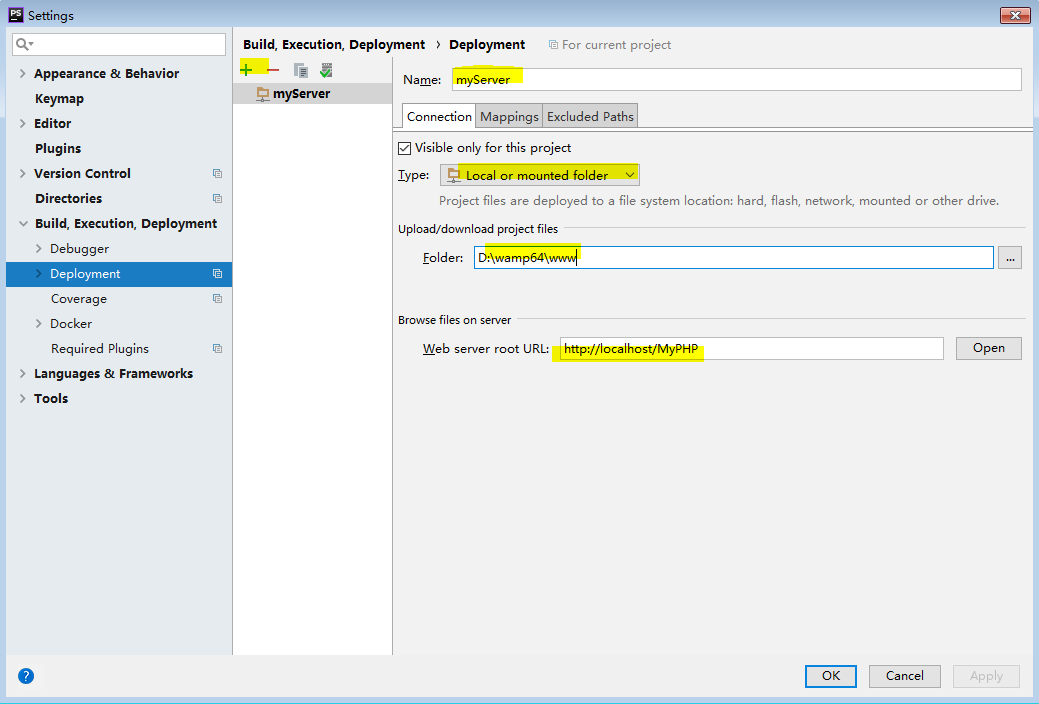
4.服务器部署设置:File>>>Setting>>>Build,Excution,Deployment>>>Deployment
第一步,点击“+”添加部署服务器。服务器类型:local or mounted folder
第二步,命名部署服务器:myServer
第三步,connection设置:项目文件上传下载目录设置为www;服务器文件目录设置为http://localhost/MyPHP
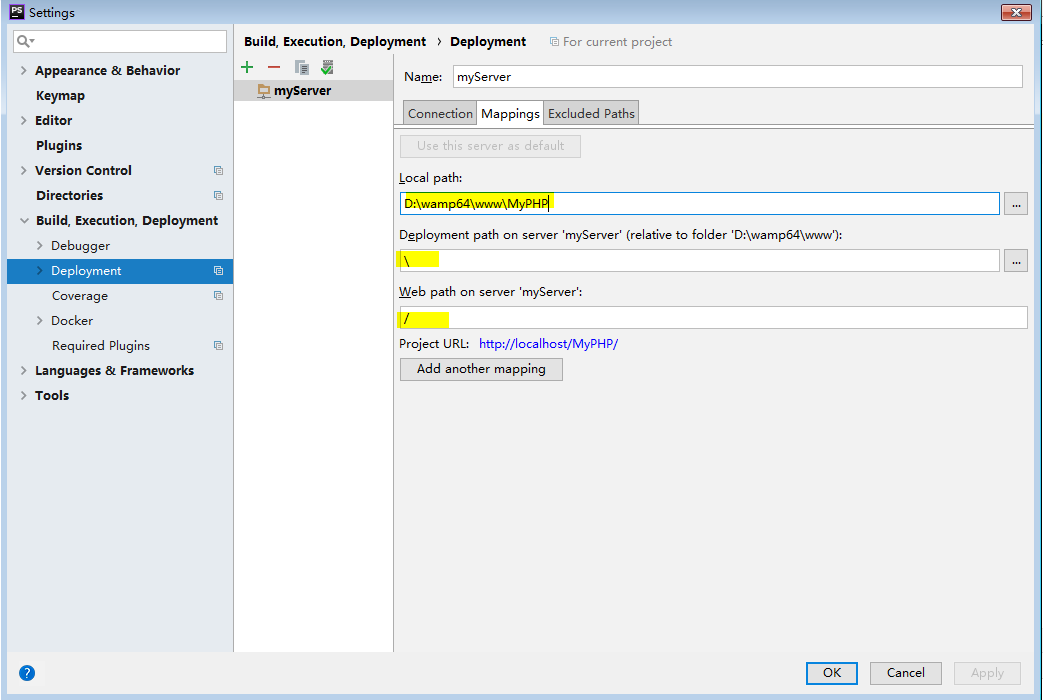
第四步:文件映射设置。把MyPHP目录下的文件全部映射为http://localhost/MyPHP
开启调试功能
在php.ini中开启xdebug功能
[xdebug]
zend_extension ="d:/wamp64/bin/php/php7.0.10/zend_ext/php_xdebug-2.4.1-7.0-vc14-x86_64.dll"

;xdebug.remote_enable = off
xdebug.profiler_enable = off
xdebug.profiler_enable_trigger = Off
xdebug.profiler_output_name = cachegrind.out.%t.%p
xdebug.profiler_output_dir = "d:/wamp64/tmp"
xdebug.show_local_vars = 0


; XDEBUG配置修改
xdebug.idekey = phpstorm
xdebug.remote_enable = on
xdebug.remote_host = localhost
xdebug.remote_port = 9000
xdebug.remote_handler = dbgp
xdebug.remote_mode = req
xdebug.remote_autostart = off
开启浏览器调试功能
1.设置phpstorm的xdebug的监听端口为9000
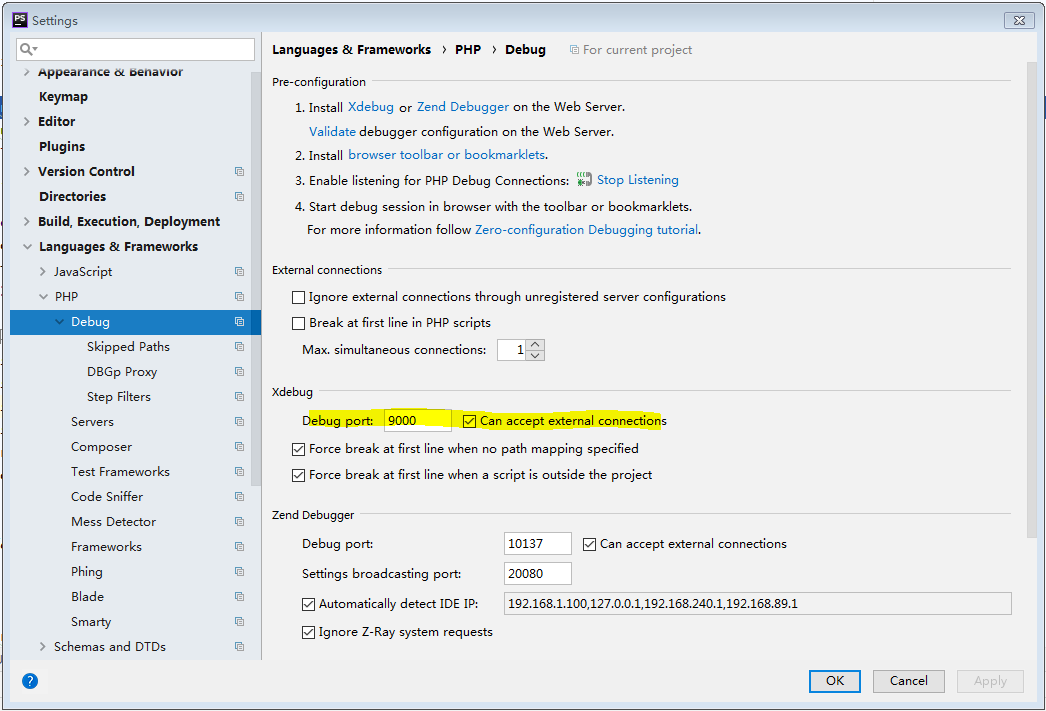
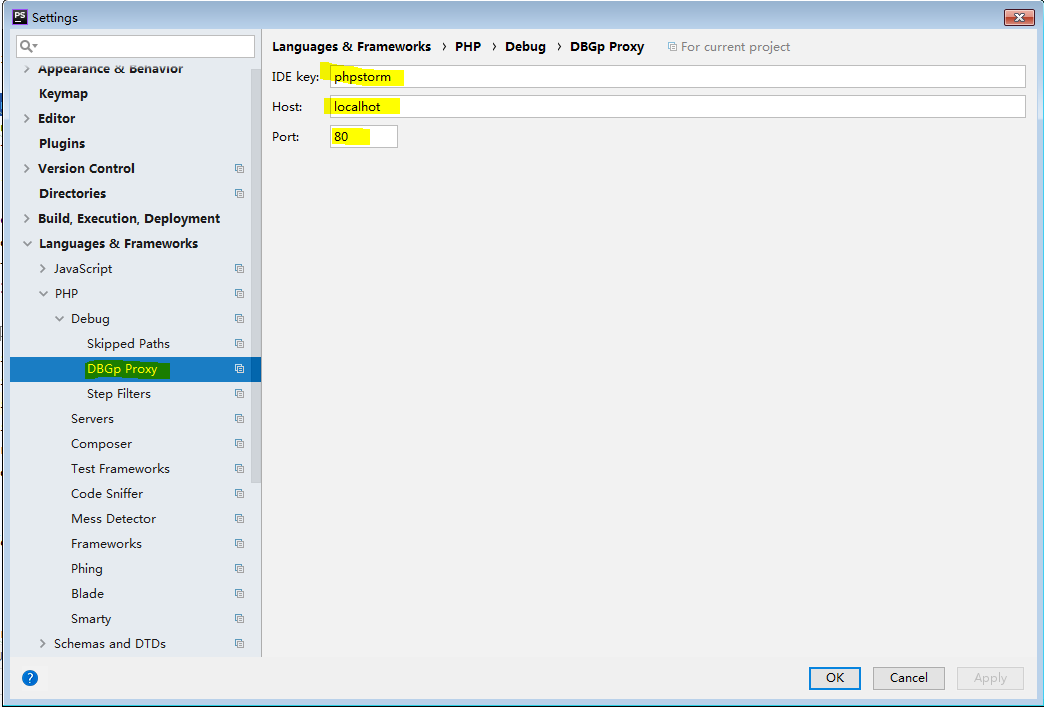
2.设置Debug的DBGP参数,IDE key为浏览器测试的sessionid。端口为80。
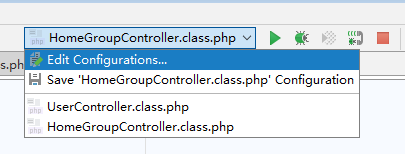
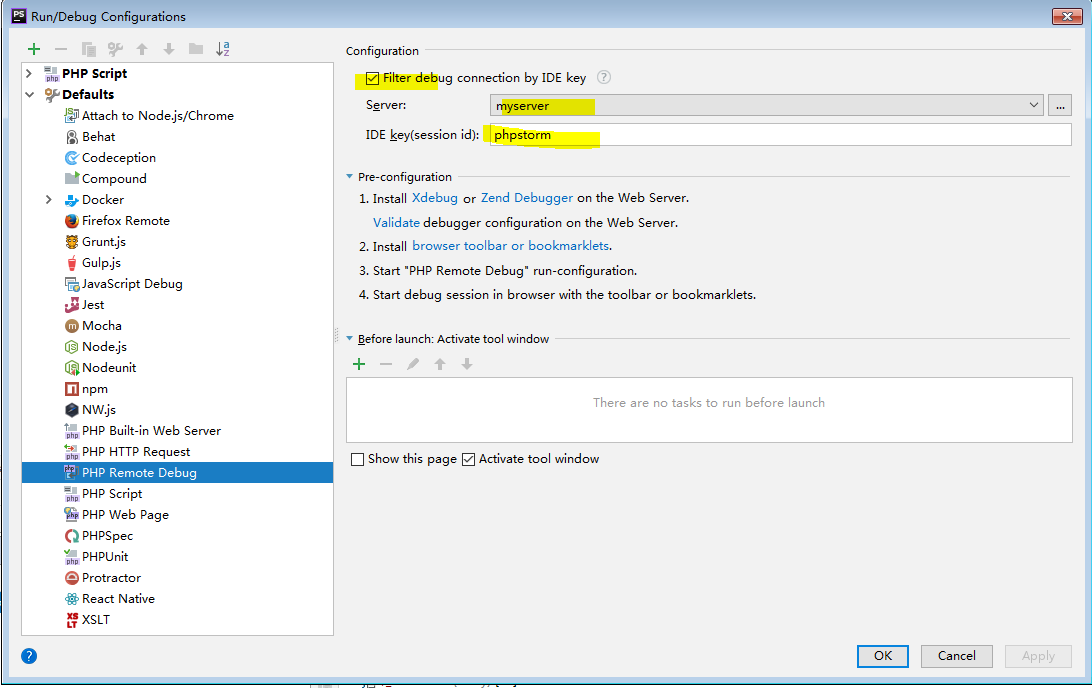
3.设置php-remote-debug。
计算机设置系统环境变量
XDEBUG_CONFIG="idekey=phpstorm remote_host=localhost profiler_enable=1"
chrome版本(67)
先点击监听,在点击调试,打断点,即可实现浏览器和phpstrom的联调。(项目必须从入口文件启动)
本博客文章未经许可,禁止转载和商业用途!
如有疑问,请联系: 2083967667@qq.com

 浙公网安备 33010602011771号