Java 学习笔记
1 JVM & JRE & JDK
1.1 JVM
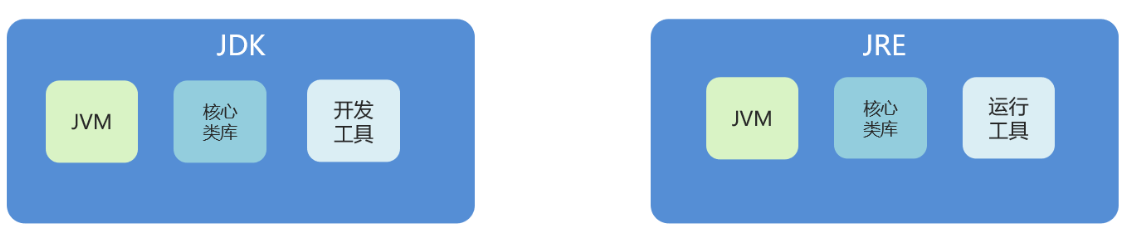
JVM(Java Virtual Machine, Java虚拟机)是运行 Java 程序的核心组件。它的作用是提供一个平台无关的运行环境,使得开发者可以编写一次代码(编译成字节码),然后在任何支持 JVM 的平台上运行。JVM 使得 Java 程序具有 跨平台性 和 安全性,并负责执行 Java 字节码、内存管理、垃圾回收等工作
1.2 JRE
JRE (Java Runtime Environment, Java运行环境),包含 JVM 和一些标准的 Java 类库,支持 Java 程序的运行
1.3 JDK
JDK (Java Development Kit, Java 开发工具包),包含 JRE 和开发 Java 程序所需的工具,如编译器(javac)、调试器(jdb)等
1.4 代码执行过程
1.4.1 编写 java 源代码
// HelloWorld.java
public class HelloWorld {
    public static void main(String[] args) {
        System.out.println("Hello, World!");
    }
}
1.4.2 编译
使用编译器 javac 将 Java 源代码(.java文件)编译成 字节码(.class文件)
字节码 是可以被 JVM 理解和执行的中间代码
机器码 不能在 JVM 上运行,而是在操作系统上运行
1.4.3 JVM 加载字节码文件
类加载器 将 .class 文件加载到 JVM 的内存中
1.4.4 JVM 解释字节码 或 JIT 编译
JVM 使用两种方式执行字节码:
- 解释执行
解释器逐行读取字节码并执行,效率低 - 即时编译(JIT 编译)
即时编译(Just-In-Time Compilation, JIT),在程序运行时,JVM 会将热点代码(即频繁执行的代码)动态编译成机器码,并缓存这些机器码,以便后续直接执行,避免重复解释执行
2 OOP
Object-Oriented Programming, 面向对象编程
在 Java 中,内存的分配由 堆内存(Heap)和 栈内存(Stack)负责
-
栈内存
存储:局部变量、方法调用信息
生命周期:方法调用时,局部变量在栈中分配空间,方法调用结束时,局部变量被销毁
特点:空间小 -
堆内存
存储:对象、数组
生命周期:由引用关系决定。只要有引用指向某个对象,它就不会被回收
特点:空间大
面向对象三大特征(封装,继承,多态)
2.1 封装
封装(Encapsulation) 是指将对象的状态(属性)和行为(方法)绑定在一起,并通过访问控制机制对外界进行限制,使得对象的内部实现细节对外界不可见,只提供对外的操作接口
封装的核心思想是 数据隐藏,即将对象的内部数据和实现细节隐藏起来,只暴露必要的接口给外部使用。外部代码不直接操作对象的内部数据,而是通过对象提供的公共方法来间接访问和修改数据
实现:
class Student {
    // 成员变量
    private String name;
    private int age;

    // 无参构造
    public Student() {}

    // 有参构造
    public Student(String name) {
        this.name = name;
    }

    public Student(int age) {
        this.age = age;
    }

    public Student(String name,int age) {
        this.name = name;
        this.age = age;
    }

    // setter 方法
    public void setAge(int age) {
        this.age = age;
    }
    // getter 方法
    public int getAge() {
        return age;
    }

    // 成员方法
    public void show() {
        System.out.println(name + "," + age);
    }
}
2.2 继承
继承(Inheritance)允许一个类(子类)从另一个类(父类)继承属性和方法。通过继承,子类能够重用父类的代码,并且可以扩展或修改父类的行为,形成类之间的层次结构
class Animal {
    private String name;
    private int age;

    public Animal() {
    }

    public Animal(String name, int age) {
        this.name = name;
        this.age = age;
    }

    public void getName() {
        System.out.println("name:" + this.name);
    }
}

class Cat extends Animal {
    public Cat() {
    }

    public Cat(String name, int age) {
        super(name, age);
    }

    public void voice() {
        System.out.println("miao");
    }
}

class test {
    public static void main(String[] args) {
        Cat c = new Cat("mimi", 1);
        c.getName(); // name: mimi
        c.voice(); // miao
    }
}
2.3 多态
多态(Polymorphism) 指的是同一个方法或操作,可以作用于不同类型的对象,表现出不同的行为。通过多态,同一操作可以在不同对象上表现出不同的行为
多态主要分为两种类型:
- 编译时多态(静态多态):也称为 方法重载(Method Overloading)
- 运行时多态(动态多态):也称为 方法重写(Method Overriding)
2.3.1 方法重载
class Calculator {
    // 加法操作
    public int add(int a, int b) {
        return a + b;
    }

    // 加法操作,三个参数
    public int add(int a, int b, int c) {
        return a + b + c;
    }

    // 加法操作,浮点数参数
    public double add(double a, double b) {
        return a + b;
    }
}

public class Test {
    public static void main(String[] args) {
        Calculator calc = new Calculator();

        // 调用不同的 add 方法,根据参数类型和数量的不同
        System.out.println(calc.add(1, 2));          // 输出: 3
        System.out.println(calc.add(1, 2, 3));       // 输出: 6
        System.out.println(calc.add(1.5, 2.5));      // 输出: 4.0
    }
}
2.3.2 方法重写
class Animal {
    // 父类方法
    public void makeSound() {
        System.out.println("Animal makes a sound");
    }
}

class Dog extends Animal {
    // 子类重写父类方法
    @Override
    public void makeSound() {
        System.out.println("Dog barks");
    }
}

class Cat extends Animal {
    // 子类重写父类方法
    @Override
    public void makeSound() {
        System.out.println("Cat meows");
    }
}

public class Test {
    public static void main(String[] args) {
        Animal animal1 = new Dog();  // 向上转型,父类引用指向子类对象
        Animal animal2 = new Cat();  // 向上转型,父类引用指向子类对象

        // 多态:调用的是子类重写的方法
        animal1.makeSound();  // 输出: Dog barks
        animal2.makeSound();  // 输出: Cat meows
    }
}
多态的实现需要使用向上转型(Upcasting)和向下转型(Downcasting)
- 向上转型
Animal animal = new Dog();- 向下转型
Dog dog = (Dog) animal;
| 重载(Overloading) | 重写(Overriding) | |
|---|---|---|
| 定义 | 同一类中方法名相同,参数列表不同 | 子类中重新定义父类的方法 |
| 阶段 | 编译时(静态多态) | 运行时(动态多态) |
| 方法签名 | 方法名相同,参数列表必须不同 | 方法名、参数列表、返回值类型完全相同 |
| 访问修饰符 | 任意 | 不能比父类方法的访问权限更低 |
| 继承 | 不需要 | 必须有 |
2.4 static
创建不依赖于类的实例对象的变量或方法。使得这些成员可以在类加载时直接访问,而不需要先创建该类的对象
class Counter {
    private static int count = 0;
    public static void increment() {
        count++;
        System.out.println("Count: " + count);
    }
    public static int getCount() {
        return count;
    }
}

public class Test {
    public static void main(String[] args) {
        Counter.increment();  // 输出: Count: 1
        Counter.increment();  // 输出: Count: 2
        Counter.increment();  // 输出: Count: 3

        System.out.println("Final Count: " + Counter.getCount());  // 输出: Final Count: 3
    }
}
2.5 权限修饰符
| public | protected | 默认 | private | |
|---|---|---|---|---|
| 同一类中 | √ | √ | √ | √ |
| 同一包中的类 | √ | √ | √ | |
| 不同包的子类 | √ | √ | ||
| 不同包中的无关类 | √ |
2.6 final
final:不可改变,最终的含义。可以用于修饰类、方法和变量
- 类:被修饰的类,不能被继承
- 方法:被修饰的方法,不能被重写
- 变量:被修饰的变量,有且仅能被赋值一次
2.7 抽象类 与 接口
2.7.1 抽象类
抽象类 是一个无法实例化的类,它可以包含抽象方法和非抽象方法。抽象类的目的是为了让子类继承并实现抽象方法,通常用于为其他类提供一个模板或基础
抽象方法 :没有方法体的方法
抽象类:包含抽象方法的类
abstract class animal {
    private String name;
    private int age;

    public animal() {
    }

    public animal(String name, int age) {
        this.name = name;
        this.age = age;
    }

    public void getName() {
        System.out.println("name: " + this.name);
    }

    abstract public void voice();
}

class Cat extends animal {
    public Cat() {
        super();
    }

    public Cat(String name, int age) {
        super(name, age);
    }

    @Override
    public void voice() {
        System.out.println("miao");
    }
}

public class AbstractTest {
    public static void main(String[] args) {
        //Animal 是抽象类,不能实例化
//        Animal animal= new Animal();
        Cat c = new Cat("mimi", 1);
        c.getName(); // mimi
        c.voice(); // miao
    }
}
2.7.2 接口
接口(Interface)是一种特殊的引用类型,它类似于类,但接口只包含常量(static final 变量)和方法声明(abstract 方法),没有方法的实现。接口可以通过 implements 关键字在类中实现,类继承接口并提供接口 所有方法 的具体实现
接口中的变量默认被public static final修饰
方法默认被public abstract修饰
需要实现某个接口的类,使用关键字implements
interface Animal {
    void voice();
}

class Cat implements Animal {
    private String name;
    private int age;

    public Cat() {
    }

    public Cat(String name, int age) {
        this.name = name;
        this.age = age;

    }

    @Override
    public void voice() {
        System.out.println("miao");
    }
}

public class InterfaceTest {
    public static void main(String[] args) {
        Cat c = new Cat("mimi", 1);
        c.voice();
    }
}
Q:如果一个接口中,有10个抽象方法,但是我在实现类中,只需要用其中一个,该怎么办?
A:可以在接口跟实现类中间,新建一个中间类(适配器类),让这个适配器类去实现接口,对接口里面的所有的方法做 空重写。让子类继承这个适配器类,想要用到哪个方法,就重写哪个方法。因为中间类没有什么实际的意义,所以一般会把中间类定义为抽象的,不让外界创建对象
| 抽象类 | 接口 | |
|---|---|---|
| 构造方法 | 可以有 | 不能有 |
| 方法 | 抽象方法 和 具体方法 | 抽象方法(Java 8 后可以有 默认方法) |
| 字段 | 实例变量 和 静态变量 | 常量(public static final) |
| 继承/实现 | 单继承(extends) | 多继承(implements) |
| 实例化 | 不能实例化 | 不能实例化 |
| 方法访问修饰符 | public、protected、private |
public |
| 默认方法 | 不支持 | Java8 后支持默认方法 |
| 静态方法 | 支持 | Java8 后支持静态方法 |
使用场景:
-
抽象类
当多个类有共性行为和属性时,使用抽象类来封装这些共享代码
当你希望有部分实现并共享实现时,使用抽象类 -
接口
当你希望提供某种行为的规范,不关心具体实现时,使用接口
如果希望一个类能够继承多个行为时,使用接口(因为 Java 不支持类的多重继承,但支持多接口实现)
默认方法(default method) 是 Java 8 引入的一个新特性,允许在 接口 中提供方法的 默认实现,从而避免了接口的实现类强制必须实现所有接口方法的要求。默认方法使用 default 关键字来定义,并且可以有方法体。接口的实现类如果没有实现这个方法,默认会使用接口中提供的实现。
Q: 为什么需要默认方法?
A: 在 Java 8 之前,接口中的所有方法默认都是 抽象的,即没有方法体,必须由实现类提供具体实现。这种设计使得接口不能为已有方法提供实现,从而增加了代码的维护成本。特别是当接口已经广泛使用时,增加新的方法可能会导致大量实现类需要修改。
Q: Java8 为什么要引入默认方法,而不是直接修改 interface 支持非抽象方法
A:
- 向后兼容性: 在 Java 8 之前,所有接口中的方法默认都是 抽象方法,实现类必须提供具体实现。如果 Java 8 改变接口的行为,允许接口中出现非抽象方法,那么现有的接口实现类(在 Java 8 发布之前编写的类)将会破坏,因为这些类可能没有实现新增的非抽象方法,导致编译错误。为了避免这种破坏性的改动,Java 8 选择引入 默认方法,即为接口的方法提供默认实现。这样,老的接口和实现类可以继续工作,而 新的接口方法可以通过默认方法提供实现,而不会破坏现有代码
- 接口的设计哲学:接口的本质目的是 定义行为,即规定类应该具备哪些功能,但不提供具体的实现。支持非抽象方法违背了接口的设计初衷
2.8 内部类
按定义的位置来分
- 成员内部类,类定义在了成员位置 (类中方法外称为成员位置,无static修饰的内部类)
class Outer {
    private String name = "outer class";

    class Inner {
        public void innerMethod() {
            System.out.println(Outer.this.name); // outer class
            System.out.println(name); // outer class
        }
    }

    public Inner getOuterInstance() {
        Inner i = new Inner();
        return i;
    }
}

public static void main(String[] args) {
    Outer o = new Outer();
    // 也可以这样直接创建【成员非静态内部类】的实例
    // Outer.Inner inner = o.new Inner();
    Outer.Inner inner = o.getOuterInstance();
    inner.innerMethod();
}
- 静态内部类,类定义在了成员位置 (类中方法外称为成员位置,有static修饰的内部类)
class StaticOuter {
    private String name = "outer class";
    static private String static_name = "static outer";

    static class Inner {
        public void innerMethod() {
            // 无法从 static 上下文引用非 static 字段 'name'
            // System.out.println(name);
            System.out.println(static_name);
        }
    }

}

public class InnerClass {
    public static void main(String[] args) {
        StaticOuter so = new StaticOuter();
        // 静态内部类可以直接通过类名创建实例
        // StaticOuter.Inner si = so.new Inner();
        StaticOuter.Inner si = new StaticOuter.Inner();
        si.innerMethod();
    }
}
- 局部内部类,类定义在方法内
class Outer {
    private String name = "Outer class";

    // 外部类方法
    public void outerMethod() {
        // 局部内部类定义在方法内
        class Inner {
            public void display() {
                System.out.println("Accessing outer class's name: " + name);
            }
        }

        // 创建局部内部类的实例
        Inner inner = new Inner();
        inner.display();
    }

    public static void main(String[] args) {
        Outer outer = new Outer();
        outer.outerMethod();  // 调用外部类方法
    }
}
- 匿名内部类,没有名字的内部类,可以在方法中,也可以在类中方法外
一般用于:将匿名内部类作为参数传递
interface AnimalInterface {
    void sound();
}

public class Main {
    public static void main(String[] args) {
        AnimalInterface animal = new AnimalInterface() {
            public void sound() {
                System.out.println("Dog barks");
            }
        };
        animal.sound();
    }
}
3 API
3.1 Math
Math 类属于
java.lang包,它是一个工具类,其中的所有方法和字段都是静态的(static)。Math 类不能被实例化,因此所有的操作都是通过类名直接调用,如Math.abs(a, b)
java.lang包 默认导入,所以直接使用
public static int abs(int a)					// 返回参数的绝对值
public static double ceil(double a)				// 返回大于或等于参数的最小整数
public static double floor(double a)			// 返回小于或等于参数的最大整数
public static int round(float a)				// 按照四舍五入返回最接近参数的int类型的值
public static int max(int a,int b)				// 获取两个int值中的较大值
public static int min(int a,int b)				// 获取两个int值中的较小值
public static double pow (double a,double b)	// 计算a的b次幂的值
public static double random()					// 返回一个[0.0,1.0)的随机值
3.2 System
java.lang包
同 Math 类,System 也是通过类名直接调用
public static long currentTimeMillis()			// 获取当前时间所对应的毫秒值(当前时间为0时区所对应的时间即就是英国格林尼治天文台旧址所在位置)
public static void exit(int status)				// 终止当前正在运行的Java虚拟机,0表示正常退出,非零表示异常退出
public static native void arraycopy(Object src,  int  srcPos, Object dest, int destPos, int length); // 进行数值元素copy
3.3 Runtime
java.lang包
public static Runtime getRuntime()		//当前系统的运行环境对象
public void exit(int status)			//停止虚拟机
public int availableProcessors()		//获得CPU的线程数
public long maxMemory()				    //JVM能从系统中获取总内存大小(单位byte)
public long totalMemory()				//JVM已经从系统中获取总内存大小(单位byte)
public long freeMemory()				//JVM剩余内存大小(单位byte)
public Process exec(String command) 	//运行cmd命令
3.4 Object
Object 是所有类的超类,即所有的类都是 Object 的子类
public String toString()				//返回该对象的字符串表示形式(可以看做是对象的内存地址值)
public boolean equals(Object obj)		//比较两个对象地址值是否相等;true表示相同,false表示不相同
protected Object clone()    			//对象克隆
3.4.1 toString()
Object 的
toString()默认实现public String toString() { return getClass().getName() + "@" + Integer.toHexString(hashCode()); }即 类的完全限定名@对象的哈希码的十六进制表示
示例
package com.example;

public class ObjectDemo {
    public static void main(String[] args) {
        Test t = new Test();
        System.out.println(t.toString()); // com.example.Test@2f4d3709
    }
}

class Test {

}
通常 override 重写 toString:
package com.example;

public class ObjectDemo {
    public static void main(String[] args) {
        Test t = new Test();
        Student s = new Student("tom", 12);
        System.out.println(s.toString()); // Student{name='tom', age=12}
        System.out.println(s); // Student{name='tom', age=12} 直接打印对象也是 toString

    }
}

class Student {

    private String name;       // 姓名
    private int age;        // 年龄

    public Student() {
    }

    public Student(String name, int age) {
        this.name = name;
        this.age = age;
    }

    @Override
    public String toString() {
        return "Student{" +
                "name='" + name + '\'' +
                ", age=" + age +
                '}';
    }
}
3.4.2 equals()
Object 的
equals()默认实现,比较的是对象的 地址public boolean equals(Object obj) { return (this == obj); }
@Override
public boolean equals(Object object) {
    if (this == object) return true;  // 如果两个对象地址相同,直接返回 true
    if (object == null || getClass() != object.getClass()) return false;  // 如果对象为 null 或类型不匹配,返回 false
    Student student = (Student) object;  // 强制类型转换为 Student
    return age == student.age && Objects.equals(name, student.name);  // 比较 age 和 name
}
3.4.3 clone()
Object 的
clone()默认实现,只有实现了Cloneable接口的类才可以支持克隆@IntrinsicCandidate protected native Object clone() throws CloneNotSupportedException;
Cloneable是一个标记接口(marker interface),这意味着它不包含任何方法,而是通过接口的存在来标识类的特性或行为
public interface Cloneable {
}
浅拷贝示例,需要重写clone()方法
package com.example;

import java.util.Objects;

public class ObjectDemo {
    public static void main(String[] args) {
        Student s1 = new Student("tom", 12);
        Student s2 = null;
        try {
            s2 = (Student) s1.clone();
        } catch (CloneNotSupportedException e) {
            e.printStackTrace(); // 捕获异常
        }
        System.out.println(s1.equals(s2)); // True
    }
}

class Student implements Cloneable {
    private String name;       // 姓名
    private int age;        // 年龄

    public Student() {
    }

    public Student(String name, int age) {
        this.name = name;
        this.age = age;
    }

    @Override
    public String toString() {
        return "Student{" +
                "name='" + name + '\'' +
                ", age=" + age +
                '}';
    }

    @Override
    public boolean equals(Object object) {
        if (this == object) return true;
        if (object == null || getClass() != object.getClass()) return false;
        Student student = (Student) object;
        return age == student.age && Objects.equals(name, student.name);
    }

    @Override
    protected Object clone() throws CloneNotSupportedException {
        return super.clone(); // 浅拷贝
    }
}
这里用了
Objects.equals()
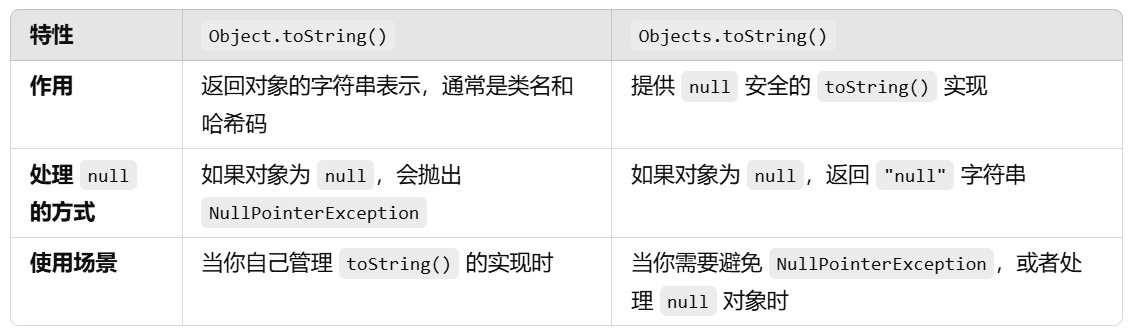
3.5 Objects
java.util.Objects包(需要导包)
public static String toString(Object o) 		// 获取对象的字符串表现形式
public static boolean equals(Object a, Object b)	// 比较两个对象是否相等
public static boolean isNull(Object obj)		// 判断对象是否为null
public static boolean nonNull(Object obj)		// 判断对象是否不为null
3.6 BigInteger
java.math.BigInteger
// 构造方法
public BigInteger(int num, Random rnd) 		//获取随机大整数,范围:[0 ~ 2的num次方-1]
public BigInteger(String val) 			//获取指定的大整数
public BigInteger(String val, int radix) 	//获取指定进制的大整数

// 静态方法获取 BigInteger 对象
public static BigInteger valueOf(long val) 	//静态方法获取BigInteger的对象,内部有优化

// 成员方法
public BigInteger add(BigInteger val)					//加法
public BigInteger subtract(BigInteger val)				//减法
public BigInteger multiply(BigInteger val)				//乘法
public BigInteger divide(BigInteger val)				//除法
public BigInteger[] divideAndRemainder(BigInteger val)			//除法,获取商和余数
public boolean equals(Object x) 					//比较是否相同
public BigInteger pow(int exponent) 					//次幂、次方
public BigInteger max/min(BigInteger val) 				//返回较大值/较小值
public int intValue(BigInteger val) 					//转为int类型整数,超出范围数据有误
3.7 BigDecimal
public BigDecimal add(BigDecimal value)				// 加法运算
public BigDecimal subtract(BigDecimal value)		        // 减法运算
public BigDecimal multiply(BigDecimal value)			// 乘法运算
public BigDecimal divide(BigDecimal value)			// 触发运算
3.8 Date
java.util.DateJDK 1.0
// 构造函数
public Date() // 从运行程序的此时此刻到时间原点经历的毫秒值,转换成 Date 对象,分配 Date 对象并初始化此对象,以表示分配它的时间(精确到毫秒)
public Date(long date) // 将指定参数的毫秒值 date,转换成 Date 对象,分配 Date 对象并初始化此对象,以表示自从标准基准时间(称为“历元(epoch)”,即1970年1月1日00:00:00 GMT)以来的指定毫秒数


public long getTime() // 把日期对象转换成对应的时间毫秒值。
public void setTime(long time) // 把方法参数给定的毫秒值设置给日期对象
示例
public static void main(String[] args) {
    Date d = new Date();
    System.out.println(d.getTime()); // 1733379255438
    System.out.println(d); // Thu Dec 05 13:41:51 CST 2024
    System.out.println(new Date(0L)); // Thu Jan 01 08:00:00 CST 1970
}
3.9 Calendar
java.util.CalendarJDK 1.1
日历类是一个抽象类,不能创建对象
public abstract class Calendar implements Serializable, Cloneable, Comparable<Calendar>
使用其子类 GregorianCalendar,Gregorian 公历
public class GregorianCalendar extends Calendar
两种使用方式:
- 直接构造
GregorianCalendar gregorianCalendar = new GregorianCalendar();
- Calendar 的
getInstance()静态方法
这是 静态工厂方法(Static Factory Method) 是一种通过静态方法返回类的实例的 设计模式。与通过构造方法直接创建对象相比,静态工厂方法的最大优势是可以控制返回的对象类型
    Calendar gregorianCalendar = Calendar.getInstance();
    System.out.println(gregorianCalendar.getClass()); // class java.util.GregorianCalendar
常用方法
| 方法名 | 说明 |
|---|---|
| public static Calendar getInstance() | 获取一个它的子类 GregorianCalendar 对象 |
| public int get(int field) | 获取某个字段的值。field 参数表示获取哪个字段的值, 可以使用 Calender 中定义的常量来表示: Calendar.YEAR : 年 Calendar.MONTH :月 Calendar.DAY_OF_MONTH:月中的日期 Calendar.HOUR:小时 Calendar.MINUTE:分钟 Calendar.SECOND:秒 Calendar.DAY_OF_WEEK:星期 |
| public void set(int field, int value) | 设置某个字段的值 |
| public void add(int field, int amount) | 为某个字段增加/减少指定的值 |
示例:
public static void main(String[] args) {
    Calendar gregorianCalendar = Calendar.getInstance();
    int year = gregorianCalendar.get(Calendar.YEAR);
    int month = gregorianCalendar.get(Calendar.MONTH);
    int date = gregorianCalendar.get(Calendar.DATE);
    int hour = gregorianCalendar.get(Calendar.HOUR_OF_DAY); // 24h制
//   int hour = gregorianCalendar.get(Calendar.HOUR);  12h制
    int minute = gregorianCalendar.get(Calendar.MINUTE);
    int second = gregorianCalendar.get(Calendar.SECOND);

    System.out.println(year + "-" + (month + 1) + "-" + date
            + " " + hour + ":" + minute + ":" + second
    ); // 2024-12-5 15:15:48
}
3.10 java.time
JDK 8
| JDK8时间类类名 | 作用 |
|---|---|
| ZoneId | 时区 |
| Instant | 时间戳 |
| ZoneDateTime | 带时区的时间 |
| DateTimeFormatter | 用于时间的格式化和解析 |
| LocalDate | 年、月、日 |
| LocalTime | 时、分、秒 |
| LocalDateTime | 年、月、日、时、分、秒 |
| Duration | 时间间隔(秒,纳,秒) |
| Period | 时间间隔(年,月,日) |
| ChronoUnit | 时间间隔(所有单位) |
3.10.1 Instant
表示时间线上的一个瞬间,它是一个基于 UTC 时区的时间点
UTC(Coordinated Universal Time, 协调世界时),如 2024-12-05T07:22:58.138799700Z
static Instant now()			        // 获取当前时间的 Instant 对象(标准时间)
						// 当前时刻与 1970 年 1 月 1 日 00:00:00 UTC 之间的时间差
static Instant ofXxxx(long epochMilli) 		// 根据(秒/毫秒/纳秒)获取 Instant 对象
ZonedDateTime atZone(ZoneIdzone) 		// 指定时区
boolean isBefore(Instant otherInstant)		// 判断当前 Instant 对象是否在指定的 otherInstant 之前
boolean isAfter(Instant otherInstant)		// 判断当前 Instant 对象是否在指定的 otherInstant 之后
Instant minusXxx(long millisToSubtract)		// 减少时间系列的方法
Instant plusXxx(long millisToSubtract) 		// 增加时间系列的方法
3.10.2 DateTimeFormatter
将 日期时间对象 转换为 字符串,或者将 字符串 解析为 日期时间对象
public static void main(String[] args) {
    DateTimeFormatter formatter = DateTimeFormatter.ofPattern("yyyy-MM-dd HH:mm:ss EE a", Locale.US);
    LocalDateTime now = LocalDateTime.now();
    System.out.println(formatter.format(now)); // 2024-12-05 15:42:10 Thu PM
}
ofPattern() 有重载方法,默认 Locale 是 Locale.CHINA,这样就变成 2024-12-05 15:42:10 周四 下午
public static DateTimeFormatter ofPattern(String pattern) {
    return new DateTimeFormatterBuilder().appendPattern(pattern).toFormatter();
}
public static DateTimeFormatter ofPattern(String pattern, Locale locale) {
    return new DateTimeFormatterBuilder().appendPattern(pattern).toFormatter(locale);
}
3.10.3 LocalDate
LocalDate today = LocalDate.now();  // 获取当前系统日期
LocalDate specificDate = LocalDate.of(2024, 12, 5);  // 创建 2024-12-05 的日期
LocalDate parsedDate = LocalDate.parse("2024-12-05");  // 使用 ISO-8601 格式解析日期

int year = today.getYear();  // 获取年份 2024
int month = today.getMonthValue();  // 获取月份 12
int dayOfMonth = today.getDayOfMonth();  // 获取月份中的日期 THURSDAY
int dayOfWeek = today.getDayOfWeek().getValue();  // 获取星期几 4

boolean isBefore = today.isBefore(specificDate);  // 判断今天是否在指定日期之前
boolean isAfter = today.isAfter(specificDate);    // 判断今天是否在指定日期之后
boolean isEqual = today.isEqual(specificDate);    // 判断两个日期是否相等

LocalDate newDate1 = today.plusDays(5);  // 加 5 天
LocalDate newDate2 = today.minusMonths(2);  // 减 2 个月
LocalDate newDate3 = today.plusYears(1);  // 加 1 年

boolean isLeapYear = today.isLeapYear();  // 判断是否是闰年

// 格式化
DateTimeFormatter formatter = DateTimeFormatter.ofPattern("yyyy-MM-dd");
String formattedDate = today.format(formatter);  // 将 LocalDate 格式化为字符串
3.10.4 LocalTime
LocalTime now = LocalTime.now();  // 获取当前的本地时间
LocalTime specificTime = LocalTime.of(15, 30, 45);  // 创建 15:30:45 的时间
LocalTime parsedTime = LocalTime.parse("15:30:45");  // 默认格式解析

int hour = now.getHour();  // 获取小时(0到23)
int minute = now.getMinute();  // 获取分钟(0到59)
int second = now.getSecond();  // 获取秒(0到59)

LocalTime newTime1 = now.plusHours(1);  // 当前时间加 1 小时
LocalTime newTime5 = now.minusMinutes(15);  // 当前时间减 15 分钟
LocalTime newTime3 = now.plusSeconds(45);  // 当前时间加 45 秒

boolean isBefore = time1.isBefore(time2);  // 判断 time1 是否早于 time2
boolean isAfter = time1.isAfter(time2);  // 判断 time1 是否晚于 time2
boolean isEqual = time1.equals(time2);  // 判断 time1 是否等于 time2

// 格式化
DateTimeFormatter formatter = DateTimeFormatter.ofPattern("HH:mm:ss");  // 定义时间格式
String formattedTime = now.format(formatter);  // 格式化时间
3.10.5 LocalDateTime
LocalDateTime = LocalDate + LocalTime
3.10.6 Duration
用于表示两个时间点之间的时间差
public static void main(String[] args) {
    DateTimeFormatter formatter = DateTimeFormatter.ofPattern("yyyy-MM-dd HH:mm:ss", Locale.US);
    LocalDateTime now = LocalDateTime.now();
    LocalDateTime birth = LocalDateTime.parse("2000-07-31 00:00:00",formatter);
    Duration between = Duration.between(birth,now);
    long days = between.toDays(); // 8893
    long hours = between.toHours(); // 213448
    System.out.println(between); // PT213448H15M2.5187004S
}
3.10.7 Period
用于表示两个日期之间的日期差
public static void main(String[] args) {
    LocalDate now = LocalDate.now();
    LocalDate birth = LocalDate.parse("2000-07-31");
    Period between = Period.between(birth, now);
    int years = between.getYears(); // 24
    int months = between.getMonths(); // 4
    int days = between.getDays(); // 5
    System.out.println(between); // P24Y4M5D
}
3.11 包装类
| 基本类型 | 对应的包装类(位于java.lang包中) |
|---|---|
| byte | Byte |
| short | Short |
| int | Integer |
| long | Long |
| float | Float |
| double | Double |
| char | Character |
| boolean | Boolean |
以 Integer 类为例
| 方法名 | 说明 |
|---|---|
| public static Integer valueOf(int i) | 返回表示指定的 int 值的 Integer 实例 |
| public static Integer valueOf(String s) | 返回保存指定 String 值的 Integer 对象 |
| static string tobinarystring(int i) | 得到二进制 |
| static string tooctalstring(int i) | 得到八进制 |
| static string toHexstring(int i) | 得到十六进制 |
| static int parseInt(string s) | 将字符串类型的整数转成 int 类型的整数 |
4 Collection
Q: 数组和集合的区别
- 相同点
都是容器,可以存储多个数据- 不同点
数组的长度是不可变的,集合的长度是可变的
数组可以存基本数据类型和引用数据类型
集合只能存引用数据类型,如果要存基本数据类型,需要存对应的包装类
Collection 方法
| 方法名 | 说明 |
|---|---|
| boolean add(E e) | 添加元素 |
| boolean remove(Object o) | 从集合中移除指定的元素 |
| boolean removeIf(Object o) | 根据条件进行移除 |
| void clear() | 清空集合中的元素 |
| boolean contains(Object o) | 判断集合中是否存在指定的元素 |
| boolean isEmpty() | 判断集合是否为空 |
| int size() | 集合的长度,也就是集合中元素的个数 |
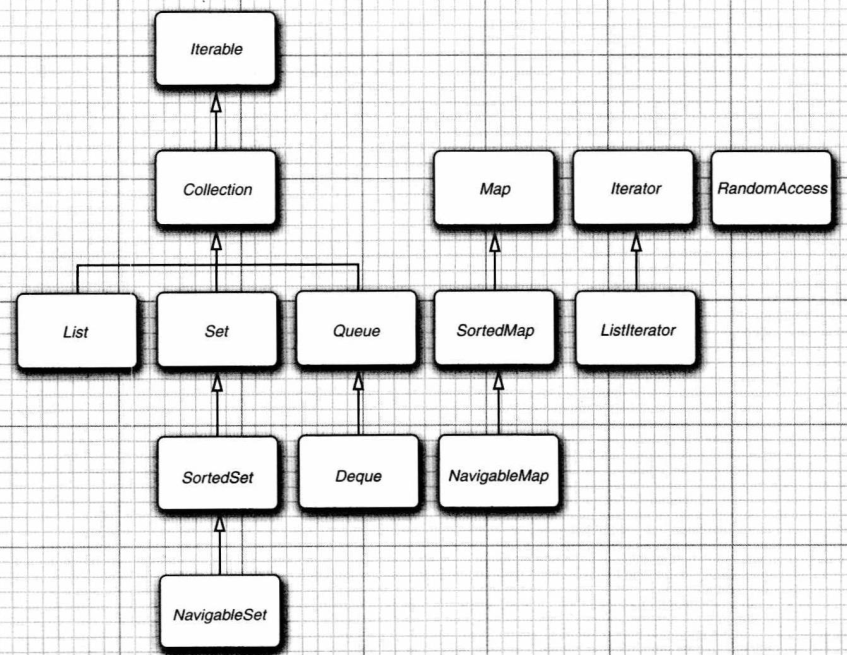
集合框架中的接口
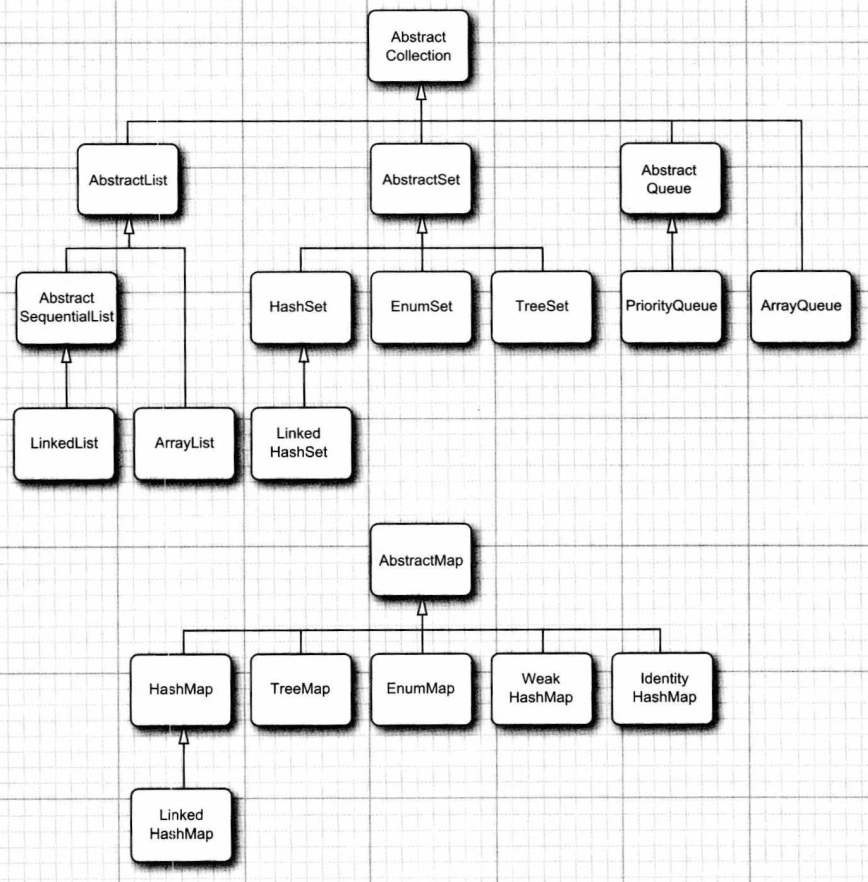
集合框架中具体集合
| 集合类型 | 描述 |
|---|---|
| ArrayList | 可以动态增长和缩减的一个索引序列 |
| LinkedList | 可以在任何位置高效插入和删除的一个有序序列 |
| ArrayDeque | 实现为循环数组的一个双端队列 |
| HashSet | 没有重复元素的一个无序集合 |
| TreeSet | 一个有序集合 |
| EnumSet | 一个包含枚举类型值的集合 |
| LinkedHashSet | 一个可以记住元素插入次序的集合 |
| PriorityQueue | 允许高效删除最小元素的一个集合 |
| HashMap | 存储键 / 值关联的一个数据结构 |
| TreeMap | 键有序的一个映射 |
| EnumMap | 键属于枚举类型的一个映射 |
| LinkedHashMap | 可以记住键 / 值插入次序的一个映射 |
| WeakHashMap | 值不会在别处引用时就可以被垃圾回收的一个映射 |
| IdentityHashMap | 用 == 而不是用 equals 比较键的一个映射 |
4.1 遍历
4.1.1 Iterator
通过 .iterator() 获得集合的遍历器
Iterator 接口源码
public interface Iterator<E> {
    boolean hasNext(); // 判断当前位置是否有元素可以被取出
    E next(); //  获取当前位置的元素, 将迭代器对象移向下一个索引位置
}
示例
public static void main(String[] args) {
    List<Integer> arrayList = new ArrayList<>(); // Upcasting 向上转型
    Random random = new Random();
    for (int i = 0; i < 10; i++) {
        int r = random.nextInt(100);
        arrayList.add(r);
    }
    Iterator<Integer> iterator = arrayList.iterator();
    while (iterator.hasNext()) {
        Integer integer = iterator.next();
        System.out.printf("%d ", integer);
    } // 95 59 18 86 20 81 17 17 89 64
}
4.1.2 增强 for 循环
只有实现了 Iterable 接口的类才可以使用 迭代器 和 增强 for 循环
public static void main(String[] args) {
    List<Integer> arrayList = new ArrayList<>(); // Upcasting 向上转型
    Random random = new Random();
    for (int i = 0; i < 10; i++) {
        int r = random.nextInt(100);
        arrayList.add(r);
    }
    for (Integer integer : arrayList) {
        System.out.printf("%d ", integer);
    } // 95 59 18 86 20 81 17 17 89 64
}
注:迭代器遍历时,不能用集合的方法进行增加或者删除
4.1.3 forEach(lambda 表达式)
public static void main(String[] args) {
    List<Integer> arrayList = new ArrayList<>(); // Upcasting 向上转型
    Random random = new Random();
    for (int i = 0; i < 10; i++) {
        int r = random.nextInt(100);
        arrayList.add(r);
    }
    arrayList.forEach((integer) -> {
        System.out.printf("%d ", integer);
    }); // 12 72 36 74 54 69 99 46 91 53
}
4.2 List
public interface List<E> extends SequencedCollection<E>
- 有存取顺序的集合
- 用户可以精确控制列表中每个元素的插入位置, 用户可以通过整数索引访问元素,并搜索列表中的元素
- 允许重复的元素
List 特有方法
void add(int index, E element); 	// 在此集合中的指定位置插入指定的元素
E remove(int index); 			// 删除指定索引处的元素,返回被删除的元素
E set(int index,E element); 		// 修改指定索引处的元素,返回被修改的元素
E get(int index); 			// 返回指定索引处的元素
Q: 如果
list.remove(1)是删除值为 1 的元素还是删除索引为 1 的元素?
A:ArrayList 的 remove 方法有两个重载版本:public E remove(int index) // 删除 index 对应的元素 public boolean remove(Object o) // 删除元素 o如果
list.remove(1),是删除索引为 1 的元素;如果list.remove(Integer.valueOf(1))则删除的是值为 1 的元素
List 实现类:
ArrayList
底层数据结构是 数组,查询快、增删慢
时间复杂度:查询O(1),插入/删除O(n)LinkedList
底层数据结构是 链表,查询慢、增删快
时间复杂度:查询O(n),头插/尾插O(1),中间O(n)
LinkedList 特有方法
| 方法名 | 说明 |
|---|---|
| public void addFirst(E e) | 在该列表开头插入指定的元素 |
| public void addLast(E e) | 将指定的元素追加到此列表的末尾 |
| public E getFirst() | 返回此列表中的第一个元素 |
| public E getLast() | 返回此列表中的最后一个元素 |
| public E removeFirst() | 从此列表中删除并返回第一个元素 |
| public E removeLast() | 从此列表中删除并返回最后一个元素 |
4.3 Set
public interface Set<E> extends Collection<E>
- 不可以存储重复元素
- 没有索引,不能使用普通 for 循环遍历
Set 的实现类:
TreeSet()
可以将元素按照规则进行排序 --> 元素有序TreeSet():根据其元素的自然排序进行排序TreeSet(Comparator comparator):根据指定的比较器进行排序
4.3.1 TreeSet
底层数据结构:红黑树(自平衡二叉搜索树)
O(log n) 的时间复杂度来完成添加、删除和查找操作
注:Set 不能存储 重复 元素,各个实现类对于 重复 的定义不同:
TreeSet:根据实现了 Comparable 接口的类的重写方法 compareTo 比较的字段相同,则为重复
HashSet:判断重复时依赖 equals 和 hashCode
import java.util.Random;
import java.util.TreeSet;

public class TreeSetDemo {
    public static void main(String[] args) {
        TreeSet<Integer> ts = new TreeSet<>();
        Random r = new Random();
        for (int i = 0; i < 20; i++) {
            ts.add(r.nextInt(100));
        }
        System.out.println(ts);
//        [2, 15, 21, 28, 31, 34, 38, 49, 51, 57, 68, 69, 71, 78, 79, 83, 89, 91]

        Stu stu1 = new Stu(12, "we");
        Stu stu3 = new Stu(13, "aqw");
        Stu stu2 = new Stu(12, "zxc");
        TreeSet<Stu> stus = new TreeSet<>() {
        };
        stus.add(stu1);
        stus.add(stu2);
        stus.add(stu3);
        System.out.println(stus);
//        [Stu{age=12, name='we'}, Stu{age=12, name='zxc'}, Stu{age=13, name='aqw'}]
    }
}

class Stu implements Comparable<Stu> {
    private int age;
    private String name;

    public int getAge() {
        return age;
    }

    public String getName() {
        return name;
    }

    public Stu() {
    }

    public Stu(int age, String name) {
        this.age = age;
        this.name = name;
    }

    // 如果只比较 age 字段,则 TreeSet 认为 stu1 和 stu2 是一样的,集合中只有一个 stu1
    @Override
    public int compareTo(Stu s) {
        if (this.age != s.getAge()) {
            return this.age - s.getAge();
        } else {
            return this.name.compareTo(s.getName());
        }
    }

    @Override
    public String toString() {
        return "Stu{" +
                "age=" + age +
                ", name='" + name + '\'' +
                '}';
    }
}
两种比较方法:
- 实现 Comparable 接口,重写 compareTo(T o) 方法 (上述是 1)
- TreeSet 构造方法
public TreeSet(Comparator<? super E> comparator),传入自定义的比较器(下述是2)
import java.util.Comparator;
import java.util.Random;
import java.util.TreeSet;

public class TreeSetDemo {
    public static void main(String[] args) {
        TreeSet<Stu2> stu2s = new TreeSet<>(new Comparator<Stu2>() {
            @Override
            public int compare(Stu2 o1, Stu2 o2) {
                if (o1.getAge() != o2.getAge()) {
                    return o1.getAge() - o2.getAge();
                } else {
                    return o1.getName().compareTo(o2.getName());
                }
            }
        });
        Stu2 stu4 = new Stu2(17, "tom");
        Stu2 stu5 = new Stu2(18, "peter");
        Stu2 stu6 = new Stu2(11, "rain");

        stu2s.add(stu4);
        stu2s.add(stu5);
        stu2s.add(stu6);
        System.out.println(stu2s);
//        [Stu{age=11, name='rain'}, Stu{age=17, name='tom'}, Stu{age=18, name='peter'}]
    }
}

class Stu2 {
    private int age;
    private String name;

    public int getAge() {
        return age;
    }

    public String getName() {
        return name;
    }

    public Stu2() {
    }

    public Stu2(int age, String name) {
        this.age = age;
        this.name = name;
    }

    @Override
    public String toString() {
        return "Stu{" +
                "age=" + age +
                ", name='" + name + '\'' +
                '}';
    }
}
4.3.2 HashSet
- 底层数据结构是 哈希表(HashMap)
- 无序性:HashSet 中的元素没有特定的顺序,它们的存储顺序可能与插入顺序不同。元素的顺序由哈希值决定
- 不允许重复:HashSet 继承自 Set 接口,不允许存储重复的元素(元素是否重复由 equals 和 hashCode 方法决定)
- 没有索引, 不能使用普通for循环遍历
- 时间复杂度:O(1) 进行添加、删除和查找操作
哈希值:根据对象的地址或者字符串或者数字算出来的int类型的数值
4.4 Map
public interface Map<K, V>
用于存储 键值对(Key-Value)。Map 中的每个键都是唯一的,键用于映射到对应的值。Map 接口提供了一种通过键快速访问值的机制,类似于字典
方法
| 方法名 | 说明 |
|---|---|
| V put(K key,V value) | 添加元素 |
| V remove(Object key) | 根据键删除键值对元素 |
| void clear() | 移除所有的键值对元素 |
| boolean containsKey(Object key) | 判断集合是否包含指定的键 |
| boolean containsValue(Object value) | 判断集合是否包含指定的值 |
| boolean isEmpty() | 判断集合是否为空 |
| int size() | 集合的长度,也就是集合中键值对的个数 |
| V get(Object key) | 根据键获取值 |
| Set<K> keySet() | 获取所有键的集合 |
| Collection<V> values() | 获取所有值的集合 |
| Set<Map.Entry<K,V>> entrySet() | 获取所有键值对对象的集合 |
遍历:
- forEach lambda 直接遍历 map,不能修改值
entrySet(),可以通过setValue()修改值
import java.sql.SQLOutput;
import java.util.HashMap;
import java.util.Map;

public class MapDemo {
    public static void main(String[] args) {
        HashMap<Integer, String> map = new HashMap<>();
        map.put(1, "h");
        map.put(2, "asda");
        map.put(3, "wqe");
        map.forEach((k, v) -> {
            System.out.printf("key[%d] value[%s]", k, v);
            System.out.println();
        });
        // key[1] value[h]
        // key[2] value[asda]
        // key[3] value[wqe]

        for (Map.Entry<Integer, String> entry : map.entrySet()) {
            entry.setValue(entry.getValue() + "123");
            Integer k = entry.getKey();
            String v = entry.getValue();
            System.out.printf("key[%d] value[%s]", k, v);
            System.out.println();
        }
        // key[1] value[h123]
        // key[2] value[asda123]
        // key[3] value[wqe123]

    }
}
Map 的实现类:
- HashMap
- TreeMap
4.4.1 HashMap
- 底层数据结构:哈希表
- 依赖 hashCode 方法和 equals 方法保证键的唯一
- 如果键要存储的是自定义对象,需要重写 hashCode 和 equals 方法
package com.example;

import java.util.HashMap;
import java.util.Objects;

public class HashMapDemo {
    public static void main(String[] args) {
        HashMap<Student, String> map = new HashMap<>();
        Student s1 = new Student("a", 12);
        Student s2 = new Student("b", 12);

        String add1 = "add1";
        String add2 = "add2";
        map.put(s1, add1);
        map.put(s2, add2);
        System.out.println(map);
//        {Student{name='b', age=12}=add2, Student{name='a', age=12}=add1}
    }
}

class Student {
    private String name;
    private int age;

    public String getName() {
        return name;
    }

    public int getAge() {
        return age;
    }

    public Student(String name, int age) {
        this.name = name;
        this.age = age;
    }

    @Override
    public String toString() {
        return "Student{" +
                "name='" + name + '\'' +
                ", age=" + age +
                '}';
    }

    @Override
    public boolean equals(Object o) {
        // 1.检查是否为同一个对象引用
        if (this == o) return true;
        // 2.检查类型是否一致
        if (o == null || getClass() != o.getClass()) return false;
        // 3.检查所有字段是否相等
        Student other = (Student) o;
        return age == other.age && Objects.equals(name, other.name);
    }

    @Override
    public int hashCode() {
        int result = name != null ? name.hashCode() : 0;
        result = 31 * result + age;
        return result;
    }
}
4.4.1 TreeMap
- 底层数据结构:红黑树
- 依赖自然排序或者比较器排序, 对键进行排序
- 如果键存储的是自定义对象,需要实现Comparable接口或者在创建TreeMap对象时候给出比较器排序规则
4.5 Collections
java.utils.Collections是集合工具类,用来对集合进行操作
常用方法
public static void shuffle(List<?> list) 				// 打乱集合顺序。
public static <T> void sort(List<T> list) 				// 将集合中元素按照默认规则排序
public static <T> void sort(List<T> list,Comparator<? super T> ) 	// 将集合中元素按照指定规则排序。
- 自然排序
public static void main(String[] args) {
    ArrayList<Integer> arrayList = new ArrayList<>();
    Random random = new Random(0);
    for (int i = 0; i < 10; i++)
        arrayList.add(random.nextInt(100));
    Collections.sort(arrayList);
    System.out.println(arrayList); // [15, 19, 29, 47, 48, 53, 54, 60, 61, 91]
}
- 自定义排序
import java.util.ArrayList;
import java.util.Collections;

public class CollectionsDemo {
    public static void main(String[] args) {
        ArrayList<CollectionsDemoStudent> arrayList = new ArrayList<>();
        CollectionsDemoStudent s1 = new CollectionsDemoStudent("tom",12);
        CollectionsDemoStudent s2 = new CollectionsDemoStudent("peter",11);
        CollectionsDemoStudent s3 = new CollectionsDemoStudent("lucy",17);

        arrayList.add(s1);
        arrayList.add(s2);
        arrayList.add(s3);

        Collections.sort(arrayList);
        System.out.println(arrayList);
//        [Student{name='lucy', age=17}, Student{name='tom', age=12}, Student{name='peter', age=11}]
    }
}
class CollectionsDemoStudent implements Comparable<CollectionsDemoStudent>{
    private String name;
    private int age;

    public CollectionsDemoStudent(String name, int age) {
        this.name = name;
        this.age = age;
    }

    @Override
    public int compareTo(CollectionsDemoStudent o) {
        return o.age-age;
    }

    @Override
    public String toString() {
        return "Student{" +
                "name='" + name + '\'' +
                ", age=" + age +
                '}';
    }
}
4.6 不可变集合
在 JDK 9 之后,
of()方法返回的是一个不可变集合
不可变集合的好处:
- 性能更好
不可变集合在某些场景下(比如并发访问时)具有更好的性能,因为不需要额外的同步机制来保证线程安全。
它也可以减少一些内存消耗,因为不可变对象可以共享,避免了对同一数据的多次修改- 更安全
返回不可变集合是一种保护数据不被外部修改的设计方式,可以让开发者放心地传递集合数据而不必担心被修改。
List<Integer> list = List.of(1,2,3);
Set<Integer> set = Set.of(1,2,3);
Map<Integer, String> map = Map.of(1, "a", 2, "b");
5 可变参数
方法可以接受多个相同类型的参数,而无需显式地指定每个参数
public static <T> boolean addAll(Collection<? super T> c, T... elements)
其中 elements 是一个 T 泛型数组
示例
public class Varargs {
    public static void main(String[] args) {
        System.out.println(varargs(1, 2, 3, 4.4)); // 10.4
    }

    private static <T extends Number> double varargs(T... nums) {
        double res = 0;
        for (T num : nums) {
            res += num.doubleValue();
        }
        return res;
    }
}
6 Stream 流
Stream 流 是一个数据元素的序列,可以支持顺序和并行的聚合操作。Stream 本身 不存储数据,它是对数据源的一个 视图
6.1 中间操作
中间操作会将一个流转换为另一个流,但它是 懒加载 的(只有在执行终端操作时才会真正执行)
Stream<T> filter(Predicate<? super T> predicate);		// 过滤
<R> Stream<R> map(Function<? super T, ? extends R> mapper); 	// 映射
Stream<T> sorted(); 						// 排序
Stream<T> sorted(Comparator<? super T> comparator);
Stream<T> distinct();						 // 去重
Stream<T> limit(long maxSize); 					 // 限制流的元素数量
Stream<T> skip(long n);						 // 跳过n个元素
public static <T> Stream<T> concat(Stream<? extends T> a, Stream<? extends T> b) // 合并流
6.1.1 filter
筛选符合条件的元素。filter 方法接收一个 Predicate 函数式接口,只有当 Predicate 返回 true 时,元素才会被保留在结果流中。
public static void main(String[] args) {
    ArrayList<Integer> arrayList = new ArrayList<>();
    Random random = new Random(0);
    for (int i = 0; i < 10; i++)
        arrayList.add(random.nextInt(100));
    System.out.print("arrayList: ");
    System.out.println(arrayList); // arrayList: [60, 48, 29, 47, 15, 53, 91, 61, 19, 54]
    // 函数式接口
    arrayList.stream().filter(new Predicate<Integer>() {
        @Override
        public boolean test(Integer integer) {
            return integer % 2 == 0;
        }
    }).forEach(integer -> System.out.printf("%d ", integer)); // 60 48 54
}
函数式接口可以使用 lambda 表达式简化:
public static void main(String[] args) {
    ArrayList<Integer> arrayList = new ArrayList<>();
    Random random = new Random(0);
    for (int i = 0; i < 10; i++) {
        arrayList.add(random.nextInt(100));
    }
    System.out.print("arrayList: ");
    System.out.println(arrayList); // arrayList: [60, 48, 29, 47, 15, 53, 91, 61, 19, 54]

    arrayList.stream().filter(integer -> integer % 2 == 0).forEach(System.out::println);
}
6.1.2 map
传入一个函数式接口 Function 来对元素进行处理,并返回一个包含转换后元素的新流
public static void main(String[] args) {
    List<String> stringList = Arrays.asList("apple", "banana", "cake", "cyberpunk");
    stringList.stream().map(String::length).forEach(integer -> System.out.print(integer + " "));
    // 5 6 4 9
}
6.2 终端操作
终端操作触发流的执行,并返回一个结果
<R> R collect(Supplier<R> supplier,
              BiConsumer<R, ? super T> accumulator,
              BiConsumer<R, R> combiner);
<R, A> R collect(Collector<? super T, A, R> collector); 	// 收集为集合或其他数据结构

void forEach(Consumer<? super T> action); 			// 遍历

T reduce(T identity, BinaryOperator<T> accumulator);
Optional<T> reduce(BinaryOperator<T> accumulator);
<U> U reduce(U identity,
             BiFunction<U, ? super T, U> accumulator,
             BinaryOperator<U> combiner); 			// 归约
long count(); 							// 计数
Object[] toArray(); 						// 转换为数组
6.2.1 collect
工具类 Collectors 提供了具体的收集方式
| 方法名 | 说明 |
|---|---|
| public static <T> Collector toList() | 把元素收集到List集合中 |
| public static <T> Collector toSet() | 把元素收集到Set集合中 |
| public static Collector toMap(Function keyMapper,Function valueMapper) | 把元素收集到Map集合中 |
6.2.2 reduce
将流中的元素合并为单一结果,比如求和、求积、连接字符串等
public static void main(String[] args) {
        List<Integer> numbers = Arrays.asList(1, 2, 3, 4, 5);

        // 使用 reduce 计算所有元素的乘积
        Optional<Integer> product = numbers.stream()
                                           .reduce((a, b) -> a * b); // 无初始值

        product.ifPresent(p -> System.out.println("Product: " + p)); // 输出: Product: 120
    }
public static void main(String[] args) {
        List<String> strings = Arrays.asList("Java", "Stream", "API");

        // 使用 reduce 将字符串连接起来
        String concatenated = strings.stream()
                                     .reduce("", (a, b) -> a + b);

        System.out.println("Concatenated: " + concatenated); // 输出: Concatenated: JavaStreamAPI
    }
public static void main(String[] args) {
        List<Integer> numbers = Arrays.asList(1, 2, 3, 4, 5);

        // 使用 reduce 找到最大值
        Optional<Integer> max = numbers.stream()
                                       .reduce(Integer::max);

        max.ifPresent(m -> System.out.println("Max: " + m)); // 输出: Max: 5
    }
7 异常
异常(Exception) 是程序运行中出现的一种错误事件,它会中断正常的程序执行流程。Java 提供了一个强大的异常处理机制,可以捕获和处理这些异常,避免程序因异常而崩溃
根类java.lang.Throwable有两个子类java.lang.Error和java.lang.Exception
Throwable 的常用方法
public void printStackTrace() // 打印异常的详细信息
public String getMessage() // 获取发生异常的原因
异常(Exception)的分类 :
- 检查异常(Checked Exception)-> 编译时,如时间类的formatter
- 运行时异常(Runtime Exception)-> 运行时,如数组下标越界
举例:
public static void main(String[] args) {
    int[] ints = {1, 2, 3};
    System.out.println(ints[3]);
    // Exception in thread "main" java.lang.ArrayIndexOutOfBoundsException:
    // Index 3 out of bounds for length 3 at com.throwable.ExceptionDemo.main(ExceptionDemo.java:6)
}
当程序执行到 ints[3] 时,由于访问数组索引超出范围,Java 会检测到这个运行时错误并创建一个 ArrayIndexOutOfBoundsException 异常对象
然后,这个异常对象会被抛出到当前方法(main 方法)的调用栈中。如果 main 方法中没有显式的异常处理逻辑(比如 try-catch 块),异常会继续向上抛给调用者
对于 main 方法而言,它的调用者是 JVM。当 JVM 收到异常时,会捕获这个异常,打印异常的堆栈信息(包含异常的类型、详细信息和抛出异常的代码位置),然后终止程序的执行
7.1 throw
throw 用在方法内,用来抛出一个异常对象,将这个异常对象 传递到调用者 处,并 结束 当前方法的执行
public class ExceptionDemo {
    public static void main(String[] args) {
        int[] ints = {1, 2, 3};
        System.out.println(getElement(ints, 3));
    }

    public static int getElement(int[] arr, int index) {
        if (index < 0 || index >= arr.length) {
            throw new ArrayIndexOutOfBoundsException(index);
        }
        return arr[index];
    }
}
7.2 处理异常
在 7.1 调用者收到了异常,需要进行处理,两种方法:
- 声明异常
- 捕获异常
7.2.1 声明异常(对于检查时异常)
声明异常:将问题标识出来,报告给调用者。如果方法内通过 throw 抛出了 编译时异常,而没有捕获处理(稍后讲解该方式),那么必须通过throws进行声明,让调用者去处理
关键字 throws 运用于方法声明之上,用于表示当前方法不处理异常,而是提醒该方法的调用者来处理异常(抛出异常)
以读文件为例,需要判断文件是否存在,这是编译时的异常
下列代码编译器报错:未处理异常: java.io.FileNotFoundException
public static void readTxt(String path) {
    FileReader reader = new FileReader("nonexistentfile.txt");
    BufferedReader br = new BufferedReader(reader);
    String line = br.readLine();
    System.out.println(line);
    br.close();
}
对于检查时异常,需要有处理的方法,这里使用 声明异常,即 向上抛给调用者
public static void readTxt(String path) throws IOException {
    FileReader reader = new FileReader("nonexistentfile.txt");
    BufferedReader br = new BufferedReader(reader);
    String line = br.readLine();
    System.out.println(line);
    br.close();
}
在 main() 方法中调用 readTxt() 方法,也需要声明异常,继续往上抛给 JVM
public static void main(String[] args) throws IOException {
    String path = "src/com/throwable/test.txt";
    readTxt(path);
}
7.2.1 catch 捕获异常
如果异常出现的话,会立刻终止程序,所以需要 处理异常
Java 中对异常有针对性的语句进行捕获,可以对出现的异常进行指定方式的处理
try{
     编写可能会出现异常的代码
}catch(异常类型  e){
     处理异常的代码
     //记录日志/打印异常信息/继续抛出异常
}
捕获数据下标越界异常,如果超过了就返回边界
import java.io.IOException;

public class ExceptionDemo {
    public static void main(String[] args) throws IOException {
        int[] ints = {1, 2, 3, 4, 5};
        System.out.println(getElement(ints, 10)); // 5
        System.out.println(getElement(ints, -10)); // 1

    }

    public static int getElement(int[] arr, int index) {
        try {
            return arr[index];
        } catch (ArrayIndexOutOfBoundsException e) {
            if (index >= arr.length)
                return arr[arr.length - 1];
            else
                return arr[0];
        }
    }
}
获取异常信息:
Throwable 类中定义了一些查看方法
public String getMessage(); // 获取异常的描述信息,原因(提示给用户的时候,就提示错误原因
public void printStackTrace(); // 打印异常的跟踪栈信息并输出到控制台
对于多个异常:
try{
     编写可能会出现异常的代码
}catch(异常类型A  e){  当try中出现A类型异常,就用该catch来捕获.
     处理异常的代码
     //记录日志/打印异常信息/继续抛出异常
}catch(异常类型B  e){  当try中出现B类型异常,就用该catch来捕获.
     处理异常的代码
     //记录日志/打印异常信息/继续抛出异常
}
7.2.1 finally
有一些特定的代码无论异常是否发生,都需要执行。另外,因为异常会引发程序跳转,导致有些语句执行不到。而finally就是解决这个问题的,在finally代码块中存放的代码都是一定会被执行的。
什么时候的代码必须最终执行?
当我们在try语句块中打开了一些物理资源(磁盘文件/网络连接/数据库连接等),我们都得在使用完之后,最终关闭打开的资源
用于 回收资源
在 catch 后面
8 IO 流
bit(比特):信息的最小单位,代表一个二进制位,即 0 或 1
byte(字节):计算机存储的基本单位,1 byte = 8 bit
根据数据的流向分为
- 输入流 :把数据从 其他设备 上读取到 内存 中的流
- 输出流 :把数据从 内存 中写出到 其他设备 上的流
根据数据的类型分为
- 字节流 :以字节为单位->
InputStreamOutputStream - 字符流 :以字符为单位,如 Unicode 使用多个字节来表示->
ReaderWriter
| 输入流 | 输出流 | |
|---|---|---|
| 字节流 | 字节输入流 InputStream |
字节输出流 OutputStream |
| 字符流 | 字符输入流 Reader |
字符输出流 Writer |
注:现在的"流" 和 java.util.streamd 流 不同
8.1 字节输出流 OutputStream
java.io.OutputStream 抽象类是表示字节输出流的所有类的超类,将指定的字节信息写出到目的地。它定义了字节输出流的基本共性功能方法:
public void write(byte[] b); 			// 将 b.length字节从指定的字节数组写入此输出流
public void write(byte[] b, int off, int len); 	// 从指定的字节数组写入 len 字节,从偏移量 off 开始输出到此输出流
public abstract void write(int b); 		// 将指定的字节输出流
public void close(); 				// 关闭此输出流并释放与此流相关联的任何系统资源
public void flush(); 				// 刷新此输出流并强制任何缓冲的输出字节被写出
以下是 OutputStream 常见子类:
FileOutputStream用于将字节写入文件
8.1.1 FileOutputStream
文件输出流,用于将数据写出到文件
// 构造方法,当创建一个 FileOutputStream 流对象时,必须传入一个文件路径。该路径下,如果没有这个文件,会创建该文件。如果有这个文件,会清空这个文件的数据
public FileOutputStream(File file); // 创建文件输出流以写入由指定的 File 对象表示的文件
public FileOutputStream(File file, boolean append); // append指定了是否是"附加模式",否则默认是"覆盖模式"
public FileOutputStream(String name);
public FileOutputStream(String name, boolean append); // 创建文件输出流以指定的名称写入文件

// 写入
public void write(byte[] b); // 返回实际读取的字节数
public void write(byte[] b, int off, int len); // 指定从字节数组的哪个位置开始写入(off),以及要写入多少字节(len)
public void write(int b);
举例:
public static void main(String[] args) throws IOException {
    String path = "src/com/IO/test.txt";
    // append 模式
    FileOutputStream fileOutputStream = new FileOutputStream(path, true);
    fileOutputStream.write(65);
    byte[] helloworld = "helloworld".getBytes();
    fileOutputStream.write(helloworld);

    // 用 Files 类输出
    byte[] bytes = Files.readAllBytes(Path.of(path));
    System.out.println(new String(bytes)); // Ahelloworld
    fileOutputStream.close(); // 释放资源
}
注:对于方法
write(int b);输入的 b 如果大于了1字节,会被截断,只会保留一个字节的信息写出
8.2 字节输入流 InputStream
java.io.InputStream 抽象类是表示字节输入流的所有类的超类,可以读取字节信息到内存中。它定义了字节输入流的基本共性功能方法
public abstract int read(); // 从输入流读取数据的下一个字节
public int read(byte[] b); // 从输入流中读取一些字节数,并将它们存储到字节数组 b 中
8.2.1 FileInputStream
文件输入流,从文件中读取字节
// 构造方法
public FileInputStream(String name)
public FileInputStream(File file)

// 读出
public int read() // 每次可以读取一个字节的数据,提升为 int 类型,读取到文件末尾,返回 -1
public int read(byte[] b) // 每次读取 b.length 个字节到数组中,返回读取到的有效字节个数,读取到末尾时,返回-1
public int read(byte[] b, int off, int len)
示例
public static void main(String[] args) throws IOException {
    String path = "src/com/IO/test.txt";
    FileInputStream fileInputStream = new FileInputStream(path);
    int read = 1;
    while (true) {
        read = fileInputStream.read();
        if (read == -1)
            break;
        System.out.print((char) read);
    }
    fileInputStream.close();
}
public static void main(String[] args) throws IOException {
        String path = "src/com/IO/test.txt";
        FileInputStream fileInputStream = new FileInputStream(path);
        byte[] bytes = new byte[20];
        while (fileInputStream.read(bytes) > 0) {
        }
        System.out.println(new String(bytes));
        fileInputStream.close();
    }
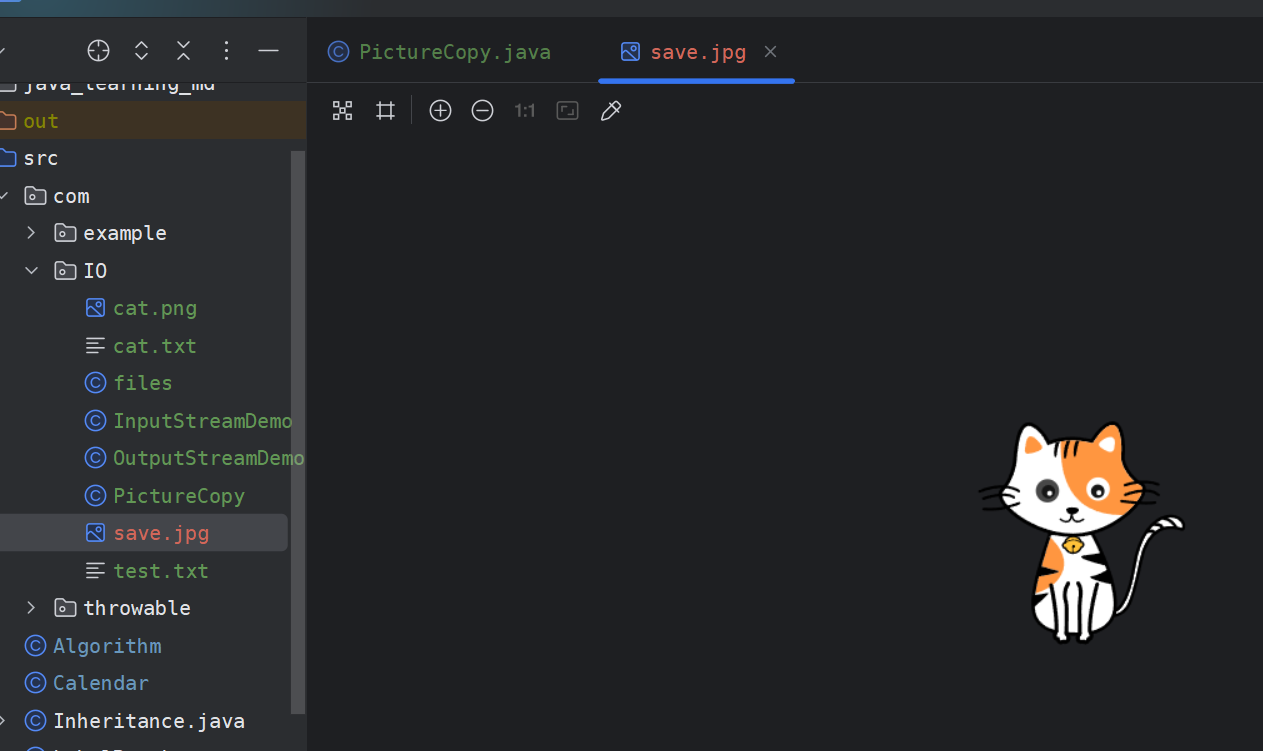
8.3 复制图片
import java.io.FileInputStream;
import java.io.FileOutputStream;
import java.io.IOException;

public class PictureCopy {
    public static void main(String[] args) throws IOException {
        String path = "src/com/IO/cat.png";
        pictureCopy(path);
    }

    public static void pictureCopy(String load_path) throws IOException {
        String save_path = "src/com/IO/save.jpg";
        FileInputStream fis = new FileInputStream(load_path);
        FileOutputStream fos = new FileOutputStream(save_path);
        byte[] buffer = new byte[1024];
        int len;

        // 循环读取文件内容
        while ((len = fis.read(buffer)) > 0) {
            // 写入到目标文件
            fos.write(buffer, 0, len); // 后面会有很多 0,所以只写入实际 len
        }

        // 先开后关,后开先关
        fos.close();
        fis.close();
    }
}
8.4 字符输入流 Reader
当使用字节流读取文本文件时,可能会有一个小问题。就是遇到中文字符时,可能不会显示完整的字符,那是因为一个中文字符可能占用多个字节存储。所以Java提供一些字符流类,以字符为单位读写数据,专门用于处理文本文件
public void close(); // 关闭此流并释放与此流相关联的任何系统资源
public int read() // 从输入流读取一个字符
public int read(char[] cbuf) // 从输入流中读取一些字符,并将它们存储到字符数组 cbuf 中(char buffer)
8.4.1 FileReader
// 构造方法
FileReader(File file) // 创建一个新的 FileReader ,给定要读取的 File 对象
FileReader(String fileName) // 创建一个新的 FileReader ,给定要读取的文件的名称
8.5 Writer 字符输出流
void write(int c) // 写入单个字符。
void write(char[] cbuf) // 写入字符数组
abstract void write(char[] cbuf, int off, int len) // 写入字符数组的某一部分,off 数组的开始索引,len 写的字符个数
void write(String str) // 写入字符串
void write(String str, int off, int len) // 写入字符串的某一部分,off字符串的开始索引,len写的字符个数
void flush() // 刷新该流的缓冲,强制写入缓冲区中的所有数据
void close() // 关闭此流,但要先刷新它
8.5.1 FileWriter
FileWriter(File file) // 创建一个新的 FileWriter,给定要读取的File对象
FileWriter(String fileName) // 创建一个新的 FileWriter,给定要读取的文件的名称
8.6 try-with-resources
try-with-resources 是 Java 7 引入的一种语法,它简化了对资源(如文件、数据库连接、网络连接等)的管理。通过这种语法,Java 会自动关闭在 try 块中打开的资源,确保资源被正确释放,而无需显式调用 close() 方法
package com.IO;

import java.io.FileInputStream;
import java.io.FileOutputStream;
import java.io.IOException;

public class PictureCopy {
    public static void main(String[] args) throws IOException {
        String path = "src/com/IO/cat.png";
        pictureCopy(path);
    }

    public static void pictureCopy(String load_path) {
        String save_path = "src/com/IO/save.jpg";
        try (FileInputStream fis = new FileInputStream(load_path);
             FileOutputStream fos = new FileOutputStream(save_path);) {
            byte[] buffer = new byte[1024];
            int len;

            // 循环读取文件内容
            while ((len = fis.read(buffer)) > 0) {
                // 写入到目标文件
                fos.write(buffer, 0, len); // 后面会有很多 0,所以只写入实际 len
            }

        } catch (IOException e) {
            e.printStackTrace();
        }
    }
}
不需要手动 close() 关闭
8.7 缓冲流
提高输入输出效率,通过在内存中设置一个缓冲区来减少对物理设备(如文件或网络)的频繁访问,是对 FileInputStream、FileOutputStream、FileReader、FileWriter 的增强
原理:
缓冲流通过将数据从物理设备读取到内存缓冲区中,或者将数据从缓冲区写入物理设备,来 减少磁盘 I/O 操作的频率。这样,数据的读写操作并不是每次都直接进行,而是先在内存中缓存一定量的数据,再批量进行读写。(内存访问速度远快于磁盘)
8.7.1 字节缓冲流 BufferedInputStream / BufferedOutputStream
// 构造方法
public BufferedInputStream(InputStream in) // 创建一个新的缓冲输入流
public BufferedOutputStream(OutputStream out) // 创建一个新的缓冲输出流
示例
import java.io.*;

public class BufferedDemo {
    public static void main(String[] args) {
        long start = System.currentTimeMillis();
        String inputPath = "src/com/IO/sth.msi";
        String outputPath = "src/com/IO/sth_copy.msi"; // 新的输出文件
        byte[] buffer = new byte[1024];  // 设置缓冲区大小为1024字节
        int bytesRead;

        try (BufferedInputStream bis = new BufferedInputStream(new FileInputStream(inputPath));
             BufferedOutputStream bos = new BufferedOutputStream(new FileOutputStream(outputPath))) {
            // 从输入流读取数据,并将其写入到输出流
            while ((bytesRead = bis.read(buffer)) != -1) {
                bos.write(buffer, 0, bytesRead);  // 将读取的字节数据写入输出流
            }
        } catch (IOException e) {
            e.printStackTrace();
        }

        long end = System.currentTimeMillis();
        System.out.println("buffered cost: " + (end - start) + " milliseconds");

        long time = copyFile(inputPath, outputPath);
        System.out.println("normal cost: " + time + " milliseconds");
        // buffered cost: 248 milliseconds
        // normal cost: 894 milliseconds
    }

    public static long copyFile(String in, String out) {
        byte[] buffer = new byte[1024];
        int bytesRead;
        long start = System.currentTimeMillis();
        try (FileInputStream fis = new FileInputStream(in);
             FileOutputStream fos = new FileOutputStream(out)) {
            while ((bytesRead = fis.read(buffer)) > 0) {
                fos.write(buffer, 0, bytesRead);
            }
        } catch (IOException e) {
            e.printStackTrace();
        }
        return System.currentTimeMillis() - start;
    }
}
8.7.2 字节符缓冲流 BufferedReader / BufferedWriter
// 构造方法
public BufferedReader(Reader in) // 创建一个 新的缓冲输入流
public BufferedWriter(Writer out) // 创建一个新的缓冲输出流
8.8 转换流
public class TransDemo {
   public static void main(String[] args) {
    	// 1.定义文件路径
     	String srcFile = "file_gbk.txt";
        String destFile = "file_utf8.txt";
		// 2.创建流对象
    	// 2.1 转换输入流,指定GBK编码
        InputStreamReader isr = new InputStreamReader(new FileInputStream(srcFile) , "GBK");
    	// 2.2 转换输出流,默认utf8编码
        OutputStreamWriter osw = new OutputStreamWriter(new FileOutputStream(destFile));
		// 3.读写数据
    	// 3.1 定义数组
        char[] cbuf = new char[1024];
    	// 3.2 定义长度
        int len;
    	// 3.3 循环读取
        while ((len = isr.read(cbuf))!=-1) {
            // 循环写出
          	osw.write(cbuf,0,len);
        }
    	// 4.释放资源
        osw.close();
        isr.close();
  	}
}
8.9 序列化流
序列化(Serialization)是指将 Java 对象转换为字节流的过程,以便于存储在文件中、通过网络传输或将对象保存到数据库等。反序列化(Deserialization)是将字节流转换回 Java 对象的过程
序列化通常用于以下几种场景:
- 持久化:将对象状态保存到磁盘或数据库中,以便在未来恢复
- 网络通信:通过网络发送对象,使得远程调用更加容易
- 深拷贝:通过序列化和反序列化实现对象的深拷贝
一个对象想要序列化需要实现序列化,需要实现 Serializable 标记接口
该类的所有属性必须是可序列化的。如果有一个属性不需要可序列化的,则该属性必须注明是瞬态的,使用 transient 关键字修饰
8.9.1 ObjectOutputStream 序列化流
将 Java 对象的写出到文件
// 构造方法
public ObjectOutputStream(OutputStream out)

public final void writeObject (Object obj) // 将指定的对象写出
8.9.2 ObjectInputStream 反序列化流
将 ObjectOutputStream 序列化的原始数据恢复为 Java 对象
// 构造方法
public ObjectInputStream(InputStream in)

public final Object readObject()
示例,保存 student 列表
package com.IO;

import java.io.*;
import java.util.ArrayList;
import java.util.List;

public class SerializeDemo {
    public static void main(String[] args) {
        ArrayList<Student> students = new ArrayList<>();
        students.add(new Student("a", 11));
        students.add(new Student("u", 13));
        students.add(new Student("r", 19));

        String path = "static/student.txt";
        try (var oos = new ObjectOutputStream(new FileOutputStream(path))) {
//            students.forEach(student -> {
//                try {
//                    oos.writeObject(student);
//                } catch (IOException e) {
//                    e.printStackTrace();
//                }
//            });
            oos.writeObject(students);  // 将整个列表序列化
        } catch (IOException e) {
            e.printStackTrace();
        }
        System.out.println("save success");

        try (var ois = new ObjectInputStream(new FileInputStream(path))) {
            Object object = ois.readObject();
            List<Student> newStudentList = (List<Student>) object;
            System.out.println(newStudentList);
        } catch (IOException e) {
            e.printStackTrace();
        } catch (ClassNotFoundException e) {
            throw new RuntimeException(e);
        }
        // [Student{name='a', age=11}, Student{name='u', age=13}, Student{name='r', age=19}]
    }
}
8.10 PrintStream 打印流
前情提要:
关于System.out.println();
System是java.lang包下的一个类,所以默认导包,in和out分别是其 输入流 和 打印流 的 静态常量 对象public static final InputStream in = null; public static final PrintStream out = null;
// 构造函数
public PrintStream(String fileName) // 使用指定的文件名创建一个新的打印流

public static void main(String[] args) throws IOException {
    // 调用系统的打印流,控制台直接输出97
    System.out.println(97);

    // 创建打印流,指定文件的名称
    PrintStream ps = new PrintStream("ps.txt");

    // 设置系统的打印流流向,输出到ps.txt
    System.setOut(ps);
    // 调用系统的打印流,ps.txt中输出97
    System.out.println(97);
}
9 多线程
多线程:允许在一个程序中同时执行多个任务,从而提高程序的效率
并行 与 并发:
- 并行:在同一时刻,有多个指令在多个CPU上同时执行
- 并发:在同一时刻,有多个指令在单个CPU上交替执行
进程 和 线程
- 进程:正在运行的程序
- 线程:是程序执行的最小单位。每个线程都有自己的执行路径,可以并发地执行代码
单线程:一个进程如果只有一条执行路径,则称为单线程程序
多线程:一个进程如果有多条执行路径,则称为多线程程序
实现多线程的两种方法:
- 继承 Thread 类
- 实现 Runnable 接口
9.1 继承 Thread 类
继承 Thread 类并重写 run() 方法来定义线程的执行逻辑
然后用 start() 方法启动线程
Thread 方法
- run() 封装线程执行的代码,直接调用,相当于普通方法的调用
- start() 启动线程;然后由 JVM 调用此线程的 run() 方法
- join() 当主线程调用一个线程对象的 join() 方法时,主线程会进入阻塞状态,直到被调用的线程执行完毕后,主线程才会继续执行
public class ThreadDemo {
    public static void main(String[] args) {
        MyThread mt = new MyThread();
        mt.start(); // 启动线程
        // Thread is running...
    }
}

class MyThread extends Thread {
    @Override
    public void run() {
        // 线程执行的代码
        System.out.println("Thread is running...");
    }
}
9.2 实现 Runnable 接口
注:
public class Thread implements RunnableThread 实际上实现了 Runnable 接口
而 Runnable 接口来自于java.lang包
定义一个 MyRunnable 类实现 Runnable 接口,并重写 run() 方法
创建 Thread 类的对象,把 MyRunnable 对象作为构造方法的参数
public class ThreadDemo {
    public static void main(String[] args) {
        // 实现 Runnable 接口
        MyRunnable runnable = new MyRunnable();
        Thread thread = new Thread(runnable);
        thread.start();

//        错误
//        runnable.start();
    }
}

class MyRunnable implements Runnable{
    @Override
    public void run() {
        // 线程执行的代码
        System.out.println("Thread is running...");
    }
}
9.3 实现 Callable 接口
Callable接口来自于java.util.concurrent包
import java.util.concurrent.Callable;
import java.util.concurrent.ExecutionException;
import java.util.concurrent.FutureTask;

public class ThreadDemo {
    public static void main(String[] args) throws ExecutionException, InterruptedException {
        // 3.实现 Callable
        FutureTask ft = new FutureTask<>(new MyCallable());
        Thread ft_thread = new Thread(ft);
        ft_thread.start();
        ft.get();
    }
}

class MyCallable implements Callable<String> {

    @Override
    public String call() throws Exception {
        return "Thread is running...";
    }
}
9.4 设置和获取线程名称
void setName(String name) // 将此线程的名称更改为等于参数name
String getName() // 返回此线程的名称
Thread currentThread() // 返回对当前正在执行的线程对象的引用
9.5 线程休眠
static void sleep(long millis) // 使当前正在执行的线程停留(暂停执行)指定的毫秒数
9.6 线程优先级
线程调度 的两种调度方式
- 分时调度模型:所有线程轮流使用 CPU 的使用权,平均分配每个线程占用 CPU 的时间片
- 抢占式调度模型:优先让优先级高的线程使用 CPU,如果线程的优先级相同,那么会随机选择一个,优先级高的线程获取的 CPU 时间片相对多一些
Java 使用的是 抢占式调度模型
final int getPriority() // 返回此线程的优先级final void setPriority(int newPriority)更改此线程的优先级线程默认优先级是5;线程优先级的范围是:1-10
9.7 【案例】卖票(synchronized 线程同步)
某电影院目前正在上映国产大片,共有100张票,而它有3个窗口卖票,请设计一个程序模拟该电影院卖票
public class SellTicketDemo {
    public static void main(String[] args) {
        SellTicket st = new SellTicket();
		// 一个类对象 st,三个线程 t1,t2,t3
        Thread t1 = new Thread(st);
        Thread t2 = new Thread(st);
        Thread t3 = new Thread(st);

        t1.start();
        t2.start();
        t3.start();
    }
}

class SellTicket implements Runnable {
    // 三个线程贡献一个 tickets
    private int tickets = 100;

    @Override
    public void run() {
        while (true) {
            if (tickets > 0) {
                tickets--;
                System.out.println(Thread.currentThread().getName() + "还剩下 " + tickets + " 张票");
            } else {
                break;
            }
        }
    }
}
部分结果截图如下,剩余的票数是乱的,因为三个线程的优先级的相同的(可以通过 Thread.currentThread().getPriority() 方法获得优先级,默认是 5),所以三个线程竞争 cpu 的使用权,cpu 随机选线程执行 =====> 数据安全问题
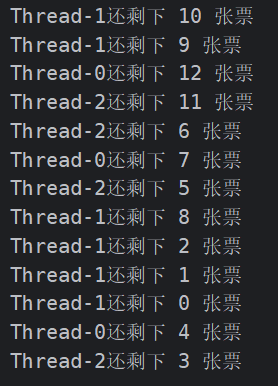
数据安全问题的原因:
- 是多线程环境
- 有共享数据
- 有多条语句操作共享数据
解决数据安全问题 =====> 线程同步
synchronized 是 Java 提供的基本同步机制,它可以确保在同一时刻只有一个线程能够访问某个代码块或方法,从而避免数据冲突。
- 优点:解决了多线程的数据安全问题
- 缺点:当线程很多时,因为每个线程都会去判断同步上的锁,耗费资源,降低程序的运行效率
两种 synchronized 使用方法:
- 同步代码块
- 同步方法
9.7.1 同步代码块
class SellTicket implements Runnable {
    private int tickets = 100;

    @Override
    public void run() {
        while (true) {
            synchronized (this) {
                if (tickets > 0) {
                    tickets--;
                    System.out.println(Thread.currentThread().getName() + "还剩下 " + tickets + " 张票");
                } else {
                    break;
                }
            }
        }
    }
}
确保了每个线程访问 tickets 时,只有一个线程可以修改票数
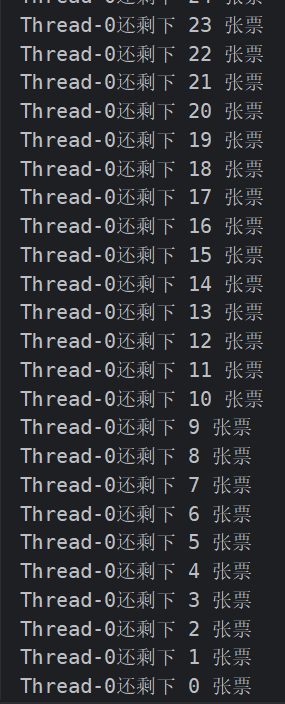
9.7.1 同步方法
class SellTicket implements Runnable {
    private static int tickets = 100; // 这里注意要变成 static,属于类而不是对象

    @Override
    public void run() {
        while (true) {
            if (sellTickets())
                break;
        }
    }

    private static synchronized boolean sellTickets() {
        if (tickets > 0){
            tickets--;
            System.out.println(Thread.currentThread().getName() + "还剩下 " + tickets + " 张票");
            return false;
        }
        return true;
    }
}
9.8 死锁
死锁是指两个或多个线程在执行过程中由于竞争资源而相互等待,从而导致线程无法继续执行的状态
死锁产生的条件
根据经典的死锁理论,死锁的产生必须满足以下 4 个条件,一旦打破其中一个条件,就可以避免死锁:
- 互斥条件
线程需要独占资源,其他线程无法同时访问该资源 - 占有并等待
线程已经持有一个资源,同时等待另一个资源 - 不可剥夺
线程持有的资源在未完成任务前,不能被其他线程强制剥夺 - 循环等待
两个或多个线程形成一个资源等待环,线程 A 等待线程 B 占用的资源,线程 B 等待线程 A 占用的资源,以此类推
public class DeadlockExample {
    private static final Object lock1 = new Object();
    private static final Object lock2 = new Object();

    public static void main(String[] args) {
        Thread t1 = new Thread(() -> {
            synchronized (lock1) {
                System.out.println("Thread 1: Holding lock1...");
                try {
                    Thread.sleep(100);
                } catch (InterruptedException e) {
                    e.printStackTrace();
                }
                System.out.println("Thread 1: Waiting for lock2...");
                synchronized (lock2) {
                    System.out.println("Thread 1: Acquired lock2!");
                }
            }
        });

        Thread t2 = new Thread(() -> {
            synchronized (lock2) {
                System.out.println("Thread 2: Holding lock2...");
                try {
                    Thread.sleep(100);
                } catch (InterruptedException e) {
                    e.printStackTrace();
                }
                System.out.println("Thread 2: Waiting for lock1...");
                synchronized (lock1) {
                    System.out.println("Thread 2: Acquired lock1!");
                }
            }
        });

        t1.start();
        t2.start();
    }
}
Thread 1: Holding lock1...
Thread 2: Holding lock2...
Thread 1: Waiting for lock2...
Thread 2: Waiting for lock1...
程序会卡在最后两个打印消息,线程 1 和线程 2 互相等待,导致死锁
9.9 生产者和消费者
多个生产者线程向一个共享缓冲区中生产数据,多个消费者线程从缓冲区中消费数据
共享缓冲区
- 缓冲区有固定容量
- 生产者线程向缓冲区中放入数据,消费者线程从缓冲区中取出数据
同步要求
- 生产者必须在缓冲区满时等待(不能再放入数据)
- 消费者必须在缓冲区空时等待(没有数据可以取)
线程安全
- 多线程访问共享缓冲区时需要保证线程安全,避免竞态条件
实现方法:
wait()方法和notify()方法- 阻塞队列
9.9.1 wait() 方法和 notify() 方法
void wait() // 导致当前线程等待,直到另一个线程调用该对象的 notify()方法或 notifyAll()方法
void notify() // 唤醒正在等待对象监视器的单个线程
void notifyAll() // 唤醒正在等待对象监视器的所有线程
示例
import java.util.LinkedList;

public class ProducerConsumerDemo {
    public static void main(String[] args) {
        Buffer buffer = new Buffer(3);

        Thread producer = new Thread(() -> {
            for (int i = 0; i < 10; i++) {
                buffer.produce(i);
            }
        });

        Thread consumer = new Thread(() -> {
            for (int i = 0; i < 10; i++) {
                buffer.consume();
            }
        });

        producer.start();
        consumer.start();
    }
}

class Buffer {
    private final LinkedList<Integer> list = new LinkedList<>();
    private final Object lock = new Object(); // 自定义锁对象
    private final int capacity;

    public Buffer(int capacity) {
        this.capacity = capacity;
    }

    public void produce(int value) {
        synchronized (lock) {
            while (list.size() == capacity) { // 缓冲区满时等待
                try {
                    lock.wait(); // 使用锁对象调用 wait
                } catch (InterruptedException e) {
                    e.printStackTrace();
                }
            }
            list.add(value); // 添加数据到缓冲区
            System.out.println("produce " + value);
            lock.notifyAll(); // 唤醒所有等待的线程
        }
    }

    public void consume() {
        synchronized (lock) {
            while (list.isEmpty()) { // 缓冲区空时等待
                try {
                    lock.wait(); // 使用锁对象调用 wait
                } catch (InterruptedException e) {
                    e.printStackTrace();
                }
            }
            int value = list.removeFirst(); // 从缓冲区取出数据
            System.out.println("Consume: " + value);
            lock.notifyAll(); // 唤醒所有等待的线程
        }
    }
}
/*
produce 0
produce 1
produce 2
Consume: 0
Consume: 1
Consume: 2
produce 3
produce 4
produce 5
Consume: 3
Consume: 4
Consume: 5
produce 6
produce 7
produce 8
Consume: 6
Consume: 7
Consume: 8
produce 9
Consume: 9
 */
9.9.2 阻塞队列
阻塞队列(BlockingQueue)是 Java 提供的一种 线程安全 的数据结构,广泛用于生产者消费者模型

它的特点是:
- 线程安全
通过内置的锁机制确保线程间的数据访问安全。 - 自动阻塞
在队列为空时,消费者线程会阻塞等待;在队列满时,生产者线程会阻塞等待
内置线程安全机制,无需显式编写 wait() 和 notify()和 synchronized
import java.util.concurrent.ArrayBlockingQueue;
import java.util.concurrent.BlockingQueue;

public class BlockingQueueDemo {
    public static void main(String[] args) {
        BlockingQueue<Integer> queue = new ArrayBlockingQueue<>(3); // 阻塞队列,容量为5
        // 生产者线程
        Thread producer = new Thread(() -> {
            for (int i = 0; i < 10; i++) {
                try {
                    queue.put(i); // 如果队列满,生产者阻塞
                    System.out.println("Produced: " + i);
                } catch (InterruptedException e) {
                    e.printStackTrace();
                }
            }
        });

        // 消费者线程
        Thread consumer = new Thread(() -> {
            for (int i = 0; i < 10; i++) {
                try {
                    int value = queue.take(); // 如果队列空,消费者阻塞
                    System.out.println("Consumed: " + value);
                } catch (InterruptedException e) {
                    e.printStackTrace();
                }
            }
        });

        producer.start();
        consumer.start();
    }
}
/*
Consumed: 0
Produced: 0
Produced: 1
Produced: 2
Produced: 3
Consumed: 1
Produced: 4
Produced: 5
Consumed: 2
Produced: 6
Consumed: 3
Consumed: 4
Consumed: 5
Produced: 7
Produced: 8
Consumed: 6
Produced: 9
Consumed: 7
Consumed: 8
Consumed: 9
 */

 浙公网安备 33010602011771号