
kubernetes安装
本文主要参考自:
还有一份更适合在生产环境使用的超强高可用(多master,nginx+keepalived负载)
部分参考:
机器环境
| 主机 | 部署服务 |
|---|---|
| 192.168.201.181 | etcd/master |
| 192.168.201.182 | etcd/flannel |
| 192.168.201.183 | etcd/ |
K8S核心概念等
安装etcd:
Master节点安装:
- 在主节点181直接使用yum安装
yum -y install kubernetes
如果报错说docker-cli docker-ce冲突什么的,那就卸载掉docker, 然后重新运行上面的步骤,K8S会选择匹配版本的docker自动安装.
  yum list installed | grep docker
  yum remove -y
  yum remove -y docker-ce.x86_64
  yum remove -y docker-ce-cli.x86_64
安装成功之后会显示K8S的版本和安装的以来版本,可以看到里面有docker:
已安装:
  kubernetes.x86_64 0:1.5.2-0.7.git269f928.el7

作为依赖被安装:
  PyYAML.x86_64 0:3.10-11.el7                                             atomic-registries.x86_64 1:1.22.1-26.gitb507039.el7.centos    conntrack-tools.x86_64 0:1.4.4-4.el7
  container-storage-setup.noarch 0:0.11.0-2.git5eaf76c.el7                containers-common.x86_64 1:0.1.31-8.gitb0b750d.el7.centos     docker.x86_64 2:1.13.1-94.gitb2f74b2.el7.centos
  docker-client.x86_64 2:1.13.1-94.gitb2f74b2.el7.centos                  docker-common.x86_64 2:1.13.1-94.gitb2f74b2.el7.centos        kubernetes-client.x86_64 0:1.5.2-0.7.git269f928.el7
  kubernetes-master.x86_64 0:1.5.2-0.7.git269f928.el7                     kubernetes-node.x86_64 0:1.5.2-0.7.git269f928.el7             libnetfilter_cthelper.x86_64 0:1.0.0-9.el7
  libnetfilter_cttimeout.x86_64 0:1.0.0-6.el7                             libnetfilter_queue.x86_64 0:1.0.2-2.el7_2                     libyaml.x86_64 0:0.1.4-11.el7_0
  oci-register-machine.x86_64 1:0-6.git2b44233.el7                        oci-systemd-hook.x86_64 1:0.1.18-3.git8787307.el7_6           oci-umount.x86_64 2:2.3.4-2.git87f9237.el7
  python-backports.x86_64 0:1.0-8.el7                                     python-backports-ssl_match_hostname.noarch 0:3.5.0.1-1.el7    python-ipaddress.noarch 0:1.0.16-2.el7
  python-pytoml.noarch 0:0.1.14-1.git7dea353.el7                          python-setuptools.noarch 0:0.9.8-7.el7                        socat.x86_64 0:1.7.3.2-2.el7
  subscription-manager-rhsm-certificates.x86_64 0:1.21.10-3.el7.centos    yajl.x86_64 0:2.0.4-4.el7
- 配置K8S:
#vim /etc/kubernetes/apiserver

###
# kubernetes system config
#
# The following values are used to configure the kube-apiserver
#

# The address on the local server to listen to.
KUBE_API_ADDRESS="--insecure-bind-address=0.0.0.0"

# The port on the local server to listen on.
KUBE_API_PORT="--port=8080"

# Port minions listen on
KUBELET_PORT="--kubelet-port=10250"

# Comma separated list of nodes in the etcd cluster
KUBE_ETCD_SERVERS="--etcd-servers=http://192.168.201.181:2379,http://192.168.201.182:2379,http://192.168.201.183:2379"

# Address range to use for services
KUBE_SERVICE_ADDRESSES="--service-cluster-ip-range=10.254.0.0/16"

# default admission control policies
#KUBE_ADMISSION_CONTROL="--admission-control=NamespaceLifecycle,NamespaceExists,LimitRanger,SecurityContextDeny,ServiceAccount,ResourceQuota"
# (PS:也有人说测试时需要把KUBE_ADMISSION_CONTROL中的SecurityContextDeny和ServiceAccount去掉,这是权限相关的  先试试吧)
KUBE_ADMISSION_CONTROL="--admission-control=NamespaceLifecycle,NamespaceExists,LimitRanger,SecurityContextDeny,ResourceQuota"

# Add your own!
KUBE_API_ARGS=""
还改了一个文件vim /etc/kubernetes/config,修改了KUBE_MASTER为当前181机器的master IP
###
# kubernetes system config
#
# The following values are used to configure various aspects of all
# kubernetes services, including
#
#   kube-apiserver.service
#   kube-controller-manager.service
#   kube-scheduler.service
#   kubelet.service
#   kube-proxy.service
# logging to stderr means we get it in the systemd journal
KUBE_LOGTOSTDERR="--logtostderr=true"

# journal message level, 0 is debug
KUBE_LOG_LEVEL="--v=0"

# Should this cluster be allowed to run privileged docker containers
KUBE_ALLOW_PRIV="--allow-privileged=false"

# How the controller-manager, scheduler, and proxy find the apiserver
KUBE_MASTER="--master=http://192.168.201.181:8080"
- 重启服务
for SERVICES in etcd kube-apiserver kube-controller-manager kube-scheduler; do systemctl restart $SERVICES ; systemctl enable $SERVICES ; systemctl status $SERVICES ; done
-
配置etcd内网信息
etcdctl -C //192.168.201.181:2379 set /atomic.io/network/config '{"Network":"172.17.0.0/16"}'
PS:其中网络号172.17.0.0/16与docker中的docker0网络一致(若不一致,可修改docker0网络或者配置上述etcd网络);atomic.io与下面的Flannel配置中的FLANNEL_ETCD_PREFIX对应 -
至此master配置完成,运行kubectl get nodes可以查看有多少minion在运行,以及其状态。这里我们的minion还都没有开始安装配置,所以运行之后结果为空
No resources found.```
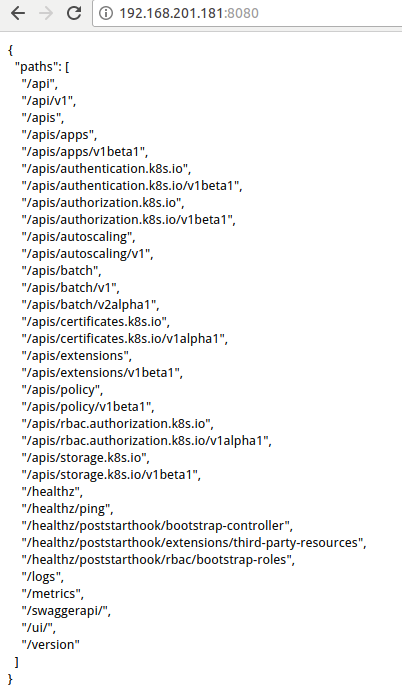
- 此时访问master:8080可以看到api服务支持的路径:
## Node节点安装flannel
> https://www.jianshu.com/p/165a256fb1da
使用`yum install flannel`安装,然后修改配置文件`vim /etc/sysconfig/flanneld `:
Flanneld configuration options
etcd url location. Point this to the server where etcd runs
FLANNEL_ETCD_ENDPOINTS="http://192.168.201.181:2379,http://192.168.201.182:2379,http://192.168.201.183:2379"
etcd config key. This is the configuration key that flannel queries
For address range assignment
FLANNEL_ETCD_PREFIX="/atomic.io/network"
Any additional options that you want to pass
FLANNEL_OPTIONS=""
PS:其中atomic.io与上面etcd中的Network对应!!

## Node节点安装kubernetes-node
`yum install kubernetes-node`

`vim /etc/kubernetes/config`
配置k8s公共配置文件,指定etcd的节点信息,和k8s的master信息:
kubernetes system config
The following values are used to configure various aspects of all
kubernetes services, including
kube-apiserver.service
kube-controller-manager.service
kube-scheduler.service
kubelet.service
kube-proxy.service
logging to stderr means we get it in the systemd journal
KUBE_LOGTOSTDERR="--logtostderr=true"
journal message level, 0 is debug
KUBE_LOG_LEVEL="--v=0"
Should this cluster be allowed to run privileged docker containers
KUBE_ALLOW_PRIV="--allow-privileged=false"
How the controller-manager, scheduler, and proxy find the apiserver
KUBE_MASTER="--master=http://192.168.201.181:8080"
KUBE_ETCD_SERVERS="--etcd-servers=http://192.168.201.181:2379,http://192.168.201.182:2379,http://192.168.201.183:2379"
### 配置Node节点的 kubernetes kubelet (minion) config:
`vim /etc/kubernetes/kubelet `
修改下面的`KUBELET_ADDRESS`和`KUBELET_HOSTNAME`为当前机器,`KUBELET_API_SERVER`为真实Master
kubernetes kubelet (minion) config
The address for the info server to serve on (set to 0.0.0.0 or "" for all interfaces)
KUBELET_ADDRESS="--address=0.0.0.0"
The port for the info server to serve on
KUBELET_PORT="--port=10250"
You may leave this blank to use the actual hostname
KUBELET_HOSTNAME="--hostname-override=192.168.201.182"
location of the api-server
KUBELET_API_SERVER="--api-servers=http://192.168.201.181:8080"
pod infrastructure container
KUBELET_POD_INFRA_CONTAINER="--pod-infra-container-image=registry.access.redhat.com/rhel7/pod-infrastructure:latest"
Add your own!
KUBELET_ARGS=""
### 启动并配置开机启动
systemctl enable kubelet kube-proxy
systemctl start kubelet kube-proxy

 浙公网安备 33010602011771号