
Spring Security 安全框架
目录
一、Spring Security 安全框架
1.介绍
Spring Security框架为我们提供了用户认证和授权的能力。
- 用户认证: 登陆验证
- 用户授权:某个用户是否具有某个权限。具有相应权限的用户才能进行具体的操作。比如: 管理员能进行工资设置,但是普通用户只能查看工资。
2.初体验
1) 引入依赖
 		<dependency>
            <groupId>org.springframework.boot</groupId>
            <artifactId>spring-boot-starter-security</artifactId>
        </dependency>
2)设计接口
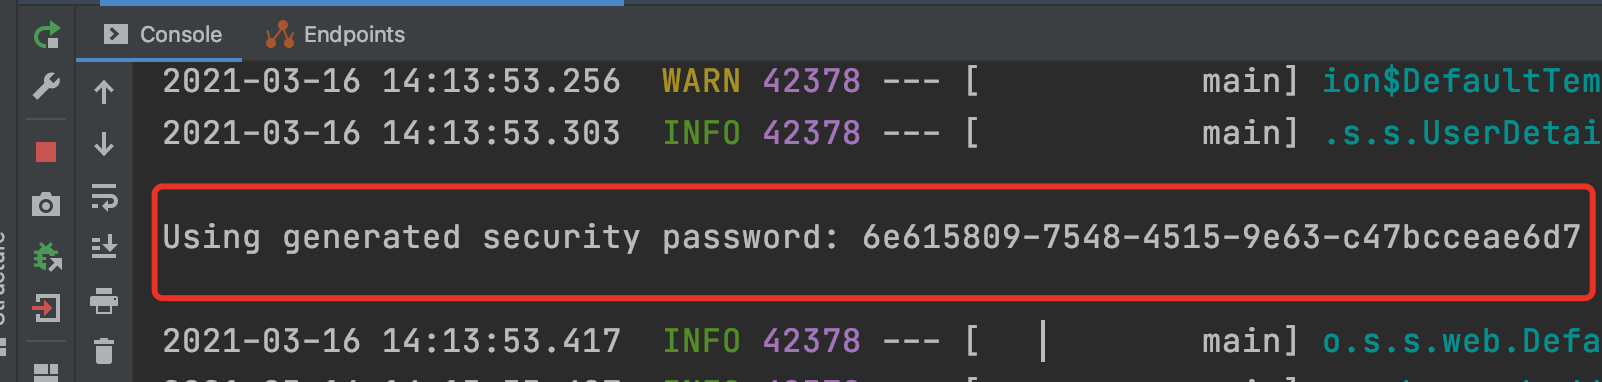
在访问接口时就会自动的被security的登陆页面拦截
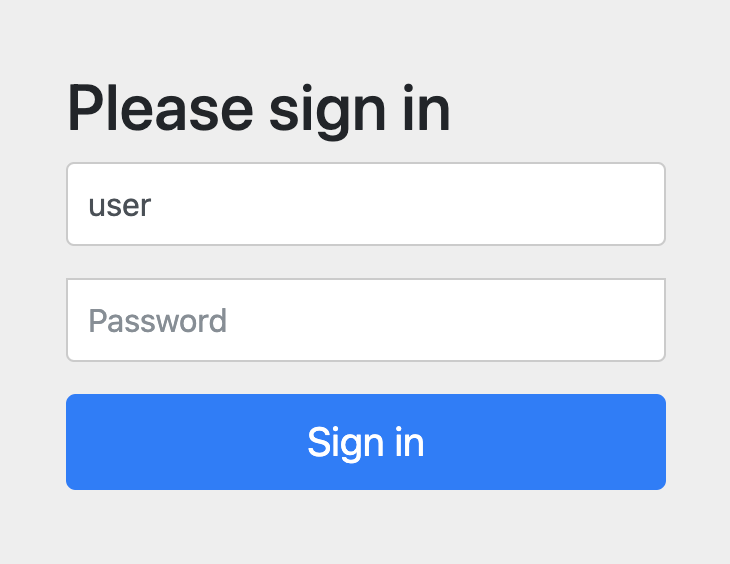
用户名: user
密码: 控制台会提示的
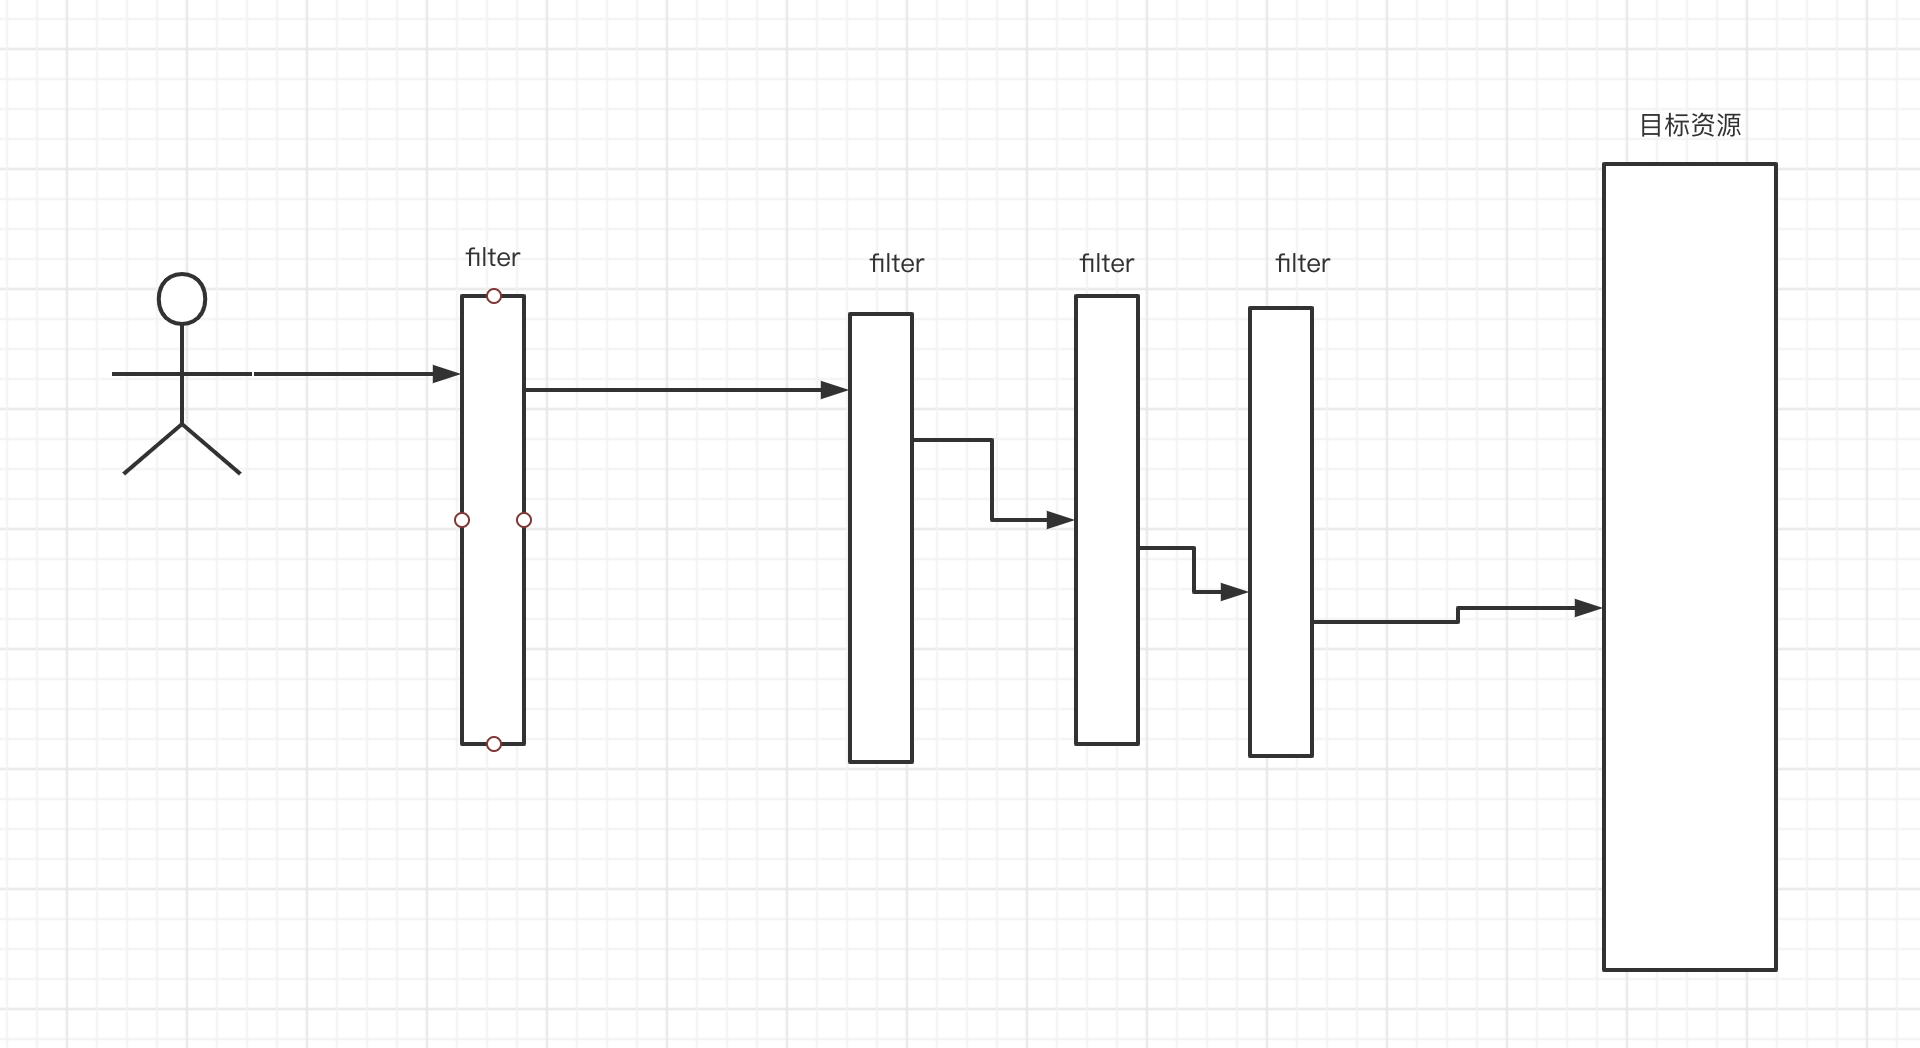
3.过滤器链
security实际上就是一串过滤器链。通过过滤器链来实现用户验证和授权。
4.多种方式设置用户名和密码
方式一:yml配置文件
# 设置用户名和密码
spring:
  security:
    user:
      name: qfadmin
      password: 123456
方式二: 设置配置类的方式
@Configuration
public class SecurityConfig extends WebSecurityConfigurerAdapter {

    @Override
    protected void configure(AuthenticationManagerBuilder auth) throws Exception {

        BCryptPasswordEncoder passwordEncoder = new BCryptPasswordEncoder();

        String password = passwordEncoder.encode("123456");

        auth.inMemoryAuthentication().withUser("xiaoming").password(password).roles();

    }

    @Bean
    PasswordEncoder passwordEncoder(){
        return new BCryptPasswordEncoder();
    }
}
方式三:设置自定义登陆页面
步骤:
- 创建了一个UserDetailsService接口的实现类
/**
 * 创建一个UserDetailsService实现类来设置用户名和密码
 */
@Service("userDetailsService")
public class MyUserService implements UserDetailsService {

    @Override
    public UserDetails loadUserByUsername(String s) throws UsernameNotFoundException {
        BCryptPasswordEncoder passwordEncoder = new BCryptPasswordEncoder();
        //设置角色,角色的概念在之后章节介绍
        List<GrantedAuthority> auths = AuthorityUtils.commaSeparatedStringToAuthorityList("role");
        //模拟从数据库获取用户名和密码
        User qfadmin = new User("qfadmin", passwordEncoder.encode("123456"), auths);

        return qfadmin;
    }
}
- 编写配置类
@Configuration
public class SecurityConfigPro extends WebSecurityConfigurerAdapter {

    @Autowired
    private UserDetailsService userDetailsService;

    @Override
    protected void configure(AuthenticationManagerBuilder auth) throws Exception {
        auth.userDetailsService(userDetailsService).passwordEncoder(passwordEncoder());
    }

    @Override
    protected void configure(HttpSecurity http) throws Exception {
        http.formLogin()
                .loginPage("/login.html") //设置自定义登陆页面
                .loginProcessingUrl("/usr/login") //登陆时访问的路径
                .defaultSuccessUrl("/index").permitAll() //登陆成功后跳转的路径
                .and().authorizeRequests()
                .antMatchers("/","/hello","/user/login").permitAll() //设置可以直接访问的路径,取消拦截
                .anyRequest().authenticated()
                .and().csrf().disable(); //关闭csrf防护
    }
    @Bean
    PasswordEncoder passwordEncoder(){
        return new BCryptPasswordEncoder();
    }
}
- 设计自定义登陆页面
注意: 表单中的用户名和密码的name属性必须是: username、password
<!DOCTYPE html>
<html lang="zh-CN">
<head>
    <meta charset="utf-8">
    <meta http-equiv="X-UA-Compatible" content="IE=edge">
    <meta name="viewport" content="width=device-width, initial-scale=1">
    <!-- 上述3个meta标签*必须*放在最前面,任何其他内容都*必须*跟随其后! -->
    <title>Bootstrap 101 Template</title>

    <!-- Bootstrap -->
    <link href="https://cdn.jsdelivr.net/npm/bootstrap@3.3.7/dist/css/bootstrap.min.css" rel="stylesheet">

    <!-- HTML5 shim 和 Respond.js 是为了让 IE8 支持 HTML5 元素和媒体查询(media queries)功能 -->
    <!-- 警告:通过 file:// 协议(就是直接将 html 页面拖拽到浏览器中)访问页面时 Respond.js 不起作用 -->
    <!--[if lt IE 9]>
    <script src="https://cdn.jsdelivr.net/npm/html5shiv@3.7.3/dist/html5shiv.min.js"></script>
    <script src="https://cdn.jsdelivr.net/npm/respond.js@1.4.2/dest/respond.min.js"></script>
    <![endif]-->
</head>
<body>

<form class="form-horizontal" action="/usr/login" method="post">
    <div class="form-group">
        <label for="inputEmail3" class="col-sm-2 control-label">Email</label>
        <div class="col-sm-10">
            <input type="text" name="username" class="form-control" id="inputEmail3" placeholder="Email">
        </div>
    </div>
    <div class="form-group">
        <label for="inputPassword3" class="col-sm-2 control-label">Password</label>
        <div class="col-sm-10">
            <input type="password" name="password" class="form-control" id="inputPassword3" placeholder="Password">
        </div>
    </div>
    <div class="form-group">
        <div class="col-sm-offset-2 col-sm-10">
            <div class="checkbox">
                <label>
                    <input type="checkbox"> Remember me
                </label>
            </div>
        </div>
    </div>
    <div class="form-group">
        <div class="col-sm-offset-2 col-sm-10">
            <button type="submit" class="btn btn-default">Sign in</button>
        </div>
    </div>
</form>

<!-- jQuery (Bootstrap 的所有 JavaScript 插件都依赖 jQuery,所以必须放在前边) -->
<script src="https://cdn.jsdelivr.net/npm/jquery@1.12.4/dist/jquery.min.js"></script>
<!-- 加载 Bootstrap 的所有 JavaScript 插件。你也可以根据需要只加载单个插件。 -->
<script src="https://cdn.jsdelivr.net/npm/bootstrap@3.3.7/dist/js/bootstrap.min.js"></script>
</body>
</html>
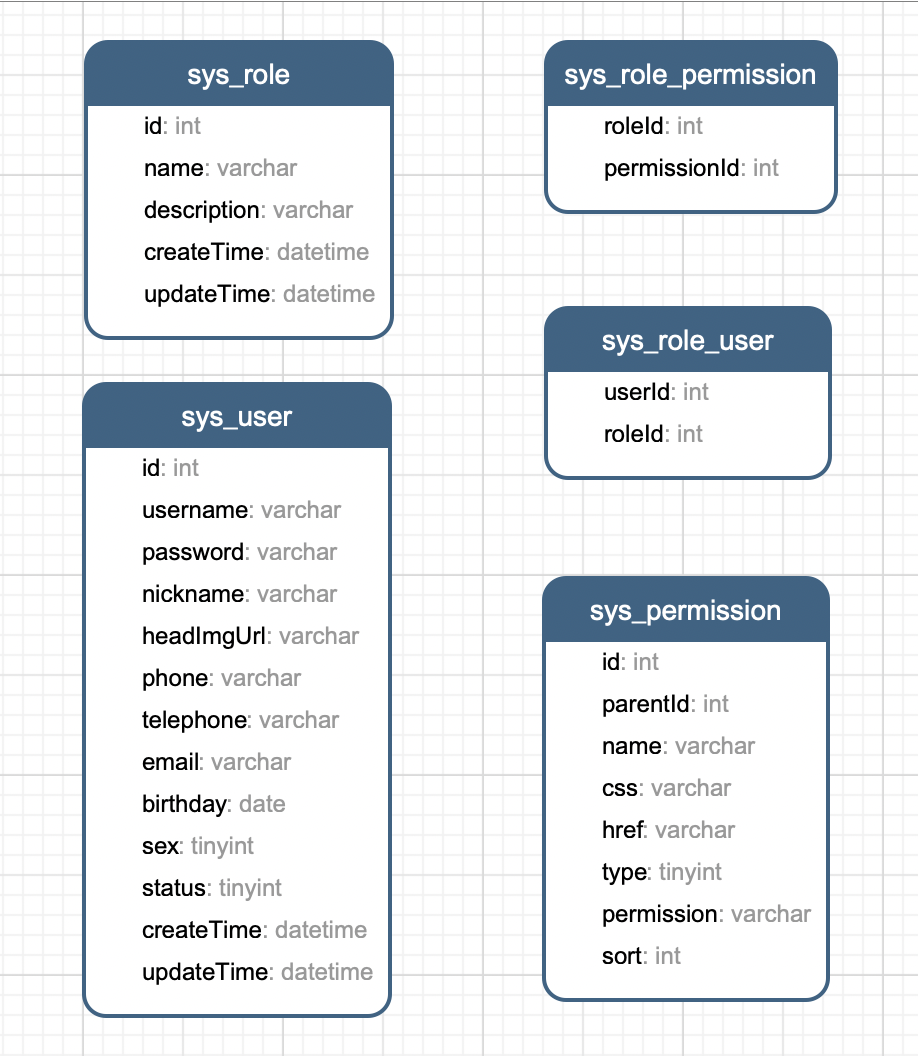
5.角色和权限的四个方法
1)角色和权限的概念
某个角色,拥有怎样的权限。
比如说管理员角色,拥有文件管理、日志管理的权限
比如说 普通用户角色,拥有文件查看的权限。
对于角色和权限来说,必须得看用户属于哪个角色,于是具有相应的权限。
比如小明属于普通用户,那么小明只有查看文件的权限。
2)hasAuthority、hasAnyAuthority、hasRole、hasAnyRole
判断当前登陆成功的用户,能否具有访问指定路径的权限的四个方法:
@Override
    protected void configure(HttpSecurity http) throws Exception {
        http.formLogin()
                .loginPage("/login.html") //设置自定义登陆页面
                .loginProcessingUrl("/usr/login") //登陆时访问的路径
                .defaultSuccessUrl("/index").permitAll() //登陆成功后跳转的路径
                .and().authorizeRequests()
                .antMatchers("/","/hello","/usr/login").permitAll() //设置可以直接访问的路径,取消拦截


                //1.hasAuthority方法:当前登陆用户,只有具有admin权限才可以访问这个路径
//                .antMatchers("/index").hasAuthority("admins")
                //2.hasAnyAuthority方法:当前登陆用户,具有指定的多个权限中的某一个权限即可访问
                //.antMatchers("/index").hasAnyAuthority("admins","admin")
                //3.hasRole:当前登陆用户是否属于指定的角色
//                .antMatchers("/index").hasRole("student")
                //4.hasAnyRole: 当前登陆用户满足某一个角色即可
                .antMatchers("/index").hasAnyRole("student","admin")
                .anyRequest().authenticated()
                .and().csrf().disable(); //关闭csrf防护
    }
还需要修改,UserDetailsService中的auths集合,例子中直接写死了权限和角色,实际可以从数据库获取并返回。
 @Override
    public UserDetails loadUserByUsername(String s) throws UsernameNotFoundException {
        BCryptPasswordEncoder passwordEncoder = new BCryptPasswordEncoder();
        //设置角色,角色的概念在之后章节介绍
        List<GrantedAuthority> auths = AuthorityUtils.commaSeparatedStringToAuthorityList("role,admin,ROLE_student");
        //模拟从数据库获取用户名和密码,且当前用户有admin的权限
        User qfadmin = new User("qfadmin", passwordEncoder.encode("123456"), auths);

        return qfadmin;
    }
6.security中的常用注解
- Secured: 具有指定的角色权限才能访问注解的方法
 	@RequestMapping("/items")
    @Secured({"ROLE_student1"})
    @ResponseBody
    public String items(){
        return "items";
    }
- PreAuthorize: 在访问方法之前先进行角色和权限的验证
 @RequestMapping("/items")
    @PreAuthorize("hasAnyAuthority('admin')")
    @ResponseBody
    public String items(){
        return "items";
    }
- PostAuthorize: 先执行方法,再进行角色和权限的验证
@RequestMapping("/postItems")
    @PostAuthorize("hasAnyAuthority('teacher')")
    @ResponseBody
    public String postItems(){
        //先执行方法内容,再做权限校验
        System.out.println("show detail here...");
        return "show post items";
    }
- PostFilter:返回到前端的数据会被过滤,过滤条件在注解中声明
    @RequestMapping("/users")
    @PreAuthorize("hasAnyAuthority('admin')")
    @PostFilter("filterObject.name=='xiaoming'")
    @ResponseBody
    public List<User> users(){

        List<User> users = new ArrayList<>();
        users.add(new User(1001L,"xiaoming"));
        users.add(new User(1002L,"xiaowang"));


        return users;
    }
- PreFilter:只有符合条件的数据才会被传入方法,条件在注解中声明
	@RequestMapping("/preFilterItems")
    @PreAuthorize("hasAnyAuthority('admin')")
    @PreFilter(value="filterObject.userName == 'xiaoming'")
    public List<User> getUsersByPreFilter(@RequestBody List<User> list){
        //只有userName是'xiaoming'的数据才会被传入
        list.forEach(t->{
            System.out.println(t.getUserName());
        });
        return list;
    }
关于如何校验数据库保存的密码。
 	@Test
    public void testPassword(){
        BCryptPasswordEncoder passwordEncoder = new BCryptPasswordEncoder();
        //1.数据库中要存密码的密文

        String password = "abc123";//明文
        String encodePassword = passwordEncoder.encode(password);


        //2.用户输入一个明文,怎么和数据库的密文进行比较
        boolean matches = passwordEncoder.matches(password, encodePassword);
        System.out.println(matches);

    }
二、实现注销功能
1.注销的流程
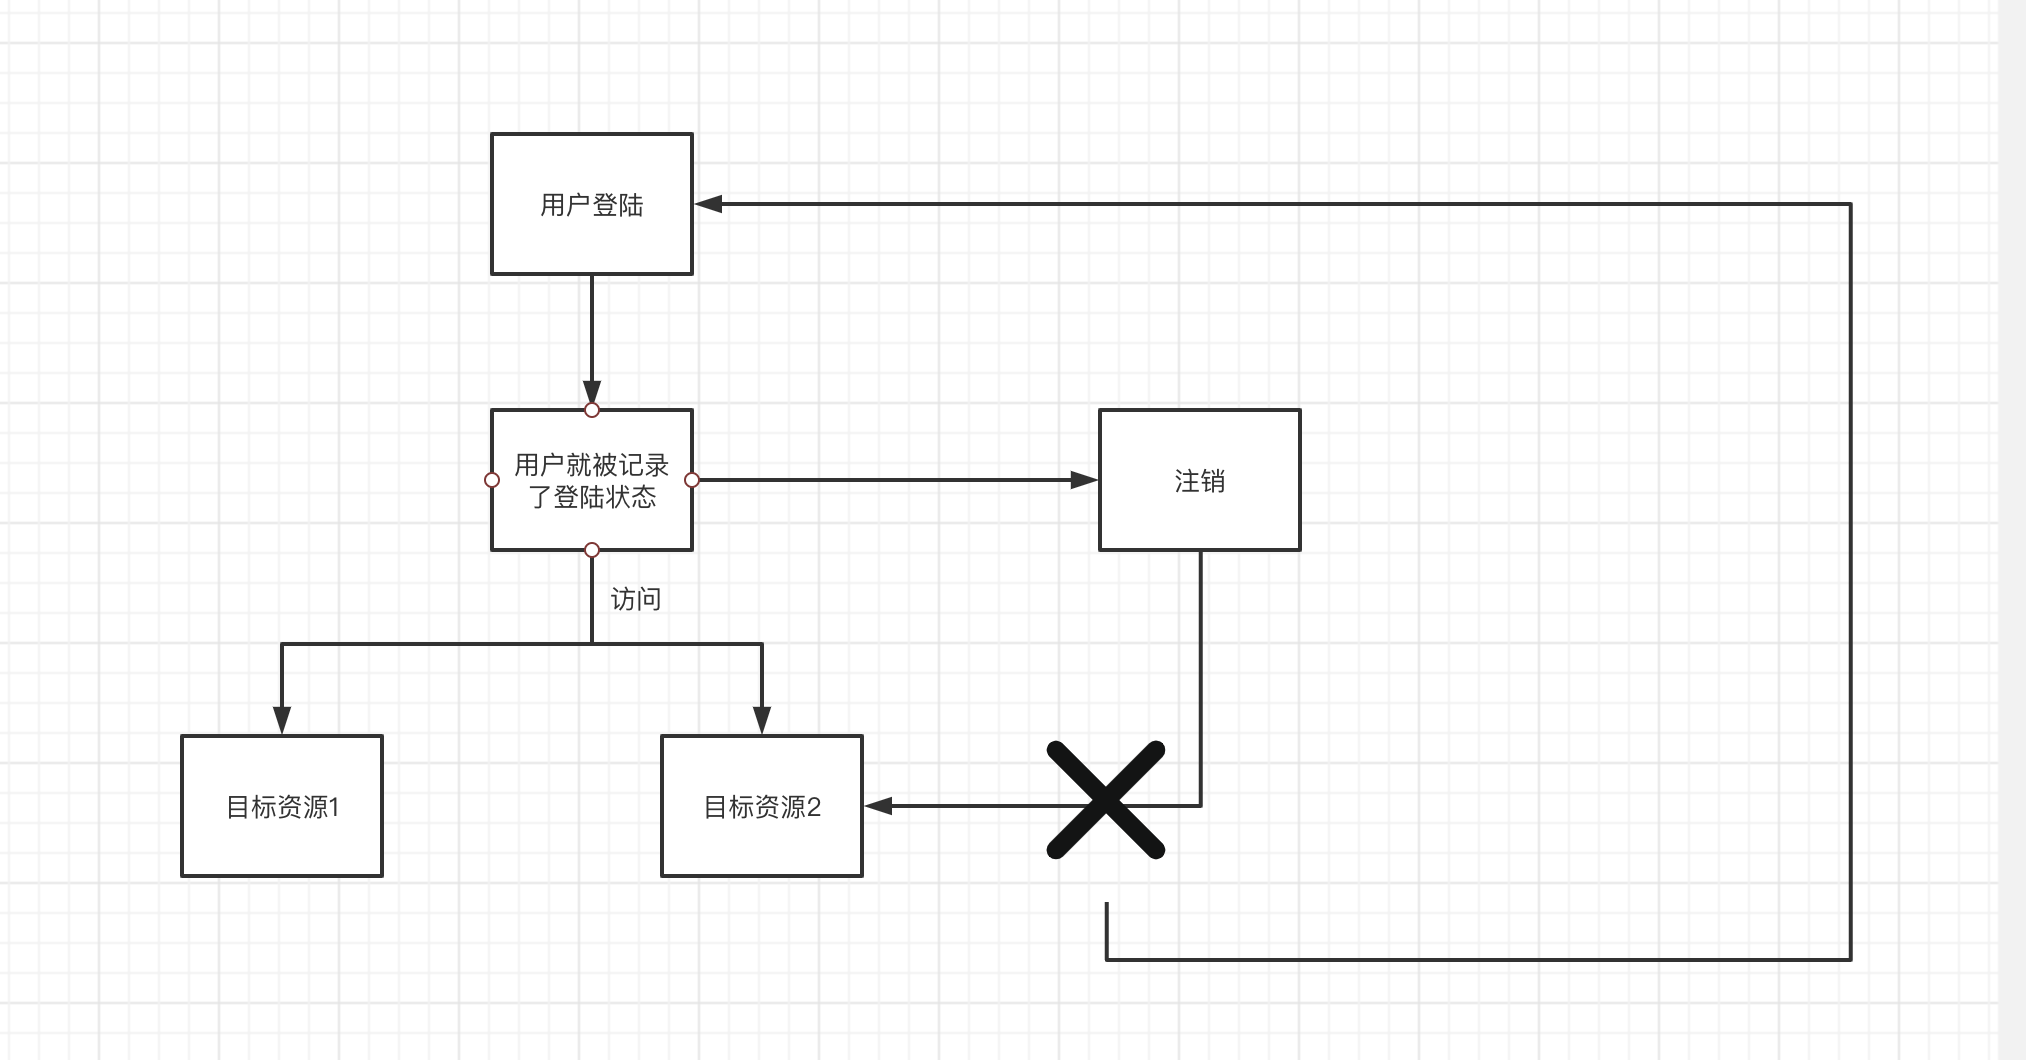
2.步骤
1)在配置类中添加注销配置
@Override
    protected void configure(HttpSecurity http) throws Exception {
        //配置没有权限的跳转页面
        http.exceptionHandling().accessDeniedPage("/error.html");

        //注销的配置
        http.logout().logoutUrl("/logout") //注销时访问的路径
                .logoutSuccessUrl("/logoutSuccess").permitAll(); //注销成功后访问的路径

        http.formLogin()
                .loginPage("/login.html") //设置自定义登陆页面
                .loginProcessingUrl("/usr/login") //登陆时访问的路径
                .defaultSuccessUrl("/index").permitAll() //登陆成功后跳转的路径
                .and().authorizeRequests()
                .antMatchers("/","/hello","/user/login").permitAll() //设置可以直接访问的路径,取消拦截
                //1.hasAuthority方法:当前登陆用户,只有具有admin权限才可以访问这个路径
//                .antMatchers("/index").hasAuthority("admins")
                //2.hasAnyAuthority方法:当前登陆用户,具有指定的多个权限中的某一个权限即可访问
                //.antMatchers("/index").hasAnyAuthority("admins","admin")
                //3.hasRole:当前登陆用户是否属于指定的角色
//                .antMatchers("/index").hasRole("student")
                //4.hasAnyRole: 当前登陆用户满足某一个角色即可
//                .antMatchers("/index").hasAnyRole("student","admin")
                .anyRequest().authenticated()
                .and().csrf().disable(); //关闭csrf防护
    }
2)创建注销链接,链接中访问注销路径/logout
<!DOCTYPE html>
<html lang="en">
<head>
    <meta charset="UTF-8">
    <title>首页</title>
</head>
<body>
  欢迎来到主页!<a href="/logout">注销</a>
</body>
</html>
3)编写注销成功后的跳转接口
    @RequestMapping("/logoutSuccess")
    public String logoutSuccess(){
        return "logoutsuccess";
    }
