深入浅出WPF(Binding篇1)
Binding在业界的使用一直是音译而来的,称为"Binding"。Binding的源是逻辑数据对象,目标则是UI层上面的控件对象。数据通过Binding送达UI层,被UI层展示出来,也就完成了数据驱动UI的过程了。
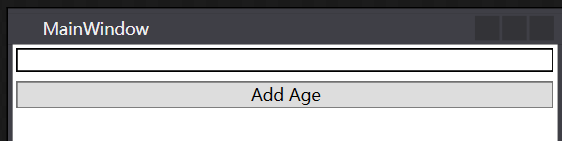
下面通过一个很简单的列子来引入我们最原始的Binding:
1 2 3 4 5 6 7 8 9 10 11 12 13 | <Window x:Class="BindingTest.MainWindow" xmlns="http://schemas.microsoft.com/winfx/2006/xaml/presentation" xmlns:x="http://schemas.microsoft.com/winfx/2006/xaml" xmlns:d="http://schemas.microsoft.com/expression/blend/2008" xmlns:mc="http://schemas.openxmlformats.org/markup-compatibility/2006" xmlns:local="clr-namespace:BindingTest" mc:Ignorable="d" Title="MainWindow" Height="100" Width="400"> <StackPanel> <TextBox Name="MyTextBlock" BorderBrush="Black" Margin="3"/> <Button Content="Add Age" Margin="3" Click="Button_Click"/> </StackPanel></Window> |
Binding有一种自动机制,就是当后台绑定的属性值发生改变时,会自动通知给UI元素,怎么样才能让属性具备这样的能力呢,其实只需要在属性set的时候去触发PropertyChanged事件。这个事件不需要我们声明,只需要我们去实现INotifyPropertyChanged接口。实现了此接口的学生类如下:

using System;
using System.Collections.Generic;
using System.ComponentModel;
using System.Linq;
using System.Text;
using System.Threading.Tasks;

namespace BindingTest.Models
{
    public class Student : INotifyPropertyChanged
    {
        public event PropertyChangedEventHandler PropertyChanged;
        public int _age;
        public int Age
        {
            get { return this._age; }
            set
            {
                if (value != 0)
                {
                    this._age = value;
                    PropertyChanged?.Invoke(this, new PropertyChangedEventArgs(nameof(Age)));
                }
            }
        }
    }
}
最终在窗体的后台代码中:
namespace BindingTest
{
    /// <summary>
    /// MainWindow.xaml 的交互逻辑
    /// </summary>
    public partial class MainWindow : Window
    {
        Student studen;
        public MainWindow()
        {
            InitializeComponent();
            studen = new Student();
            Binding binding = new Binding();
            binding.Source = studen;
            binding.Path = new PropertyPath("Age");
            BindingOperations.SetBinding(this.MyTextBlock, TextBox.TextProperty, binding);//设置目标对象的属性和源的绑定
        }

        private void Button_Click(object sender, RoutedEventArgs e)
        {
            studen.Age += 1;//改变对象,页面中textbox中数据也会变化
        }
    }
}
1绑定的源和路径
1.1 控件作为binding的源
Ui元素之间有时候需要进行一些关联效果可以利用Binding在控件之间建立关联,下面的代码就是将TextBlock的text和Slider(滑动条)的value进行了关联。运行下面这段代码就会发现当Slider滑动的时候,TextBlock中的值会随之改变。
<Window x:Class="BindingTest.MainWindow"
        xmlns="http://schemas.microsoft.com/winfx/2006/xaml/presentation"
        xmlns:x="http://schemas.microsoft.com/winfx/2006/xaml"
        xmlns:d="http://schemas.microsoft.com/expression/blend/2008"
        xmlns:mc="http://schemas.openxmlformats.org/markup-compatibility/2006"
        xmlns:local="clr-namespace:BindingTest"
        mc:Ignorable="d"
        Title="MainWindow" Height="100" Width="400">
    <StackPanel>
        <Slider Value="0" Name="slider1" Minimum="0" Maximum="100"></Slider>
        <TextBlock Text="{Binding ElementName=slider1,Path=Value}" Margin="3"></TextBlock>
    </StackPanel>
</Window>
可以通过设置Binding的Mode来设置数据流向,一般有TwoWay,OneWay,OnTime,OneWayToSource以及Default,如果不设置就是Default,如果你的目标控件是用户可编辑的就是双向的,比如TextBox如果是不可编辑的,那么就是单向的,比如TextBlock。


【推荐】国内首个AI IDE,深度理解中文开发场景,立即下载体验Trae
【推荐】编程新体验,更懂你的AI,立即体验豆包MarsCode编程助手
【推荐】抖音旗下AI助手豆包,你的智能百科全书,全免费不限次数
【推荐】轻量又高性能的 SSH 工具 IShell:AI 加持,快人一步
· .NET Core 中如何实现缓存的预热?
· 从 HTTP 原因短语缺失研究 HTTP/2 和 HTTP/3 的设计差异
· AI与.NET技术实操系列:向量存储与相似性搜索在 .NET 中的实现
· 基于Microsoft.Extensions.AI核心库实现RAG应用
· Linux系列:如何用heaptrack跟踪.NET程序的非托管内存泄露
· TypeScript + Deepseek 打造卜卦网站:技术与玄学的结合
· 阿里巴巴 QwQ-32B真的超越了 DeepSeek R-1吗?
· 【译】Visual Studio 中新的强大生产力特性
· 【设计模式】告别冗长if-else语句:使用策略模式优化代码结构
· 10年+ .NET Coder 心语 ── 封装的思维:从隐藏、稳定开始理解其本质意义