leetcode 706 设计哈希映射
leetcode 706. 设计哈希映射
实现一个 hashmap
题目描述:
不使用任何内建的哈希表库设计一个哈希映射(HashMap)。
实现 MyHashMap 类:
MyHashMap() 用空映射初始化对象
void put(int key, int value) 向 HashMap 插入一个键值对 (key, value) 。如果 key 已经存在于映射中,则更新其对应的值 value 。
int get(int key) 返回特定的 key 所映射的 value ;如果映射中不包含 key 的映射,返回 -1 。
void remove(key) 如果映射中存在 key 的映射,则移除 key 和它所对应的 value 。
class MyHashMap {

using value_type = std::pair<int, int>;
using node_pair = std::pair<node*, node*>;
using hasher = std::hash<int>;

struct node {
    value_type value;
    node* next;
    node(value_type val = value_type(), node* next = nullptr) : value(val), next(next) {}
};

public:
    MyHashMap() {
        size_ = 0;
        hash_function_ = hasher();
        bucket_array_.resize(default_bucket_, nullptr);
    }

    void put(int key, int value) {
        auto [prev, node_to_insert] = find_node(key);
        int index = hash_function_(key) % bucket_count();
        if (node_to_insert != nullptr) {
            node_to_insert->value.second = value;
            return;
        }
        auto temp = new node(value_type(key,value), bucket_array_[index]);
        bucket_array_[index] = temp;
        ++size_;
    }

    int get(int key) {
        auto [prev, node_found] = find_node(key);
        if (node_found == nullptr) {
            return -1;
        }
        return node_found->value.second;
    }

    void remove(int key) {
        auto [prev, node_to_erase] = find_node(key);
        if (node_to_erase == nullptr) {
            return;
        }
        int index = hash_function_(key) % bucket_count();
        (prev ? prev->next : bucket_array_[index]) = node_to_erase->next;
        size_--;
    }

    int bucket_count() const {
        return bucket_array_.size();
    }

    node_pair find_node(const int& key) const {
        int index = hash_function_(key) % bucket_count();
        node* curr = bucket_array_[index];
        node* prev = nullptr;
        while (curr != nullptr) {
            auto [found_key, found_mapped] = curr->value;
            if (found_key == key) {
                return {prev, curr};
            }
            prev = curr;
            curr = curr->next;
        }
        return {nullptr, nullptr};
    }

    void clear() {
        for (auto& curr : bucket_array_) {
            while (curr != nullptr) {
                auto will_del = curr;
                curr = curr->next;
                delete will_del;
            }
        }
        size_ = 0;
    }

    int size() const {
        return size_;
    }

    ~MyHashMap() {
        clear();
    }

    float load_factor() const {
        return static_cast<float>(size()) / bucket_count();
    }

private:
    std::vector<node*> bucket_array_;
    static const int default_bucket_ = 100;
    hasher hash_function_;
    int size_;
};
思路
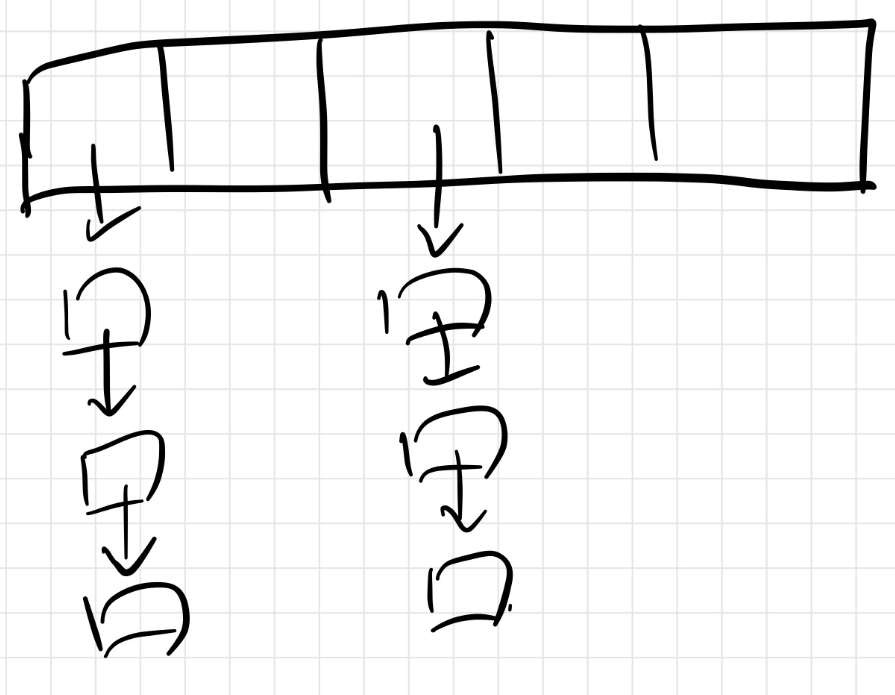
Hash 表的结构
由代码可得到如下图所示的 hash 表的结构:
find_node 函数
在对 hash 表操作的函数中,首先要实现一个 find_node 函数,代码如下图所示:
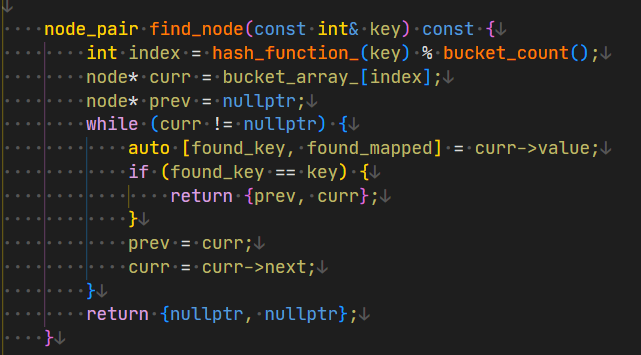
这个函数的思路为:
- 通过 hash 函数计算 key 所在的 bucket
- 定义两个变量用于记录当前遍历到的节点 curr 和其之前的一个节点 prev
- 遍历这个链表,如果找到符合 key 的 node 就返回这个 curr 和 prev
- 不符合就继续迭代到下一个节点
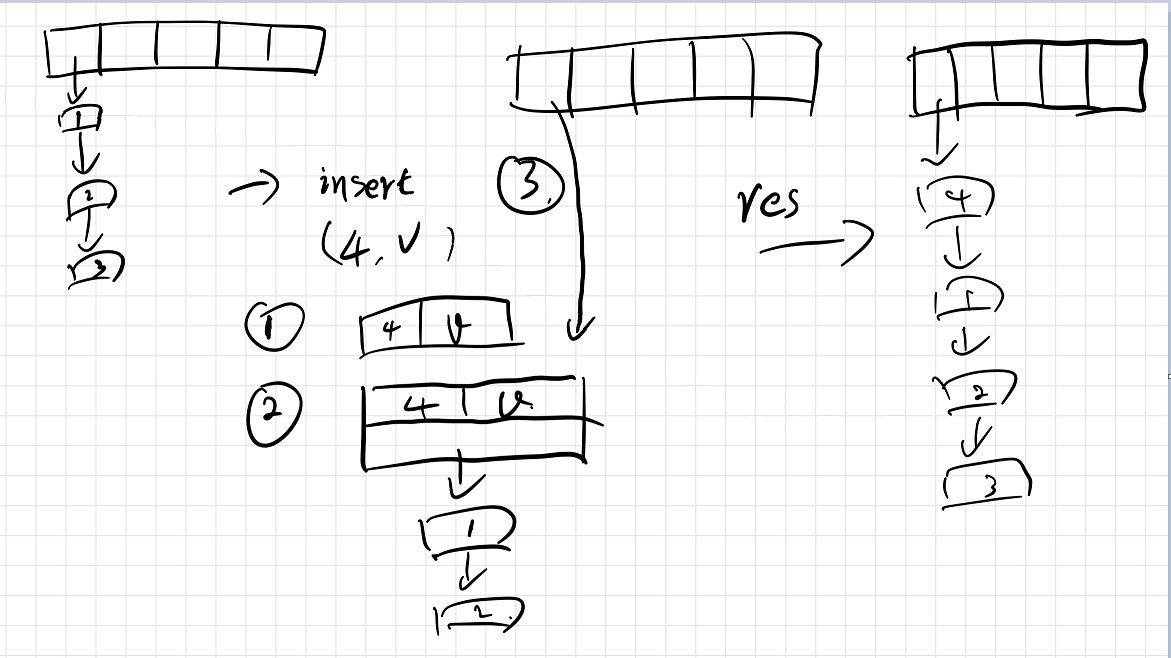
put 函数
-
如果 find_node 不为空,就更新其 value
-
如果 find_node 为空,其流程如下所示:
rehash 函数
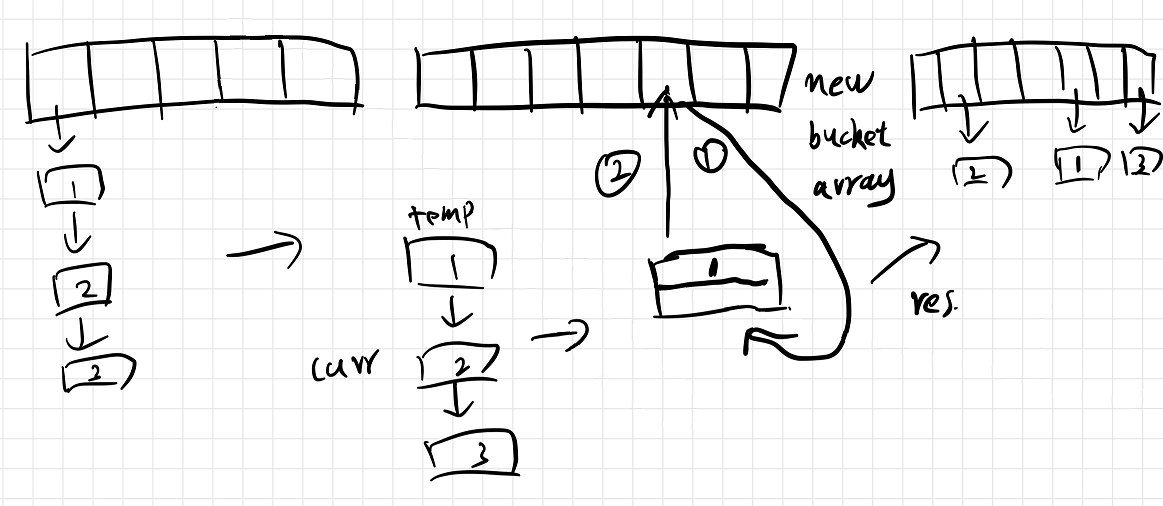
当前的哈希表的实现没有进行 rehash,当 load_factor 大于 0.75 时需要进行 rehash,避免碰撞。其实代码如下所示:
void HashMap<K, M, H>::rehash(size_t new_bucket_count) {
    if (new_bucket_count == 0) {
        throw std::out_of_range("HashMap<K, M, H>::rehash: new_bucket_count must be positive.");
    }

    std::vector<node*> new_buckets_array(new_bucket_count, nullptr);
    for (auto& curr : _buckets_array) {
        while (curr != nullptr) {
            const auto& [key, mapped] = curr->value;
            size_t index = _hash_function(key) % new_bucket_count;
            // curr 存储的是当前桶的第一个元素的地址
            auto temp = curr;                     // temp 为将要更换桶位置的节点地址
            curr = temp->next;                    // curr 为 temp 的下一个节点地址
            temp->next = new_buckets_array[index];// temp 节点的下一个节点是新桶的第一个节点的地址
            new_buckets_array[index] = temp;      // 将 temp 做为新桶的第一个节点
        }
    }
    _buckets_array = std::move(new_buckets_array);
}
流程图如下所示:
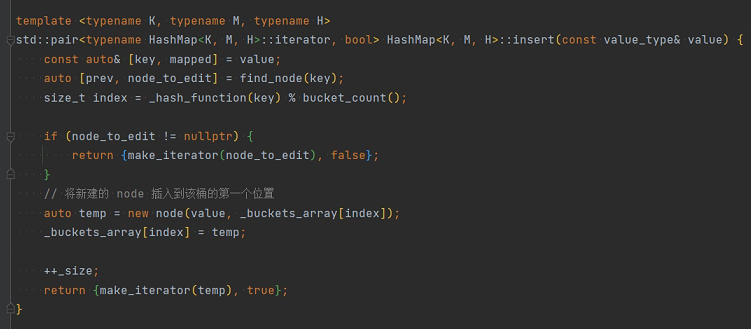
insert 函数
- 寻找 key 对应的 node
- 如果没有,就创建一个新的 node 并返回其迭代器
- 如果有就直接返回迭代器
[] 运算符
- 调用 insert 插入一个 {key, {}} 的键值对


【推荐】国内首个AI IDE,深度理解中文开发场景,立即下载体验Trae
【推荐】编程新体验,更懂你的AI,立即体验豆包MarsCode编程助手
【推荐】抖音旗下AI助手豆包,你的智能百科全书,全免费不限次数
【推荐】轻量又高性能的 SSH 工具 IShell:AI 加持,快人一步
· 阿里最新开源QwQ-32B,效果媲美deepseek-r1满血版,部署成本又又又降低了!
· 开源Multi-agent AI智能体框架aevatar.ai,欢迎大家贡献代码
· Manus重磅发布:全球首款通用AI代理技术深度解析与实战指南
· 被坑几百块钱后,我竟然真的恢复了删除的微信聊天记录!
· 没有Manus邀请码?试试免邀请码的MGX或者开源的OpenManus吧