
【教程】Windows环境下Vscode配置C与C++环境(最详细)
编译器MinGW
MinGW 的全称是:Minimalist GNU on Windows 。它实际上是将经典的开源 C语言 编译器 GCC 移植到了 Windows 平台下,并且包含了 Win32API ,因此可以将源代码编译为可在 Windows 中运行的可执行程序。而且还可以使用一些 Windows 不具备的,Linux平台下的开发工具。一句话来概括:MinGW 就是 GCC 的 Windows 版本 。
MinGW-w64相较于MinGW来说,MinGW只能编译生成32位可执行程序,而 MinGW-w64 则编译生成 64位 或 32位 可执行程序。
下载和安装
官网地址:https://www.mingw-w64.org/
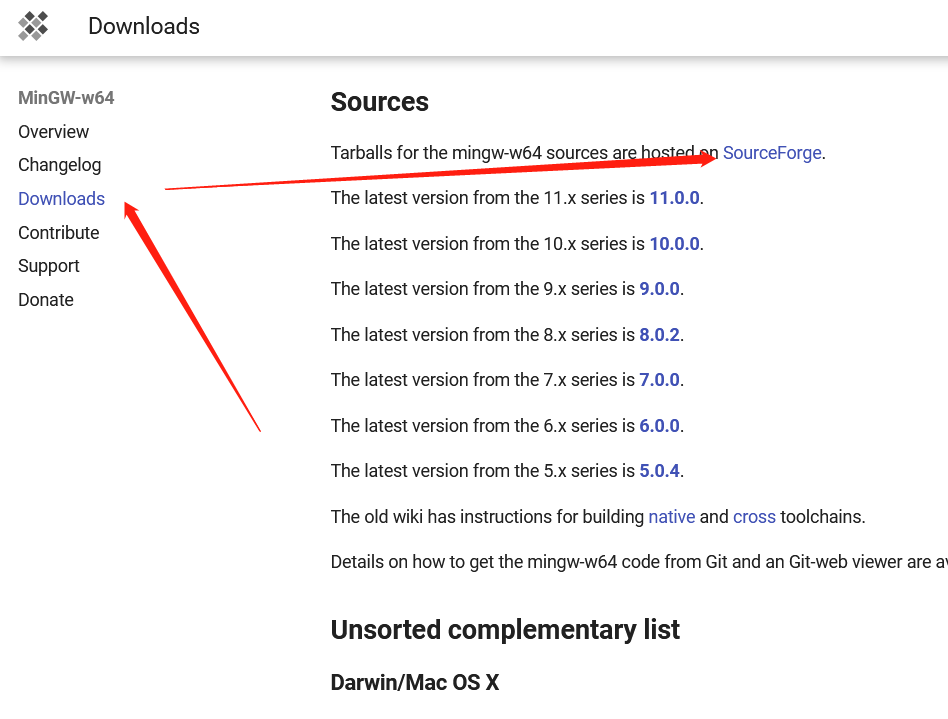
点击Downloads,选择SourceForge
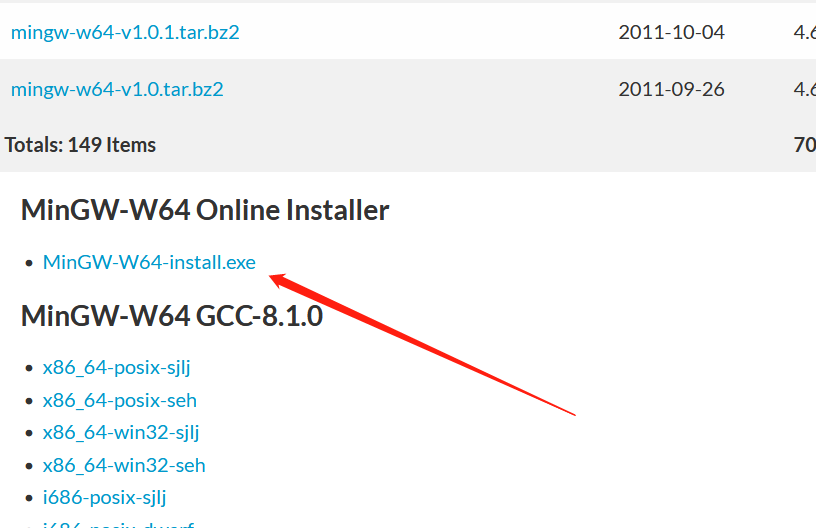
之后滑向页面下方,找到install.exe
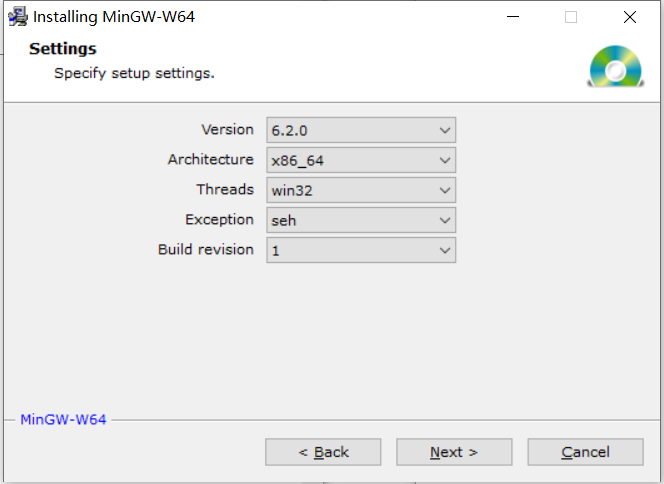
下载完成后,得到在线安装器。双击打开,如果不知道如何设置可以参考下图。
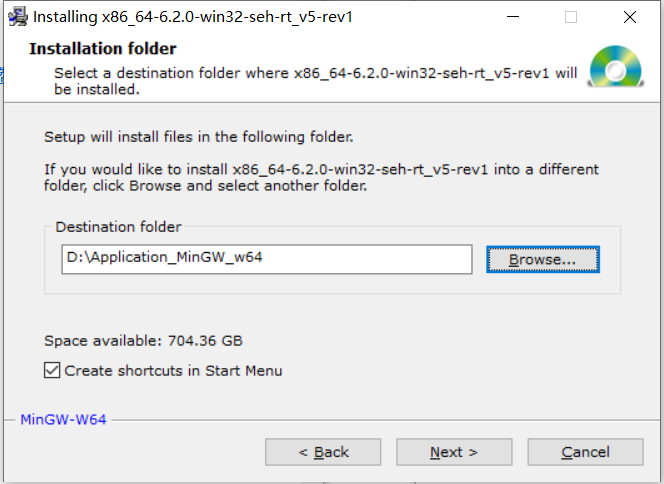
重新选择安装位置,尽量不放在C盘。
之后点击next即开始下载,如果下载过程中出现下图问题
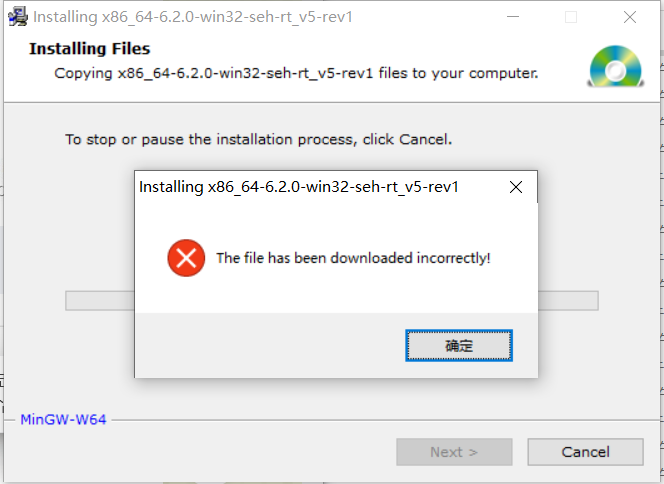
则尝试离线安装。
如果能够完成下载,则直接跳到环境配置
离线安装
在SourceForge页面向下滑动,找到适合自己的版本点击下载,如下图。

下载完成后,解压至自定义目录,该目录后续配置环境变量时要用到。
环境配置
将MinGW的bin目录添加至系统变量path中。
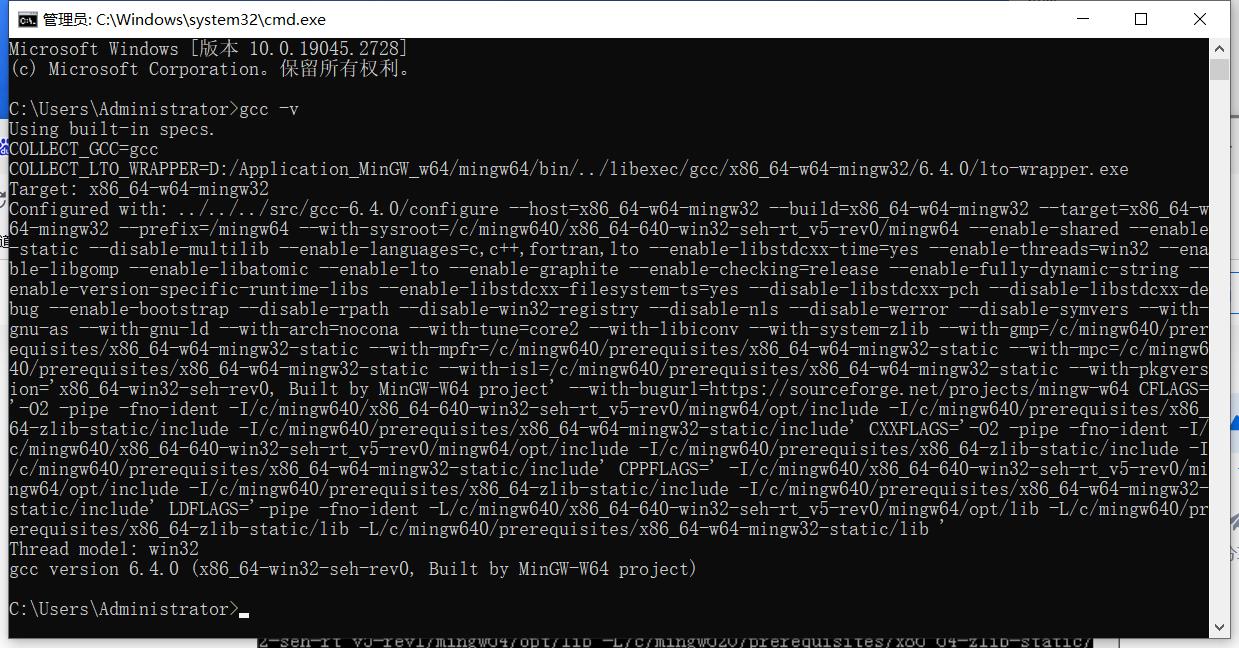
打开控制台,输入gcc -v,完成测试。
CMake
CMake是一个用于管理源代码的跨平台构建工具,可以方便地根据目标平台和编译工具产生对应的编译文件。主要用于C/C++语言的构建,也可以用于其它编程语言的源代码。
下载地址:https://cmake.org/download/
下载完成后,与MinGW相同,解压至自定义目录,将bin的路径加入到环境变量path中即可。

vscode
相信你来找C++相关的教程,vscode一定会使用了...这里就不再贴下载和安装教程了。
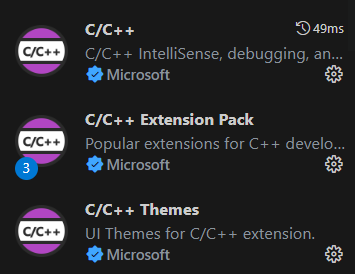
所需扩展
运行C程序
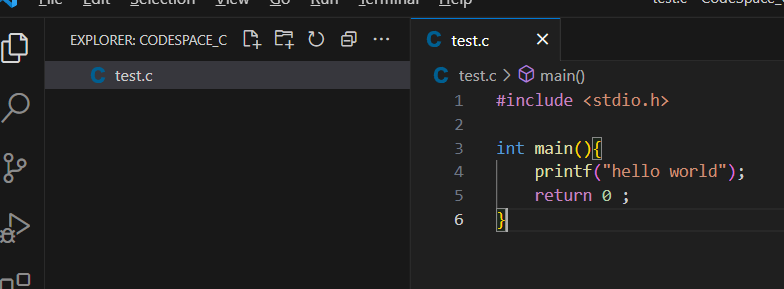
创建test.c文件,内容为hello world
点击右上角run file
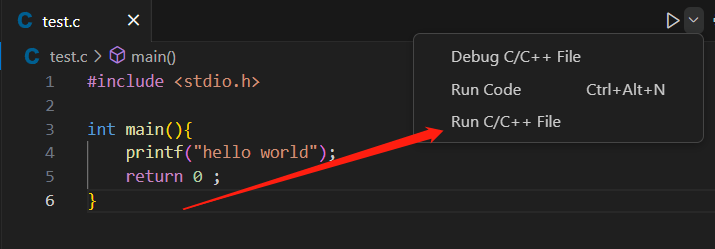
选择使用gcc生成可执行文件
成功
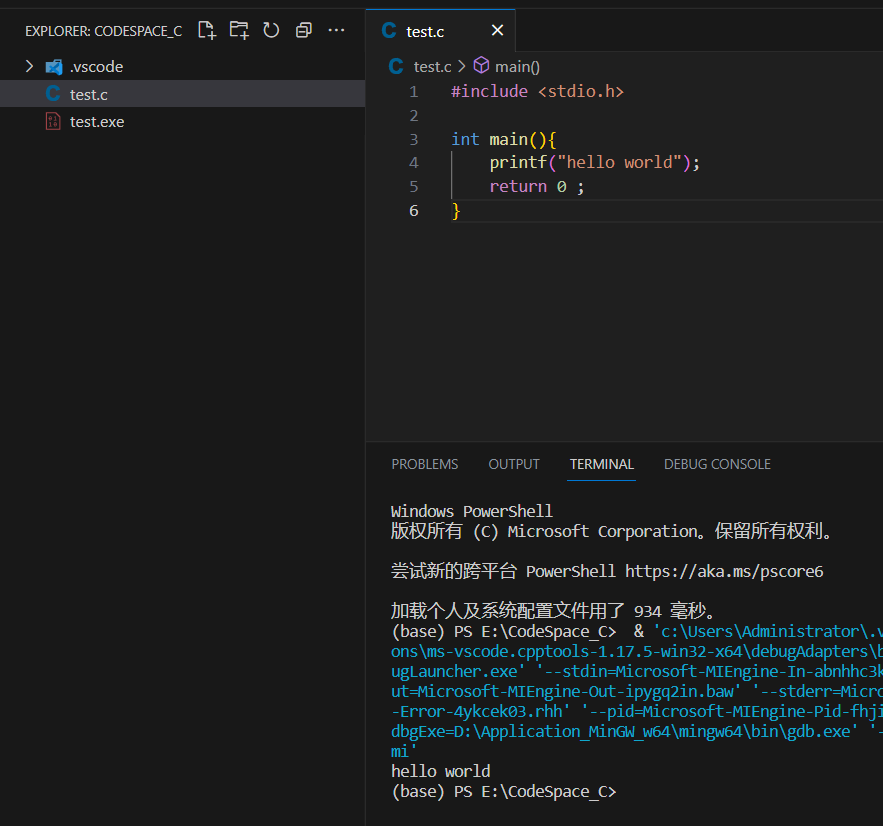
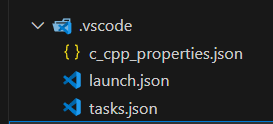
此时根目录将会生成.vscode目录,同时包含tasks.json文件。
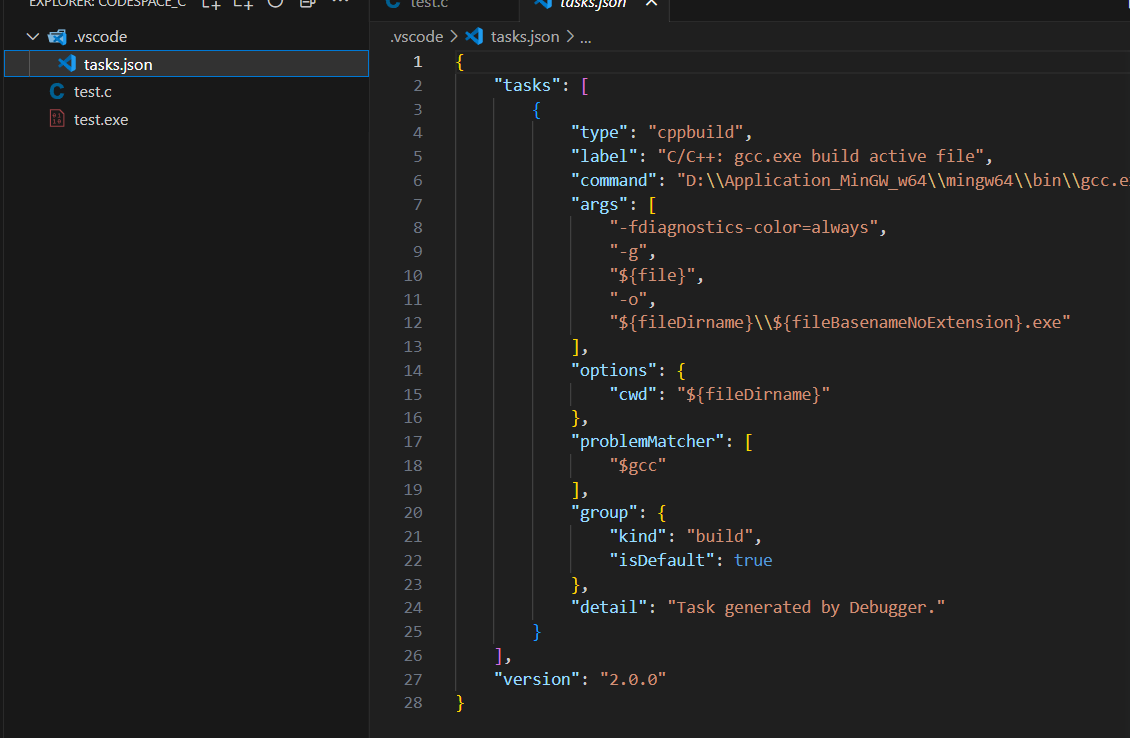
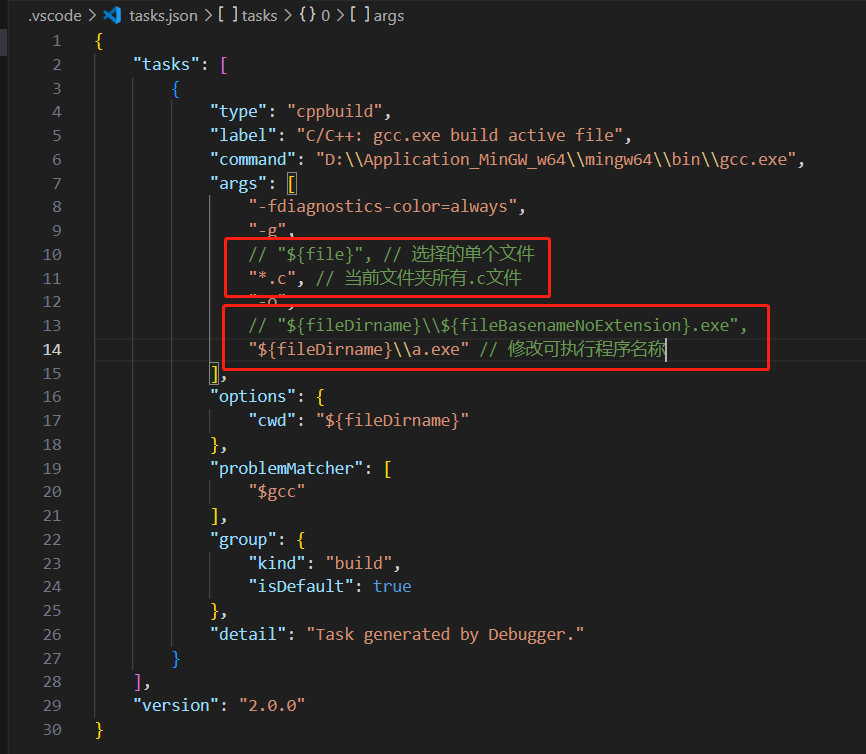
这个时候的tasks.json文件仅支持单个文件的编译,若想实现多文件编译,需要按照下图进行修改
调试C程序
其实此时已经能够调试单个文件了,这里就不截图举例,大家可以自行尝试,接下来的配置主要是实现多文件的调试。
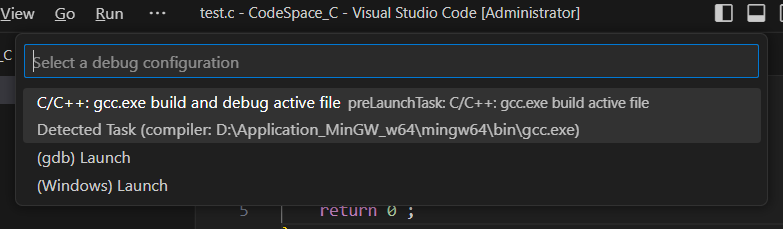
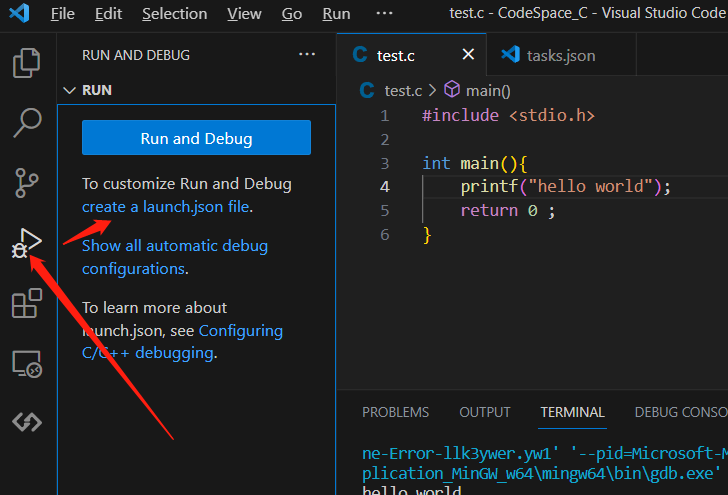
点击左侧run and debug,选择create a launch.json file
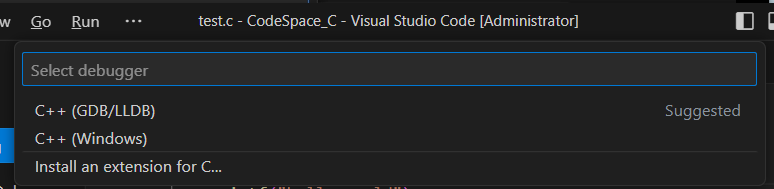
选择GDB
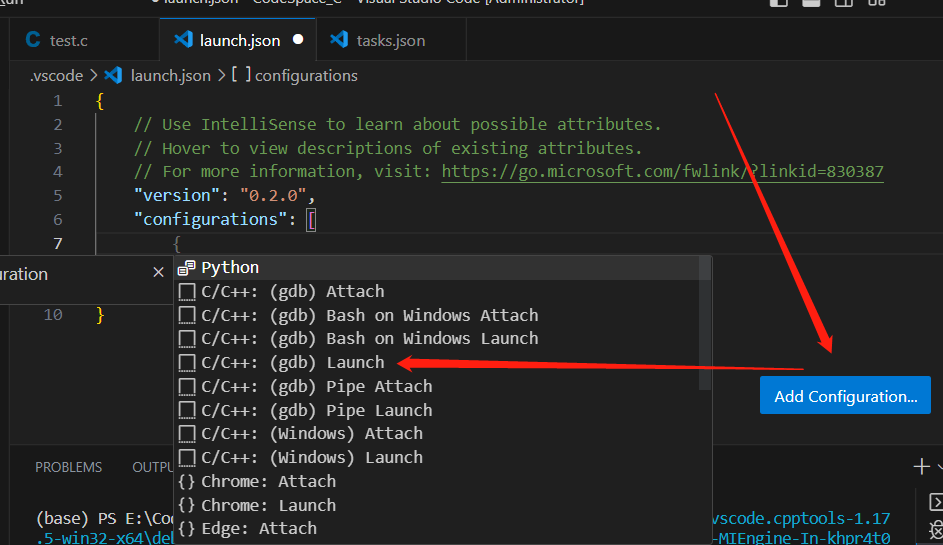
在launch.json中,点击添加配置,选择gdb Launch
依照下图进行修改
测试多个C文件运行和调试
创建三个测试文件
max.c
int Max(int a,int b){
return a>b?a:b;
}
max.h
int max(int a,int b);
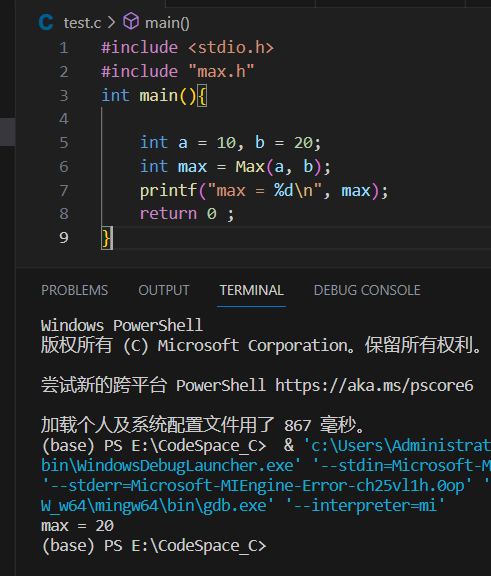
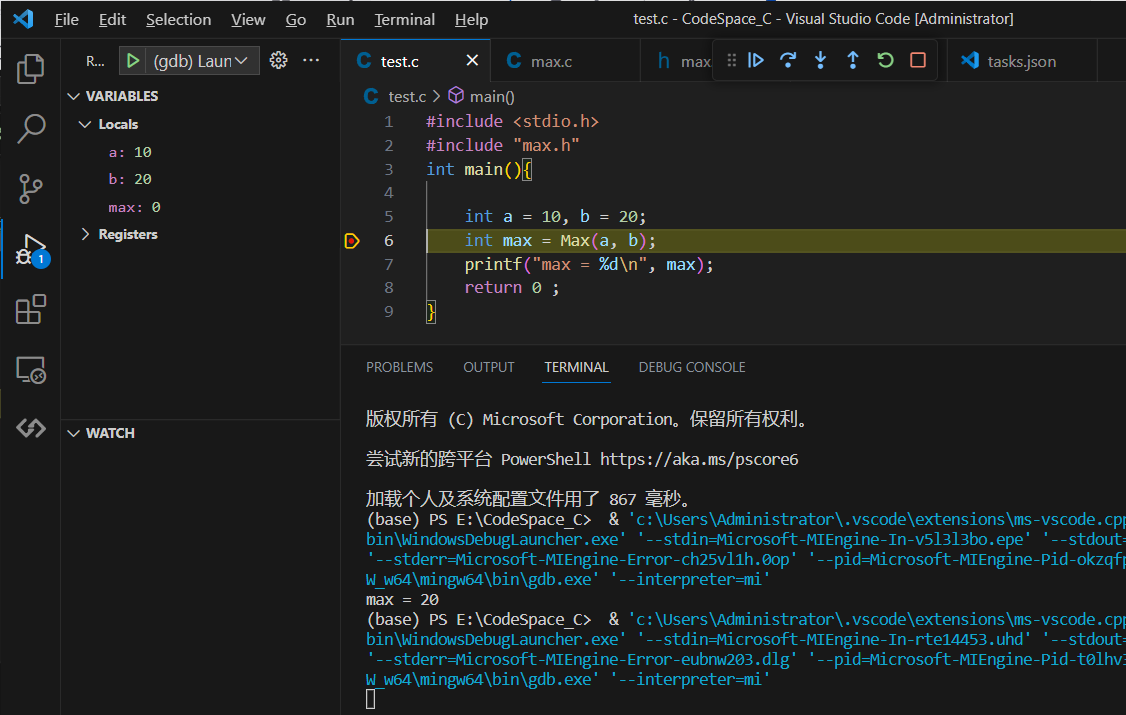
test.c
#include <stdio.h>
#include "max.h"
int main(){
int a = 10, b = 20;
int max = Max(a, b);
printf("max = %d\n", max);
return 0 ;
}
点击右上角运行
点击右上角debug
运行和调试C++程序
c++需要与c在不同的路径下,这里我新建一个目录为CodeSpace_cpp。
这里为了方便,直接把配置文件给大家
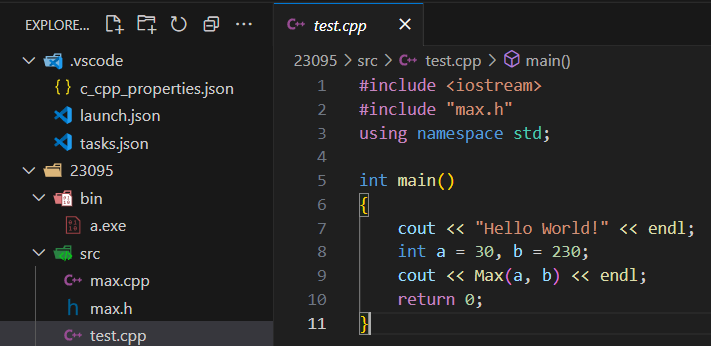
目录结构如下图所示
- c_cpp_properties.json
{
    "configurations": [
        {
            "name": "Win32",
            "includePath": [
                "${workspaceFolder}/**"
            ],
            "defines": [
                "_DEBUG",
                "UNICODE",
                "_UNICODE"
            ],
            "compilerPath": "D:\\Application_MinGW_w64\\mingw64\\bin\\g++.exe",
            "cStandard": "c11",
            "cppStandard": "gnu++14",
            "intelliSenseMode": "windows-gcc-x64"
        }
    ],
    "version": 4
}
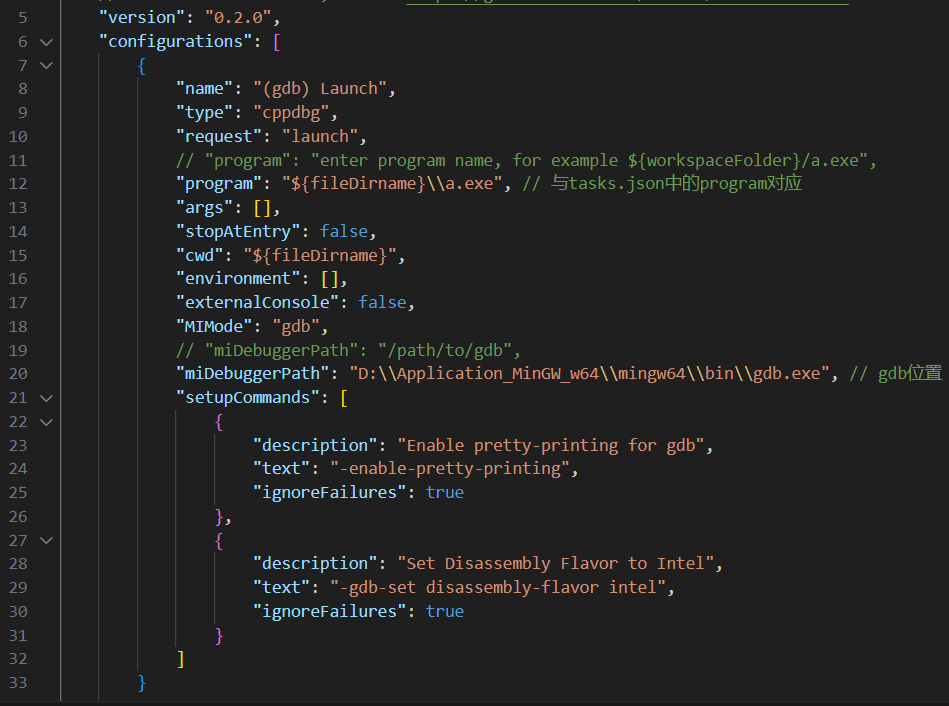
- launch.json
{
    // Use IntelliSense to learn about possible attributes.
    // Hover to view descriptions of existing attributes.
    // For more information, visit: https://go.microsoft.com/fwlink/?linkid=830387
    "version": "0.2.0",
    "configurations": [
        {
            "name": "(gdb) Launch",
            "type": "cppdbg",
            "request": "launch",
            // "program": "enter program name, for example ${workspaceFolder}/a.exe",
            "program": "${fileDirname}\\..\\bin\\a.exe", // 与tasks.json中的program对应
            "args": [],
            "stopAtEntry": false,
            "cwd": "${fileDirname}",
            "environment": [],
            "externalConsole": false,
            "MIMode": "gdb",
            // "miDebuggerPath": "/path/to/gdb",
            "miDebuggerPath": "D:\\Application_MinGW_w64\\mingw64\\bin\\gdb.exe", // gdb位置
            "setupCommands": [
                {
                    "description": "Enable pretty-printing for gdb",
                    "text": "-enable-pretty-printing",
                    "ignoreFailures": true
                },
                {
                    "description": "Set Disassembly Flavor to Intel",
                    "text": "-gdb-set disassembly-flavor intel",
                    "ignoreFailures": true
                }
            ]
        }
    ]
}
- tasks.json
{
    "tasks": [
        {
            "type": "cppbuild",
            "label": "C/C++: gcc.exe build active file",
            "command": "D:\\Application_MinGW_w64\\mingw64\\bin\\g++.exe",
            "args": [
                "-fdiagnostics-color=always",
                "-g",
                // "${file}", // 选择的单个文件
                "*.cpp", // 当前文件夹所有.c文件
                "-o",
                // "${fileDirname}\\${fileBasenameNoExtension}.exe",
                "${fileDirname}\\..\\bin\\a.exe" // 修改可执行程序名称
            ],
            "options": {
                "cwd": "${fileDirname}"
            },
            "problemMatcher": [
                "$gcc"
            ],
            "group": {
                "kind": "build",
                "isDefault": true
            },
            "detail": "Task generated by Debugger."
        }
    ],
    "version": "2.0.0"
}
配置完成后,即实现了多文件的C++运行和编译

 浙公网安备 33010602011771号