bottle学习
Bottle 是一个快速,简单,轻量级的 Python WSGI Web 框架。单一文件,只依赖 Python 标准库 。了解Django的话bottle学习起来非常简单,本文记录下bottle学习记录
项目目录
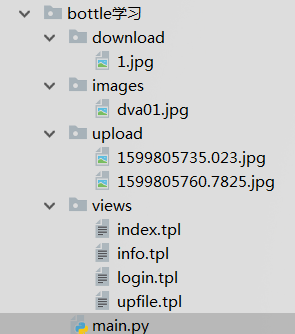
main.py文件主程序 views目录下文件各html模板
一、定义路由,url
from bottle import route, run,request
from bottle import template,view,static_file
@route('/hello')  #定义路由,即浏览器访问的地址
def hello():
    return "Hello"

@route('/he')
def he():
    return "He"

#动态路由 一个通配符包含在一对尖括号里面 (像这样 <name> ),通配符之间用”/” 分隔开来 可以匹配多个url地址
@route('/hello/<name>')
def helloName(name):
    return "hello:%s" % name

run(host='localhost', port=8080)#开启服务启动监听
二、http请求方法
HTTP 协议定义了多个 请求方法 来满足不同的需求。所有 route 默认使用 GET 方法,只响应 GET 请求。可给 route() 函数指定 method 参数。或用 get() , post() , put() 或 delete() 等函数来代替route() 函数。
#一个简单登录的列子
@route('/login')
def login():
        '''
        默认为GET方法

        当从GET方法传递键值时,用 request.query方法来获取,如:请求http://127.0.0.1:8080/info?id=12&name=drfdai&age=30
        t通过如下获取值
        id = request.query.id
        name = request.query.name
        age = request.query.age
        '''

        id = request.query.id
        name = request.query.name
        age = request.query.age
        print(id,name,age)
        print(request.query)#<bottle.FormsDict object at 0x0000000003062B00>
        #直接返回html代码
        return '''
        <html>
        <head>
        </head>
        <body>
        <form action="/login" method="post">
            Username: <input name="username" type="text" />
            Password: <input name="password" type="password" />
            <input value="Login" type="submit" />
        </form>
        </body>
        </html>
    '''
@route('/login', method='POST')
def do_login():
        '''
        method 指定post方法
        当访问login页面,同时带了POST请求时,这个函数将响应
        request.forms.get获取提交过来的数据,是一个字典 <bottle.FormsDict object at 0x00000000030588D0>
        '''

        username = request.forms.get('username')
        password = request.forms.get('password')
        return '<p>帐号:%s</p><p>密码:%s</p>' %(username,password)

run(host='localhost', port=8080, debug=True)   #开启服务
三、模板使用
可通过 template() 函数或 view() 修饰器来渲染一个模板。只需提供模板的名字和传递给模板的变量
@route('/login')
def login():
    return template('login')     #login是模板名,这里不需要填写后缀.tpl

#给模板传递参数
@route('/info')
def info():
    name = 'root'
    age = '30'
    return template('info', name=name, age=age)

#使用views()渲染
@route('/vie')
@view('info')     #在这里用view来加载info模板,记得这里不需要写模板后缀名
def vie():
    name = 'root'
    age = '30'
    data={'name': name, 'age': age}
    return data

run(host='localhost', port=8080, debug=True)   #开启服务


<html>
    <head>
    <title>登陆页面</title>
    </head>
    <body>
        <p><h2>管理员登陆</h2></p>
        <form action="/login" method="post">
            Username: <input name="username" type="text" />
            Password: <input name="password" type="password" />
            <input value="Login" type="submit" />
        </form>
    </body>
</html>
<html>
    <head>
    <title>会员中心</title>
    </head>
    <body>
        <p><h2>会员信息</h2></p>
        <p>姓名:{{name}}</p>
        <p>年龄:{{age}}</p>

    </body>
</html>
四、静态资源
设置静态资源访问路由,要设置route,如@route('/images/<filename:re:.*\.png>') ,/image,是url访问路径,/<filename:re:.*\.png>' 是一个正则匹配,如匹配以.png结尾的所有文件,如果是jpg图片,即可以用*\.jpg,如果是css或js则用.*\.css,.*\.js。然后调用bottle static_file()方法,static_file(filename, root=images_path) :filename是url里匹配到的文件名,root是图片等静态资源存放路径。最后,程序就会根据这设置好的路由,去找到相关的文件,并在浏览器显示出来。
images_path = './images'
@route('/images/<filename:re:.*\.jpg>') #我们可以用 | 来匹配多种类型:@route('/assets/<filename:re:.*\.css|.*\.js|.*\.png|.*\.jpg|.*\.gif>')
def server_static(filename):
    return static_file(filename, root=images_path)
run(host='localhost', port=8080, debug=True)   #开启服务
五、文件下载
还是使用static_file()方法,添加download=filename参数,如果不用这个参数,而且你的文件又是html的话,一点击这个文件,可能就在浏览器显示出来,而不是下载下来。
#定义下载路径
download_path = './download'
#强制文件下载
@route('/download/<filename:path>')
def download(filename):
    return static_file(filename, root=download_path, download=filename)

#显示下载页面
@route('/')
def index():
        return template('index')

run(host='localhost', port=8080, debug=True)   #开启服务
<html>
        <head>
        </head>
        <body>
        </p>
        <a href="/download/1.jpg">点击下载</a>
        </body>
</html>
六、文件上传
上传文件需要注意前端html的form表单中,要添加 enctype="multipart/form-data"属性,后端,用request.files方法,获取到表单传上来的文件然后用save()的方法来保存到服务器中。
upload.save(save_path,overwrite=True),save_path是保存文件的路径,overwrite=True是指如果服务器中已有同名文件存在,则覆盖。
#定义上传路径
save_path = './upload'

#显示文件上传页面
@route('/')
def index():
        return template('upfile')

#上传文件时,文件对象有2个属性文件名:filename,文件类型:content_type   通过文件对象.filename获取
@route('/upload', method = 'POST')
def do_upload():
    upload = request.files.get('data')
    file_name =upload.filename
    print(file_name)
    import os.path,time
    name, ext = os.path.splitext(file_name)  # 用os.path.splitext方法把文件名和后缀相分离
    upload.filename = ''.join((str(time.time()), ext))  # 修改文件名
    upload.save(save_path, overwrite=True)  # 把文件保存到save_path路径下,overwrite=True存在相同文件强制覆盖
    return u'上传成功  原文件名是:%s  文件后缀名是:%s \n 修改后的文件名是:%s' % (name, ext, ''.join((str(time.time()), ext)))

run(host='localhost', port=8080, debug=True)   #开启服务
 <html>
    <head>
      </head>
         <body>
            <form action="/upload" method="post" enctype="multipart/form-data">
                <input type="file" name="data" />
                <input type="submit" value="Upload" />
            </form>
            </body>
        </html>
七、错误和重定向
捕获错误的 route:@error(),可以捕获403,404等
abort()方法可以用来特意引发一种错误,如abort(404)
redirect()方法可以重定向到别的页面上去,如redirect('/')跳转到首页
from bottle import route, run ,error,abort,redirect

#用于捕获404并执行相关代码
@error(404)
def miss(code):
    return '没找到页面!'

@route('/error')
def nofound():
    #模拟引发404错误
    abort(404)
