统信UOS-时间同步服务器
方法一
NTP时间同步
NTP基于UDP报文进行传输,使用的UDP端口号为123
一、服务端:
假设ip是192.168.100.100
1、安装ntp
外网:sudo apt install ntp (内网拷贝离线包安装)
2、修改配置文件:vim /etc/ntp.conf
注释默认的时间同步源
#pool 127.0.0.1 iburst
#pool 1.debian.pool.ntp.org iburst
#pool 2.debian.pool.ntp.org iburst
#pool 3.debian.pool.ntp.org iburst
增加以下2行
server 127.127.1.0
fudge 127.127.1.0 stratum 8
修改后,保存退出
3、启动服务并设置服务开机自启
systemctl start ntp && systemctl enable ntp
4、查看侦听端口
netstat -tunlp | grep ntp 或者ss -ntulp | grep ntp 一般是在123端口
timedatectl 查看当前机器时间
ip a 查看服务端ip
二、客户端
客户端需要安装ntpdate的包:sudo apt install ntpdate
输入 ntpdate serverip(服务端配置ntp的ip地址)去同步时间
结果显示类似: 18 Aug 16:04:24 ntpdate[30646]: step time server 10.20.xx.xx offset 47606319.594686 sec
PS:
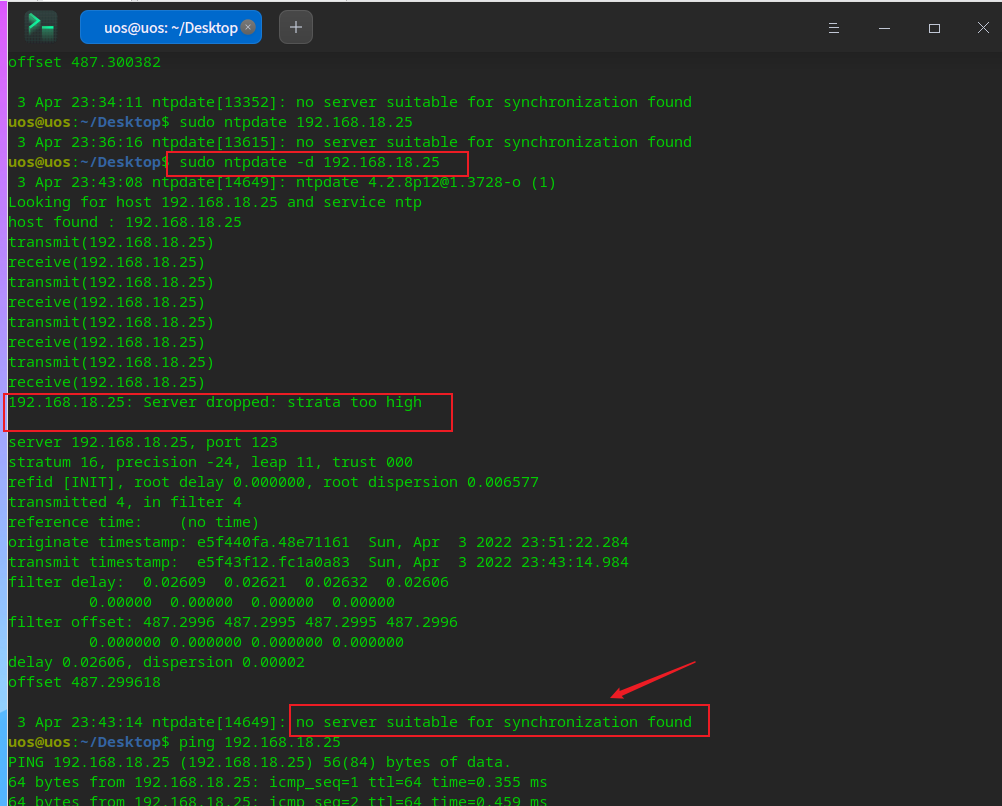
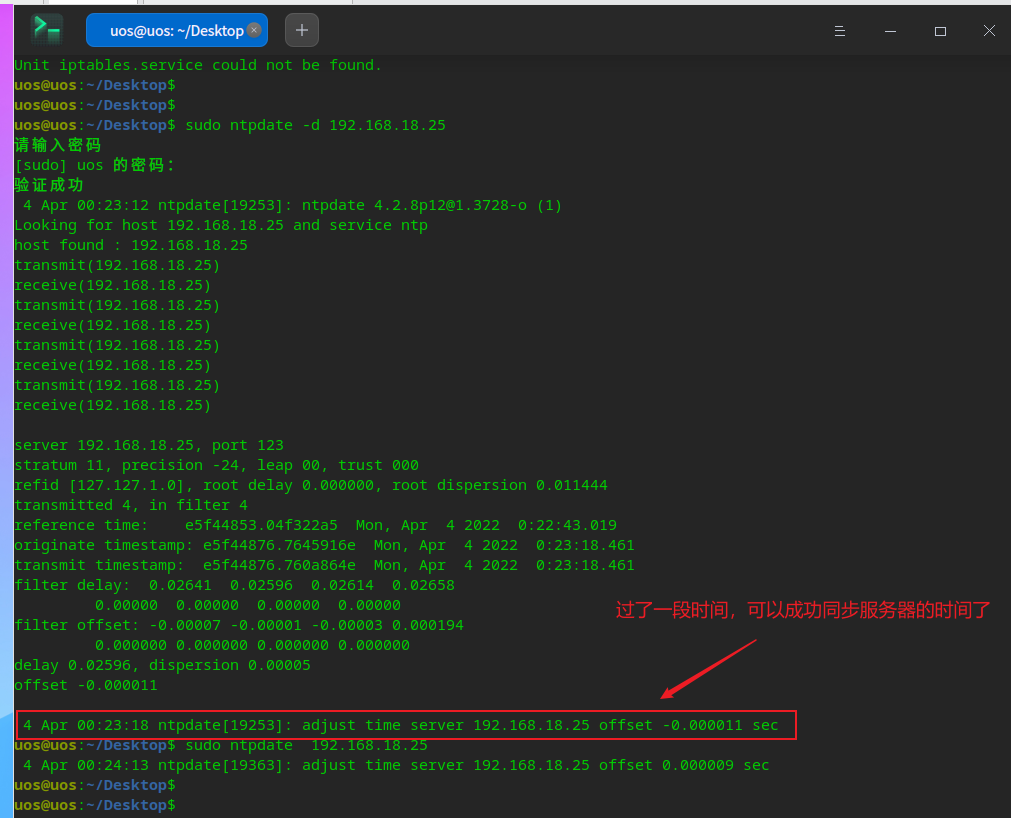
1、如果上述操作不成功,可以 ntpdate -d 192.168.100.100 查看报错详情,然后再去ntpdate 服务端ip 同步时间
2、ntp客户端用ntpdate -d serverip查看,发现有192.168.100.100: Server dropped: strata too high
的错误,这是因为ntp server还没有和其自身或者它的server同步上。可以用ntptrace 和ntpd -s -d 命令,再去ntpdate serverip即可。
no server suitable for synchronization found没有找到适合同步的服务器(在ntp server上重新启动ntp服务后,ntp server自身或者与其server的同步的需要一个时间段,这个过程可能是5分钟,在这个时间之内在客户端运行ntpdate命令时会产生no server suitable for synchronization found的错误。)
方法二
chrony时间同步
chronyd实现了NTP协议并且可以作为服务器或客户端。
一、服务端:
假设ip是192.168.18.25
1、安装chrony
外网:sudo apt install chrony(内网拷贝离线包安装)

2、修改配置文件
vim /etc/chrony/chrony.conf
#pool 2.debian.pool.ntp.org iburst
server 192.168.18.25 iburst
allow all #允许所有客户端主机
local stratum 10 #即使自己未能通过网络时间服务器同步到时间,也允许将本地时间作为标准时间授时给其它客户端。

3、启动服务并设置服务开机自启
systemctl restart chrony
systemctl enable chrony

4、
root@ysl:~# chronyc sources 检查自己能同步自己
210 Number of sources = 1
MS Name/IP address Stratum Poll Reach LastRx Last sample
^* ysl 10 6 17 9 +599ns[+2836ns] +/- 3857ns
二、客户端
修改配置文件:
vim /etc/chrony/chrony.conf
#pool 2.debian.pool.ntp.org iburst
server 192.168.18.25 iburst

systemctl restart chrony
systemctl restart chronyd

chronyc sources 检查是否同步成功,同步成功会有*,如果未同步成功,可以用sudo chronyc -a makestep 强制同步
210 Number of sources = 1
MS Name/IP address Stratum Poll Reach LastRx Last sample
^* 192.168.18.25 11 6 377 30 +629ns[+2835ns] +/- 5801us
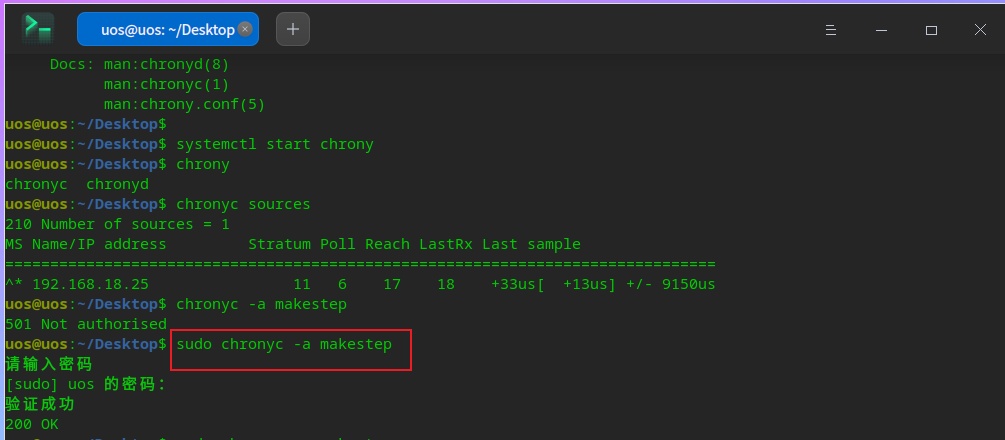
注意:使用sudo chronyc -a makestep命令强制同步,在第二次使用这个命令时需要重启下chrony服务,不然同步不了

问题

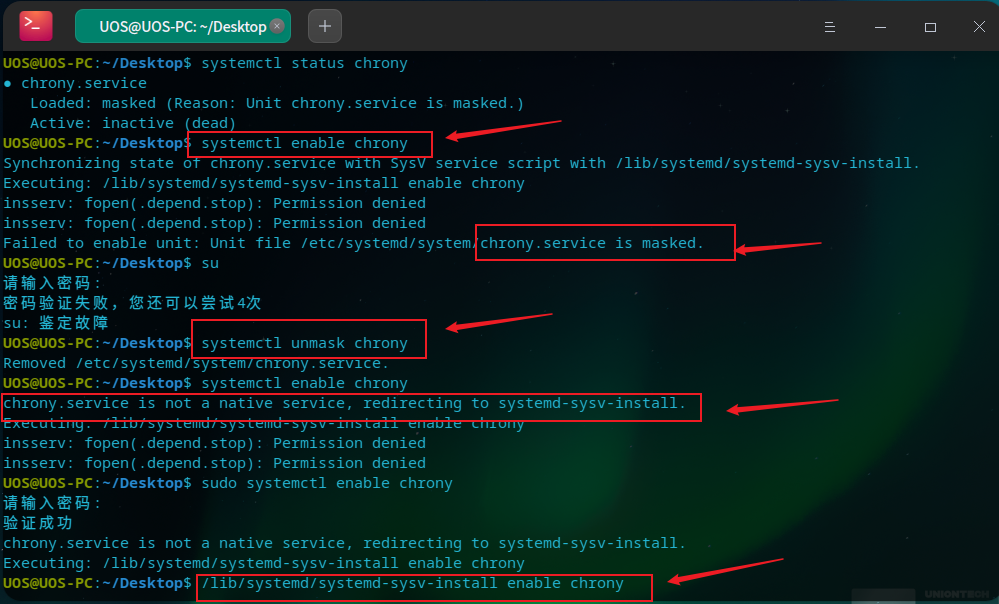
说明:刚刚使用systemctl start chrony命令开启服务的时候,却开不成功,出现failed to enable unit file /etc/systemd/system/chrony.service is masked的错误,经过搜索下后,发现是chrony服务被锁定了,这里说下方法。
方法
执行命令,即可实现取消firewalld的锁定
systemctl unmask chrony
解锁后,就可以再开启chrony服务了。

方法三
Windows端当作NTP服务器
搭建NTP服务
Windows 10本身是可以作NTP时间同步服务器的,无需安装其它软件,只需要修改一些配置。
1.修改注册表
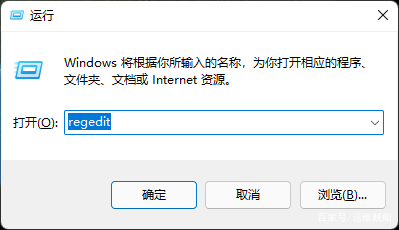
使用win + R 组合键在运行窗口中输入regedit,打开注册表编辑器。
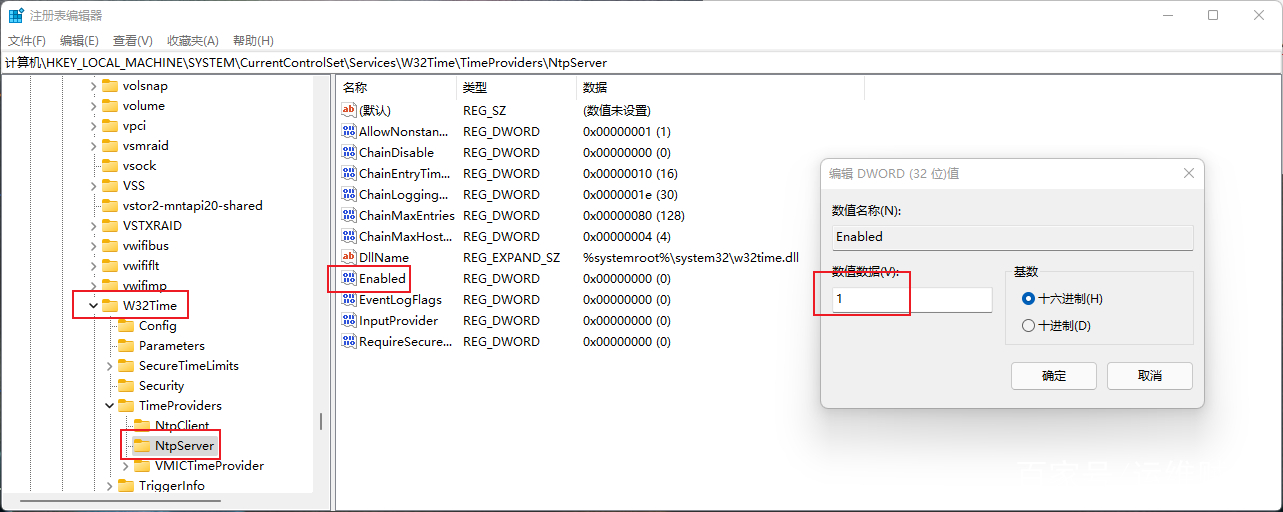
依次展开数据项目,计算机\HKEY_LOCAL_MACHINE\SYSTEM\CurrentControlSet\Services\W32Time\TimeProviders\NtpServer,把Enabled设置为1,为打开NTP服务,操作如下图所示。
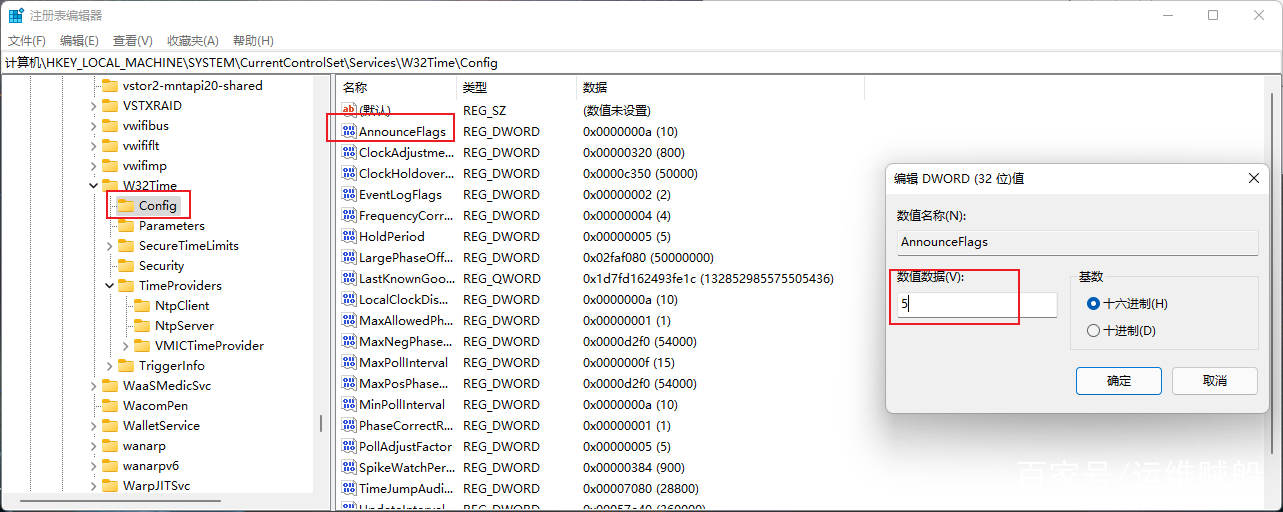
依次打开,计算机\HKEY_LOCAL_MACHINE\SYSTEM\CurrentControlSet\Services\W32Time\Config,并把AnnounceFlags的值设置为5(系统默认为a)。
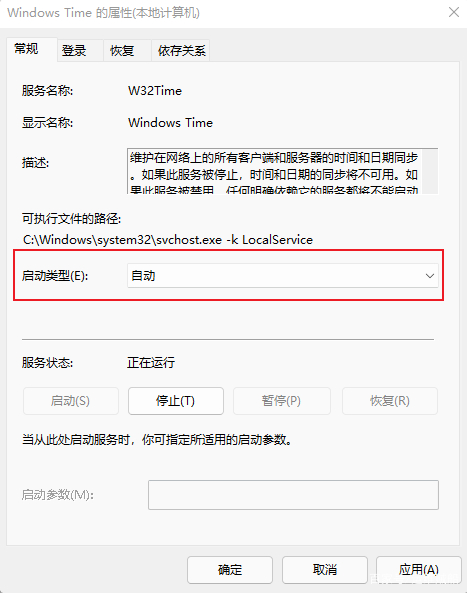
2.启动NTP服务
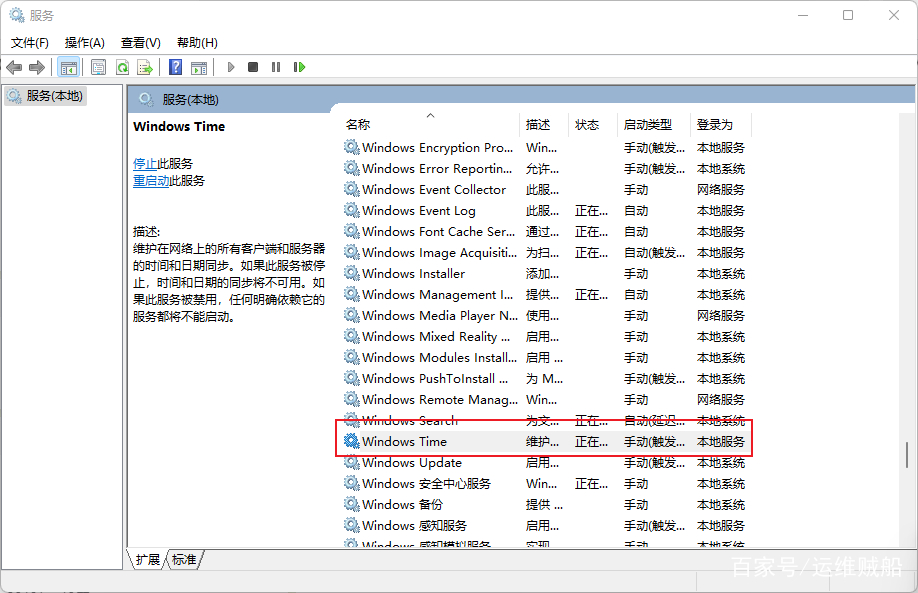
使用win + R 组合键在运行窗口中输入services.msc,打开服务。

在服务项中找到Windows Time
重启WindowsTime服务,打开开始菜单输入“CMD”在命令行模式下输入
net stop w32time
net start w32time  重启一下win32time服务。
设置为自动后确定,点击右键重新启动此服务,至此服务启动成功。
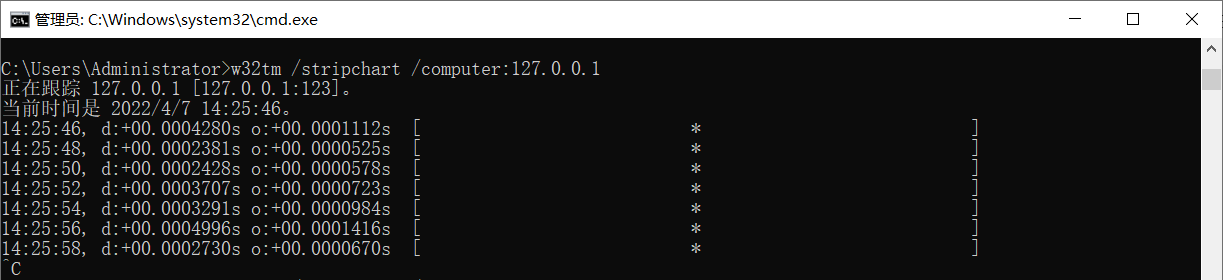
3.本机测试
在cmd窗口中输入w32tm /stripchart /computer:127.0.0.1 ,如果有回显则服务正常。
4.部署客户端。。。

 浙公网安备 33010602011771号