初探AI之got-ocr2.0大模型本地部署与遇到的各种坑处理
一、环境搭建
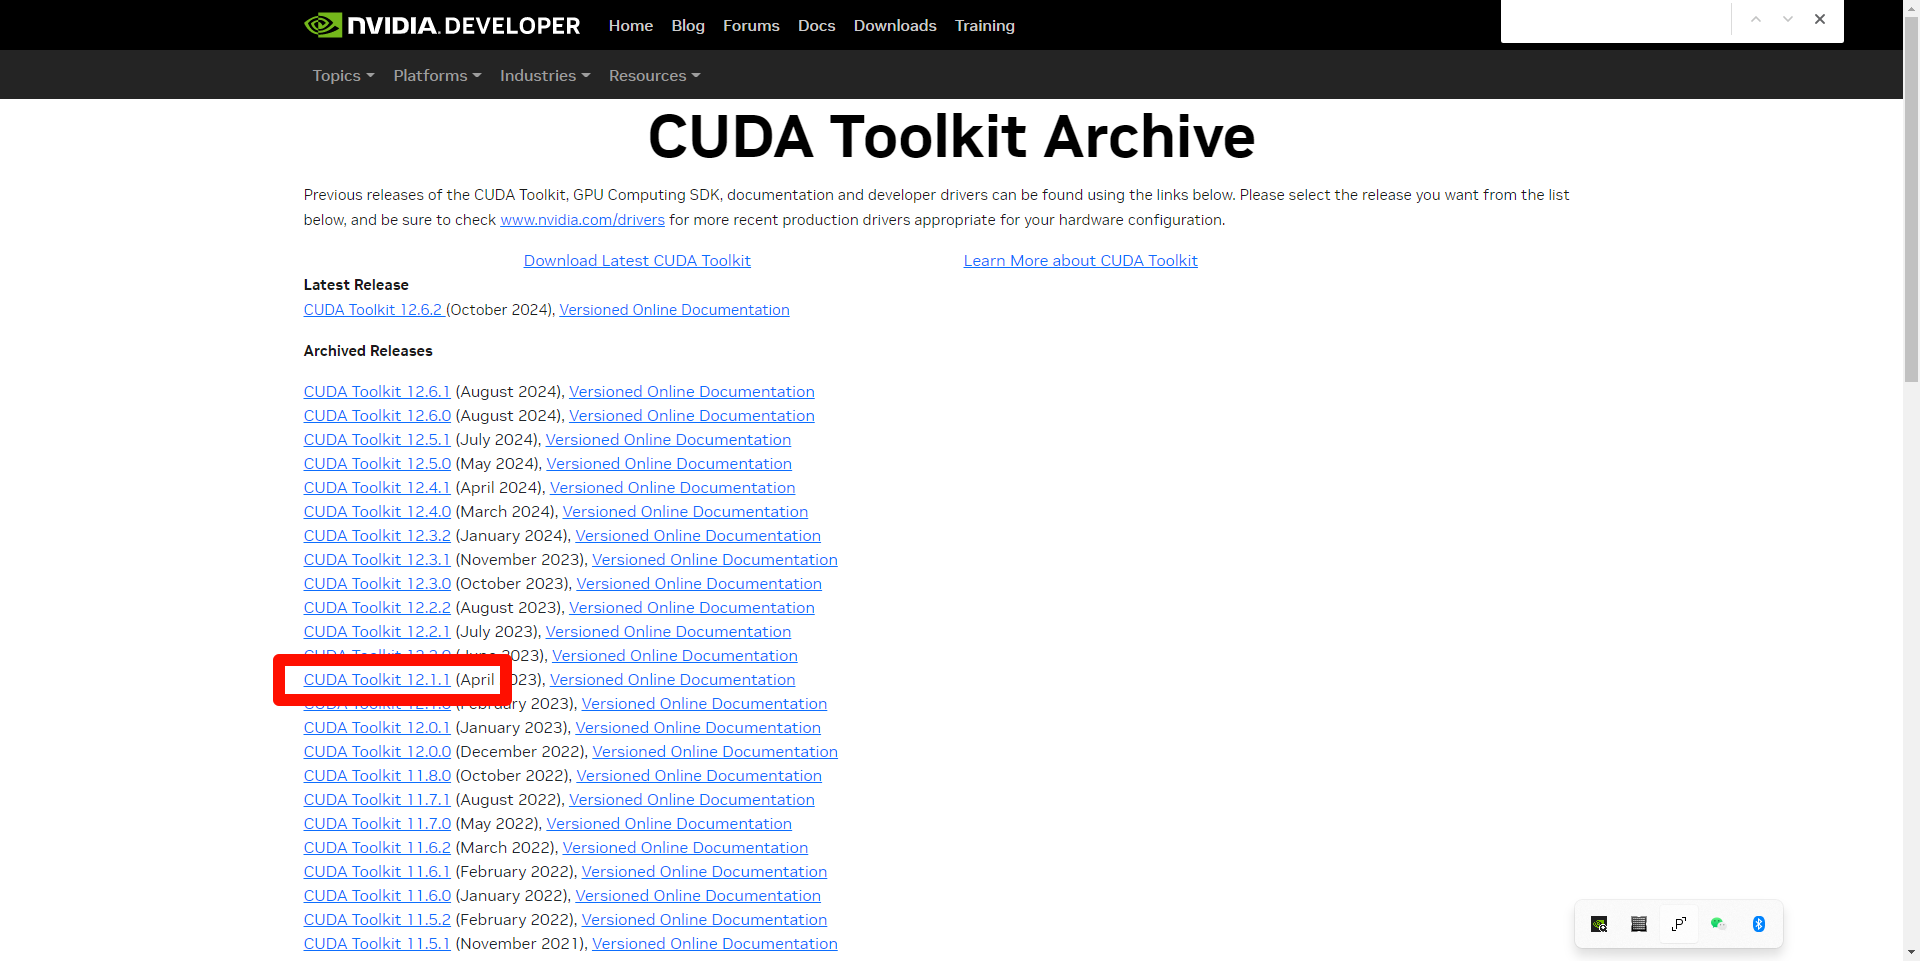
1.安装cuda(这里需要注意,需要先安装visual studio,推荐2019,链接:https://zhuanlan.zhihu.com/p/94998894 ),本人使用的是12.1版本,下载地址:https://developer.nvidia.com/cuda-12-1-1-download-archive
2.安装conda3,https://blog.csdn.net/m0_73634846/article/details/136378350
3.准备代码环境
原文: https://mp.weixin.qq.com/s/PQVrlr5FoVb89Mivzi7pLA
顺序执行:
git clone https://github.com/Ucas-HaoranWei/GOT-OCR2.0.git (已上传到网盘,可直接下载使用)
conda create -n got python=3.10 -y #创建虚拟环境
conda activate got #激活虚拟环境
pip install -e . # 使用项目里面pyproject.toml安装依赖
安装 Flash-Attention:(直接pip安装会有各种报错加上编译巨慢,pytorch2.3.1可用pip包已经上传网盘,直接安装即可)
pip install ninja
pip install flash-attn --no-build-isolation
ps:以上是官方的安装教程,但是其实会遇到很多问题,以下进行逐一说明,不保证能解决所有问题,但是大部分问题都能解决
二、问题序列:
1.python安装cuda出现错误提示:AssertionError: Torch not compiled with CUDA enabled
https://blog.csdn.net/qq_44750293/article/details/129685556
问题本质是pytorch无法调用cuda,原因是国内加速镜像默认会安装cpu版本,安装gpu版本即可,及torch.cuda.is_available输出为false即代表安装的版本为cpu版本,安装gpu版本后即可输出为true
###1、torch.cuda.is_available()显示false解决方法:
使用pytorch官方推荐的版本安装:
https://pytorch.org/
例如cuda12.1的安装命令:
conda: conda install pytorch torchvision torchaudio pytorch-cuda=12.1 -c pytorch -c nvidia
pip:
pip install torch torchvision torchaudio --index-url https://download.pytorch.org/whl/cu121 (亲测有效,这个需要下载2小时+)
阿里云加速(使用这个最快,推荐,只需要下载2min+):
pip install torch2.3.1 torchvision0.18.1 torchaudio==2.3.1 -f https://mirrors.aliyun.com/pytorch-wheels/cu121
2.遇到deepspeed安装报错(资源已上传至网盘)
Python|Windows 安装 DeepSpeed 安装方法及报错 Unable to pre-compile async_io 处理:
https://blog.csdn.net/Changxing_J/article/details/139789110
配置visual studio
运行Anaconda Powershell Prompt,执行 Set-Item Env:\DS_BUILD_OPS 0,切换到deepspeed目录,再次执行 : .\build_win.bat
3.pip错误
ERROR: Could not find a version that satisfies the requirement setuptools_scm (from versions: none)
尝试切换pip源试试,pip install -i 源地址
4.conda错误
在VS界面激活anaconda,但是报错”CondaError: Run 'conda init' before 'conda activate'“,该如何解决?
打开Anaconda Prompt
conda init
conda activate 环境
5.遇到依赖C++环境的库错误解决
【报错】fatal error C1189
visual studio 版本过高或过低导致,目前2019版本兼容性相对较好
https://blog.csdn.net/thisjuly/article/details/136260069
6.flash_attn安装后执行失败,本质是编译的包不对(已上传到网盘)
text-generation-webui加载codellama报错DLL load failed while importing flash_attn_2_cuda: 找不到指定的模块。:
https://blog.csdn.net/dandandancpop/article/details/134729988
解决: https://github.com/Dao-AILab/flash-attention/releases ,在此链接中下载与本地cuda与torch且python相对应的版本即可,cuda12.1下载cu123亲测可用,cp310为python3.10,cp311为python3.11其他同理
7.本地无法启动大模型
因为默认的源是hugging-face,但是国内无法访问,国内可使用modelscope(魔塔社区)的模型
hugging-face模型下载不成功?
https://zhuanlan.zhihu.com/p/722248326?utm_campaign=shareopn&utm_medium=social&utm_psn=1824225242303819776&utm_source=wechat_session
使用modelscope提供的模型
8.cudnn部署(已上传到网盘)
https://blog.csdn.net/retainenergy/article/details/126183711
cuDNN下载链接:https://developer.nvidia.com/rdp/cudnn-archive ,本人使用的8.9.7,安装链接中进行配置即可
三、需要用到的资源下载链接(只上传了下载很慢的资源):
通过网盘分享的文件:GOT-OCR大模型部署相关
百度云链接: https://pan.baidu.com/s/1s18O0kS3apBvs-L35KB-qw?pwd=y4ht 提取码: y4ht
阿里云盘链接: https://www.cnblogs.com/qtclm/p/18475732 提取码 6mw7
四、执行代码与输出
from modelscope import AutoModel, AutoTokenizer

tokenizer = AutoTokenizer.from_pretrained('stepfun-ai/GOT-OCR2_0', trust_remote_code=True)
model = AutoModel.from_pretrained('stepfun-ai/GOT-OCR2_0', trust_remote_code=True, low_cpu_mem_usage=True, device_map='cuda', use_safetensors=True, pad_token_id=tokenizer.eos_token_id)
model = model.eval().cuda()


# input your test image
# image_file = '/mnt/workspace/58F3EF14-E073-4BBE-B9D9-53CCFE6AE183.png'
image_file = 'benchmarks/format_doc_benchmark/2020-03-27__潍柴动力股份有限公司__000338__潍柴动力__2019年__年度报告/38.jpg'

# plain texts OCR
res = model.chat(tokenizer, image_file, ocr_type='ocr')

# format texts OCR:
# res = model.chat(tokenizer, image_file, ocr_type='format')

# fine-grained OCR:
# res = model.chat(tokenizer, image_file, ocr_type='ocr', ocr_box='')
# res = model.chat(tokenizer, image_file, ocr_type='format', ocr_box='')
# res = model.chat(tokenizer, image_file, ocr_type='ocr', ocr_color='')
# res = model.chat(tokenizer, image_file, ocr_type='format', ocr_color='')

# multi-crop OCR:
# res = model.chat_crop(tokenizer, image_file, ocr_type='ocr')
# res = model.chat_crop(tokenizer, image_file, ocr_type='format')

# render the formatted OCR results:
# res = model.chat(tokenizer, image_file, ocr_type='format', render=True, save_render_file = './demo.html')

print(res)
原图
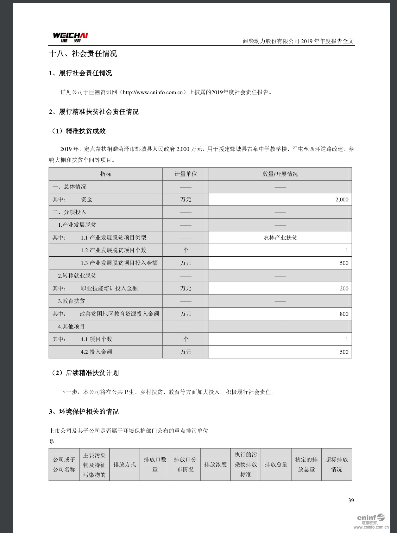
输出
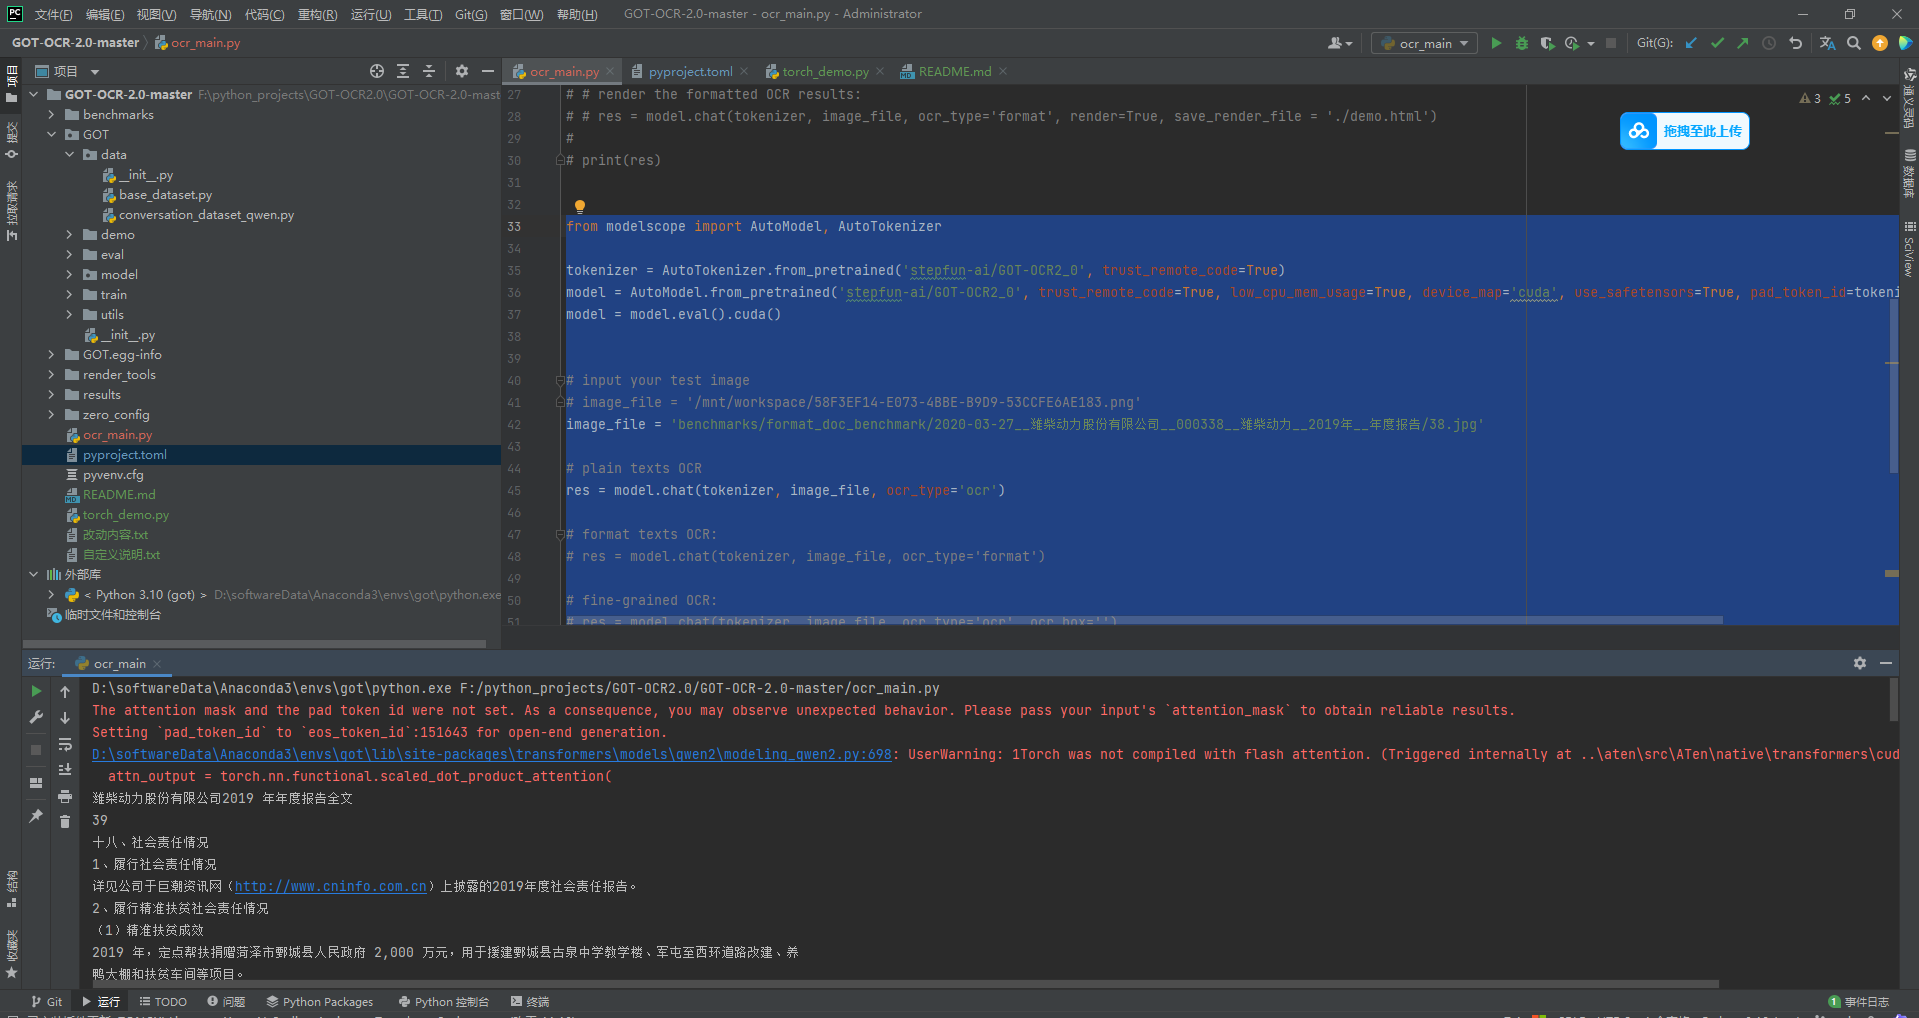
结论: 识别率还是很不错的,后面在使用大量图片测试
五、其他补充
1.modelscope默认下载的模型目录:
~/.cache/modelscope/hub
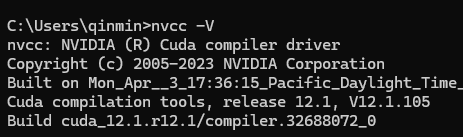
2.一定要注意cuda版本与torch的版本要对应
https://blog.csdn.net/u011489887/article/details/135250561
查看cuda版本,执行命令,nvcc -V 或 nvcc --version可查看
查看cuda配置的环境变量,set cuda

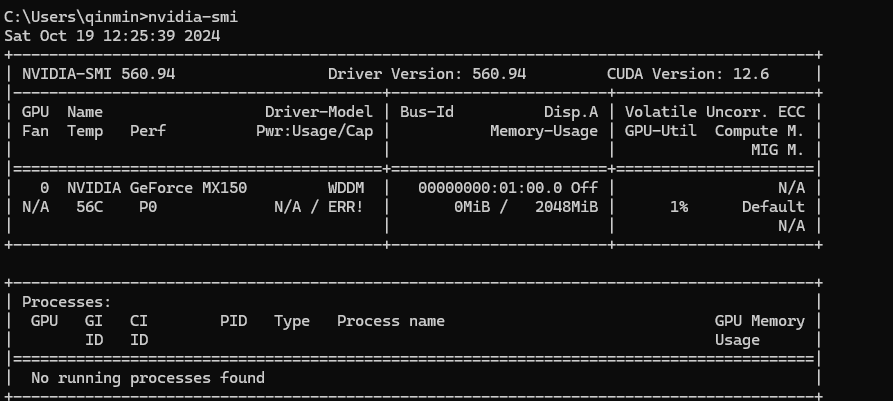
显卡驱动版本可高于cuda版本,会向下兼容,但是不可小于,执行命令,nvidia-smi可查看显卡目前的状态以及运行中的进程

 浙公网安备 33010602011771号