应用框架@SpringMVC
1 SpringMVC 简介
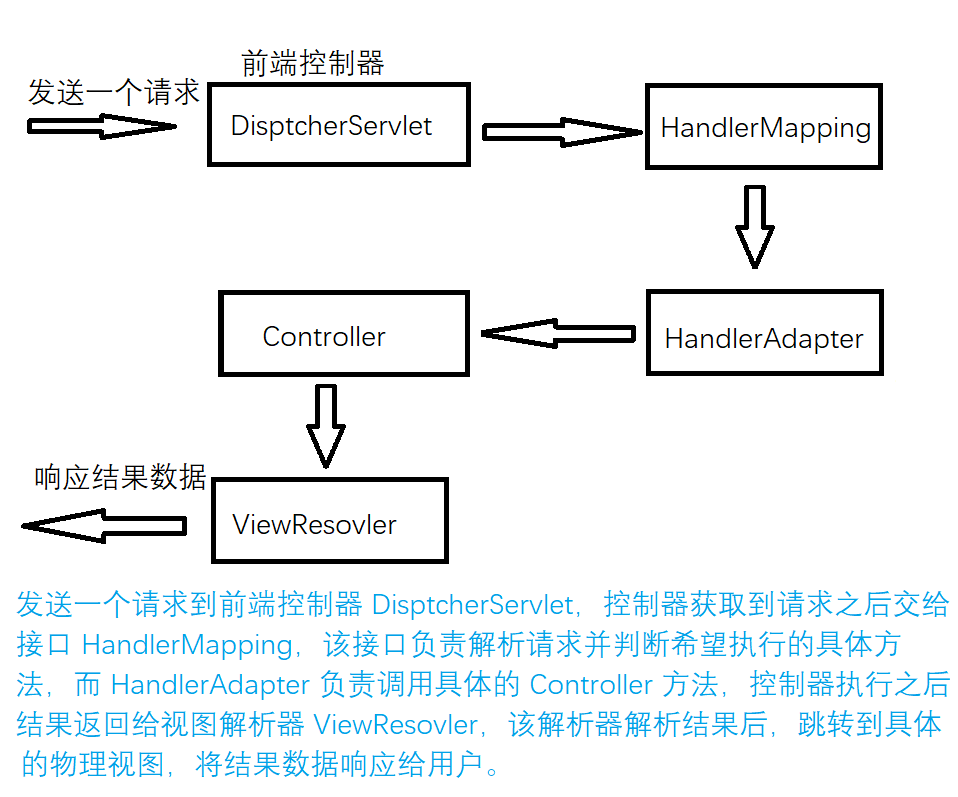
(一)SpringMVC 中重要组件
- DispatcherServlet:前端控制器,接收所有请求(如果配置
/就除了jsp 之外都拦截); - HandlerMapping:解析请求格式的,判断希望要执行哪个具体的方法;
- HandlerAdapter:负责调用具体的方法;
- ViewResovler:视图解析器,负责解析结果,准备跳转到具体的物理视图(即页面文件),就是不需要写跳转语句了;
(二)SpringMVC 运行原理图
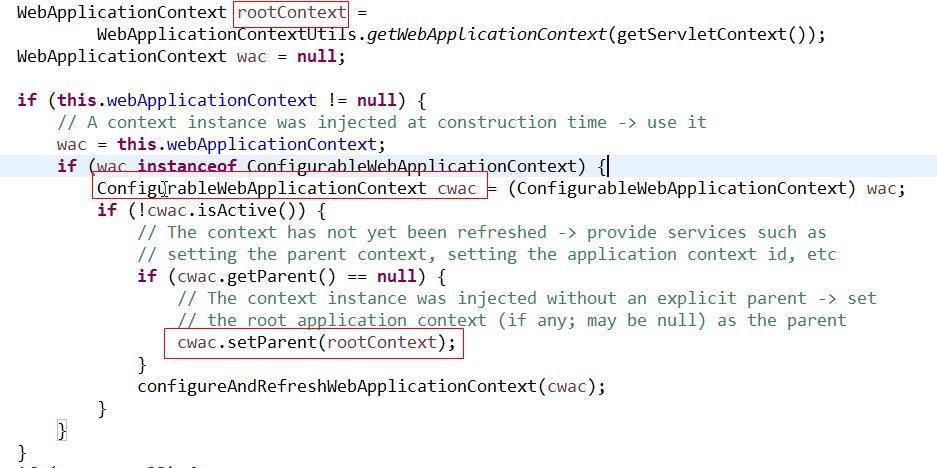
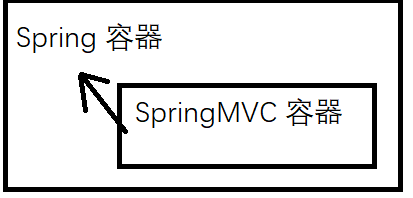
(三)Spring 容器和 SpringMVC 容器的关系
-
代码
-
Spring 容器和 SpringMVC 容器是父子容器。
- SpringMVC 容器中能够调用 Spring 容器的所有内容。
- 图示
2 SpringMVC 环境搭建【使用注解方式】
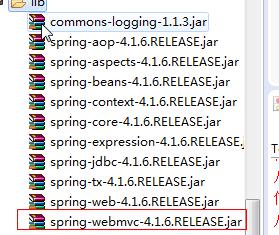
(一)导入 jar
(二)配置 web.xml
- 首先在 web.xml 中配置前端控制器 DispatcherServlet
<servlet>
	<servlet-name>springmvc123</servlet-name>
	<servlet-class>org.springframework.web.servlet.DispatcherServlet</servlet-class>
	<!-- 修改 SpringMVC 配置文件路径和名称,value值是指在 src 目录下 -->
	<init-param>
		<param-name>contextConfigLocation</param-name>
		<param-value>classpath:springmvc.xml</param-value>
	</init-param>
	<!-- 设置自启动,不设置的话只有 Tomcat 访问的时候才会加载这个类 -->
	<load-on-startup>1</load-on-startup>
</servlet>

<servlet-mapping>
	<servlet-name>springmvc123</servlet-name>
	<!--下面含义:拦截除了 Jsp 之外所有的请求-->
	<url-pattern>/</url-pattern>
</servlet-mapping>
如果不配置 <init-param> 默认会在/WEB-INF/<servlet-name>-servlet.xml找默认位置的配置文件名,这里使用 <init-param> 指定 SpringMVC 配置文件为:src 目录下的 springmvc.xml。
(三)在 src 下新建 springmvc.xml
这里需要新引入 xmlns:mvc 命名空间
<?xml version="1.0" encoding="UTF-8"?>
<beans xmlns="http://www.springframework.org/schema/beans"
	xmlns:xsi="http://www.w3.org/2001/XMLSchema-instance"
	xmlns:mvc="http://www.springframework.org/schema/mvc"
	xmlns:context="http://www.springframework.org/schema/context"
	xsi:schemaLocation="http://www.springframework.org/schema/beans
        http://www.springframework.org/schema/beans/spring-beans.xsd
        http://www.springframework.org/schema/context
        http://www.springframework.org/schema/context/spring-context.xsd
        http://www.springframework.org/schema/mvc
        http://www.springframework.org/schema/mvc/spring-mvc.xsd">
    <!-- 步骤一:扫描注解,必须在 SpringMVC 的配置文件中配置,不能在 web.xml 中配置 -->
	<context:component-scan base-package="com.moyue.controller"></context:component-scan>
	<!-- 注解驱动 -->
	<!-- org.springframework.web.servlet.mvc.annotation.DefaultAnnotationHandlerMapping -->
	<!-- org.springframework.web.servlet.mvc.annotation.AnnotationMethodHandlerAdapter -->
	<!--下面配置相当于配置了上面两个-->
	<mvc:annotation-driven></mvc:annotation-driven>
	<!-- 配置不要拦截静态资源(js/css/html/图片文件),location为路径, mapping只是配置匹配规则-->
    <!-- /js/*: 表示 JS文件下所有文件,/js/**:表示js文件夹下面所有文件及其子文件-->
	<mvc:resources location="/js/" mapping="/js/**"></mvc:resources>
	<mvc:resources location="/css/" mapping="/css/**"></mvc:resources>
	<mvc:resources location="/images/" mapping="/images/**"></mvc:resources>
</beans>
(四)编写控制器类
package com.moyue.controller;

import com.moyue.pojo.Demo;
import org.springframework.stereotype.Controller;
import org.springframework.web.bind.annotation.RequestMapping;
import org.springframework.web.bind.annotation.RequestParam;

import java.util.List;

// 通过 Controller注解,将该类交给容器去管理
@Controller
public class DemoController {
	@RequestMapping("demo")
	public String demo(){
		System.out.println("执行demo");
		return "main.jsp";
	}
	@RequestMapping("demo2")
	public String demo2(){
		System.out.println("demo2");
		return "main1.jsp";
	}
}
3 字符编码过滤器
用于解决在下面传参时候,传入的中文参数显示为乱码
只要在 web.xml 中配置 Filter
<!--配置一个字符编码过滤器-->
<filter>
	<filter-name>MyEncoding</filter-name>
	<filter-class>org.springframework.web.filter.CharacterEncodingFilter</filter-class>
	<init-param>
		<!--下面的 name 是固定的,需要对这个参数进行赋值-->
		<param-name>encoding</param-name>
		<param-value>utf-8</param-value>
	</init-param>
</filter>

<filter-mapping>
	<filter-name>MyEncoding</filter-name>
	<url-pattern>/*</url-pattern>
</filter-mapping>
4 传参
大原则:只要把内容写到方法(HandlerMethod)参数中,SpringMVC 只要有这个对应内容,就会注入内容;
(一)传输的是基本数据类型参数
1. 默认保证参数名称和请求中传递的参数名相同
- 请求中传入的参数:在 index.jsp 配置内容为:下面传入的参数名为:name、age
<body>
<form action="demo3" method="post">
    <input type="text" name = "name"/>
    <input type="text" name = "age"/>
    <input type="submit" name = "提交">
</form>
</body>
- 对应的 Controller 中的内容为:参数名称为:name、age
@Controller
public class DemoController {
  	@RequestMapping("demo3")
	public String demo3(String name, int age){
		System.out.println("demo2 " + name + " "+age);
		return "main.jsp";
	}
}
然后使用 Tomcat 在页面中输入相应数据之后,页面跳转到 main.jsp,同时在控制窗口输出:demo3 GJXAIOU 123
2.如果请求参数名和方法参数名不对应,则使用@RequestParam()赋值
- index.jsp 内容为:传入的参数为:name1、age1
<body>
<form action="demo3" method="post">
    <input type="text" name = "name1"/>
    <input type="text" name = "age1"/>
    <input type="submit" name = "提交">
</form>
</body>
- 对应的 Controller 中的内容为:参数名称为:name、age
@Controller
public class DemoController {
  	@RequestMapping("demo3")
    public String demo3(@RequestParam(value="name1")String name, @RequestParam(value="age1") int age){
        System.out.println("执行demo3"+" "+name+" "+age);
        return "main.jsp";
    }
}
如果以上参数中的基本数据类型(不是对应的封装类,因为封装类不会出现这种情况),例如 int,如果在页面中没有输入参数直接提交之后会报错,为了防止出现这种情况;
3.通过 @RequestParam 设置默认值
- index.jsp 内容为:传入的参数为:name、age
<body>
<form action="demo4" method="post">
    <input type="text" name = "name"/>
    <input type="text" name = "age"/>
    <input type="submit" name = "提交">
</form>
</body>
- 对应的 Controller 中的内容为:参数名称为:name、age
@Controller
public class DemoController {
  	@RequestMapping("demo4")
    public String demo4(@RequestParam(defaultValue="1")int name, @RequestParam(defaultValue="2") int age){
        System.out.println("执行demo4"+" "+name+" "+age);
        return "main.jsp";
    }
}
4.设置强制要求必须有某个参数
- 对应的 Controller 中的内容为:下面要求 name 属性必须进行赋值;
@Controller
public class DemoController {
  	@RequestMapping("demo5")
    public String demo5(@RequestParam(required = true)String name, int age){
        System.out.println("执行demo5"+" "+name+" "+age);
        return "main.jsp";
    }
}
这里可以使用 Index.jsp 中使用输入框进行赋值,也可以在 URL 输入框中直接追加:demo5?name=gjx&age=23,中间不能有空格,完整路径为:http://localhost:8080/springmvc02_war_exploded/demo3?name=GJX&age=3,同样上面的所有都可以使用这种方式进行赋值;
5.请求的参数中包含多个同名参数的获取方式
- 这里的 index.jsp 以复选框为例,所有的 name 值均为:hover
<!--对应于复选框-->
<form action="demo6" method="post">
    <input type="text" name = "name"/>
    <input type="text" name = "age"/>
    <input type="checkbox" name = "hover" value="学习"> 学习
    <input type="checkbox" name = "hover" value="笔记"> 笔记
    <input type="checkbox" name = "hover" value="视频"> 视频
    <input type="submit" name = "提交">
</form>
- 对应的 Controller 中获取方式
@Controller
public class DemoController {
  	@RequestMapping("demo6")
  // @RequestParam("hover") List<String> lis 表示将所有的 hover 都放在 list中
    public String demo6(String name, int age, @RequestParam("hover") List<String> list){
   System.out.println(name + "  " + age + " " + list);
 return "main.jsp"; }
}
示例结果为:GJXAIOU 23 [学习, 哈哈, 视频]
(二)HandlerMethod 中参数是对象类型
只需要请求参数名和对象中属性名对应(同时有 get/set 方法)
- 对应的 Controller 中内容为:
@Controller
public class DemoController {
  @RequestMapping("demo7")
  public String demo7(Demo demo){
     System.out.println("demo7" + " " + demo);
     return "main.jsp";
  }
}
前提条件是实现 People 实体类,以及对应的 get/set 、构造方法、toString 方法一定要有无参构造方法:
public class People {
    private String name;
    private int age;
    // 省略 get、set方法以及构造方法、toString方法
}
对应的 demo 类的代码为:类对象名和下面 jsp 文件中参数的 点 的前面的名称对应
public class Demo {
     private People peo;

    @Override
    public String toString() {
        // 这里传参的时候 peo 值为 null,因此这里不能写 peo.getName等等,否则报NullPointerException
        return "Demo{" + "peo=" + peo  + '}';
    }
}
- 对应的 index.jsp 代码为:
<form action="demo7" method="post"> demo7,测试传入为对象
    <input type="text" name = "peo.name"/>
    <input type="text" name = "peo.age"/>
    <input type="submit" name = "提交">
</form>
控制窗口输出为:
demo7 Demo{peo=null}
在请求参数中传递集合对象类型参数
- 对应的 index.jsp 中代码为:
<form action="demo8" method="post"> demo8,测试传入为集合对象
    <input type="text" name = "peoList[0].name"/>
    <input type="text" name = "peoList[0].age"/>
    <input type="text" name = "peoList[1].name"/>
    <input type="text" name = "peoList[1].age"/>
    <input type="submit" name = "提交">
</form>
具体里面传递的类 People 没有改变。
同时新建类:Demo2.java
public class Demo2 {
    private List<People> peopleList;

    @Override
    public String toString() {
        return "Demo2{" +
                "peopleList=" + peopleList +
                '}';
    }
}
- 控制器 Controller 中代码
@Controller
public class DemoController {
  @RequestMapping("demo8")
  public String demo8(Demo2 demo2){
      System.out.println("demo8" + " " + demo2);
      return "main.jsp"; }
}
(三)restful 传值方式,正常使用在超链接中
用于简化 jsp 中参数编写格式
- 首先在 jsp 中设定特定的格式:
<a href="demo9/123/abc">跳转</a>
- 然后在控制器中设置如下:
- 在@RequestMapping 中一定要和请求格式对应
{名称}中名称是自定义名称- @PathVariable 获取@RequestMapping 中内容,默认按照方法参数名称去寻找。
控制器 Controller 中代码
@Controller
public class DemoController {
  	@RequestMapping("demo9/{id}/{name}")
	public String demo9(@PathVariable String name, @PathVariable("id") int age){
		System.out.println(name + "  " + age);
		return "main.jsp";
	}
}
根据上面设置,需要在 WebContent 目录下新建 demo9/123/main.jsp,才能正确的跳转。
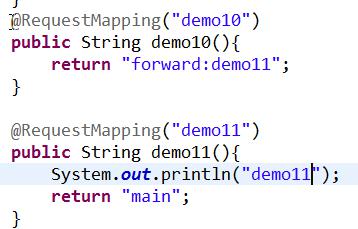
5 跳转方式
- 默认跳转方式请求转发.
- 设置返回值字符串内容
2.1 添加 redirect:资源路径 重定向
2.2 添加 forward:资源路径 或省略 forward: 转发
6 视图解析器
-
SpringMVC 会提供默认视图解析器.
-
程序员自定义视图解析器
<bean id="viewResolver"
    class="org.springframework.web.servlet.view.InternalResourceViewResolver">
    <property name="prefix" value="/"></property>
    <property name="suffix" value=".jsp"></property>
</bean>
- 如果希望不执行自定义视图解析器, 在方法返回值前面添加forward:或 redirect:
7 @ResponseBody
- 在方法上只有@RequestMapping 时,无论方法返回值是什么都认为需要跳转
- 在方法上添加@ResponseBody(恒不跳转)
- 如果返回值满足 key-value 形式(即返回值为对象或 map)
- 会把响应头设置为 application/json;charset=utf-8
- 把转换后的内容以输出流的形式响应给客户端.
- 如果返回值不满足 key-value,例如返回值为 String
- 把相应头设置为 text/html
- 把方法返回值以流的形式直接输出.
- 如果返回值包含中文,出现中文乱码
- produces 表示设置响应头中 Content-Type 的值.
- 如果返回值满足 key-value 形式(即返回值为对象或 map)
// @ResponseBody // 将返回值转换为 json字符串 ,同时设置响应头类型为Application/json,同时不再跳转,表示该内容转化为json字符串之后以流的形式输出

@RequestMapping(value="demo12",produces="text/html;charset=utf-8")
public String demo12() throws IOException{
    People p = new People();
    p.setAge(12);
    p.setName("张三");
    return "中文";
}
- 底层使用Jackson 进行json 转换,在项目中一定要导入 jackson 的 jar
3.1 spring4.1.6 对 jackson 不支持较高版本,jackson 2.7 无效.
spring5要使用jackson 2.9.X的版本,低于会报错版本不匹配
8 JSP 九大内置对象和四大作用域复习
(一)九大内置对象
| 名称 | 类型 | 含义 | 获取方式 |
|---|---|---|---|
| request | HttpSevletRequest | 封装所有请求信息 | 在方法参数 |
| response | HttpServletResponse | 封装所有响应信息 | 在方法参数 |
| session | HttpSession | 封装所有会话信息 | req.getSession() |
| application | ServletContext | 所有信息 | getServletContext();和 request.getServletContext(); |
| out | PrintWriter | 输出对象 | response.getWriter() |
| exception | Exception | 异常对象 | |
| page | Object | 当前页面对象 | |
| pageContext | PageContext | 作用是获取其他对象 | |
| config | ServletConfig | 配置信息 |
(二)四大作用域
- page:在当前页面不会重新实例化;
- request:在一次请求中同一个对象,下次请求重新实例化一个request 对象;
- session:作用域在一次会话,只要客户端 Cookie 中传递的 Jsessionid 不变,Session 不会重新实例化(不超过默认时间);
- application:只有在 tomcat 启动项目时才实例化,关闭 tomcat 时销毁application,所以在整个应用程序内都是单例的。
实际有效时间:
- 浏览器关闭则 Cookie 失效;
- 默认时间,在时间范围内无任何交互;可以在 tomcat 的web.xml 中配置
<session-config>
    <session-timeout>30</session-timeout>
</session-config>
9 SpringMVC 作用域传值的几种方式
(一)使用原生 Servlet
- 首先在 HanlderMethod 参数中添加作用域对象(即在 Controller 中配置)
@Controller
public class DemoController {
	@RequestMapping("demo10")
	public String demo10(HttpServletRequest abc, HttpSession sessionParam){
		// request 作用域
		abc.setAttribute("req", "req 的值");

		// session 作用域
		HttpSession session = abc.getSession();
		session.setAttribute("session", "session 的值");

		// 下面这句话是结合方法中的 HTTPSession 参数进行使用,两个加起来等效于上面两句
		sessionParam.setAttribute("sessionParam","sessionParam的值");

		// appliaction 作用域
		ServletContext application =  abc.getServletContext();
		application.setAttribute("application","application的值");
		return  "/index.jsp";
	}
}
执行之后的对应参数值在 index.jsp 中取出进行显示:
<body>
    request:${requestScope.req} <br/>
    session:${sessionScope.session} <br/>
    sessionParam:${sessionScope.sessionParam}<br/>
    application:${applicationScope.application}<br/>
</body>
通过访问:http://localhost:8080/SpringMVC03_war_exploded/demo10 得到结果为:
request:req 的值
session:session 的值
sessionParam:sessionParam的值
application:application的值
(二)使用 Map 集合
- 本质上是把 map 中内容放在 request 作用域中;
- spring 会对 map 集合通过 BindingAwareModelMap 类进行实例化;
@Controller
public class DemoController {
	@RequestMapping("demo11")
    public String demo11(Map<String,Object> map){
        System.out.println(map.getClass());
        map.put("map","map 的值");
        return "/index.jsp";
    }
}
执行之后的对应参数值在 index.jsp 中取出进行显示:
<body>
   map:${requestScope.map}
</body>
通过访问:http://localhost:8080/SpringMVC03_war_exploded/demo10得到结果为:map:map 的值
(三)使用 SpringMVC 中 Model 接口
该接口的本质把内容最终放入到 request 作用域中。
@Controller
public class DemoController {
	@RequestMapping("demo12")
    public String demo12(Model model){
        model.addAttribute("model", "model 的值");
        return "/index.jsp";
    }
}
执行之后的对应参数值在 index.jsp 中取出进行显示:
<body>
   <!--下面两种方式都是可以的-->
   model:${requestScope.model}
   model:${model}
</body>
(四)使用 SpringMVC 中 ModelAndView 类
@Controller
public class DemoController {
	@RequestMapping("demo13")
	public ModelAndView demo13(){
        //参数表示跳转视图
        ModelAndView mav = new ModelAndView("/index.jsp");
        mav.addObject("mav", "mav 的值");
        return mav;
    }
}
执行之后的对应参数值在 index.jsp 中取出进行显示:
<body>
   mav:${requestScope.mav}
</body>
10 文件下载
注意在 springmvc.xml 中配置放行 files 文件夹
<mvc:resources location="/files/" mapping="/files/**"></mvc:resources>
- 访问资源时,响应头如果没有设置 Content-Disposition 的值,浏览器默认按照 inline 值进行处理;
- inline 作用是能显示就显示,不能显示就下载;
- 只需要修改相应头中
Context-Disposition= ”attachment;filename=文件名”;- 其中
attachment表示下载,以附件形式下载; filename=值中的值就是下载时显示的下载文件名;
- 其中
实现步骤
- 导入 apache 的两个 jar
- commons-fileupload.jar
- commons-io.jar
- 在 jsp 中添加超链接,设置要下载文件,实现点击超链接就下载对应的文件;
- 在 springmvc.xml 中放行静态资源 files 文件夹,文件夹中放置的是要下载的文件;
<a href="download?fileName=a.rar">下载</a>
- 编写对应的控制器方法
@Controller
public class DemoController {
	@RequestMapping("download")
	public void download(String fileName,HttpServletResponse res,HttpServletRequest req) throws IOException{
		// 设置响应流中文件进行下载
		res.setHeader("Content-Disposition","attachment;filename="+fileName);
		// 把二进制流放入到响应体中
		ServletOutputStream os = res.getOutputStream();
		String path = req.getServletContext().getRealPath("files");
		System.out.println(path);
		File file = new File(path, fileName);
		// 把这个文件直接读成字节数组
		byte[] bytes = FileUtils.readFileToByteArray(file);
		os.write(bytes);
		os.flush();
		os.close();
	}
}
11 文件上传
- 首先是基于 apache 的 commons-fileupload.jar 完成文件上传;
- 使用 MultipartResovler,是SpringMVC中负责文件上传的组件,
- 作用: 把客户端上传的文件流转换成 MutipartFile 封装类;
- 然后可以通过 MutipartFile 封装类获取到文件流;
- 表单数据类型分类:
在
实现步骤:
-
首先导入 springmvc 包和 apache 文件上传 commons-fileupload 和commons-io 两个 jar;
-
然后编写 JSP 页面
<body>
<form action="upload" enctype="multipart/form-data" method="post">
	姓名:<input type="text" name="name"/><br/>
	文件:<input type="file" name="file"/><br/>
	<input type="submit" value="提交"/>
</form>
</body>
- 然后配置 springmvc.xml;主要是增加了 MultipartResovler 解析器和异常解析器
<?xml version="1.0" encoding="UTF-8"?>
<beans xmlns="http://www.springframework.org/schema/beans"
	xmlns:xsi="http://www.w3.org/2001/XMLSchema-instance"
	xmlns:mvc="http://www.springframework.org/schema/mvc"
	xmlns:context="http://www.springframework.org/schema/context"
	xsi:schemaLocation="http://www.springframework.org/schema/beans
        http://www.springframework.org/schema/beans/spring-beans.xsd
        http://www.springframework.org/schema/context
        http://www.springframework.org/schema/context/spring-context.xsd
        http://www.springframework.org/schema/mvc
        http://www.springframework.org/schema/mvc/spring-mvc.xsd">
    <!-- 扫描注解 -->
	<context:component-scan base-package="com.moyue.controller"></context:component-scan>
	<!-- 注解驱动 -->
	<!-- org.springframework.web.servlet.mvc.annotation.DefaultAnnotationHandlerMapping -->
	<!-- org.springframework.web.servlet.mvc.annotation.AnnotationMethodHandlerAdapter -->
	<mvc:annotation-driven></mvc:annotation-driven>
	<!-- 静态资源 -->
	<mvc:resources location="/js/" mapping="/js/**"></mvc:resources>
	<mvc:resources location="/css/" mapping="/css/**"></mvc:resources>
	<mvc:resources location="/images/" mapping="/images/**"></mvc:resources>
	<mvc:resources location="/files/" mapping="/files/**"></mvc:resources>


	<!-- MultipartResovler解析器 -->
	<bean id="multipartResolver" class="org.springframework.web.multipart.commons.CommonsMultipartResolver">
		<property name="maxUploadSize" value="50"></property>
	</bean>
	<!-- 异常解析器 -->
	<bean id="exceptionResolver" class="org.springframework.web.servlet.handler.SimpleMappingExceptionResolver">
		<property name="exceptionMappings">
			<props>
				<prop key="org.springframework.web.multipart.MaxUploadSizeExceededException">/error.jsp</prop>
			</props>
		</property>
	</bean>
</beans>
- 最后编写控制器类
MultipartFile 对象名必须和<input type="file"/>的 name 属性值相同
@Controller
public class DemoController {
	@RequestMapping("upload")
    public String upload(MultipartFile file,String name)throws IOException{
        String fileName = file.getOriginalFilename();
        String suffix = fileName.substring(fileName.lastIndexOf("."));
        //判断上传文件类型
        if(suffix.equalsIgnoreCase(".png")){
            String uuid = UUID.randomUUID().toString();
            FileUtils.copyInputStreamToFile(file.getInputStream(), new File("E:/"+uuid+suffix));
             return "/index.jsp";
            }else{
             return "error.jsp";
        }
    }
}
12 自定义拦截器
(一)使用背景
Web 项目中需要判断 http 接口用户 Post 上来的数据是否合法,如果不合法要另做处理,用户 Post 上来的数据是 Json 形式的,我们用了 @RequestBody 标记自动将 json 形式的提交封装为一个 Model 对象,这样一来,我们就不能判断在自动封装过程中是否出现了异常,此时便想起了springMVC 中的 interceptor,可以用于处理请求之前,做一些处理,我们可以取消 @RequestBody标记,然后在 interceptor 中取得请求体,检查是否符合 json 要求,即是不是一个 valid interceptor,但是这里出现了一个问题:
httpServletRequest 的请求内容,只能被读取一次,在 Interceptor 中读取了的话,在controller 中便不能读取了,解决方式是:读取到的请求内容存起来,然后在 controller 中直接使用。
这里用到了 interceptor 的一种,HandlerInterceptor;
(二)HandlerInterceptor概述
在 SpringMVC 中定义一个 Interceptor 是比较非常简单,主要有两种方式:
- 第一种:实现 HandlerInterceptor 接口,或者是继承实现了 HandlerInterceptor 接口的类,例如HandlerInterceptorAdapter;
- 第二种:实现 Spring 的 WebRequestInterceptor 接口,或者是继承实现了 WebRequestInterceptor 的类。
下面主要结合一个例子说一下第一种方式:实现HandlerInterceptor接口。
HandlerInterceptor 接口主要定义了三个方法:
boolean preHandle (HttpServletRequest request, HttpServletResponse response, Object handle)方法:该方法将在请求处理之前进行调用,只有该方法返回true,才会继续执行后续的 Interceptor 和 Controller,当返回值为true 时就会继续调用下一个Interceptor的 preHandle 方法,如果已经是最后一个 Interceptor 的时候就会是调用当前请求的 Controller 方法;void postHandle (HttpServletRequest request, HttpServletResponse response, Object handle, ModelAndView modelAndView)方法:该方法将在请求处理之后,DispatcherServlet 进行视图返回渲染之前进行调用,可以在这个方法中对 Controller 处理之后的ModelAndView 对象进行操作。void afterCompletion(HttpServletRequest request, HttpServletResponse response, Object handle, Exception ex)方法:该方法也是需要当前对应的 Interceptor 的preHandle 方法的返回值为 true 时才会执行,该方法将在整个请求结束之后,也就是在DispatcherServlet 渲染了对应的视图之后执行。用于进行资源清理。
单个拦截器执行顺序:
preHandle ->进入控制器(controller)-> postHandler -> JSP -> afterCompletion
(三)具体实现
AOP拦截的是方法,SpringMVC 拦截器拦截的是请求
-
跟过滤器比较像的技术;
-
发送请求时被拦截器拦截,拦截之后可以在控制器的前后添加额外功能;
-
跟 AOP 区分开
-
AOP 在特定方法前后进行扩充(主要针对 ServiceImpl 进行扩充),其中特定方法指的是:只要这个方法可以被spring管理,就可以在这个方法前后进行扩充;
-
SpringMVC 拦截器:请求的拦截,针对点是控制器方法(主要针对 Controller);
-
SpringMVC 拦截器和Filter 的区别
- 拦截器只能拦截 Controller;
- Filter 可以拦截任何请求;
实现自定义拦截器的步骤:
【通过下面的拦截器,URL 中输入 demo2 无法访问,demo3 可以访问】
- 首先新建类并实现 HandlerInterceptor(使用 Ctrl + O 重写未实现方法)
package com.moyue.interceptor;

import org.springframework.web.servlet.HandlerInterceptor;
import org.springframework.web.servlet.ModelAndView;

import javax.servlet.http.HttpServletRequest;
import javax.servlet.http.HttpServletResponse;

/**
 * 自定义类,同时实现 HandlerInterceptor,同时添加未实现的方法
 * @author GJXAIOU
 * @create 2019-09-20-19:34
 */
public class InterceptorDemo implements HandlerInterceptor {
    /**
     * 该方法在进入控制器之前执行
     * 所有的控制代码都写在这里,什么情况下可以访问路径,什么情况下不能访问路径;
     * @param request
     * @param response
     * @param handler
     * @return true 表示进入拦截器,false 表示阻止进入拦截器
     * @throws Exception
     */
    @Override
    public boolean preHandle(HttpServletRequest request, HttpServletResponse response, Object handler) throws Exception {
        // 参数 Object handler 表示拦截器拦截的方法的全称
        System.out.println("拦截的方法为:handeler = " + handler);
        System.out.println("preHandle");
        return true;
    }

    /**
     * 该方法在控制器执行完毕,进入到 JSP 之前执行
     * 作用:可以用于日志记录以及敏感词语过滤
     * @param request
     * @param response
     * @param handler
     * @param modelAndView
     * @throws Exception
     */
    @Override
    public void postHandle(HttpServletRequest request, HttpServletResponse response, Object handler, ModelAndView modelAndView) throws Exception {
        // 参数 ModelAndView modelAndView 可以取到视图的值,以及取到或修改视图中参数名;
        System.out.println("往视图名:" + modelAndView.getViewName() + "跳转;");
        // 取出视图中参数值,因为 getModel() 返回值为 Map,因此使用 .get(key值)取到对应值;
        String modelString = modelAndView.getModel().get("model").toString();
        System.out.println(modelAndView.getModel().put("model", "修改后的值").toString());
        // 替换视图中参数值
        String modelStringReplace = modelString.replace("值", "替换的值");
        modelAndView.getModel().put("model", modelStringReplace);

        System.out.println("postHandle");
    }

    /**
     * 该方法在 JSP 执行完成之后执行
     * 作用:用于记录执行过程中出现的异常,并且可以将异常日志记录到日志中;
     * @param request
     * @param response
     * @param handler
     * @param ex :值为 NULL 表示没有异常,反之有异常;
     * @throws Exception
     */
    @Override
    public void afterCompletion(HttpServletRequest request, HttpServletResponse response, Object handler, Exception ex) throws Exception {
        System.out.println("是否有异常:ex = " + ex + "   异常信息为:" + ex.getMessage());
        System.out.println("afterCompletion");
    }
}
- 然后在springmvc.xml 配置拦截器需要拦截哪些控制器
分为拦截所有控制器和拦截特定 URL 的控制器;
<!--扫描注解-->
    <context:component-scan base-package="com.moyue.controller"></context:component-scan>

<!--注解驱动-->
    <mvc:annotation-driven></mvc:annotation-driven>

<!--第一种表示所有控制器全部拦截-->
<mvc:interceptors>
    <bean class="com.moyue.interceptor.InterceptorDemo"></bean>   </mvc:interceptors>-->

<!-- 第二种表示只拦截以下路径的控制器-->
<mvc:interceptors>
    <mvc:interceptor>
        <mvc:mapping path="/demo1"/>
        <mvc:mapping path="/demo2"/>
        <bean class="com.moyue.interceptor.InterceptorDemo"></bean>
    </mvc:interceptor>
</mvc:interceptors>
- 控制器中实现的 DemoController 为:
package com.moyue.controller;

import org.springframework.stereotype.Controller;
import org.springframework.ui.Model;
import org.springframework.web.bind.annotation.RequestMapping;
import org.springframework.web.servlet.ModelAndView;

/**
 * @author GJXAIOU
 * @create 2019-09-20-19:50
 */
@Controller
public class ControllerDemo {
    @RequestMapping("demo1")
    public String demo1(){
        System.out.println("执行 demo1");
        return "index.jsp";
    }

    @RequestMapping("demo2")
    public ModelAndView demo2(){
        System.out.println("执行 demo2");
        ModelAndView modelAndView = new ModelAndView("/index.jsp").addObject("modelAndView",
                "modelAndView 的值");
        return modelAndView;
    }

    @RequestMapping("demo3")
    public String demo3(Model model){
        System.out.println("执行 demo3");
        model.addAttribute("model", "model 的值");
        return "index.jsp";
    }
}
- 在 index.jsp 中接收值
<body>
  modelAndView:${modelAndView} <br>

  model:${model}
</body>
13 拦截器栈
- 多个拦截器同时生效时,组成了拦截器栈
- 执行顺序:整体标准为先进后出;
- 执行顺序和在 springmvc.xml 中配置顺序有关
- 设置先配置拦截器A 在配置拦截器B 执行顺序为
preHandle(A) --> preHandle(B) --> 控制器方法 --> postHandle(B)--> postHanle(A) --> JSP --> afterCompletion(B) --> afterCompletion(A)
代码示例:
同时在包 com.moyue.interceptor 包下面实现两个拦截器:interceptor1 和 interceptor2,两者的示例代码相同,但是 print 函数结果不同作为区分;
package com.moyue.interceptor;

import javax.servlet.http.HttpServletRequest;
import javax.servlet.http.HttpServletResponse;

import org.springframework.web.servlet.HandlerInterceptor;
import org.springframework.web.servlet.ModelAndView;

public class DemoInterceptor1 implements HandlerInterceptor {
	@Override
	public boolean preHandle(HttpServletRequest arg0, HttpServletResponse arg1, Object arg2) throws Exception {
		System.out.println("preHandle1");
		return true;
	}

	@Override
	public void postHandle(HttpServletRequest arg0, HttpServletResponse arg1, Object arg2, ModelAndView arg3)
			throws Exception {
		System.out.println("postHandle1");
	}

	@Override
	public void afterCompletion(HttpServletRequest arg0, HttpServletResponse arg1, Object arg2, Exception arg3)
			throws Exception {
		System.out.println("afterCompletion1");
	}
}
然后在 springmvc.xml 配置拦截器为:
<!-- 拦截器 -->
<mvc:interceptors>
	<!--拦截顺序和配置顺序有关-->
	<bean class="com.moyue.interceptor.DemoInterceptor1"></bean>
	<bean class="com.moyue.interceptor.DemoInterceptor2"></bean>
</mvc:interceptors>
假设 controller 中只有一个控制器:
@Controller
public class DemoController {
	@RequestMapping("demo")
	public String demo( ){
		System.out.println("执行demo");
		return "index.jsp";
	}
}
当通过 URL 访问:http://localhost:8080/springmvc07_war_exploded/demo时候,结果为:
preHandle1
preHandle2
执行demo
postHandle2
postHandle1
index.jsp
afterCompletion2
afterCompletion1
14 SpringMVC 运行原理
如果在 web.xml 中设置 DispatcherServlet 的 <url-pattern> 为/时,当用户发起请求, 请求一个控制器时, 首先会执行 DispatcherServlet。 由DispatcherServlet 调 用 HandlerMapping 的DefaultAnnotationHandlerMapping 解 析 URL, 解 析 后 调 用HandlerAdatper 组 件 的 AnnotationMethodHandlerAdapter 去 调 用Controller 中的 HandlerMethod。当 HandlerMethod 执行完成后会返回View,返回的view会被 ViewResovler 进行视图解析,解析后调用 jsp 对应的.class 文件并运行,最终把运行.class 文件的结果响应给客户端。
15 SpringMVC 对 Date 类型转换
- 只需要在springmvc.xml 中配置,代码中不需要做任何修改;
- 必须额外导入 joda-time.jar
- 时间类型 java.sql.Date
springmvc.xml 内容为:
<?xml version="1.0" encoding="UTF-8"?>
<beans xmlns="http://www.springframework.org/schema/beans"
	xmlns:xsi="http://www.w3.org/2001/XMLSchema-instance" xmlns:mvc="http://www.springframework.org/schema/mvc"
	xmlns:context="http://www.springframework.org/schema/context"
	xsi:schemaLocation="http://www.springframework.org/schema/beans
        http://www.springframework.org/schema/beans/spring-beans.xsd
        http://www.springframework.org/schema/context
        http://www.springframework.org/schema/context/spring-context.xsd
        http://www.springframework.org/schema/mvc
        http://www.springframework.org/schema/mvc/spring-mvc.xsd">
	<!-- 扫描注解 -->
	<context:component-scan base-package="com.moyue.controller"></context:component-scan>
	<!-- 注解驱动 -->
	<mvc:annotation-driven conversion-service="conversionService"></mvc:annotation-driven>


<bean id="conversionService"
		class="org.springframework.format.support.FormattingConversionServiceFactoryBean">
		<property name="registerDefaultFormatters" value="false" />
		<property name="formatters">
			<set>
				<bean
					class="org.springframework.format.number.NumberFormatAnnotationFormatterFactory" />
			</set>
		</property>
		<property name="formatterRegistrars">
			<set>
				<bean
					class="org.springframework.format.datetime.joda.JodaTimeFormatterRegistrar">
					<property name="dateFormatter">
						<bean
							class="org.springframework.format.datetime.joda.DateTimeFormatterFactoryBean">
							<property name="pattern" value="yyyy-MM-dd" />
						</bean>
					</property>
				</bean>
			</set>
		</property>
	</bean>
</beans>
- 使用注解:在需要转换的参数或实体类属性上添加
@DateTimeFormatter(pattern=”表达式”)- 使用Date 参数接收(在控制器中)
@Controller
public class DemoController {
	@RequestMapping("demo")
    public String demo(@DateTimeFormat(pattern="yyyy-MM-dd") Date time){
        System.out.println(time);
        return "main.jsp";
    }
}
- 具体的实体类为:
public class Demo1 {
	@DateTimeFormat(pattern="yyyy/MM/dd")
	private Date time;

	public Date getTime() {
		return time;
	}

	public void setTime(Date time) {
		this.time = time;
	}

	@Override
	public String toString() {
		return "Demo1 [time=" + time.toLocaleString() + "]";
	}
}
- 注意地方:
- 不需要导入额外jar
- Date 是java.util.Date
