Python+Opencv3 图像基本操作
对最近学习的openCV相关的图像操作进行整理,尤其是对图像的读取、视频的读写等,详细如下:
- 1. 图像的读取显示
import cv2
img = cv2.imread('/home/zxl/Downloads/timg.jpeg')
cv2.namedWindow('Image')
cv2.imshow('Image',img)
cv2.waitKey(0)
cv2.destroyAllWindows()
- 2. 摄像头视频实时显示并保存
import cv2

cap = cv2.VideoCapture(1)

# Define the codec and create VideoWriter object
fourcc = cv2.VideoWriter_fourcc(*'XVID')
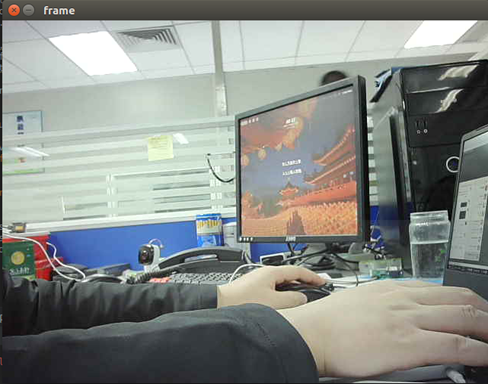
# 定义一个视频存储对象,以及视频编码方式,帧率,视频大小格式,最后一项设定灰度图 out = cv2.VideoWriter('/home/zxl/PycharmProjects/learn/output.avi',fourcc, 20.0, (1280,720)) while(cap.isOpened()): ret, frame = cap.read() if ret==True: #此处读出的图像是反的,需要将图像镜像 frame = cv2.flip(frame,0) # write the flipped frame out.write(frame) cv2.imshow('frame',frame) if cv2.waitKey(1) & 0xFF == ord('q'): break else: break # Release everything if job is finished cap.release() out.release() cv2.destroyAllWindows()运行结果如下:
注:程序中用到图像镜像函数,函数原型如下:
flip
Flips a 2D array around vertical, horizontal, or both axes.
Python: cv2.flip(src, flipCode[, dst]) → dst
Python: cv.Flip(src, dst=None, flipMode=0) → None
Parameters:
- src – input array.
- dst – output array of the same size and type as src.
- flipCode – a flag to specify how to flip the array; 0 means flipping around the x-axis and positive value (for example, 1) means flipping around y-axis. Negative value (for example, -1) means flipping around both axes (see the discussion below for the formulas).
src
Anno
0
垂直翻转
1
水平翻转
-1
水平垂直翻转
- 3. 使用opencv函数库画各种图形
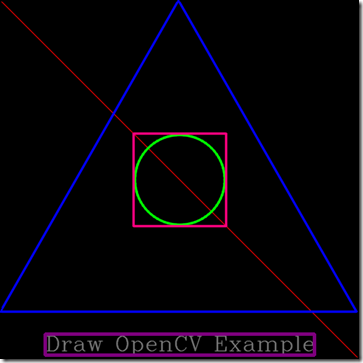
import cv2 import numpy as np #craet 512*512 black image img = np.zeros((512,512,3),np.uint8) #draw line cv2.line(img,(0,0),(512,512),(0,0,255),1,cv2.LINE_AA) #put txt cv2.putText(img,'Draw OpenCV Example',(64,500),cv2.FONT_HERSHEY_COMPLEX,1,(125,125,125),1,cv2.LINE_AA) #draw rect cv2.rectangle(img,(64,476),(512-64,506),(125,0,125),4,cv2.LINE_4) #draw circle cv2.circle(img,(256,256),64,(0,256,0),2,cv2.LINE_AA) cv2.rectangle(img,(256-64-2,256-64-2),(256+64+2,256+64+2),(125,0,256),2,cv2.LINE_AA) #draw triangle triangles = np.array([ [(256-2, 0), (0, 512-64-4), (512-4, 512-64-4)]]) cv2.polylines(img,triangles,True,(255,0,0),2,cv2.LINE_AA) #use cv2 display cv2.imshow('image',img) k = cv2.waitKey(0) # wait for ESC key to exit if k == 27: cv2.destroyAllWindows() # wait for 's' key to save and exit elif k == ord('s'): cv2.imwrite('black.png',img) cv2.destroyAllWindows()其中程序中用到画三角形,搞了我半天,因为opencv的函数库里边没有找到画三角形的,参考网上,先定义三个顶点,使用polylines链接起来。LINE_AA:线条抗锯齿。
- 4.回调函数实现坐标获取、当前像素点像素值获取,在当前像素点处画框/画圆
import cv2
import numpy as np
#Draw cilcle at where you double clicked
def draw_circle(event,x,y,flags,param):
    if event==cv2.EVENT_LBUTTONDBLCLK:
        cv2.circle(img,(x,y),100,(255,0,0),-1)
#get coordinate and get current RGB
def get_position(event,x,y,flags,param):
    if event == cv2.EVENT_FLAG_LBUTTON:
        print('coordinate:x=%d,y=%d'%(x,y))
        print('RGB=', img[x, y])
img=cv2.imread('/home/zxl/Downloads/timg.jpeg')
cv2.namedWindow('image')
cv2.setMouseCallback('image',draw_circle)
#cv2.setMouseCallback('image',get_position)  #备用
while 1:
    cv2.imshow('image',img)
    if cv2.waitKey(20)&0xFF==27:
        break
cv2.destroyAllWindows()
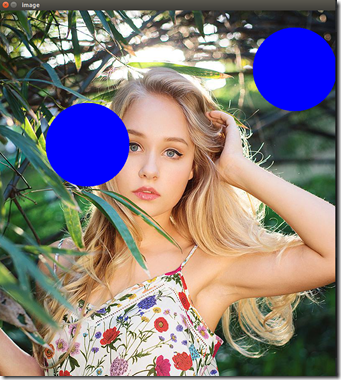
运行结果如下:
其中有个比较有意思的地方,为了实现获取当前鼠标点击处的坐标和该坐标处的像素点值,做了一个回调,会对后续图像的研究有帮助。
- 5. 在视频中添加OSD
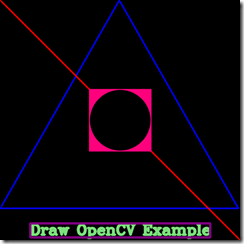
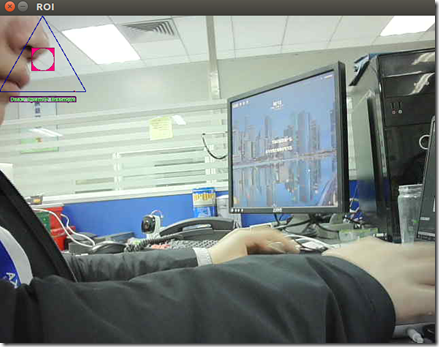
如何在摄像头预览中添加自己的OSD,并且做到部分透明的效果,研究了图片合并后采用Mask和ROI的方式,对图像进行与操作,可以给每一帧图像添加OSD,进而达到给视频添加OSD的目的。
import cv2
import numpy as np

def get_position(event,x,y,flags,param):
    if event == cv2.EVENT_FLAG_LBUTTON:
        print('coordinate:x=%d,y=%d'%(x,y))
        print('RGB=',hsv[x,y])

cap = cv2.VideoCapture(0)
cv2.namedWindow('ROI')
cv2.setMouseCallback('ROI',get_position)

img_roi = cv2.imread('black_1.png')
r,c,channel =img_roi.shape
img_roi_1 = cv2.resize(img_roi,(int(r/2),int(c/2)))

img_roi_1_gray = cv2.cvtColor(img_roi_1,cv2.COLOR_RGB2GRAY)
ret,mask = cv2.threshold(img_roi_1_gray,25,255,cv2.THRESH_BINARY)
mask_inv = cv2.bitwise_not(mask)

img_bg = cv2.bitwise_and(img_roi_1,img_roi_1,mask=mask)

rows,cols,channels =img_roi_1.shape


while cap.isOpened():
    ret, frame = cap.read()
    if ret == 1:
        frame = cv2.flip(frame,0)
        roi = frame[0:rows, 0:cols]
        img_qg = cv2.bitwise_and(roi,roi,mask=mask_inv)
        dst = cv2.add(img_qg,img_bg)
        frame[0:rows, 0:cols] = dst

        cv2.imshow('ROI',frame)

    if cv2.waitKey(2) & 0xFF == 27:
        break
cap.release()

cv2.destroyAllWindows()
到此基本把最近了解的opencv的图像基本操作搞了一边。中间涉及到Open live Write、github、ubuntu下环境的配置,来来回回折腾了有半个月,总算把这块暂时汇总了一下,年后集中注意力搞识别类的更加深入的。


