
Unity 保存本地图片到unity里面,并使用
unity打开本地文件 代码如下

using System;
using System.Collections;
using System.Collections.Generic;
using System.Runtime.InteropServices;
using UnityEngine;
/// <summary>
/// 数据接收类
/// </summary>
[StructLayout(LayoutKind.Sequential, CharSet = CharSet.Auto)]
public class FileOpenDialog{

    public int structSize = 0;
    public IntPtr dlgOwner = IntPtr.Zero;
    public IntPtr instance = IntPtr.Zero;
    public String filter = null;
    public String customFilter = null;
    public int maxCustFilter = 0;
    public int filterIndex = 0;
    public String file = null;
    public int maxFile = 0;
    public String fileTitle = null;
    public int maxFileTitle = 0;
    public String initialDir = null;
    public String title = null;
    public int flags = 0;
    public short fileOffset = 0;
    public short fileExtension = 0;
    public String defExt = null;
    public IntPtr custData = IntPtr.Zero;
    public IntPtr hook = IntPtr.Zero;
    public String templateName = null;
    public IntPtr reservedPtr = IntPtr.Zero;
    public int reservedInt = 0;
    public int flagsEx = 0;

}
//系统调用函数
public class DialogShow
{
    [DllImport("Comdlg32.dll", SetLastError = true, ThrowOnUnmappableChar = true, CharSet = CharSet.Auto)]
    public static extern bool GetOpenFileName([In, Out]FileOpenDialog dialog);  //这个方法名称必须为GetOpenFileName
}
public class OpenFileByWin32 : MonoBehaviour {

  //打开文件
    public void OpenFile()
    {
        FileOpenDialog dialog = new FileOpenDialog();

        dialog.structSize = Marshal.SizeOf(dialog);

       // dialog.filter = "exe files\0*.exe\0All Files\0*.*\0\0";

        dialog.filter = "图片文件(*.png*.jpg)\0*.png;*.jpg";

        dialog.file = new string(new char[256]);

        dialog.maxFile = dialog.file.Length;

        dialog.fileTitle = new string(new char[64]);

        dialog.maxFileTitle = dialog.fileTitle.Length;

        dialog.initialDir = UnityEngine.Application.dataPath;  //默认路径

        dialog.title = "Open File Dialog";

        dialog.defExt = "png";//显示文件的类型
        //注意一下项目不一定要全选 但是0x00000008项不要缺少
        dialog.flags = 0x00080000 | 0x00001000 | 0x00000800 | 0x00000200 | 0x00000008;

        if (DialogShow.GetOpenFileName(dialog))
        {
            if (dialog.file!=null)
            {
                Structure_RenZhi.instacnce.Chuandong(dialog.file);//dialog.file本地图片的地址

            }
            else
            {

                return;
            }
        }
    }
}
下面是把获取到图片地址的文件流转换成Image
public Image image;
public string url;
//把路径图片转换成 Image
public void Chuandong(string path)
    {
        image.sprite = ChangeToSprite(ByteToTex2d(byteToImage(path)));
        url = path;
        print(url);
    }
    //根据图片路径返回图片的字节流byte[]
    public static byte[] byteToImage(string path)
    {
        FileStream files = new FileStream(path, FileMode.Open);
        byte[] imgByte = new byte[files.Length];
        files.Read(imgByte, 0, imgByte.Length);
        files.Close();

        return imgByte;
    }
    //根据字节流转换成图片
    public static Texture2D ByteToTex2d(byte[] bytes)
    {
        int w = 500;
        int h = 500;
        Texture2D tex = new Texture2D(w, h);
        tex.LoadImage(bytes);
        return tex;
    }
    //转换为Image
    private Sprite ChangeToSprite(Texture2D tex)
    {
        Sprite sprite = Sprite.Create(tex, new Rect(0, 0, tex.width, tex.height), new Vector2(0.5f, 0.5f));
        return sprite;
    }
然后在把获取到的图片路径 转换成文件流 在保存成图片
// 开启协程就可以保存成图片了
IEnumerator DownSprite()
    {

        yield return new WaitForSeconds(0);

            Texture2D tex = ByteToTex2d(byteToImage(url));

            //保存本地
            Byte[] bytes = tex.EncodeToPNG();
            File.WriteAllBytes(Application.streamingAssetsPath + "/DataerTion/"+ filed_photo.text+".png", bytes); //filed_photo.text 是保存图片的名字
# if UNITY_EDITOR
        AssetDatabase.Refresh(); //刷新Editor  不刷新显示不出来
        #endif

    }
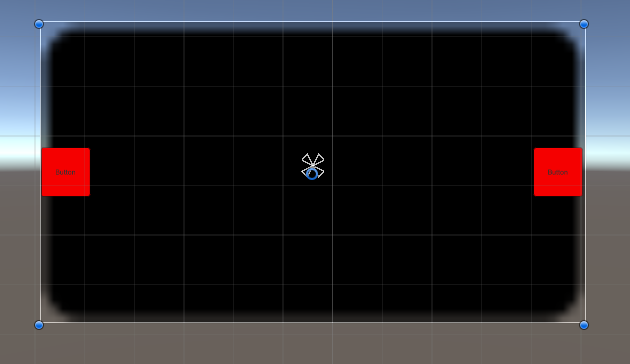
下面是使用保存的图片显示在ui上面 怎么使用具体看需要 可以拉几个UI(如下图)试一下 看看效果
下面上代码
using System.Collections;
using System.Collections.Generic;
using System.IO;
using UnityEngine;
using UnityEngine.UI;
/// <summary>
/// 切换图片显示, 读取unity本地图片文件显示在ui
/// </summary>
public class Cut_Photo : MonoBehaviour
{
    public Dictionary<int, Sprite> spriteDic = new Dictionary<int, Sprite>();
    public Button button_zuo;
    public Button button_you;
    public Image image;
    private int aa=0;
    // Start is called before the first frame update
    void Start()
    {
        GetTexture();
       // image = this.transform.GetComponent<Image>();
        image.sprite  =spriteDic[aa];

        Debug.Log(spriteDic.Count);
        button_zuo.onClick.AddListener(delegate {

            if (aa !=0)
            {
                aa--;
            }
            else
            {
                aa = (spriteDic.Count - 1);
            }
            image.sprite = spriteDic[aa];
        });
        button_you.onClick.AddListener(delegate {
            if (aa != (spriteDic.Count-1))
            {
                aa++;
            }
            else
            {
                aa = 0;
            }
            image.sprite = spriteDic[aa];
        });
    }


//获取文件里面的图片
    public void GetTexture()
    {
        DirectoryInfo dir = new DirectoryInfo(Application.streamingAssetsPath + "/DataerTion");
        FileInfo[] filess = dir.GetFiles("*.png");//获取所有文件的信息
        int i = 0;
        foreach (FileInfo file in filess)
        {
            FileStream fs = new FileStream(Application.streamingAssetsPath + "/DataerTion/" + file.Name, FileMode.Open);
            byte[] buffer = new byte[fs.Length];
            fs.Read(buffer, 0, buffer.Length);
            fs.Close();
            Texture2D tex = new Texture2D(2, 2);
            tex.LoadImage(buffer);
            tex.Apply();
            spriteDic.Add(i, ChangeToSprite(tex));
            i++;
        }
    }
    //转换为Image
    private Sprite ChangeToSprite(Texture2D tex)
    {
        Sprite sprite = Sprite.Create(tex, new Rect(0, 0, tex.width, tex.height), new Vector2(0.5f, 0.5f));
        return sprite;
    }
    // Update is called once per frame
    void Update()
    {

    }
}
 //指定一张图片显示在UI上面
    public void GetTexTure(string spriptname,Image sprit )
    {
        string picpath = Application.streamingAssetsPath + "/DataerTion/" + spriptname.ToString() + ".png";
        if (File.Exists(picpath))
        {
            byte[] bt = File.ReadAllBytes(picpath);
            Texture2D t2d = new Texture2D(1920, 1080);
            t2d.LoadImage(bt);
            Sprite sprite = Sprite.Create(t2d, new Rect(0, 0, t2d.width, t2d.height), Vector2.zero);
            sprit.sprite = sprite;
        }
    }
//指定多张图片的
    public void GetTexTure1(string spriptname)
    {
        for (int i = 0; i < 10; i++)
        {
            string picpath = Application.streamingAssetsPath + "/DataerTion/" + spriptname.ToString()+i+ ".png";

            if (File.Exists(picpath))
            {
                byte[] bt = File.ReadAllBytes(picpath);
                Texture2D t2d = new Texture2D(1920, 1080);
                t2d.LoadImage(bt);
                Sprite sprite = Sprite.Create(t2d, new Rect(0, 0, t2d.width, t2d.height), Vector2.zero);
                //sprit.sprite = sprite;
                spriteDic.Add(i, sprite);
            }
        }

    }
本次就这么多,谢谢大家,有需要会继续补充


【推荐】国内首个AI IDE,深度理解中文开发场景,立即下载体验Trae
【推荐】编程新体验,更懂你的AI,立即体验豆包MarsCode编程助手
【推荐】抖音旗下AI助手豆包,你的智能百科全书,全免费不限次数
【推荐】轻量又高性能的 SSH 工具 IShell:AI 加持,快人一步
· AI与.NET技术实操系列:基于图像分类模型对图像进行分类
· go语言实现终端里的倒计时
· 如何编写易于单元测试的代码
· 10年+ .NET Coder 心语,封装的思维:从隐藏、稳定开始理解其本质意义
· .NET Core 中如何实现缓存的预热?
· 分享一个免费、快速、无限量使用的满血 DeepSeek R1 模型,支持深度思考和联网搜索!
· 25岁的心里话
· 基于 Docker 搭建 FRP 内网穿透开源项目(很简单哒)
· ollama系列01:轻松3步本地部署deepseek,普通电脑可用
· 闲置电脑爆改个人服务器(超详细) #公网映射 #Vmware虚拟网络编辑器