八 sqoop 安装
1、准备环境
sqoop-1.99.7-bin-hadoop200(https://mirror.bit.edu.cn/apache/sqoop/)
2、解压
tar zxvf /opt/software/sqoop-1.99.7-bin-hadoop200.tar.gz -C /opt/module/
3、配置文件
hadoop配置文件路径
cd /opt/module/sqoop-1.99.7/conf

org.apache.sqoop.submission.engine.mapreduce.configuration.directory=/etc/hadoop/conf/
改为(此为hadoop 路径)
org.apache.sqoop.submission.engine.mapreduce.configuration.directory=/opt/module/hadoop-3.2.1/etc/hadoop
安全验证方式部分的注释
org.apache.sqoop.security.authentication.type=SIMPLE
org.apache.sqoop.security.authentication.handler=org.apache.sqoop.security.authentication.SimpleAuthenticationHandler
org.apache.sqoop.security.authentication.anonymous=true
配置hadoop代理访问
因为sqoop访问Hadoop的MapReduce使用的是代理的方式,必须在Hadoop中配置所接受的proxy用户和组。找到Hadoop的core-site.xml配置文件
<property>
<name>hadoop.proxyuser.sqoop2.hosts</name>
<value>root</value>
</property>
<property>
<name>hadoop.proxyuser.sqoop2.groups</name>
<value>root</value>
</property>
创建文件夹
mkdir /opt/module/sqoop-1.99.7/logs
mkdir /opt/module/sqoop-1.99.7/data
替换 @LOGDIR@ 及 @BASEDIR@
4、系统环境变量
修改环境变量:vi /etc/profile
#sqoop
export SQOOP_HOME=/opt/module/sqoop-1.99.7
export PATH=$PATH:$SQOOP_HOME/bin
刷新配置:source /etc/profile
5、验证 & 启动
验证:
sqoop2-tool verify

启动:
sqoop2-server start

6、测试
执行:sqoop2-shell
建立hdfs的连接
sqoop:000> create link --connector hdfs-connector
Creating link for connector with name hdfs-connector
Please fill following values to create new link object
Name: hdfs-link01 (#连接名字,必填)
HDFS cluster
URI: hdfs://mycluster (#hdfs的地址,必填)
Conf directory: /opt/module/hadoop-3.2.1/etc/hadoop (#hadoop的配置地址,必填)
Additional configs::
There are currently 0 values in the map:
entry#
New link was successfully created with validation status OK and name hdfs-link01
建立mysql的连接
sqoop:000> create link --connector generic-jdbc-connector
Creating link for connector with name generic-jdbc-connector
Please fill following values to create new link object
Name: jdbc-link01 (#link名称,必填)
Database connection
Driver class: com.mysql.jdbc.Driver (#jdbc驱动类,必填)
Connection String: jdbc:mysql://localhost:3306/dbtest1?userUnicode=true&characterEncoding=UTF8& useSSL=false (# jdbc链接url,必填)
Username: root (#数据库的用户,必填)
Password: **** (#数据库密码,必填)
Fetch Size:
Connection Properties:
There are currently 0 values in the map:
entry#
SQL Dialect
Identifier enclose: (#这里有一个空格,不然会报错)
New link was successfully created with validation status OK and name jdbc-link01
执行:show link

问题集锦
报错:安装sqoop-1.99.7报caused by java.lang.ClassNotFoundException: org.apache.hadoop.conf.Configuration ,配置hadoop路径错误
解决:https://blog.csdn.net/lvyuan1234/article/details/60143224

报错:java.lang.NoSuchMethodError: com.google.common.base.Preconditions.checkArgument(ZLjava/lang/String;Ljava/lang/Object;)V
解决:sqoop/tools/lib/ 、/server/lib/ 与 hadoop/share/hadoop/common/lib 中guava 包版本不一致导致,删除低版本,保留高版本

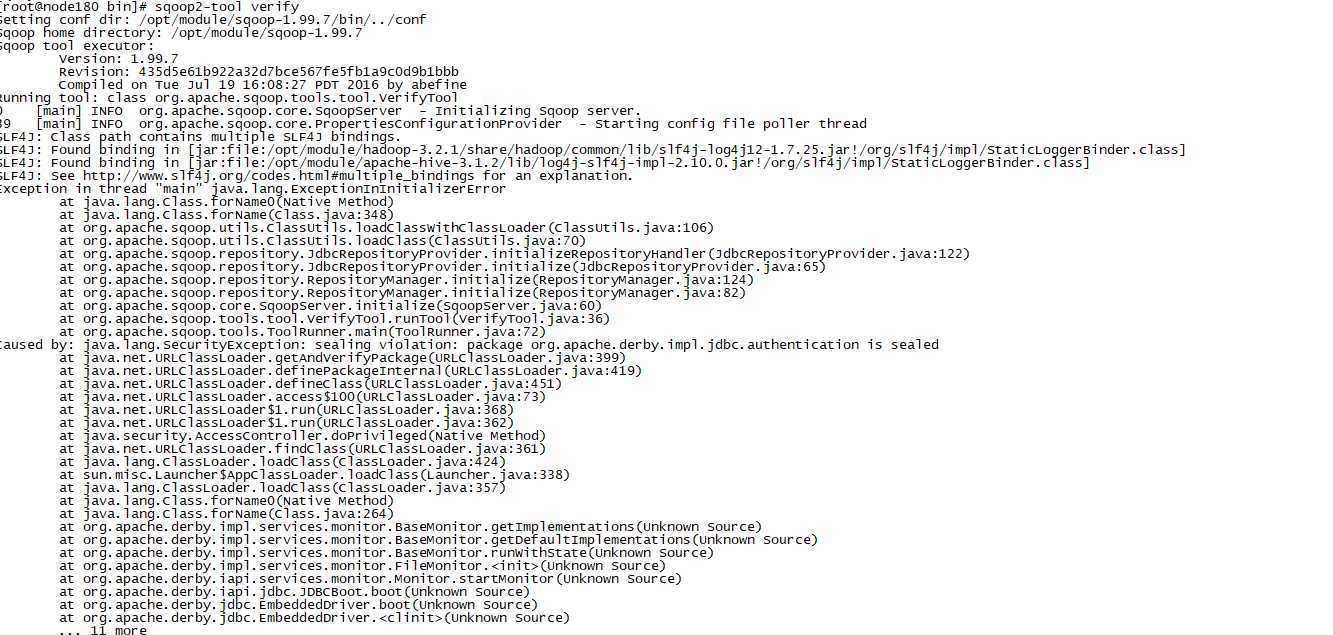
问题:java.lang.SecurityException: sealing violation: package org.apache.derby.impl.jdbc.authentication is sealed
原因:derby 版本过低导致
解决:apache-hive-3.1.2/lib 中 derby-10.14.1.0.jar 复制到 sqoop-1.99.7/server/lib 下
https://blog.csdn.net/debimeng/article/details/101162801

报错


