vs code 快速配置
1. 基本操作
- 打开工程文件: ctrl + p
- 在文件搜索内容: ctrl + shift + f
- 进入设置: ctrl + shift + p, 然后输入 user setting
- 添加插件: ctrl + shift +x
2. 注释插件
2.1 psioniq File Header 配置头文件模板
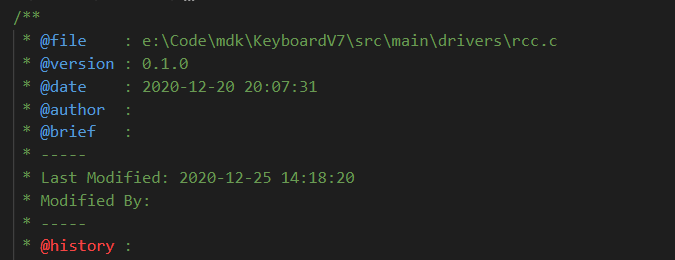
头文件注释效果:

方法:ctrl + alt + h, 两遍
配置如下:
    "psi-header": {
        "changes-tracking": {
            "isActive": true,
            "modAuthor": "Modified By: ",
            "modDate": "Last Modified: ",
            "modDateFormat": "date",
            "include": [],
            "exclude": [
                "markdown",
                "json"
            ],
            "excludeGlob": [
                "out/**",
                "src/**/*.xyz"
            ],
            "autoHeader": "manualSave"
        },
        "lang-config": [
            {
                "language": "*",
                "begin": "/**",
                "end": "*/",
                "prefix": " * "
            }
        ],
        "variables": [
            [
                "projectname",
                "CableTester"
            ],
            [
                "projectCreationYear",
                "2018"
            ],
            [
                "copyrightholder",
                "All Right Reserved"
            ],
            [
                "version",
                "v0.0.3"
            ]
        ],
        "config": {
            "forceToTop": true,
            "blankLinesAfter": 1,
            //"author": "Leon",
            "initials": "qyx",
            "authorEmail": "dsf",
            "company": "",
            "license": "Custom"
        },
        "templates": [
            {
                "language": "*",
                "template": [
                    "@file    : <<filepath>>",
                    "@project : <<projectname>>",
                    "@date    : <<filecreated('YYYY-MM-DD HH:mm:ss')>>",
                    "@author  : <<initials>>(<<authoremail>>)",
                    "@brief   :",
                    "-----",
                    "Last Modified: <<dateformat('YYYY-MM-DD HH:mm:ss')>>",
                    "Modified By: <<author>>(<<authoremail>>)",
                    "-----",
                    "@history :",
                    "================================================================================",
                    "   Date   \t By \t(version) \t                    Comments",
                    "----------\t----\t---------    ----------------------------------------------",
                    "================================================================================",
                    "Copyright (c) <<projectCreationYear>> - <<year>> <<copyrightholder>>, <<company>>",
                ],
                "changeLogCaption": "@history :",
                "changeLogHeaderLineCount": 3,
                "changeLogEntryTemplate": [
                    "",
                    "<<dateformat(YY-MM-DD)>>\t<<initials>>  \t(<<version>>) \t ",
                ]
            },
        ]
    },
修改日志效果:


方法: ctrl + alt + c, 两遍
2.2 VSCode跳出括号引号插件Tabout
这样在引号及括号内输入完成后,按下tab键可以跳出右括号或者右引号。
 \
\
2.3 函数注释 Doxygen Documentation Generator

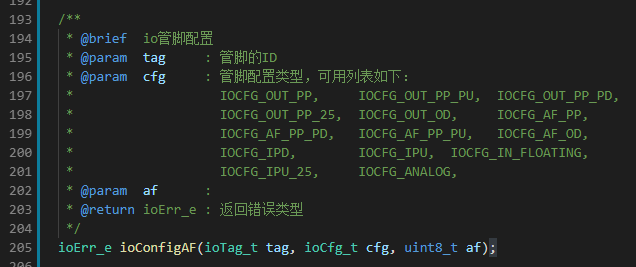
使用效果:

使用方法: 在函数定义的上一行,输入 /** 后回车即可。
配置:
// 根据自动生成的注释模板(目前主要体现在函数注释上)
    "doxdocgen.generic": {
        "order": [
            "brief",
            "tparam",
            "param",
            "return"
        ],
        "briefTemplate": "@brief  ",
        "paramTemplate": "@param  {param}{indent:16}:{indent:18}",
        "returnTemplate": "@return {type}{indent:16}:{indent:18}",
        "splitCasingSmartText": true,
    }
3. 格式化代码
vscode 自带:选中后使用快捷键 shift + alt + F
修改代码格式风格: Visual Studio(默认), LLVM, Google, Chromium, Mozilla, WebKit
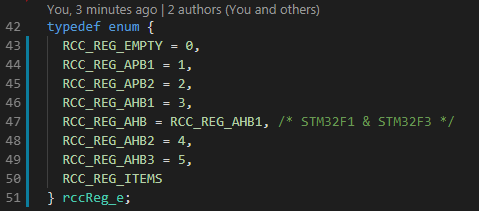
格式效果:

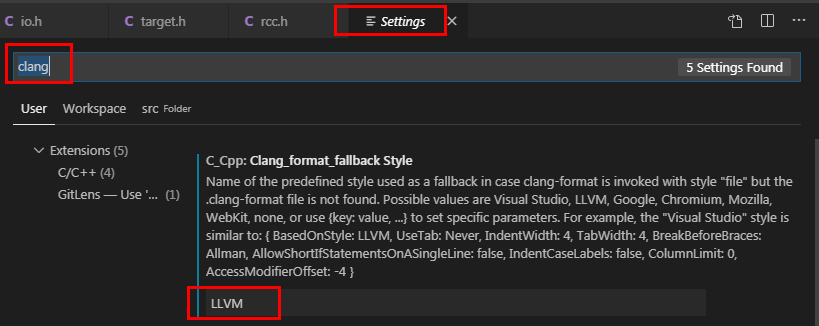
配置方法:
ctrl + shift + p, 输入setting, 进入设置后搜索 “clang”,把 Visual Studio 修改为 LLVM

ctrl + shift + p, 打开setting.json,复制下面的配置

    "editor.formatOnSave": true,
    "C_Cpp.clang_format_fallbackStyle": "LLVM",
    "[cpp]": {
        "editor.quickSuggestions": {
            "comments": "on",
            "strings": "on",
            "other": "on"
        },
        "editor.defaultFormatter": "ms-vscode.cpptools"
    },
    "[c]": {
        "editor.quickSuggestions": {
            "comments": "on",
            "strings": "on",
            "other": "on"
        },
        "editor.defaultFormatter": "ms-vscode.cpptools"
    },


