
centos7 rabbitmq安装以及应用
安装单机rabbitmq
1.安装erlang
cd /usr.local
yum install wget
yum install net-tools
wget http://erlang.org/download/otp_src_19.3.tar.g
解压
tar -xvzf otp_src_19.3.tar.gz
erlang在安装前需要先安装下它的依赖工具:
yum -y install make gcc gcc-c++ kernel-devel m4 ncurses-devel openssl-devel unixODBC-devel
然后进入解压文件对erlang进行安装环境的配置(为了以后升级版本,此处就继续使用加压文件的名字了,至少我看得懂。。。。)
./configure --prefix=/usr/erlang --without-javac
编译make
安装 make install
验证是否安装成功
./bin/erl
配置环境变量
vi /etc/profile
在最后加:export PATH=$PATH:/usr/local/otp_src_19.3/bin
source /etc/profile
2.安装RabbitMQ
yum install rabbitmq-server-3.6.6-1.el7.noarch.rpm
可能会报错
erlang >= R16B-03
解决方法
yum -y install socat
yum -y install epel-release
再进入 usr/local
yum install rabbitmq-server-3.6.6-1.el7.noarch.rpm
完成后启动服务:
service rabbitmq-server start
可以查看服务状态
service rabbitmq-server status
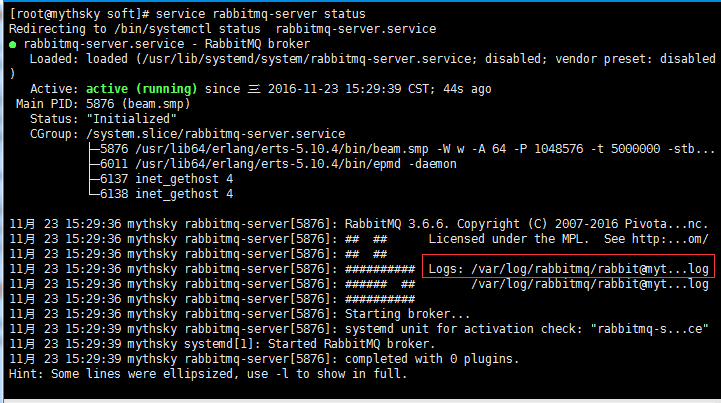
这里可以看到log文件的位置,转到文件位置,打开文件:
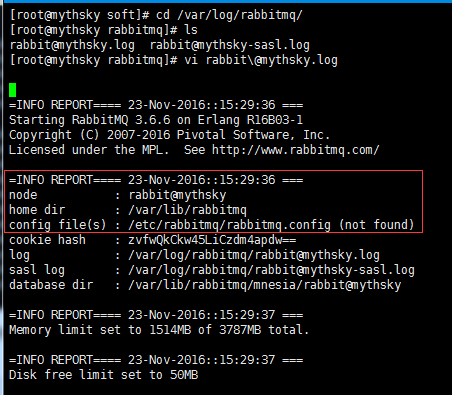
这里显示的是没有找到配置文件,我们可以自己创建这个文件
cd /etc/rabbitmq/ vi rabbitmq.config
编辑内容如下:
[{rabbit, [{loopback_users, []}]}].
保存配置后重启服务:
service rabbitmq-server stop service rabbitmq-server start
开启管理UI:
rabbitmq-plugins enable rabbitmq_management firewall-cmd --zone=public --add-port=15672/tcp --permanent firewall-cmd --reload
在Windows下打开地址:

至此 rabbitmq安装成功
应用
首页看下目录结构

这是个springboot项目,
spring-rabbitmq.xml:配置mq的所有基本信息

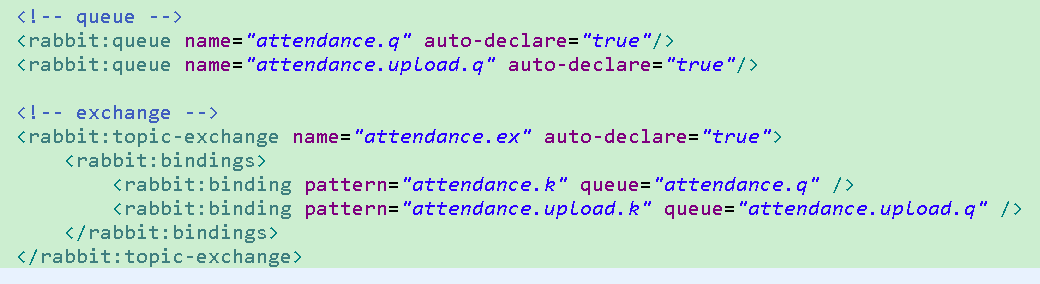
rabbit文件夹下的xml即配置的exchange,routingkey以及对应绑定的对列名
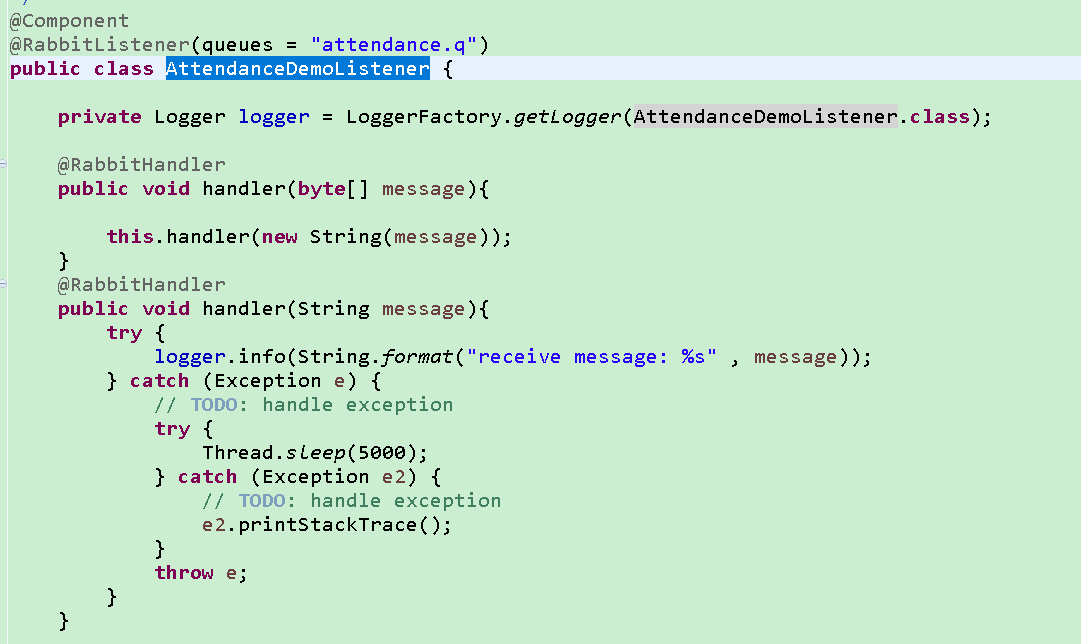
listener包下是所需要的监听类
主要是以下内容
@RabbitListener(queues = "attendance.q") :监听的队列名
@RabbitHandler 对应监听的方法
如何去发送:定义exchange和routeingkey就ok了
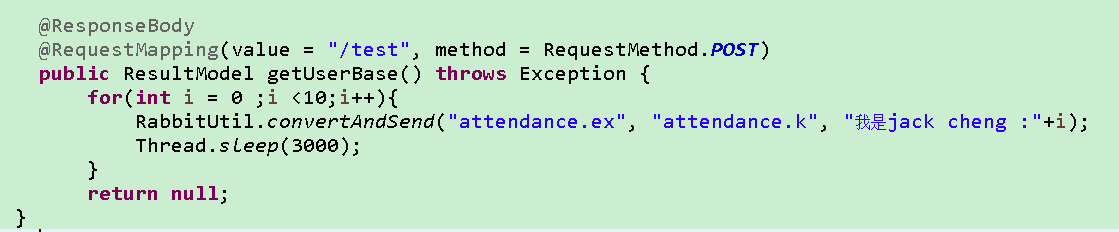
public class RabbitUtil {

    @Autowired
    private ConnectionFactory connectionFactory;

    @Autowired
    private RabbitTemplate rabbitTemplate;

    private static RabbitUtil rabbitUtil;

    @PostConstruct
    private void init() {
        rabbitUtil = this;
        rabbitUtil.rabbitTemplate = this.rabbitTemplate;
        rabbitUtil.connectionFactory = this.connectionFactory;
    }

    public static RabbitTemplate getRabbitTemplate() {
        return rabbitUtil.rabbitTemplate;
    }

    public static ConnectionFactory getConnectionFactory() {
        return rabbitUtil.connectionFactory;
    }

    /**
     * 发送RMQ消息
     *
     * @param message
     * @throws AmqpException
     */
    public void convertAndSend(String message) throws AmqpException {
        convertAndSend(null, null, message, false);
    }

    /**
     * 发送RMQ消息
     *
     * @param routingKey
     * @param message
     * @throws AmqpException
     */
    public void convertAndSend(String routingKey, String message) throws AmqpException {
        convertAndSend(null, routingKey, message, false);
    }

    /**
     * 发送RMQ消息
     *
     * @param exchange
     * @param routingKey
     * @param message
     * @throws AmqpException
     */
    public static void convertAndSend(String exchange, String routingKey, String message) throws AmqpException {
        convertAndSend(exchange, routingKey, message, false);
    }

    private static void convertAndSend(String exchange, String routingKey, Object message, boolean waitForAck)
            throws AmqpException {
        if (waitForAck) {

        } else {
            if (StringUtils.isNotEmpty(exchange) && StringUtils.isNotEmpty(routingKey)) {
                getRabbitTemplate().convertAndSend(exchange, routingKey, message);
            } else if (StringUtils.isNotEmpty(routingKey)) {
                getRabbitTemplate().convertAndSend(routingKey, message);
            } else {
                getRabbitTemplate().convertAndSend(message);
            }
        }
    }

    /**
     * 查询队列消息数量
     * @param queue
     * @throws Exception
     */
    public static long getMessageCount(String queue) throws Exception {
        Connection connection = null;
        Channel channel = null;
        try {
            ConnectionFactory connectionFactory = getConnectionFactory();
            connection = connectionFactory.createConnection();
            channel = connection.createChannel(false);
            return channel.messageCount(queue);
        } finally {
            if(channel != null){
                channel.close();
            }
            if(connection != null){
                connection.close();
            }
        }

    }
posted on 2018-08-02 15:55 Mr.chengJQ 阅读(525) 评论(0) 编辑 收藏 举报

