安装 sonatype/nexus3:nuget maven docker k8s nginx(骚)
1.nexus的安装 (linux 和 docker两种安装方式)重要参考
Sonatype Nexus3 Docker: sonatype/nexus3
Docker install: https://hub.docker.com/r/sonatype/nexus3/
https://hub.docker.com/r/sonatype/nexus3/
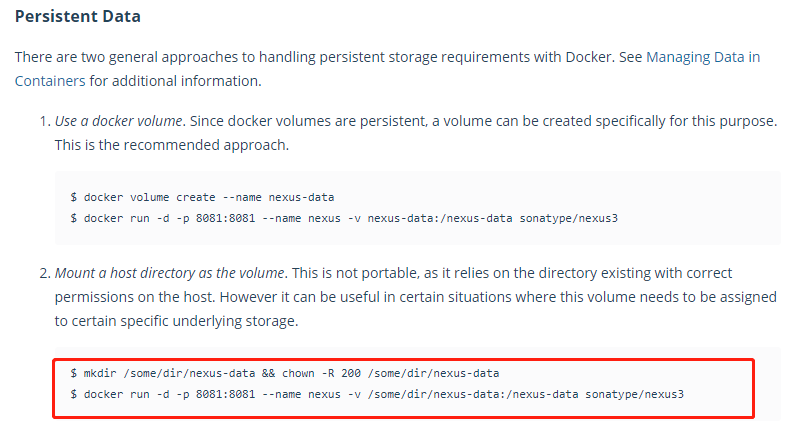
利用 Docker 部署sonatype/nexus3 创建团队私有 Maven 仓库
docker-compose-nexus3-linux.yml


# 命令行执行:
# docker container prune #用来删除不再使用的 docker 对象
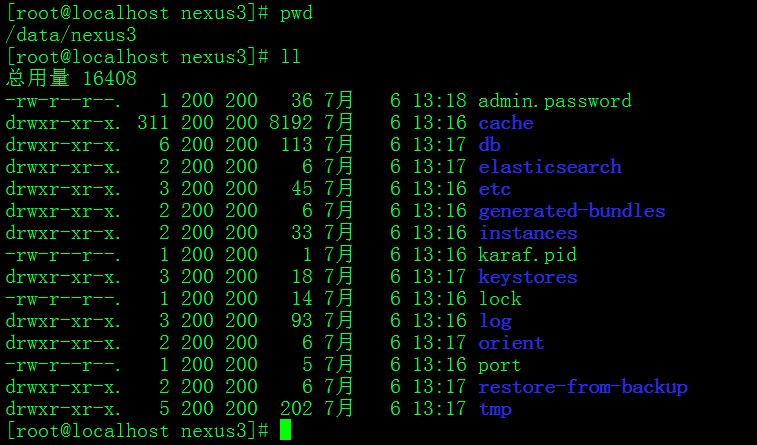
# mkdir -p /data/nexus3 && chown -R 200 /data/nexus3
# docker-compose -p nexus -f docker-compose-nexus3-linux.yml up -d
version: "3.6"
services:
nexus:
restart: always
image: sonatype/nexus3
container_name: nexus3
environment:
INSTALL4J_ADD_VM_PARAMS: |
-Xms2g -Xmx2g -XX:MaxDirectMemorySize=3g
ports:
- 8081:8081
- 8088:8088
- 8089:8089
volumes:
- /data/nexus3:/nexus-data
# 访问地址:http://123.56.57.211:8081/
# docker run -d -p 8081:8081 -p 8088:8088 -p 8089:8089 \
--volume /data/nexus3:/nexus-data \
--name nexus \
-e INSTALL4J_ADD_VM_PARAMS="-Xms2g -Xmx2g -XX:MaxDirectMemorySize=3g" \
sonatype/nexus3
docker-compose-nexus3-linux.yml
docker install
#下面的暂时不用

#docker run -d -p 8081:8081 -p 8088:8088 -p 8089:8089 \
    --volume /data/nexus3:/opt/sonatype-work/nexus3 \
    --name nexus \
    -e INSTALL4J_ADD_VM_PARAMS=" \
      -Xms2g -Xmx2g -XX:MaxDirectMemorySize=3g \
      -Dkaraf.data=/opt/sonatype-work/nexus3 \
      -Djava.io.tmpdir=/opt/sonatype-work/nexus3/tmp \
      -XX:LogFile=/opt/sonatype-work/nexus3/log/jvm.log \
      -Dkaraf.log=/opt/sonatype-work/nexus3/log "\
    sonatype/nexus3


需要多等几分钟,才能正常访问网页:http://idocker.io:8081/ (配置hosts文件)
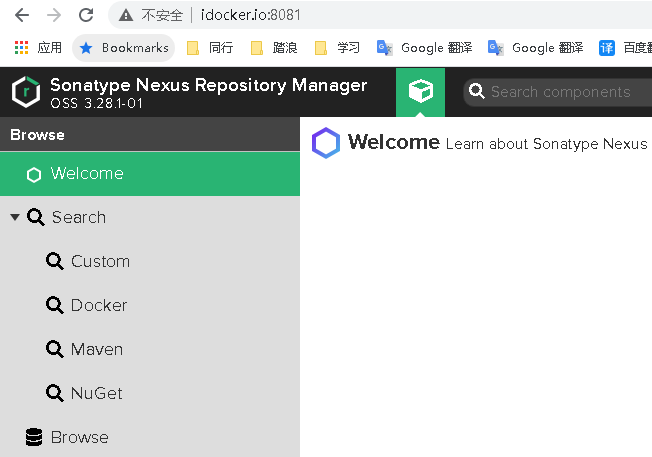
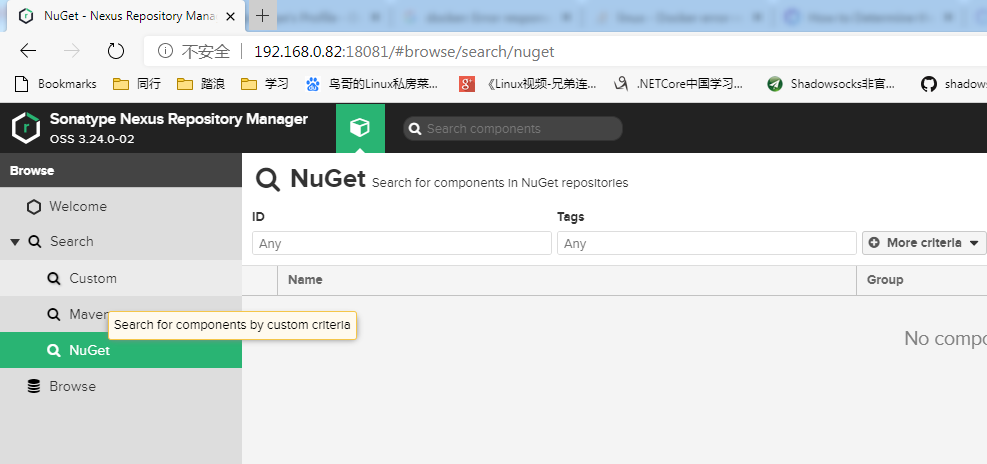
nuget仓库默认为空白的记录:
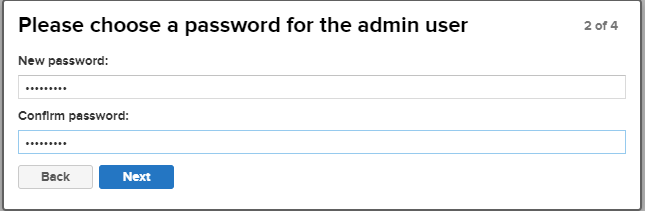
登录admin账户修改默认密码:
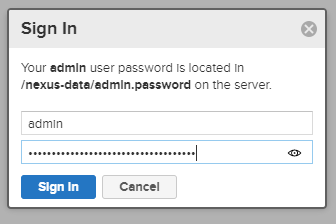
#docker exec  -it 1616c9443c43 /bin/bash
#cat /nexus-data/admin.password   #在容器里查看管理员密码


修改默认存储位置:(不修改也可以,默认就是在/nexus-data/的目录下面)
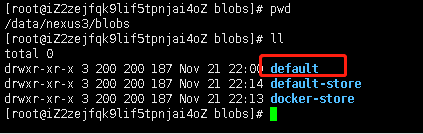
/nexus-data/blogs/default-store

设置镜像源:
cat /etc/docker/daemon.json
{
  "registry-mirrors": [
    "https://hub-mirror.c.163.com"
  ],
  #linux上可以不用做下面的设置
  "insecure-registries": [
    "123.56.57.211:8088","123.56.57.211:8089"
  ]
}
重启docker服务
service docker restart
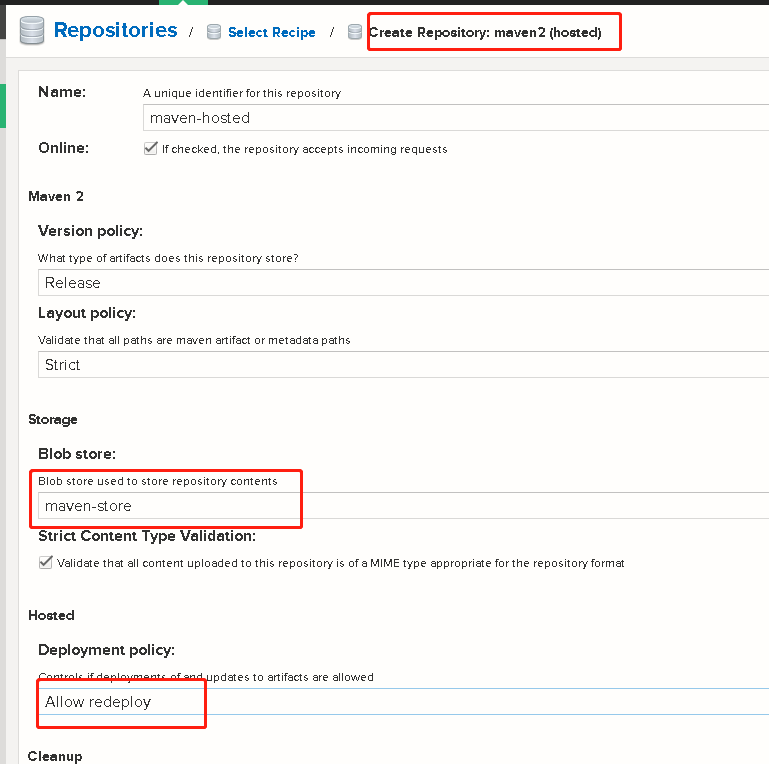
Maven私服搭建(Nexus Repository Manager 3)
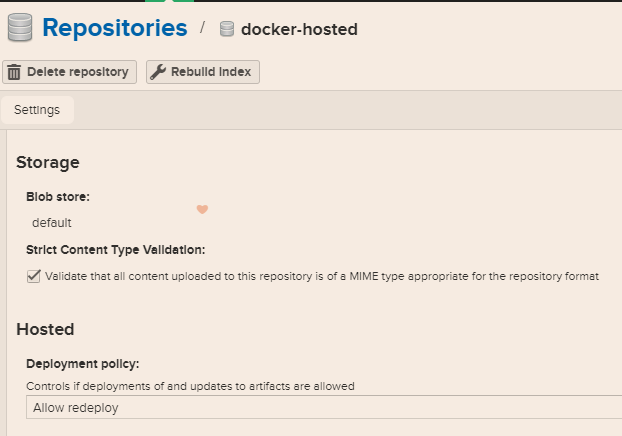
1、maven-hosted(type:maven2 hosted)开发环境,我们运行重复发布,因此Delpoyment policy 我们选择Allow redeploy。这个很重要!
2、maven-proxy (type: maven2 proxy)
https://repo1.maven.org/maven2/

3、maven-aliyun (type:maven2 proxy)
https://maven.aliyun.com/repository/central


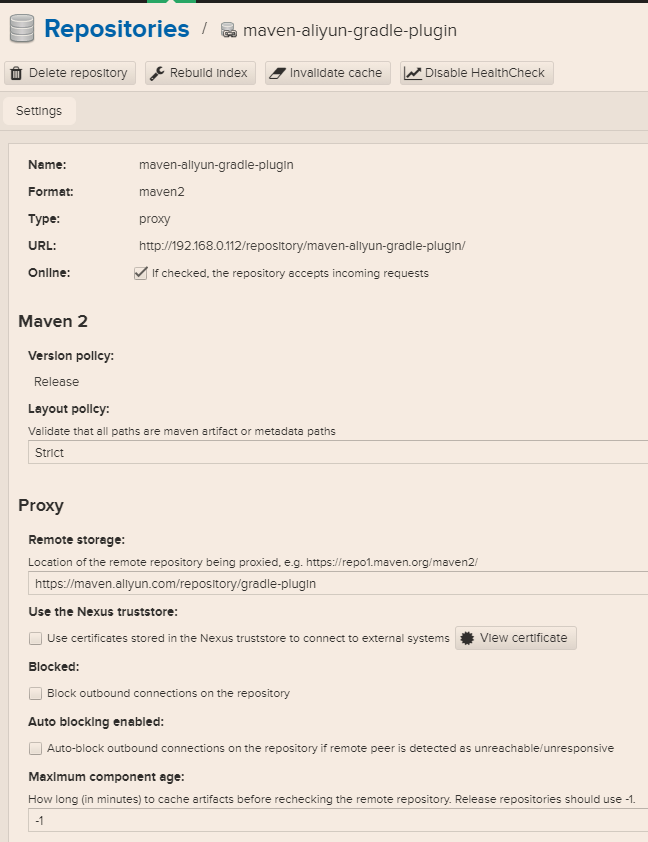
4、maven-aliyun-gradle-plugin(type:maven2 proxy)
https://maven.aliyun.com/repository/gradle-plugin

5、maven-aliyun-spring(type:maven2 proxy)
https://maven.aliyun.com/repository/spring

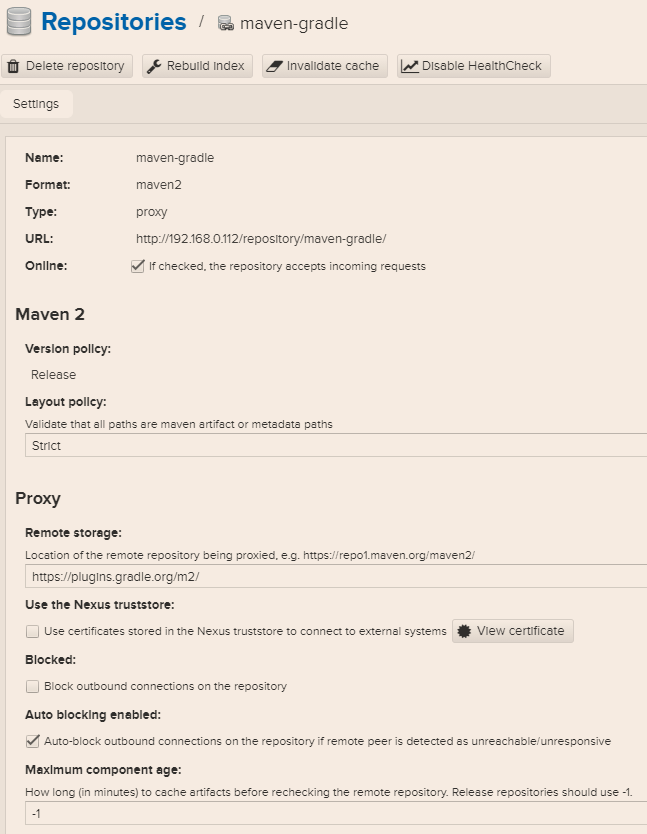
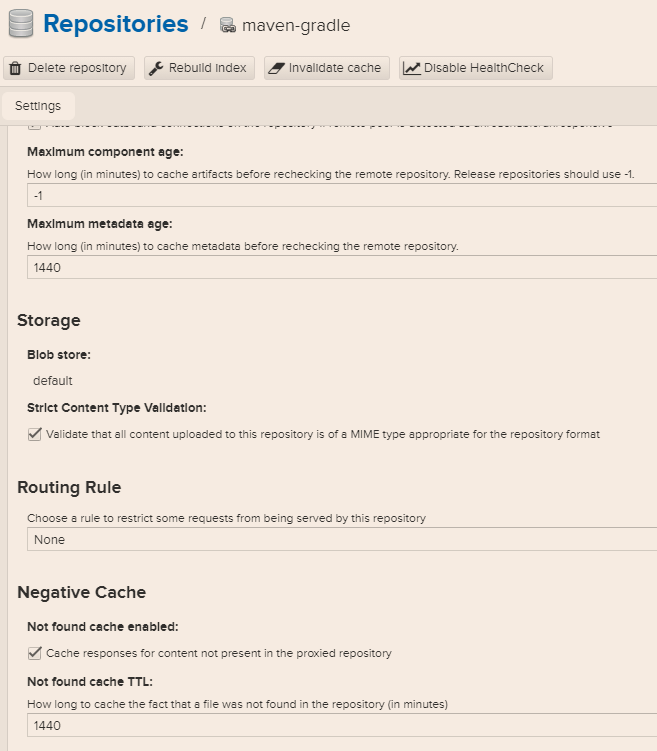
6、maven-gradle(type:proxy)
https://plugins.gradle.org/m2/
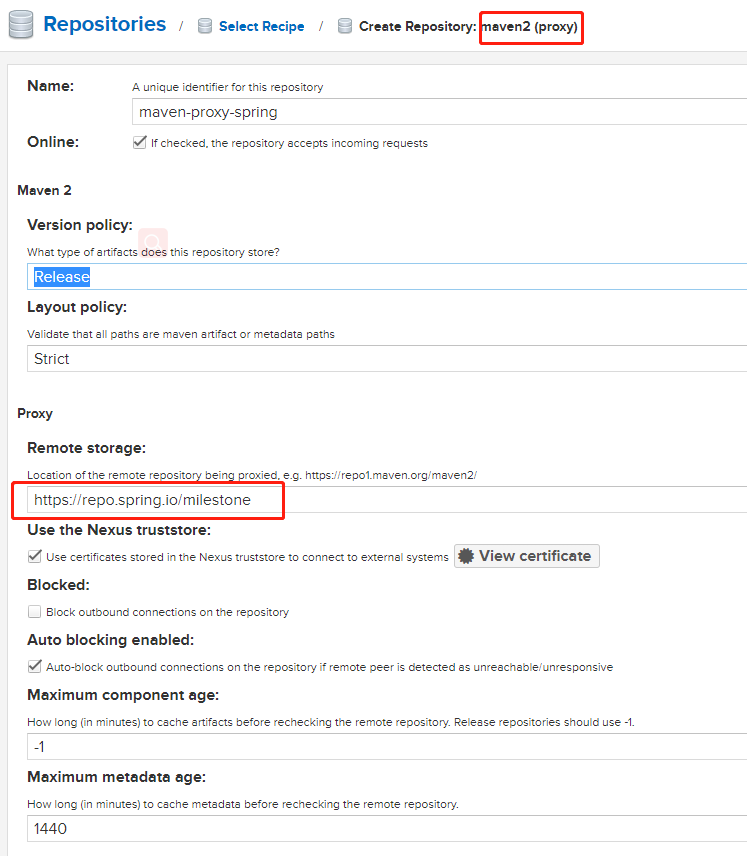
7、maven-proxy-spring(type:maven2 group)
https://repo.spring.io/milestone
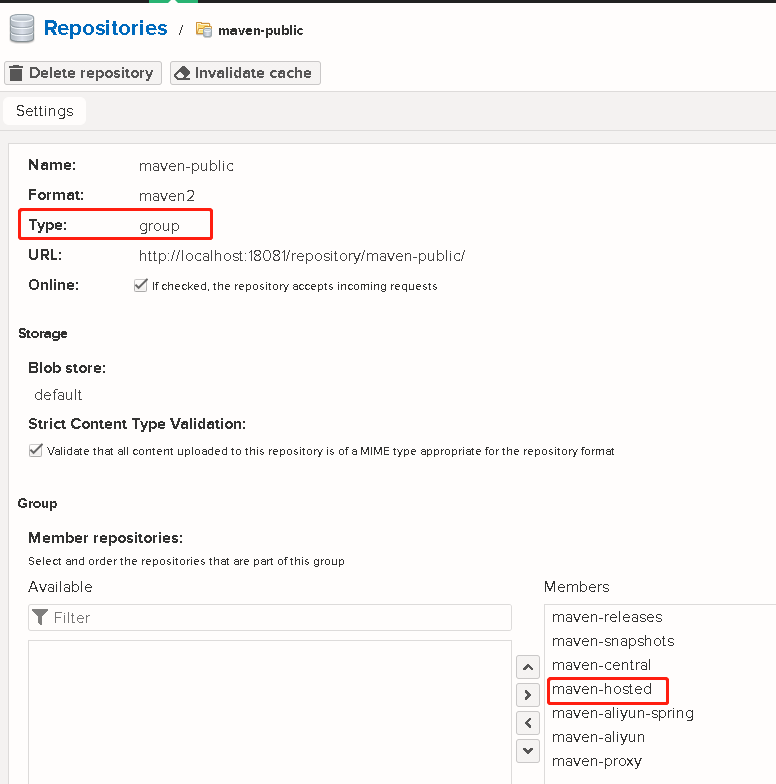
8、maven-public(type:maven2 group)

设置maven配置文件使用本地仓库
D:\maven\apache-maven-3.2.5\conf\settings.xml

<mirror>
      <id>maven-nexus-group</id>
      <mirrorOf>*</mirrorOf>
      <name>Nexus self</name>
      <url>http://ipaddress:port/repository/maven-public/</url>
</mirror>
将项目源码和部署的jar包上传到私有仓
角色
创建上传release角色
nx-maven-release

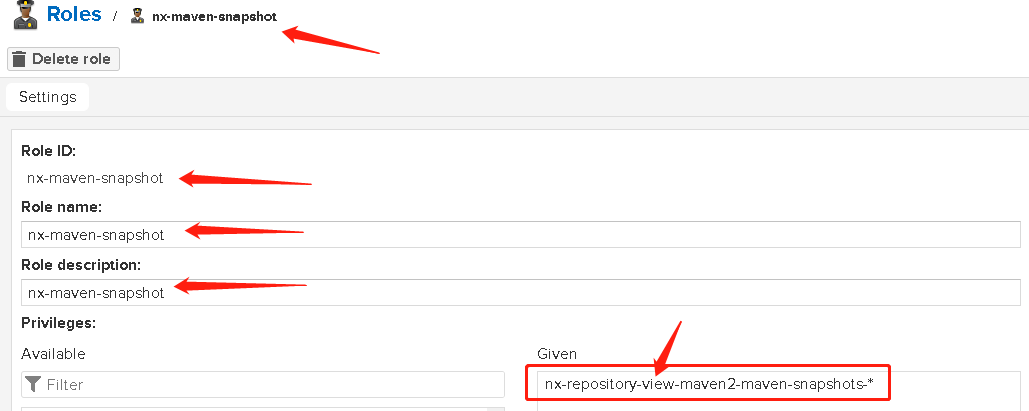
创建上传snapshot仓库的角色
nx-maven-snapshot
用户
创建上传release用户并选择对应的角色
maven-release

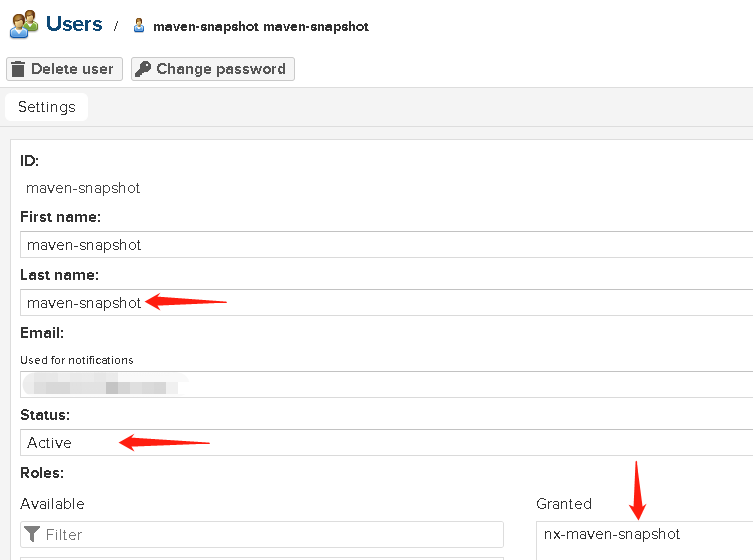
创建上传snapshot用户并选择对应的角色
maven-snapshot
修改release仓库设置,允许重新部署

修改snapshot仓库设置,允许重新部署

本地开发机设置maven的settings.xml文件,使用nexus3的用户名和密码,注意:id很重要,和项目里的pom.xml对应
<server>
      <id>nexus3-deploy-release</id>
      <username>maven-release</username>
      <password>******</password>
</server>

<server>
      <id>nexus3-deploy-snapshot</id>
      <username>maven-snapshot</username>
      <password>******</password>
</server>
项目里的pom.xml文件,设置远程仓库的地址,同时repository->id值和上面server->id保持一致。
<distributionManagement>
        <snapshotRepository>
            <id>nexus3-deploy-snapshot</id>
            <name>Nexus Snapshot Repository</name>
            <url>http://ipaddress:port/repository/maven-snapshots/</url>
        </snapshotRepository>
        <repository>
            <id>nexus3-deploy-release</id>
            <name>Nexus Release Repository</name>
            <url>http://ipaddress:port/repository/maven-releases/</url>
        </repository>
</distributionManagement>
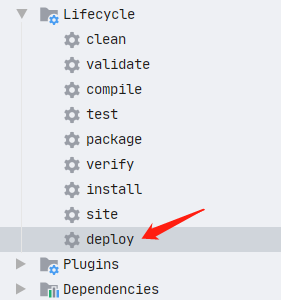
在 idea开发工具里,使用maven,部署jar到nexus3的私有仓库里
release仓库里的jar包,注意版本号那里
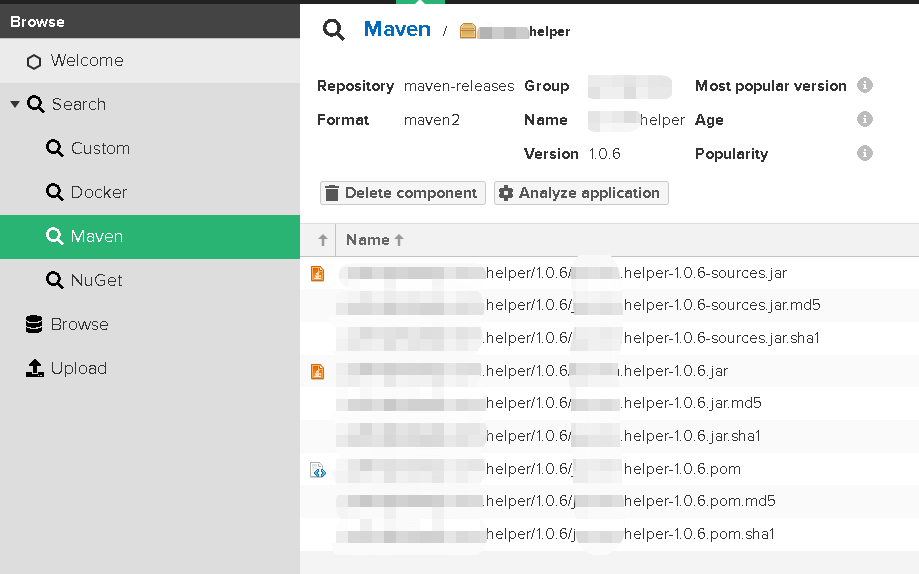
snapshot仓库里的jar包,注意版本号那里

其他项目里引用私有仓库里的jar
1、局部项目设置:(二选一)
在其他项目的最外层的pom.xml文件增加私有仓库的地址
<distributionManagement>
        <snapshotRepository>
            <id>nexus3-deploy-snapshot</id>
            <name>Nexus Snapshot Repository</name>
            <url>http://ipaddress:port/repository/maven-snapshots/</url>
        </snapshotRepository>
        <repository>
            <id>nexus3-deploy-release</id>
            <name>Nexus Release Repository</name>
            <url>http://ipaddress:port/repository/maven-releases/</url>
        </repository>
</distributionManagement>
2、全局设置:(二选一,推荐)
在maven的settings.xml文件里,设置也可以
<mirror>
        <id>maven-nexus-group</id>
        <mirrorOf>*</mirrorOf>
        <name>Nexus self</name>
        <url>http://ipaddress:port/repository/maven-public/</url>
</mirror>
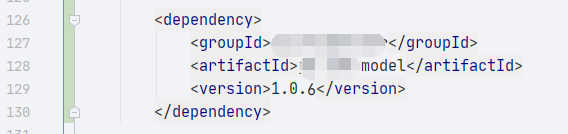
3、项目里添加依赖
在某一个项目的pom.xml文件里添加jar依赖
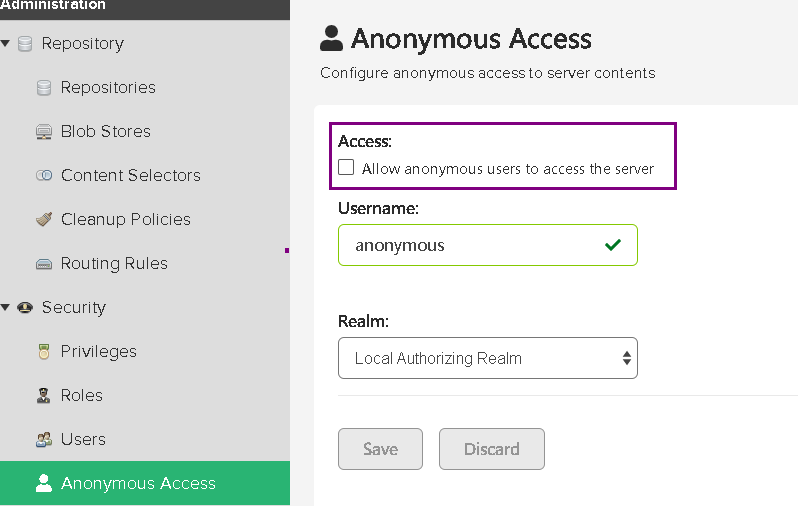
nexus禁用匿名用户访问
设置nexus禁止匿名访问
创建用户:maven-user

配置maven的settings.xml文件,增加用户名和密码
---配置用户名和密码
<server>
    <id>maven-nexus-group</id>
    <username>maven-user</username>
    <password>******</password>
</server>

---配置自己的私有仓库
<mirror>
    <id>maven-nexus-group</id>
    <mirrorOf>*</mirrorOf>
    <name>Nexus self</name>
    <url>http://ipaddress:port/repository/maven-public/</url>
</mirror>

---配置访问私有仓库地址
<profile>
    <id>nexus</id>
    <repositories>
        <repository>
            <id>maven-nexus-group</id>
            <url>http://ipaddress:port/repository/maven-public/</url>
            <releases>
                <enabled>true</enabled>
            </releases>
            <snapshots>
                <enabled>false</enabled>
            </snapshots>
        </repository>
    </repositories>
    <pluginRepositories>
        <pluginRepository>
            <id>maven-nexus-group</id>
            <url>http://ipaddress:port/repository/maven-public/</url>
            <releases>
                <enabled>true</enabled>
            </releases>
            <snapshots>
                <enabled>false</enabled>
            </snapshots>
         </pluginRepository>
    </pluginRepositories>
</profile>


---激活配置文件
<activeProfiles>
    <activeProfile>nexus</activeProfile>
</activeProfiles>
- 注意上面的server->id的值和repository->id的值一致,通过这个id关联找到凭证的。
- 注意上面的server->id的值和mirror->id的值需要一致,这样才能找到对应的凭证。
- 注意上面的profile->id的值和activeProfiles->activeProfile的值需要 一致,这样才能激活配置文件。
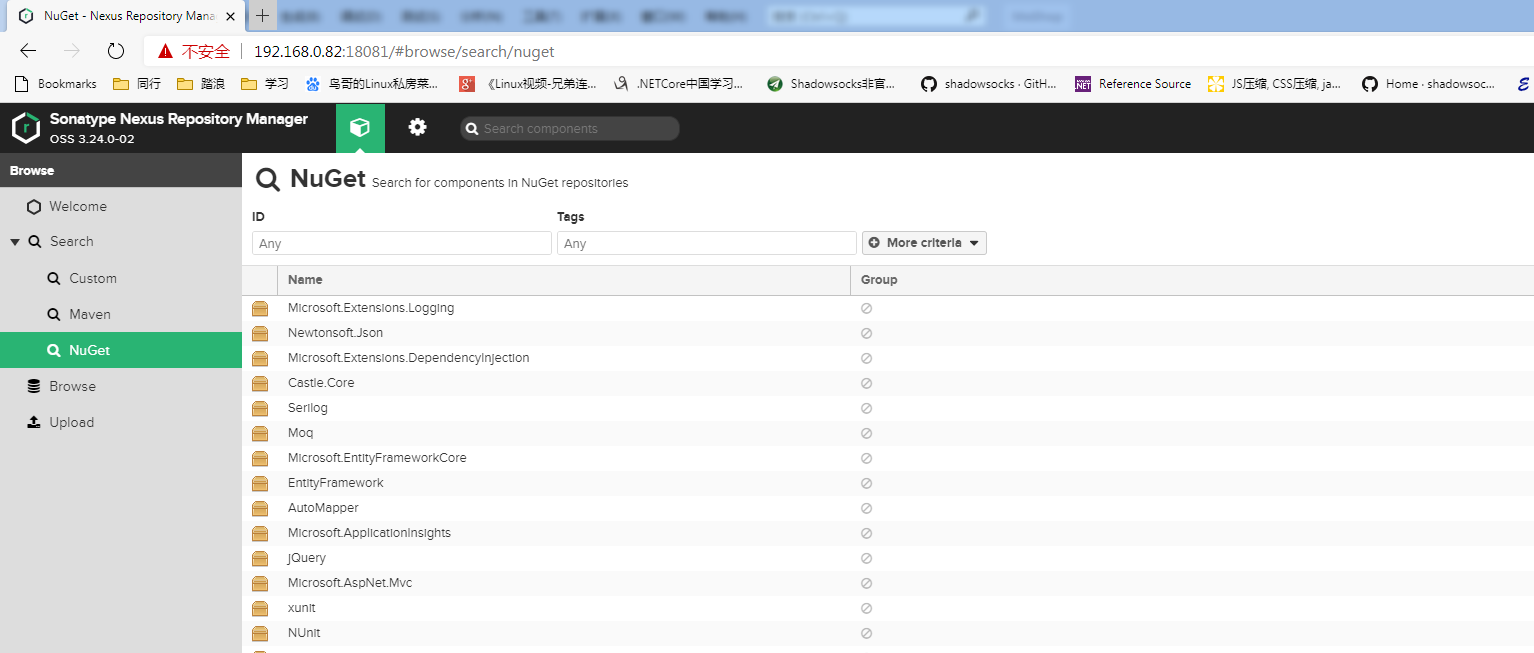
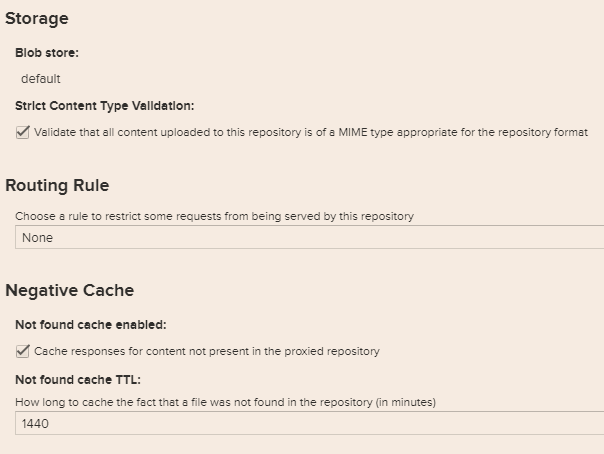
NuGet Proxy Repositories
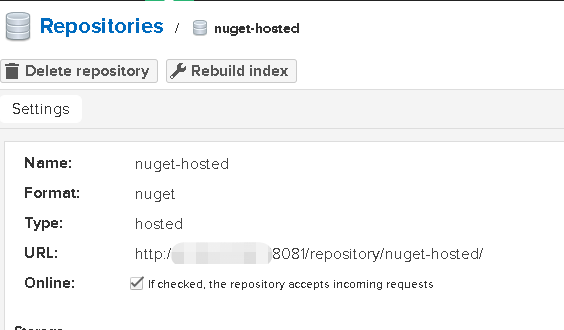
1、nuget-hosted (type: hosted)

2、nuget.org-proxy (type:proxy)
nuget官方:https://www.nuget.org/api/v2/
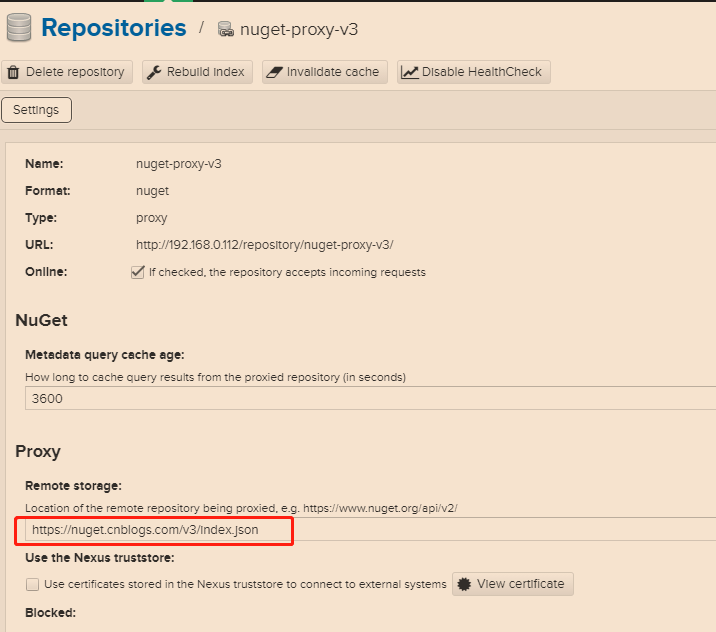
博客园:https://nuget.cnblogs.com/v3/index.json
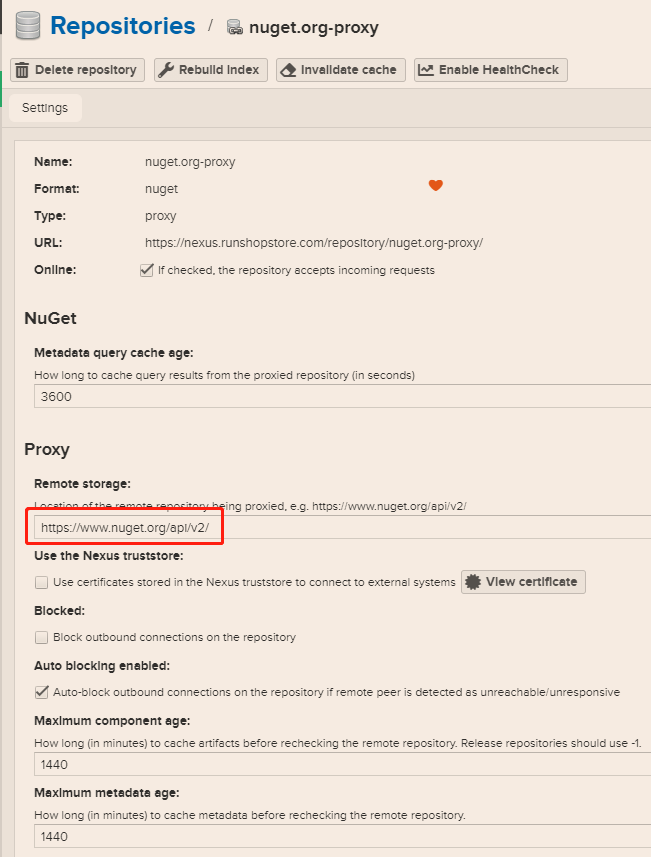
或者增加、换成博客园的都可以
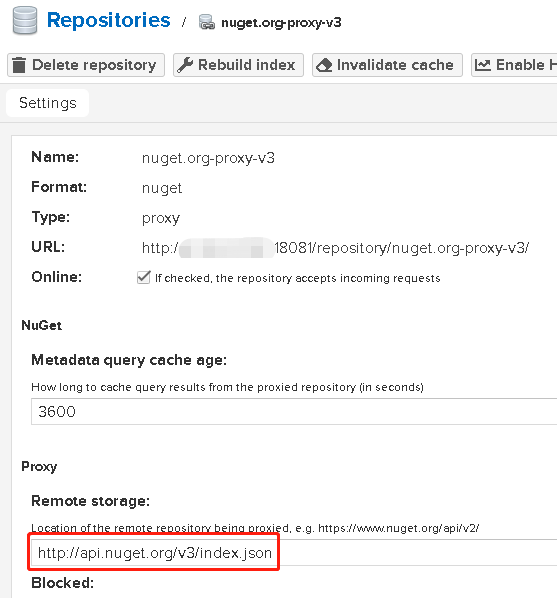
3、nuget.org-proxy-v3 (type:proxy)
http://api.nuget.org/v3/index.json (不是https的)
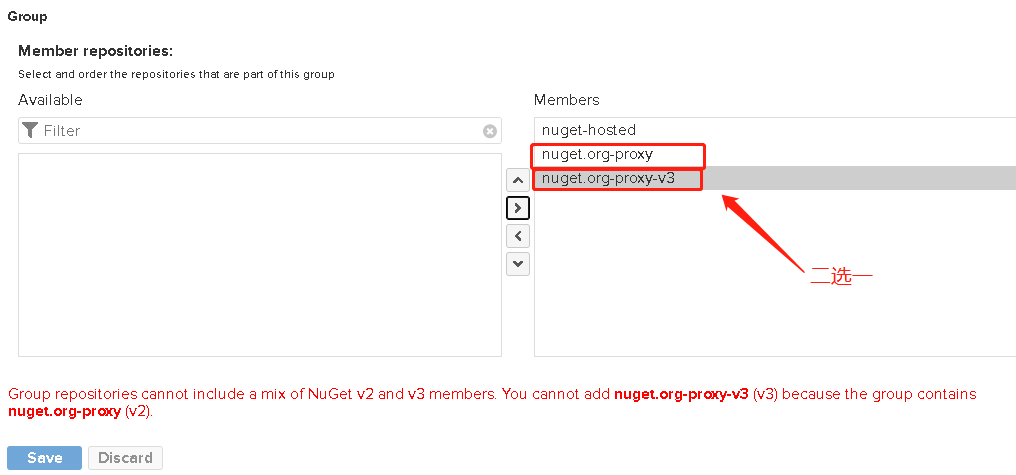
4、nuget-group (type: group)

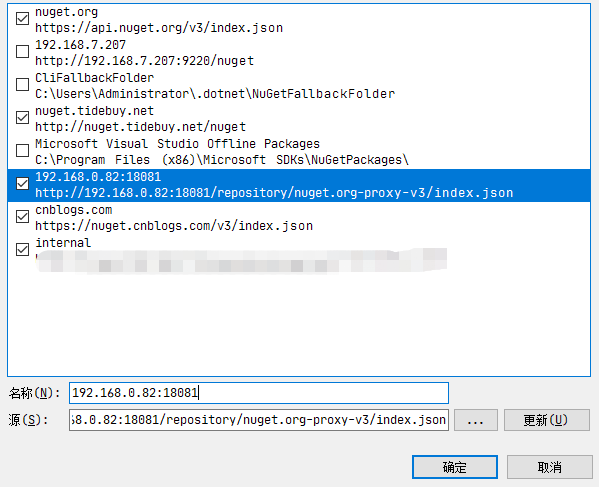
设置vs里nuget包管理器,使用本地仓库
http://192.168.0.82:18081/repository/nuget-group/  (建议使用,hosted和proxy都包含进去了)
http://192.168.0.82:18081/repository/nuget-hosted/  (使用这个只能看到本地上传的文件,看不到其他第三方的)
http://8.131.227.221:18081/repository/nuget.org-proxy/  (使用v2的版本)
http://192.168.0.82:18081/repository/nuget.org-proxy-v3/index.json  (使用v3的版本,路径的基础上还需要加index.json这个文件名)


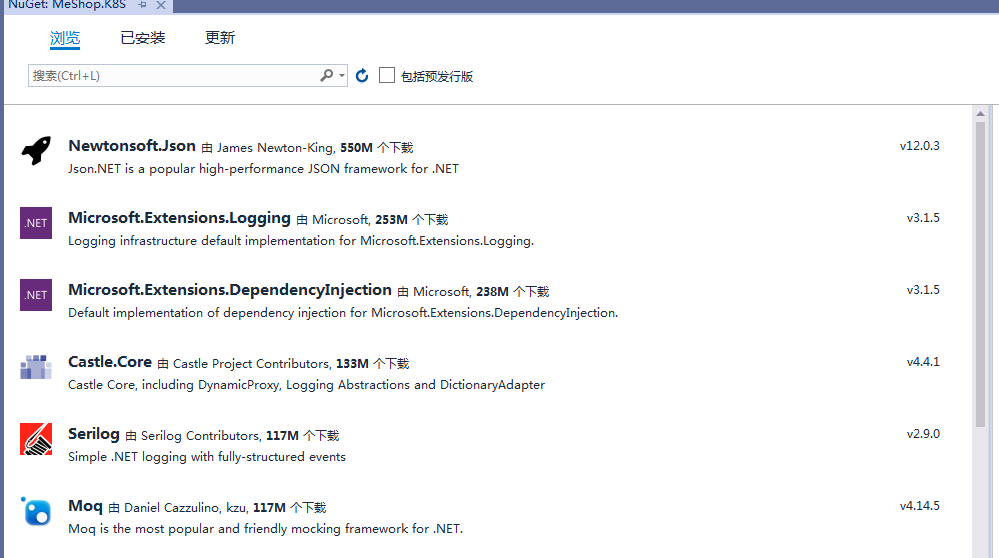
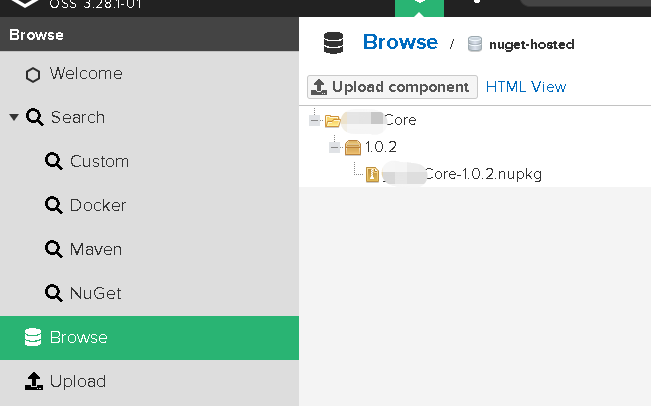
私有 nuget仓库自动就添加了dll文件
ci用到的nuget.config文件
<?xml version="1.0" encoding="utf-8"?>
<configuration>
  <packageSources>
    <add key="internal"
      value="http://192.168.0.82:18081/repository/nuget.org-proxy-v3/index.json"
      protocolVersion="3" />
  </packageSources>
</configuration>
如果私有仓设置了访问密码,如下:
<?xml version="1.0" encoding="utf-8"?>
<configuration>
  <packageSources>
    <add key="nuget.org" value="https://api.nuget.org/v3/index.json" protocolVersion="3" />
    <add key="Microsoft Visual Studio Offline Packages" value="C:\Program Files (x86)\Microsoft SDKs\NuGetPackages\" />
    <add key="nexus3_port" value="http://ipadress:port/repository/nuget-group/" />
  </packageSources>
  <packageSourceCredentials>
    <nexus3_port>
      <add key="Username" value="***" />
      <add key="ClearTextPassword" value="###" />
    </nexus3_port>
  </packageSourceCredentials>
</configuration>
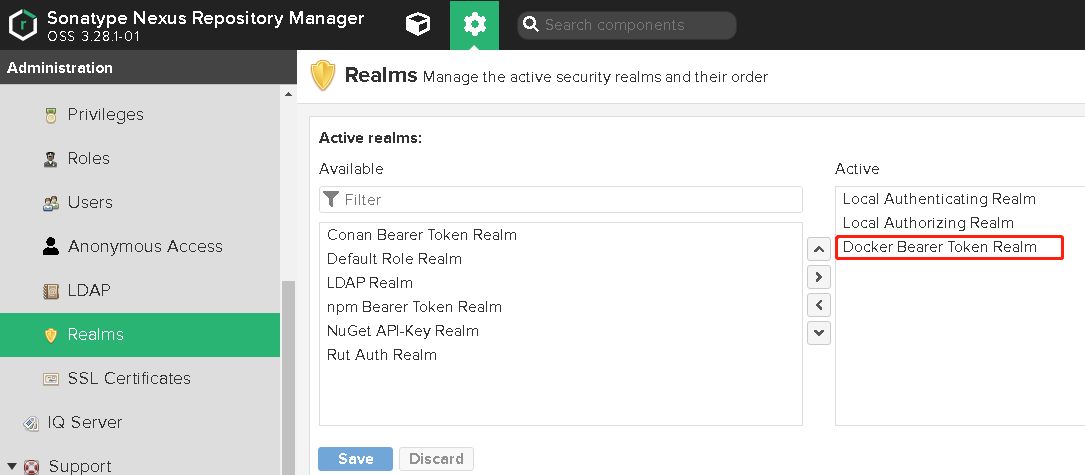
添加Nuget Realms
因为Nexus认证Nuget是通过Realms来认证,因此,要添加Nuget Realms。

配置包属性
在解决方案资源管理器中右键单击该项目,然后选择“属性” 菜单命令,然后选择“包” 选项卡

(可选)在生成期间生成包
可以将 Visual Studio 配置为在生成项目时自动生成 NuGet 包。

准备Package

获取 API 密钥
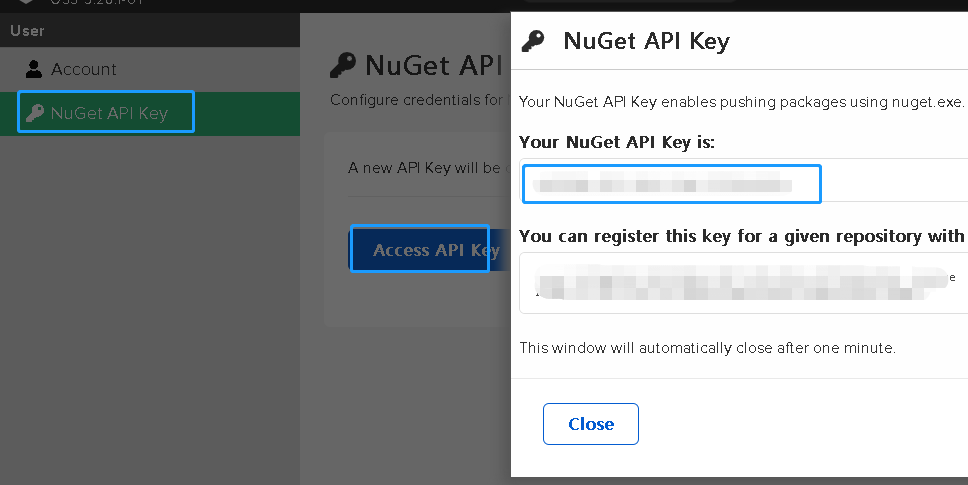
使用 dotnet CLI 或 nuget.exe CLI 发布
进入要发布的文件所在目录里执行cmd

命令行里执行下面的命令
dotnet nuget push {dll}.nupkg --api-key {apiKey} --source http://{ipadress}:18081/repository/nuget-hosted/

发布成功之后,nexus3里面能看到最新上传的dll文件
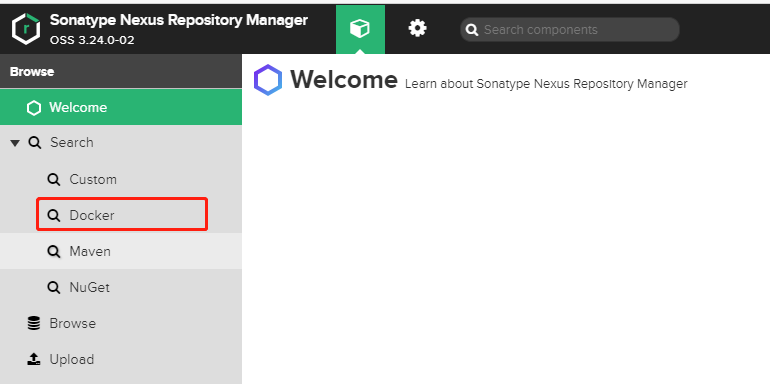
设置Docker仓库和读取docker仓库的push和pull操作权限
2.使用nexus3配置docker私有仓库
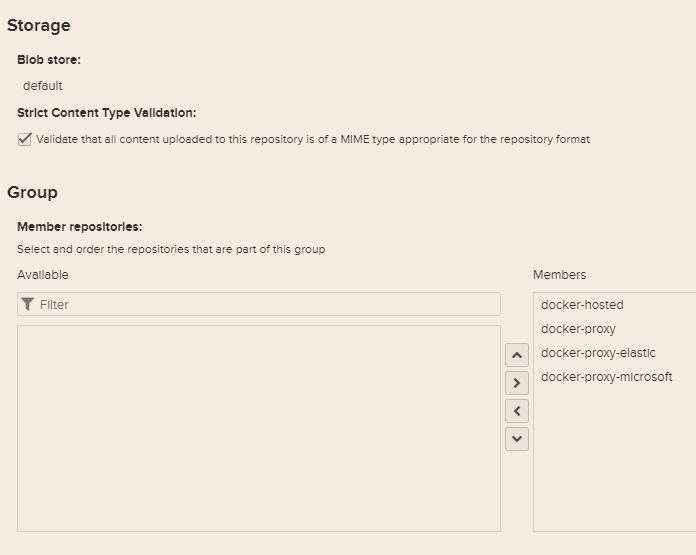
创建一个存储,支持File和S3

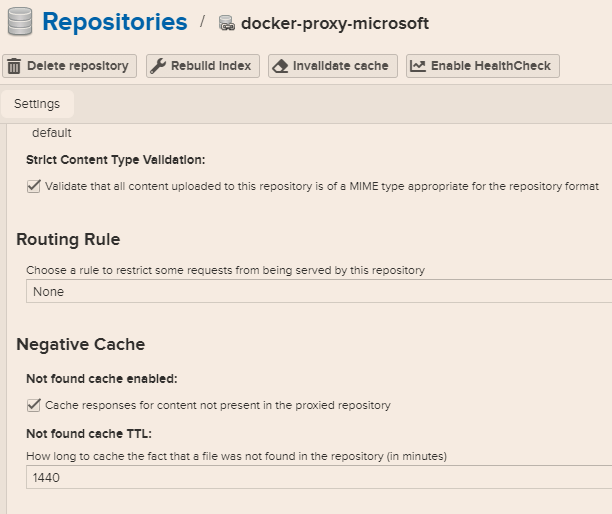
1、docker-proxy(docker 代理,使用微软地址)
- docker-proxy-microsoft(type:proxy)
https://mcr.microsoft.com


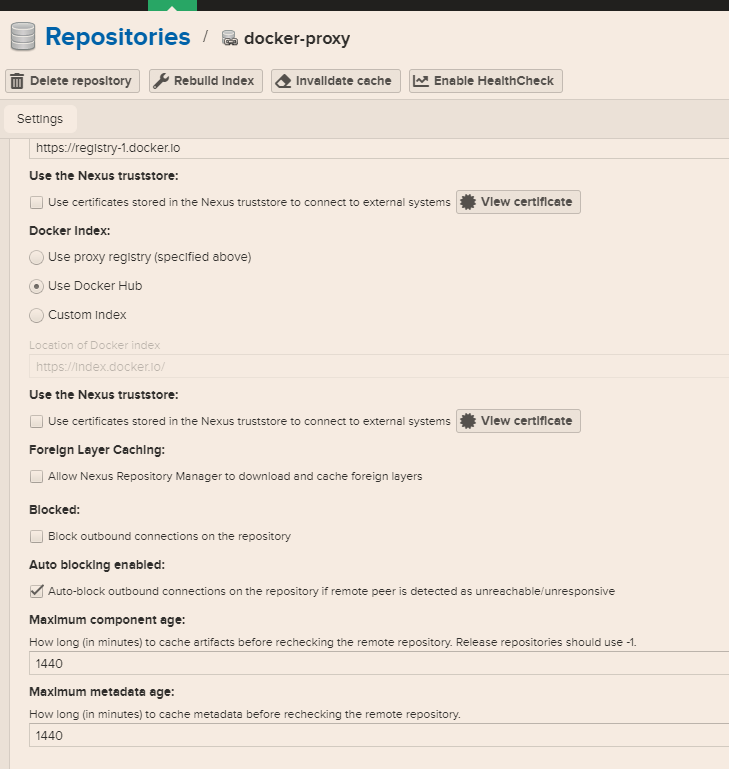
- docker-proxy(type:proxy)
https://registry-1.docker.io

注意:Docker Index: Use Docker Hub
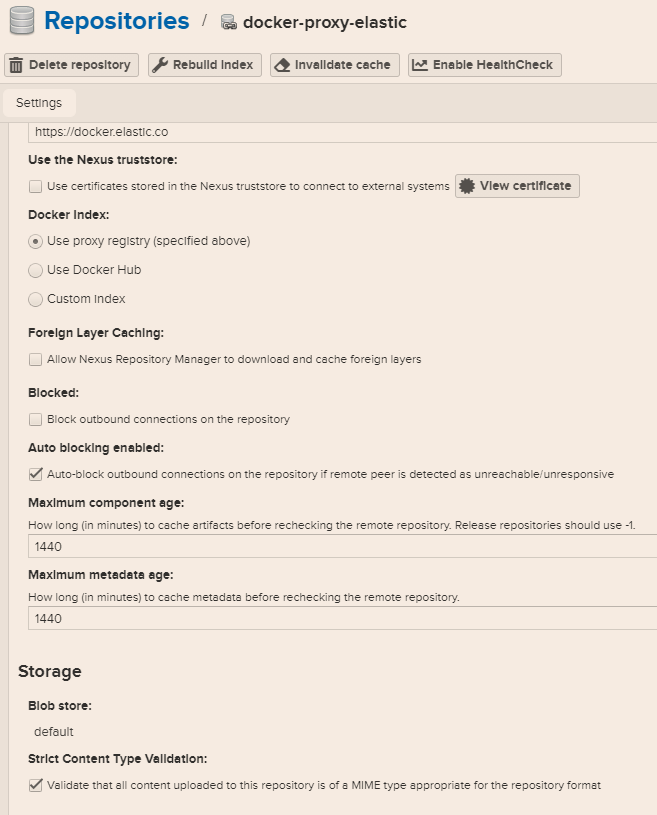
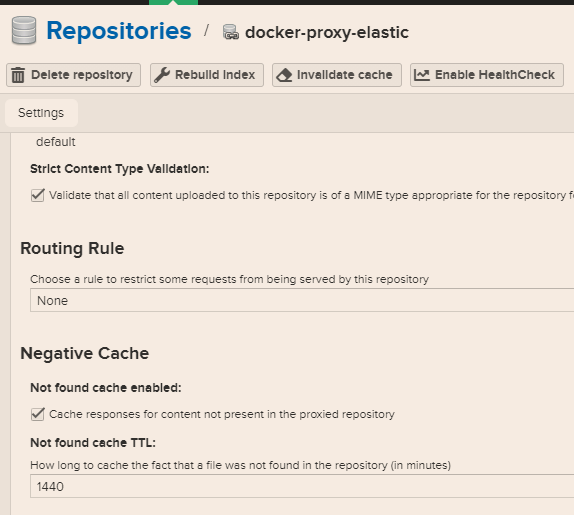
- docker-proxy-elastic(type:proxy)
https://docker.elastic.co

2、docker-hosted(gitlab docker push的地址:8088)

3、docker-group(K8S docker pull的地址:8089)

创建Role:
1、nx-docker-pull:(继承nx-repository-view-docker-*-的browser和read的角色)

2、nx-docker-push:(继承:nx-repository-admin-docker-docker-hosted-*和nx-repository-view-docker-docker-hosted-*角色)
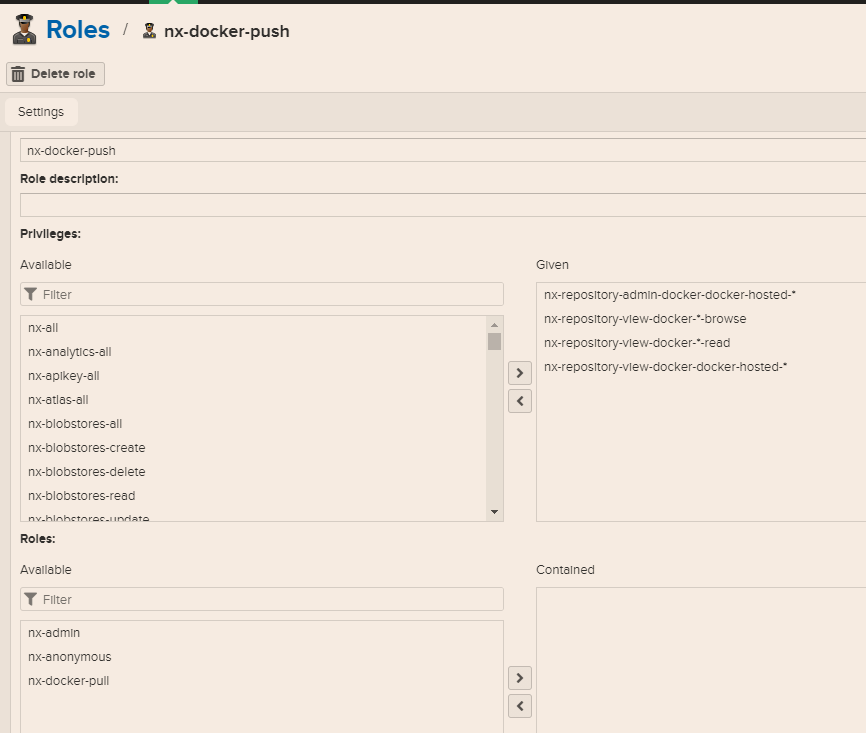
或(nx-repository-admin-docker-docker)

创建User:
1、docker-pull:(注意要设置密码)
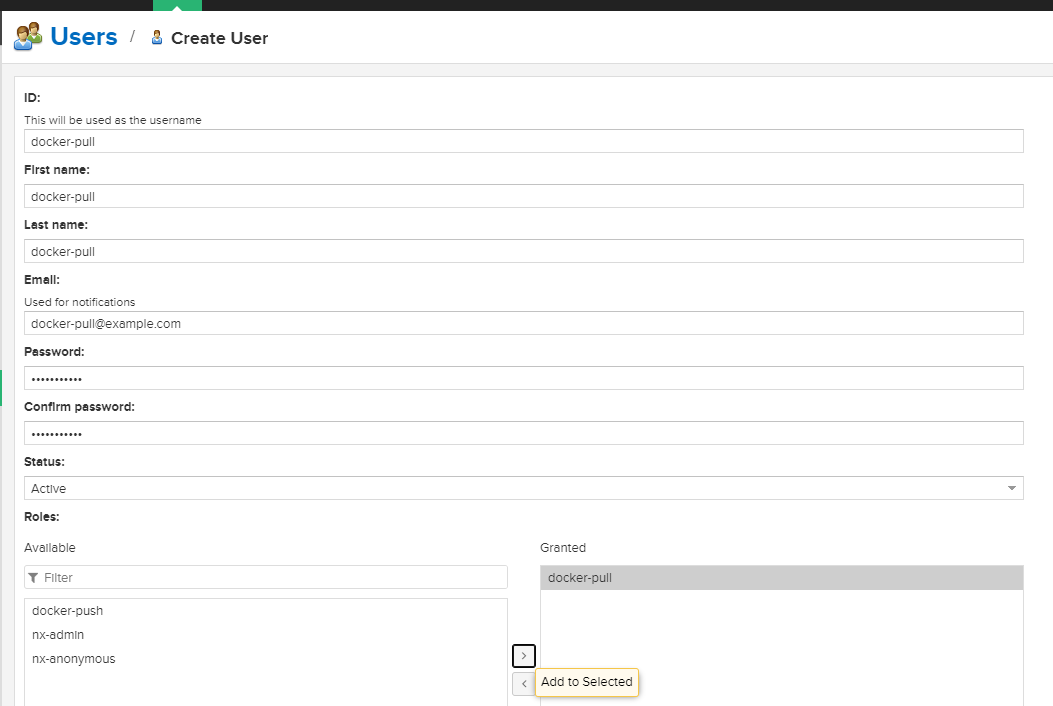
2、docker-push:(注意要设置密码)


配置docker命令连接docker仓,因为group仓库并不能推送镜像,因为你推送自己制作的镜像到仓库还得通过本地仓库的端口去推送,很不方便!
有一个解决方法:通过Nginx来判断推镜像还是拉镜像,然后代理到不同端口。
需要使用HTTP的证书,安装nginx,配置文件里面需要配置域名: ip地址 + port;还有https的域名证书
注意在nginx里面用的是:docker-hosted(gitlab docker push的地址:8088) 这个端口,这个用来负责接收推上来的image
 1 # ip地址可以换成内网ip
 2 upstream nexus_docker_get {
 3     server 127.0.0.1:8089;
 4 }
 5
 6 upstream nexus_docker_put {
 7     server 127.0.0.1:8088;
 8 }
 9 server {
10     listen 80;
11     listen 443 ssl;
12     server_name idocker.io;
13     access_log /var/log/nginx/idocker.io.log;
14     # 证书
15     ssl_certificate /etc/nginx/conf.d/ssl/out/idocker.io/idocker.io.crt; # 证书路径根据上面生成的来定
16     ssl_certificate_key /etc/nginx/conf.d/ssl/out/idocker.io/idocker.io.key.pem;
17     ssl_protocols TLSv1.1 TLSv1.2;
18     ssl_ciphers '!aNULL:kECDH+AESGCM:ECDH+AESGCM:RSA+AESGCM:kECDH+AES:ECDH+AES:RSA+AES:';
19     ssl_prefer_server_ciphers on;
20     ssl_session_cache shared:SSL:10m;
21     # disable any limits to avoid HTTP 413 for large image uploads
22     client_max_body_size 0;
23     # required to avoid HTTP 411: see Issue #1486 (https://github.com/docker/docker/issues/1486)
24     chunked_transfer_encoding on;
25     # 设置默认使用推送代理
26     set $upstream "nexus_docker_put";
27     # 当请求是GET,也就是拉取镜像的时候,这里改为拉取代理,如此便解决了拉取和推送的端口统一
28     if ( $request_method ~* 'GET') {
29         set $upstream "nexus_docker_get";
30     }
31     # 只有本地仓库才支持搜索,所以将搜索请求转发到本地仓库,否则出现500报错
32     if ($request_uri ~ '/search') {
33         set $upstream "nexus_docker_put";
34     }
35     index index.html index.htm index.php;
36     location / {
37         proxy_pass http://$upstream;
38         proxy_set_header Host $host;
39         proxy_connect_timeout 3600;
40         proxy_send_timeout 3600;
41         proxy_read_timeout 3600;
42         proxy_set_header X-Real-IP $remote_addr;
43         proxy_buffering off;
44         proxy_request_buffering off;
45         proxy_set_header X-Forwarded-For $proxy_add_x_forwarded_for;
46         proxy_set_header X-Forwarded-Proto http;
47     }
48 }
2.使用nexus3配置docker私有仓库(文章下面有nginx配置)
以下都是Linux操作:(windows10再往下)
配置没有证书的信任,否则docker pull 获取镜像失败
Error response from daemon: Get https://nexus3:8089/v2/: http: server gave HTTP response to HTTPS client

配置docker的后台服务文件:
vim /etc/docker/daemon.json

{
  "registry-mirrors": ["https://阿里云的docker镜像仓库地址"]
  ,"insecure-registries": ["nexus3:8088","nexus3:8089"]
}
sudo systemctl restart docker
sudo systemctl daemon-reload

1、pull镜像
#docker pull docker:stable

stable: Pulling from library/docker
188c0c94c7c5: Pull complete
0c7c675703d6: Pull complete
cc8c12a437cb: Pull complete
c5dafad2182a: Pull complete
5aa711733414: Pull complete
058f73b55e4b: Pull complete
8c9c664faf12: Pull complete
Digest: sha256:9170b902404a630a982a2a6473442d3e2cc2342b66345f7a9cf148f8affcf5d3
Status: Downloaded newer image for docker:stable
docker.io/library/docker:stable

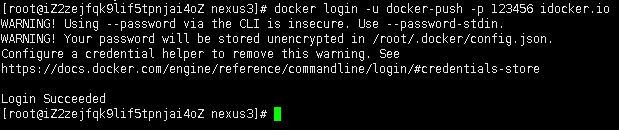
2、登录私服
docker login -u docker-push -p 123456 idocker.io

WARNING! Using --password via the CLI is insecure. Use --password-stdin.
WARNING! Your password will be stored unencrypted in /root/.docker/config.json.
Configure a credential helper to remove this warning. See
https://docs.docker.com/engine/reference/commandline/login/#credentials-store

Login Succeeded
3、打标签
docker tag docker.io/library/docker:stable idocker.io/docker:stable
docker images

REPOSITORY          TAG                 IMAGE ID            CREATED             SIZE
docker              stable              6972c414f322        4 weeks ago         217MB
idocker.io/docker   stable              6972c414f322        4 weeks ago         217MB

4、push镜像
docker push idocker.io/docker:stable

The push refers to repository [idocker.io/docker]
1d278c39f50a: Pushed
3730a0890c46: Pushed
383f309b5d37: Pushed
e1a73c32da76: Pushed
31b11ec6ff38: Pushed
911954e2fe49: Pushed
ace0eda3e3be: Pushed
stable: digest: sha256:279beeb5de99e09af79f13e85e20194ce68db4255e8b2d955e408be69d082b5a size: 1780
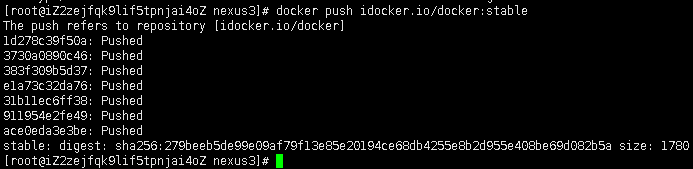
这里上传成功了,再去nexus3里边看看是有上去了。

5、测试从私服拉镜像
docker rmi -f idocker.io/docker:stable
docker images

[root@iZ2zejfqk9lif5tpnjai4oZ nexus3]# docker rmi idocker.io/docker:stable
Untagged: idocker.io/docker:stable
Untagged: idocker.io/docker@sha256:279beeb5de99e09af79f13e85e20194ce68db4255e8b2d955e408be69d082b5a
[root@iZ2zejfqk9lif5tpnjai4oZ nexus3]# docker images
REPOSITORY          TAG                 IMAGE ID            CREATED             SIZE
docker              stable              6972c414f322        4 weeks ago         217MB
sonatype/nexus3     latest              d4fbb85e8101        4 weeks ago         634MB

docker pull idocker.io/docker:stable   #秒下完成

stable: Pulling from docker
Digest: sha256:9170b902404a630a982a2a6473442d3e2cc2342b66345f7a9cf148f8affcf5d3
Status: Downloaded newer image for idocker.io/docker:stable
idocker.io/docker:stable

6、代理功能展示
当某一个镜像在我们本地仓库没有的时候,就需要从远程仓库拉取了,其他的私有仓库的操作大概都是要从远程拉取,然后在重复如上操作推到本地私有仓库,而nexus因为有了proxy功能,因此,当我们在pull远程镜像的时候,本地就会自动同步下来了。
以拉取gitlab镜像为例:
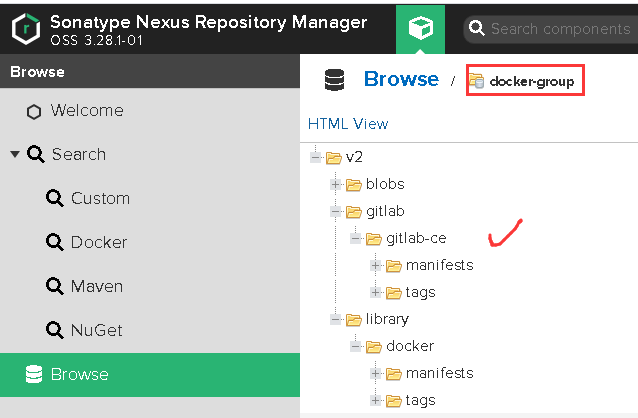
docker pull idocker.io/gitlab/gitlab-ce:latest

latest: Pulling from gitlab/gitlab-ce
2c11b7cecaa5: Pull complete
04637fa56252: Pull complete
d6e6af23a0f3: Pull complete
b4a424de92ad: Pull complete
3c6e223a17cd: Pull complete
b4f67e514b6e: Pull complete
5ac452e41439: Pull complete
64c3887f6641: Pull complete
0e4c3bedc9a6: Pull complete
849d4c8d3353: Waiting
849d4c8d3353: Pull complete
Digest: sha256:f6a1b040ca245c6e315aa6bc82f769324c4b7bb7c304fecc230e4818c7ed8aad
Status: Downloaded newer image for idocker.io/gitlab/gitlab-ce:latest
idocker.io/gitlab/gitlab-ce:latest


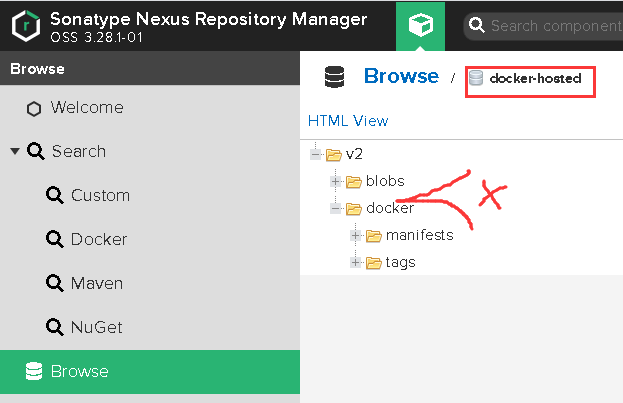
因为本地没有这个镜像,所以从远程仓库拉取,然后去私有仓库里看看啥情况:

经过查看可以发现:docker-hosted里没有,docker-group和docker-proxy里有
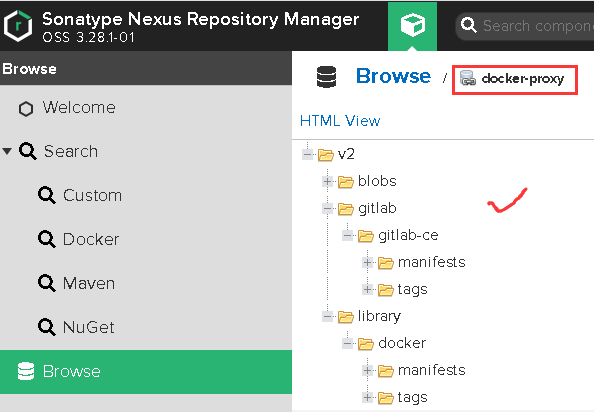
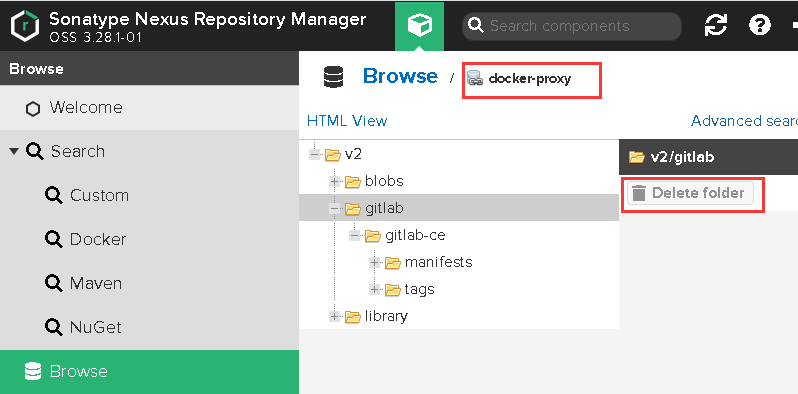
注意:删除的话只能在docker-hosted或docker-proxy中删除,当在这两者中执行删除操作后,docker-group里会自动没有的(需要先登录才能删除)
登陆的时候若是提示这个错误:Error response from daemon: login attempt to https://idocker.io/v2/ failed with status: 401 Unauthorized
这是nexus版本问题,需要通过WEB管理端设置权限
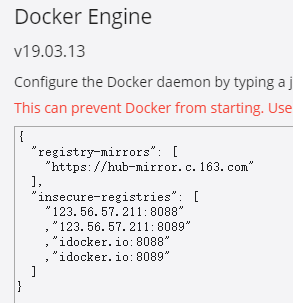
windows10的docker操作
windows10 docker desktop 设置
{
"registry-mirrors": [
"https://hub-mirror.c.163.com"
],
"insecure-registries": [
"123.56.57.211:8088"
,"123.56.57.211:8089"
,"idocker.io:8088"
,"idocker.io:8089"
]
}
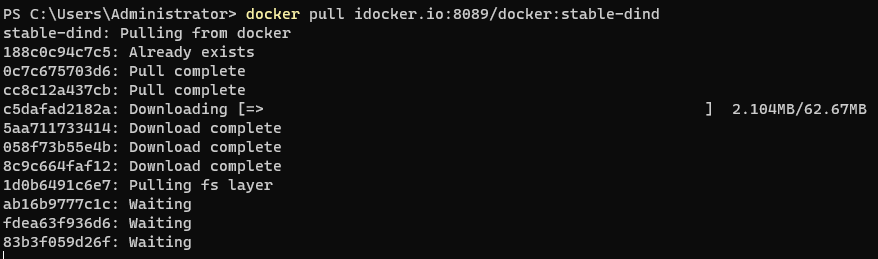
#powershell命令行操作,只写域名不加端口不行,可以pull,login
docker pull idocker.io:8089/dotnet/aspnet:5.0
docker pull 123.56.57.211:8089/dotnet/aspnet:5.0
docker login -u docker-push -p 123456 idocker.io:8088
docker login -u docker-push -p 123456 idocker.io:8089
C:\Users\Administrator\.docker\daemon.json
{
"registry-mirrors": [
"https://hub-mirror.c.163.com"
],
"insecure-registries": [
"nexus3:8088",
"nexus3:8089"
],
"allow-nondistributable-artifacts": [
"nexus3:8088",
"nexus3:8089"
],
"debug": false,
"experimental": false,
"features": {
"buildkit": true
}
}
# debian命令行里docker pull可以,但是docker login不行的解决方法
# 报错:
# Error saving credentials: error storing credentials - err: exec: "docker-credential-desktop.exe": executable file not found in $PATH, out: ``
# 解决方法:
# sudo ln -s /mnt/c/Program\ Files/Docker/Docker/resources/bin/docker-credential-desktop.exe /usr/bin/docker-credential-desktop.exe


至此,基本上关于使用nexus3搭建docker私有仓库的知识点。
variables:
  # docker private rigist
  CI_REGISTRY: ip or domain
  CI_REGISTRY_USER: username
  CI_REGISTRY_PASSWORD: password

.docker_build:
  image: "docker:stable"
  services:
    - docker:stable-dind
  variables:
    DOCKER_TLS_CERTDIR: ""
  before_script:
    - echo "Logging to GitLab Container Registry with CI credentials..."
    - echo "$CI_REGISTRY_PASSWORD" | docker login -u "$CI_REGISTRY_USER" --password-stdin "$CI_REGISTRY"

docker push $image_name:latest
配置k8s命令连接docker仓,需要使用HTTP的证书,安装nginx,配置文件里面需要配置域名: ip地址 + port;还有https的域名证书
注意在nginx里面用的是:docker-group(K8S docker pull的地址:8089)这个端口,这个用来负责拉取k8s需要用的image
yml文件
initContainers:
        - command:
            - /bin/bash
            - -c
          args:
            - if [ ! -d /app/mnt/templates ];
              then mkdir -p /app/mnt/templates;
              fi;
              cp -rf templates/* /app/mnt/templates;
              dotnet MeShop.CMD.INIT.dll
          image: {{values.chart.shop.image.registry}}/meshop/shop/init:{{values.chart.shop.image.tag}}
          imagePullPolicy: {{values.chart.shop.image.imagePullPolicy}}
          name: init-and-upgrade
          resources:
            requests:
              cpu: 200m
              memory: 200Mi
          volumeMounts:
            - name: configs
              mountPath: /app/k8s.json
              subPath: k8s.json
            - mountPath: /app/mnt/
              name: mnt

禁止匿名用户访问设置
1、禁止登陆,和下载jar包

2、禁止匿名用户访问nexus页面(看不到jar包,只能登陆后才能搜索对应的jar)


 浙公网安备 33010602011771号