Vue工程化
安装CLi
// npm 安装
npm install -g @vue/cli

// yarn 安装
yarn global add @vue/cli
查看是否安装成功
vue -V
// 正确显示版本号
初始化项目
vue create vue-learn
回车之后会出现以下画面
Vue CLI v3.9.3
┌────────────────────────────┐
│  Update available: 3.10.0  │
└────────────────────────────┘
? Please pick a preset: (Use arrow keys)
❯ default (babel, eslint)
  Manually select features
- default (babel, eslint) 默认套餐,提供 babel 和 eslint 支持。
- Manually select features 自己去选择需要的功能,提供更多的特性选择。比如如果想要支持 TypeScript ,就应该选择这一项。
- 使用上下方向键来选择需要的选项。
- 使用manually来创建项目,选中之后会出现以下画面。
Vue CLI v3.9.3
┌────────────────────────────┐
│  Update available: 3.10.0  │
└────────────────────────────┘
? Please pick a preset: Manually select features
? Check the features needed for your project: (Press <space> to select, <a> to t
oggle all, <i> to invert selection)
❯◉ Babel
 ◯ TypeScript
 ◯ Progressive Web App (PWA) Support
 ◯ Router
 ◯ Vuex
 ◯ CSS Pre-processors
 ◉ Linter / Formatter
 ◯ Unit Testing
 ◯ E2E Testing
依然是上下键选择,空格键选中。
对于每一项的功能,此处做个简单描述:
TypeScript 支持使用 TypeScript 书写源码。
Progressive Web App (PWA) Support PWA 支持。
Router 支持 vue-router 。
Vuex 支持 vuex 。
CSS Pre-processors 支持 CSS 预处理器。
Linter / Formatter 支持代码风格检查和格式化。
Unit Testing 支持单元测试。
E2E Testing 支持 E2E 测试。
第一个 typescript 暂时还不会,先不选,这次选择常用的。
◉ Babel
◯ TypeScript
◯ Progressive Web App (PWA) Support
◉ Router
◉ Vuex
◉ CSS Pre-processors
◉ Linter / Formatter
❯◉ Unit Testing
◯ E2E Testing
回车之后让选择 CSS 处理器,这里选择 Less。
? Use history mode for router? (Requires proper server setup for index fallback
in production) Yes
? Pick a CSS pre-processor (PostCSS, Autoprefixer and CSS Modules are supported
by default): (Use arrow keys)
❯ Sass/SCSS (with dart-sass)
 Sass/SCSS (with node-sass)
 Less
 Stylus
接下来选择 eslink,我选择了eslink+prettier:
? Pick a linter / formatter config:
 ESLint with error prevention only
 ESLint + Airbnb config
 ESLint + Standard config
❯ ESLint + Prettier
选择代码检查方式,第一个是保存的时候就检查,第二个是提交上传代码的时候才检查。
? Pick additional lint features: (Press <space> to select, <a> to toggle all, <i
> to invert selection)
❯◉ Lint on save
 ◯ Lint and fix on commit
选择单元测试,这个我不懂,随便先选个 jest:
? Pick a unit testing solution:
  Mocha + Chai
❯ Jest
配置文件存放的地方,选择 package.json:
? Where do you prefer placing config for Babel, PostCSS, ESLint, etc.?
  In dedicated config files
❯ In package.json
是否保存这次配置,方便下次直接使用,一般都是选择 Y
? Save this as a preset for future projects? (y/N)
配置完成之后就开始创建一个初始项目了:
启动
cd vue-learn
npm run serve
什么是 VueDevTools
vue-devtools 是一款基于 chrome 游览器的插件,用于调试 vue 应用,这可以极大地提高我们的调试效率。
VueDevTools安装
chrome商店直接安装
vue-devtools 可以从 chrome 商店直接下载安装。我们可以打开 chrome 商店,搜索vue-dev-tools,点击“添加至chrome”即可。
目录结构
首先我们先看以下用 Vue-Cli 创建项目的整体结构:
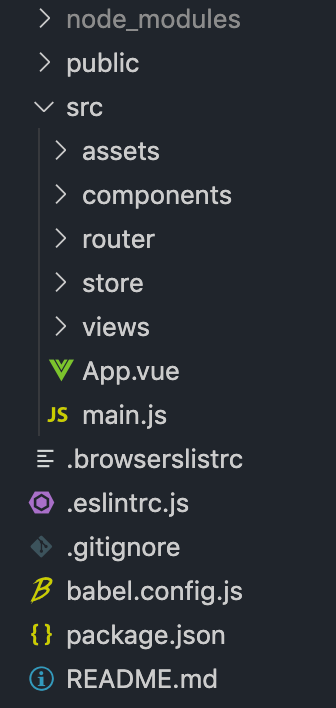
项目相关的代码,我们都放在 src 的文件夹中,该文件夹中的结构如下:
- assets 是资源文件夹,通常我们会把图片资源放在里面。
- components 文件夹通常会放一些组件。
- router 文件夹里面放的是 VueRouter 的相关配置。
- store 文件夹里面放的是 Vuex 的相关配置。
- views 文件夹里面通常放置页面的 .vue 文件。
- App.vue 定义了一个根组件。
- main.js 是项目的入口文件。
Vue-Cli 给我们提供了一个默认的项目文件结构,当然你并不是一定要按照这个文件结构来编写项目,你完全可以根据项目的需要或者个人喜好对项目结构加以改写。
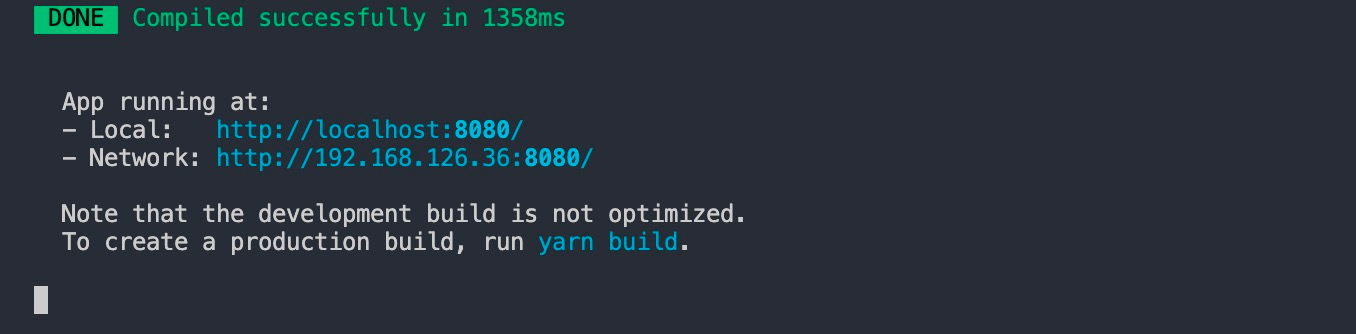
运行项目
我们打开之前通过脚手架创建的项目,在项目的根目录下运行:
npm run serve
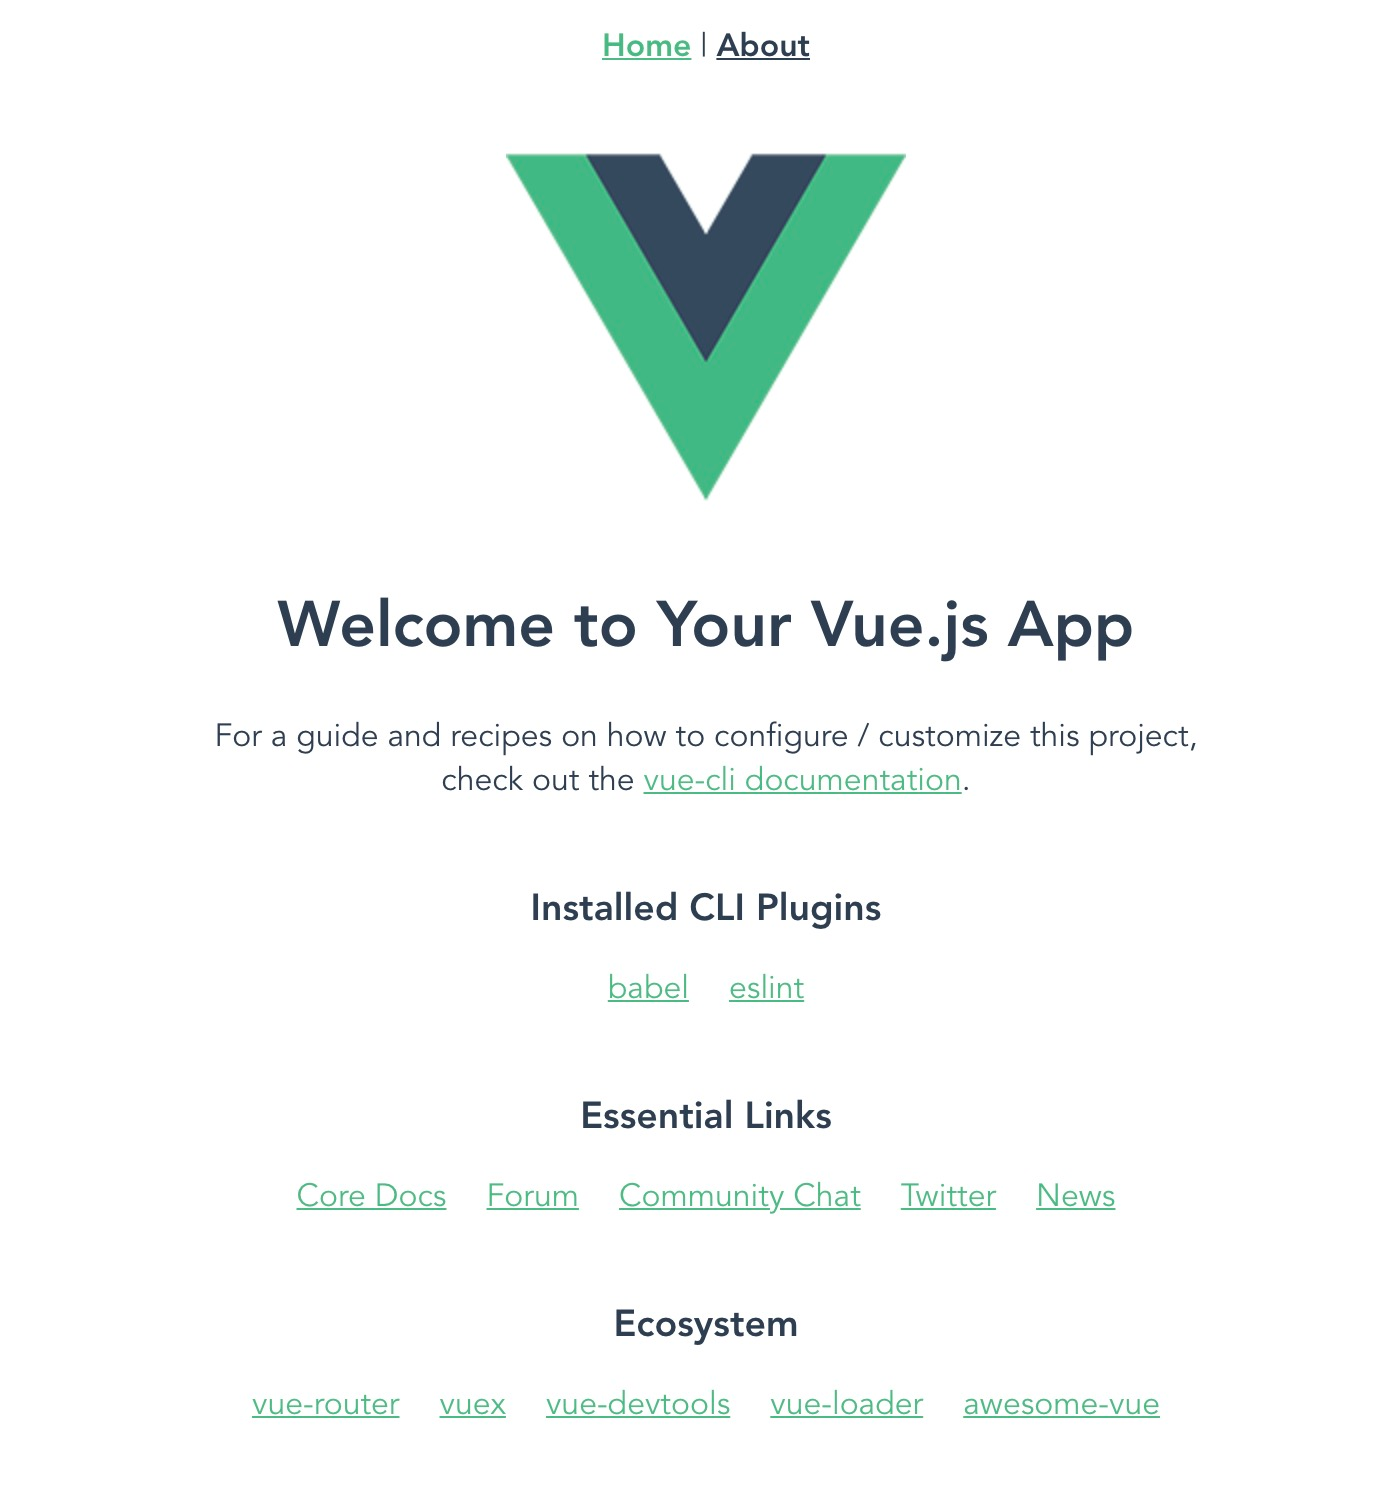
出现界面后:
我们可以打开浏览器预览项目:
详细分析
main.js入口文件分析
import Vue from "vue";
import App from "./App.vue";
import router from "./router";
import store from "./store";
我们通过 import 引入了 App 组件、VueRouter 配置 router、Vuex 配置 store。
new Vue({
  router,
  store,
  render: h => h(App)
}).$mount("#app");
通过 new Vue() 创建 Vue 实例,并将 router、store 配置传入。通过 render 函数渲染组件 App。并将 Vue 实例挂载到 id 为 app 的 div上。
router 文件分析
打开 router/index.js 文件,我们可以看到路由配置信息:
const routes = [
  {
    path: "/",
    name: "Home",
    component: Home
  },
  {
    path: "/about",
    name: "About",
    component: () =>
      import( "../views/About.vue")
  }
];
定义了两个路由:
路由 ‘/’ 匹配组件 Home。
路由 ‘/about’ 匹配组件 About。
store 文件分析
打开 store/index.js 文件,我们可以看到 Vuex 的配置信息:
import Vue from "vue";
import Vuex from "vuex";

Vue.use(Vuex);

export default new Vuex.Store({
  state: {},
  mutations: {},
  actions: {},
  modules: {}
});
使用ElementUI
安装
npm install element-ui -S
也可以通过 CDN 的方式在页面上直接引入:
<!-- 引入样式 -->
<link rel="stylesheet" href="https://unpkg.com/element-ui/lib/theme-chalk/index.css">
<!-- 引入组件库 -->
<script src="https://unpkg.com/element-ui/lib/index.js"></script>
使用
在 main.js 中写入以下内容:
import Vue from "vue";
import App from "./App.vue";
import router from "./router";
import store from "./store";

Vue.config.productionTip = false;

import ElementUI from "element-ui";
import "element-ui/lib/theme-chalk/index.css";

Vue.use(ElementUI);

new Vue({
  router,
  store,
  render: h => h(App)
}).$mount("#app");
此时,我们已经可以在项目中使用 Element 给我们提供的各种组件了。
我们可以改造 ‘views/Home.vue’ 中的内容:
<template>
  <div class="home">
    <h1>使用 icon 组件</h1>
    <i class="el-icon-edit"></i>
    <i class="el-icon-share"></i>
    <i class="el-icon-delete"></i>
    <h1>使用 button 组件</h1>
    <el-button>默认按钮</el-button>
    <el-button type="primary">主要按钮</el-button>
    <el-button type="success">成功按钮</el-button>
    <el-button type="info">信息按钮</el-button>
    <el-button type="warning">警告按钮</el-button>
    <el-button type="danger">危险按钮</el-button>
  </div>
</template>

<script>
export default {
  name: "Home",
  components: {}
};
</script>

