python之hashlib、suprocess模块
一、hashlib模块
1、什么叫hash:hash是一种算法(3.x里代替了md5模块和sha模块,主要提供 SHA1, SHA224, SHA256, SHA384, SHA512 ,MD5 算法),该算法接受传入的内容,经过运算得到一串hash值

2、hash值的特点是:
(1) 只要传入的内容一样,得到的hash值必然一样=====>要用明文传输密码文件完整性校验
(2) 不能由hash值返解成内容=======》把密码做成hash值,不应该在网络传输明文密码
(3) 只要使用的hash算法不变,无论校验的内容有多大,得到的hash值长度是固定的
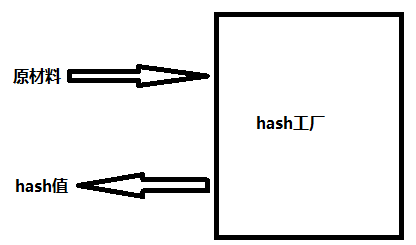
hash算法就像一座工厂,工厂接收你送来的原材料(可以用m.update()为工厂运送原材料),经过加工返回的产品就是hash值
import hashlib

m=hashlib.md5()# m=hashlib.sha256()

m.update('hello'.encode('utf8'))
print(m.hexdigest())  #5d41402abc4b2a76b9719d911017c592

m.update('alvin'.encode('utf8'))

print(m.hexdigest())  #92a7e713c30abbb0319fa07da2a5c4af

m2=hashlib.md5()
m2.update('helloalvin'.encode('utf8'))
print(m2.hexdigest()) #92a7e713c30abbb0319fa07da2a5c4af

注意:把一段很长的数据update多次,与一次update这段长数据,得到的结果一样
但是update多次为校验大文件提供了可能。
以上加密算法虽然依然非常厉害,但时候存在缺陷,即:通过撞库可以反解。所以,有必要对加密算法中添加自定义key再来做加密
import hashlib

# ######## 256 ########

hash = hashlib.sha256('898oaFs09f'.encode('utf8'))
hash.update('alvin'.encode('utf8'))
print (hash.hexdigest())#e79e68f070cdedcfe63eaf1a2e92c83b4cfb1b5c6bc452d214c1b7e77cdfd1c7
模拟撞库破解密码
import hashlib
passwds=[
    'alex3714',
    'alex1313',
    'alex94139413',
    'alex123456',
    '123456alex',
    'a123lex',
    ]
def make_passwd_dic(passwds):
    dic={}
    for passwd in passwds:
        m=hashlib.md5()
        m.update(passwd.encode('utf-8'))
        dic[passwd]=m.hexdigest()
    return dic

def break_code(cryptograph,passwd_dic):
    for k,v in passwd_dic.items():
        if v == cryptograph:
            print('密码是===>\033[46m%s\033[0m' %k)

cryptograph='aee949757a2e698417463d47acac93df'
break_code(cryptograph,make_passwd_dic(passwds))
python 还有一个 hmac 模块,它内部对我们创建 key 和 内容 进行进一步的处理然后再加密:

import hmac
h1=hmac.new('hello'.encode('utf-8'),digestmod='md5')
h1.update('world'.encode('utf-8'))

print(h1.hexdigest())
注意!注意!注意
#要想保证hmac最终结果一致,必须保证:
#1:hmac.new括号内指定的初始key一样
#2:无论update多少次,校验的内容累加到一起是一样的内容

# 操作一
import hmac
h1=hmac.new('hello'.encode('utf-8'),digestmod='md5')
h1.update('world'.encode('utf-8'))

print(h1.hexdigest()) # 0e2564b7e100f034341ea477c23f283b

# 操作二
import hmac
h2=hmac.new('hello'.encode('utf-8'),digestmod='md5')
h2.update('w'.encode('utf-8'))
h2.update('orld'.encode('utf-8'))

print(h1.hexdigest()) # 0e2564b7e100f034341ea477c23f283b
二、suprocess模块
import  subprocess

sh-3.2# ls /Users/egon/Desktop |grep txt$
mysql.txt
tt.txt
事物.txt

res1=subprocess.Popen('ls /Users/jieli/Desktop',shell=True,stdout=subprocess.PIPE)
res=subprocess.Popen('grep txt$',shell=True,stdin=res1.stdout,
                 stdout=subprocess.PIPE)

print(res.stdout.read().decode('utf-8'))


#等同于上面,但是上面的优势在于,一个数据流可以和另外一个数据流交互,可以通过爬虫得到结果然后交给grep
res1=subprocess.Popen('ls /Users/jieli/Desktop |grep txt$',shell=True,stdout=subprocess.PIPE)
print(res1.stdout.read().decode('utf-8'))


#windows下:
# dir | findstr 'test*'
# dir | findstr 'txt$'
import subprocess
res1=subprocess.Popen(r'dir C:\Users\Administrator\PycharmProjects\test\函数备课',shell=True,stdout=subprocess.PIPE)
res=subprocess.Popen('findstr test*',shell=True,stdin=res1.stdout,
                 stdout=subprocess.PIPE)

print(res.stdout.read().decode('gbk')) #subprocess使用当前系统默认编码,得到结果为bytes类型,在windows下需要用gbk解码

 浙公网安备 33010602011771号