linux 下安装mysql 5.7.31 (实战记录)
按照我的执行步骤和执行命令,依次执行即可,过程如下:
1、查看是否存在mysql用户的命令:
cat /etc/group | grep mysql
cat /etc/passwd |grep mysql
2、增加 mysql 用户的命令:
groupadd mysql
useradd -r -g mysql mysql
3、
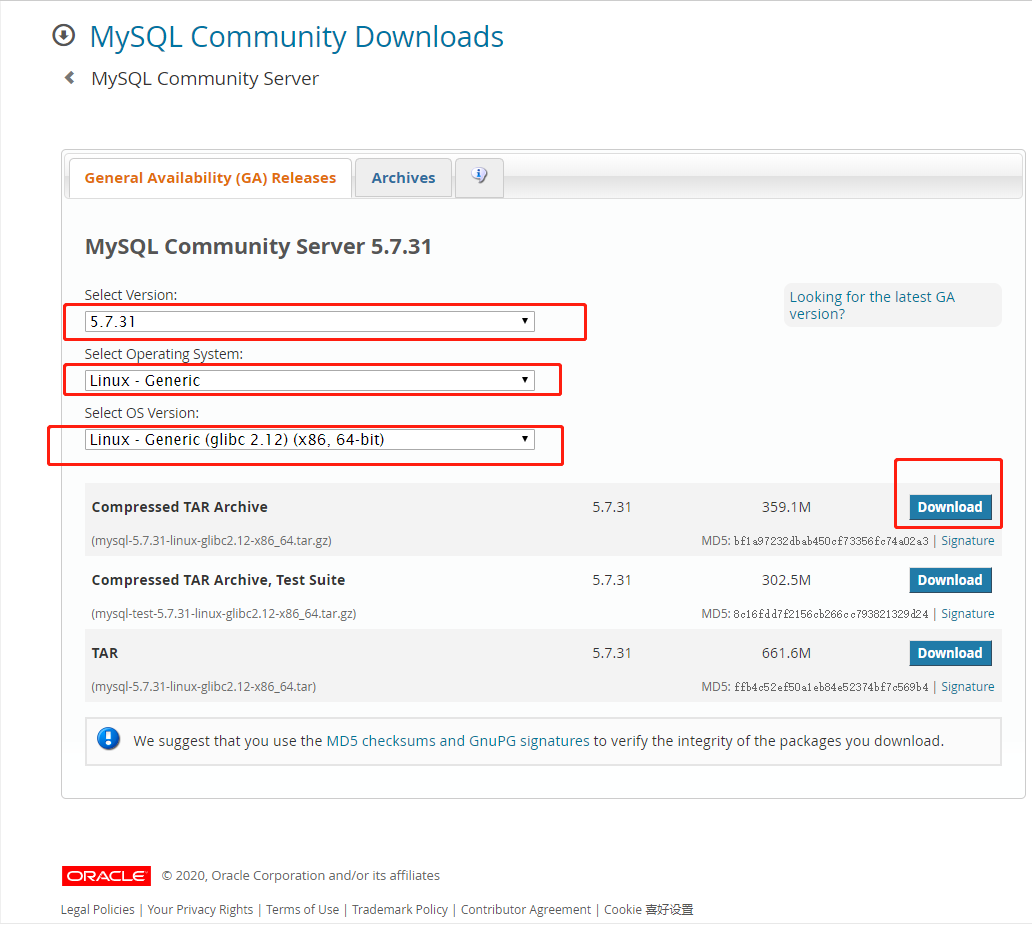
mysql 5.7.31版本下载路径:
https://dev.mysql.com/downloads/mysql/5.7.html#downloads
下载后安装步骤同上,注意 改密码那个步骤略微有不同。
1、linux上执行下载命令:wget https://dev.mysql.com/get/Downloads/MySQL-5.7/mysql-5.7.24-linux-glibc2.12-x86_64.tar.gz
2、网页上的下载如下所示:

4、tar -zxvf mysql-5.7.31-linux-glibc2.12-x86_64.tar.gz
mv mysql-5.7.31-linux-glibc2.12-x86_64 /usr/local/mysql
5、
chmod -R 755 /usr/local/mysql
mkdir -p /data/mysql #创建目录
chown mysql:mysql -R /data/mysql #网上的 赋予权限
chmod 777 /data/mysql #自己给赋的权限
6、改写配置文件
[mysqld]
#datadir=/var/lib/mysql
#socket=/var/lib/mysql/mysql.sock
# Disabling symbolic-links is recommended to prevent assorted security risks
#symbolic-links=0
# Settings user and group are ignored when systemd is used.
# If you need to run mysqld under a different user or group,
# customize your systemd unit file for mariadb according to the
# instructions in http://fedoraproject.org/wiki/Systemd
bind-address=127.0.0.1
port=3306
user=mysql
basedir=/usr/local/mysql
datadir=/data/mysql
socket=/tmp/mysql.sock
#socket=/data/mysql/mysql.sock
log-error=/data/mysql/mysql.err
pid-file=/data/mysql/mysql.pid
##character config
character_set_server=utf8mb4
symbolic-links=0
explicit_defaults_for_timestamp=true
[mysqld_safe]
#log-error=/var/log/mariadb/mariadb.log
log-error=/data/mysql/mariadb.log
#pid-file=/var/run/mariadb/mariadb.pid
pid-file=/data/mysql/mariadb.pid
#
# include all files from the config directory
#
!includedir /etc/my.cnf.d
7、
./mysqld --initialize --user=mysql --datadir=/data/mysql --basedir=/usr/local/mysql
查看密码 cat /data/mysql/mysql.err

8、
cp /usr/local/mysql/support-files/mysql.server /etc/init.d/mysql
service mysql start
ps -ef|grep mysql
9、
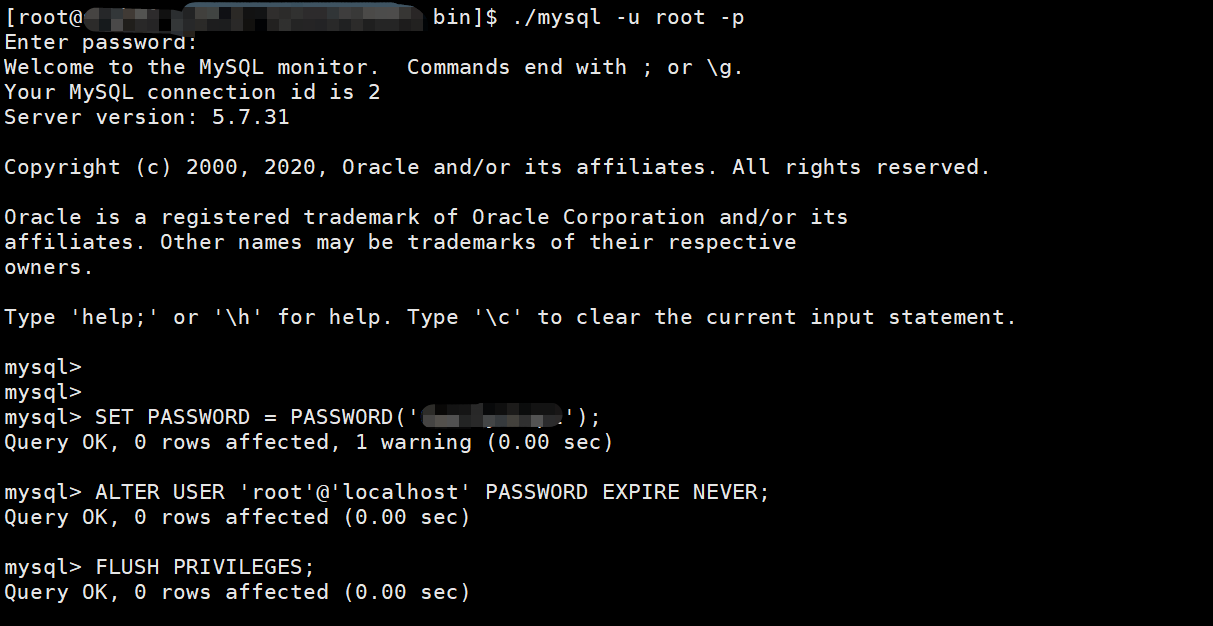
./mysql -u root -p #bin目录下
./mysql -uroot -h 127.0.0.1 -p
SET PASSWORD = PASSWORD('Qwertyuiop1');
ALTER USER 'root'@'localhost' PASSWORD EXPIRE NEVER;
或执行命令:set password for root@localhost = password('Qwertyuiop1');
FLUSH PRIVILEGES;

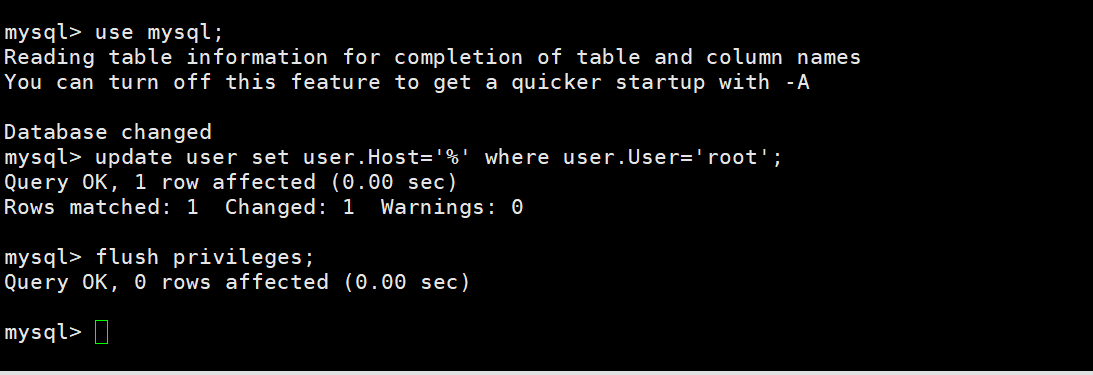
10、开启远程连接功能
use mysql;
update user set user.Host='%' where user.User='root';
flush privileges;


