flex
建议去看阮一峰的flex博客:http://www.ruanyifeng.com/blog/2015/07/flex-grammar.html
一、flex
flex布局其实包括两个部分,一个是在父元素上添加属性,另一个是在子元素上添加属性。
首先,添加在父元素上常见的属性:
(1)【justigy-content】:item在主轴上的排列方式。space-bettween是顶着两端,space-around是在两端保留一段距离。
(2)【align-items】:item在另一个主轴上的排列方式。
(3)【flex-direction】:主轴的方向。
然后,添加在子元素上常见属性:
(1)【flex-grow】:默认为0,即使有多余空间也不放大。
(2)【flex-shrink】:默认为1,当空间不足时缩小。
(3)【flex-basis】:默认auto,自动获取元素应该占得大小。
(4)【flex】:以上三种方式的缩写,最常见的样式写法应该是flex:1,表示子元素在父元素哪里获取到的长度是一样长的,即子元素平分父元素的长度。
二、flex的应用
1、元素的垂直水平居中
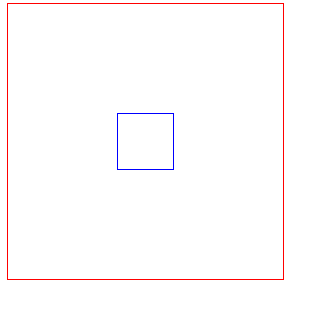
采用弹性布局,flex,也就是flexible-box的简称,弹性布局只要在父元素上设置display:flex;align-items:center;justify-content:center即可。这也是最简单的方法了。代码如下:
<!DOCTYPE html>
<html xmlns="http://www.w3.org/1999/xhtml">
<head>
<meta http-equiv="Content-Type" content="text/html; charset=utf-8"/>
    <title>水平垂直的实现</title>
    <style>
        .wrapper{
            width:250px;
            height:250px;
            border:1px red solid;
            display:flex;
            align-items:center;
            justify-content:center;
        }
        .div1{
            width:50px;
            height:50px;
            border:1px blue solid;
        }
    </style>
</head>
<body>
    <div class="wrapper">
        <div class="div1">
        </div>
    </div>
</body>
</html>
效果图:

2、两栏布局
flex还有一个常用的功能,就是实现两栏布局,左边为固定宽度,右边自适应。代码如下:
<!DOCTYPE html>
<html xmlns="http://www.w3.org/1999/xhtml">
<head>
<meta http-equiv="Content-Type" content="text/html; charset=utf-8"/>
    <title>前端开发面试题</title>
    <link href="StyleSheet1.css" rel="stylesheet" />
</head>
<body>
    <div class="wrapper wrapper-flex">
        <div class="left">左侧栏,固定宽度200px</div>
        <div class="right">右侧栏,宽度自适应,自适应的意思是加几个字就有多少的宽度</div>
    </div>
</body>
</html>
.wrapper{
    border:1px solid red;
    padding:10px 20px;
}

.left{
    width:300px;
    border:1px solid blue;
}
.right{
    border:1px solid blue;
    margin-left:300px;
    }

.wrapper-flex{
    display:flex;
    align-items:flex-start;
}
.wrapper-flex .left{
    flex:0 0 auto;
}
.wrapper-right .right{
    flex:1 1 auto;
}
效果如下:

三、样式是否有冲突问题
float与flex可以同时在一个类上使用,不会冲突。
float与relative可以同时在一个类上使用,不会冲突。
四、项目使用

上面这个image列表,就是利用flex布局实现的。这里面有几个重点:
第一,3个图片就开始换行,这就说明每一个小item宽度占33.33%
第二,上面的三个小item距离下面的一行有一个margin,但是最后一行距离横幅的底部margin是横幅带来的,所以最后一样的底部margin为0。
 <div class="container">
    <header>黑马程序员</header>
    <!-- 图片列表链接 -->
    <nav class="nav">
      <a class="item">
        <img src="./images/icon1.png" />
        <span>hr面试</span>
      </a>
      <a class="item">
        <img src="./images/icon2.png" />
        <span>hr面试</span>
      </a>
      <a class="item">
        <img src="./images/icon3.png" />
        <span>hr面试</span>
      </a>
      <a class="item">
        <img src="./images/icon4.png" />
        <span>hr面试</span>
      </a>
      <a class="item">
        <img src="./images/icon5.png" />
        <span>hr面试</span>
      </a>
      <a class="item">
        <img src="./images/icon6.png" />
        <span>hr面试</span>
      </a>
    </nav>
    <section class="go">
      <img src="./images/go.png"/>
    </section>
  </div>
.container {
  header {
    text-align: center;
  }
  .nav {
    display: flex;
    flex-direction: row;
    flex-wrap: wrap;
    padding: 1.6rem 0;
    .item {
      display: flex;
      flex-direction: column;
      align-items: center;
      justify-content: center;
      width: 33.33%;
      box-sizing: border-box;
      img {
        width: 3.7rem;
        height: 3.7rem;
      }
    }
    .item:nth-child(-n + 3) {
      margin-bottom: 1.2rem;
    }
  }
  .go{
    text-align: center;
    img{
      width: 95%;
    }
  }
}


