
Gin框架安装使用
1. 介绍
- Gin是一个golang的微框架,封装比较优雅,API友好,源码注释比较明确,具有快速灵活,容错方便等特点
- 对于golang而言,web框架的依赖要远比Python,Java之类的要小。自身的net/http足够简单,性能也非常不错
- 借助框架开发,不仅可以省去很多常用的封装带来的时间,也有助于团队的编码风格和形成规范
beego和gin的区别:
(1) MVC:Beego支持完整的MVC, Gin不支持完整的MVC(需要开发者自己实现MVC);
(2) 路由&Session:Beego支持正则路由, Gin不支持正则路由;Beego支持Session,Gin不支持Session(需要安装另外的包);安装session,推荐包:github.com/astaxie/session;
(3) 适用场景:在业务更加复杂的项目中,适用Beego;在需要快速开发的项目中,适用Beego;在1.0项目中,适用Beego;
(4) Gin在性能方面较Beego更好:当某个接口的性能遭到较大挑战的时候,考虑使用Gin重写接口;如果项目的规模不大,业务相对简单,使用Gin;
2. 安装
要安装Gin软件包,您需要安装Go并首先设置Go工作区。
1.首先需要安装Go(需要1.10+版本),然后可以使用下面的Go命令安装Gin。
go get -u github.com/gin-gonic/gin
2.将其导入您的代码中:
import "github.com/gin-gonic/gin"
3.(可选)导入net/http。例如,如果使用常量,则需要这样做http.StatusOK。
import "net/http"
可能遇到的问题补充:
1.golang.org/x/*无法访问的解决方案:
golang.org这个域名在国内是访问不到的,导致我们使用golang时,有些依赖包下载不了,好在现在,golang把这些官方依赖包都放在了github上面;
对应的github地址是:https://github.com/golang;
解决方法就是把github上这些项目都一个个git clone 下来,然后放在$GOPATH/golang/x下面,这样就可以直接使用了;
2.解决Golang获取google.golang.org/protobuf包报错的问题
需要对应下载。这里具体的操作方法是,从https://github.com/protocolbuffers/protobuf-go/tree/master/ 下载包,放到%GOPATH%\google.golang.org\protobuf下就可以;
mkdir google.golang.org
cd google.golang.org
git clone https://github.com/protocolbuffers/protobuf-go.git
mv protobuf-go protobuf
3. 使用git clone命令,无法clone成功,出现github|fatal:unable to access|OpenSSL SSL_connect: SSL_ERROR_SYSCALL in connection to github.com 443 字段:
解决的关键因素就是http.sslVerify 的配置需要设置为false,
打开git bash, 敲命令"git config --global http.sslVerify false",搞定;
3. 测试使用
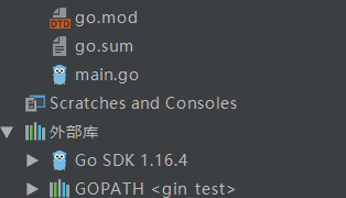
创建一个测试目录:gin_test
go mod init gin_test
go mod edit -require github.com/gin-gonic/gin@latest
go mod tidy
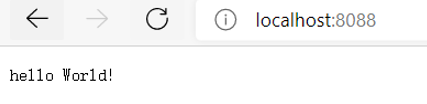
3.1.输出hello,world:
package main

import (
    "net/http"
    "github.com/gin-gonic/gin"
)

func main() {
    // 1.创建路由
   r := gin.Default()
   // 2.绑定路由规则,执行的函数
   // gin.Context,封装了request和response
   r.GET("/", func(c *gin.Context) {
      c.String(http.StatusOK, "hello World!")
   })
   // 3.监听端口,默认在8080
   // Run("里面不指定端口号默认为8080")
   r.Run(":8000")
}
启动运行:
go run main.go
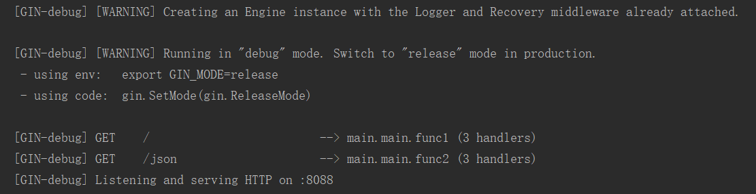
输出结果:
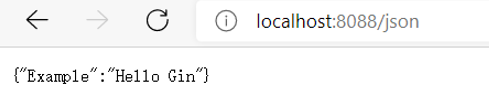
3.2.json输出返回:
    //eg2:输出json
    r.GET("/json", func(c *gin.Context) {
        c.JSON(200, gin.H{
            "Example": "Hello Gin",
        })
    })
访问输出结果:
3.3.自定义文件请求:
创建routers、controllers目录:

注册路由文件:
package routers

import (
    . "gin_test/controllers"
    "github.com/gin-gonic/gin"
    "net/http"
)

func RegisterRoutes() *gin.Engine {
    // 1.创建路由
    router := gin.Default()
    // 2.绑定路由规则,执行的函数
    // gin.Context,封装了request和response
    router.GET("/", func(c *gin.Context) {
        c.String(http.StatusOK, "hello World!")
    })
    //eg2:输出json
    router.GET("/json", func(c *gin.Context) {
        c.JSON(200, gin.H{
            "Example": "Hello Gin",
        })
    })
    //eg3:自定义方法请求
    router.GET("/cont/action", Action)

    return router
}
自定义操作方法文件:
package controllers

import (
    "github.com/gin-gonic/gin"
    "net/http"
    "strings"
)

//名称
func Action(c *gin.Context) {
    name := c.Query("name")
    action := c.Query("action")
    //截取/
    action = strings.Trim(action, "/")
    c.String(http.StatusOK, name+" is "+action)
}
Main.go文件调整:
package main

import (
    "gin_test/routers"
)

func main() {
    router := routers.RegisterRoutes()

    // 绑定端口是8088
    router.Run(":8088")
}
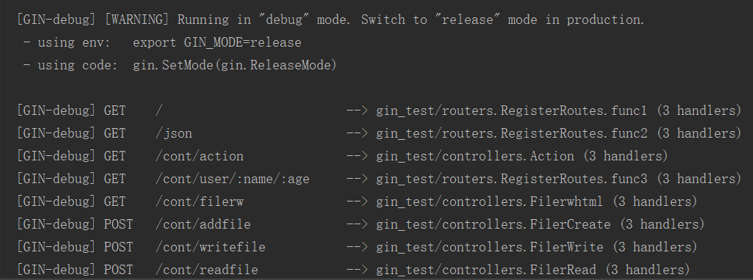
重新运行启动:
请求输出对应结果:

其余操作根据需要去编写即可。

 浙公网安备 33010602011771号