windows服务器采用Nginx部署Vue前端项目注意事项
第一步:下载并安装Nginx服务
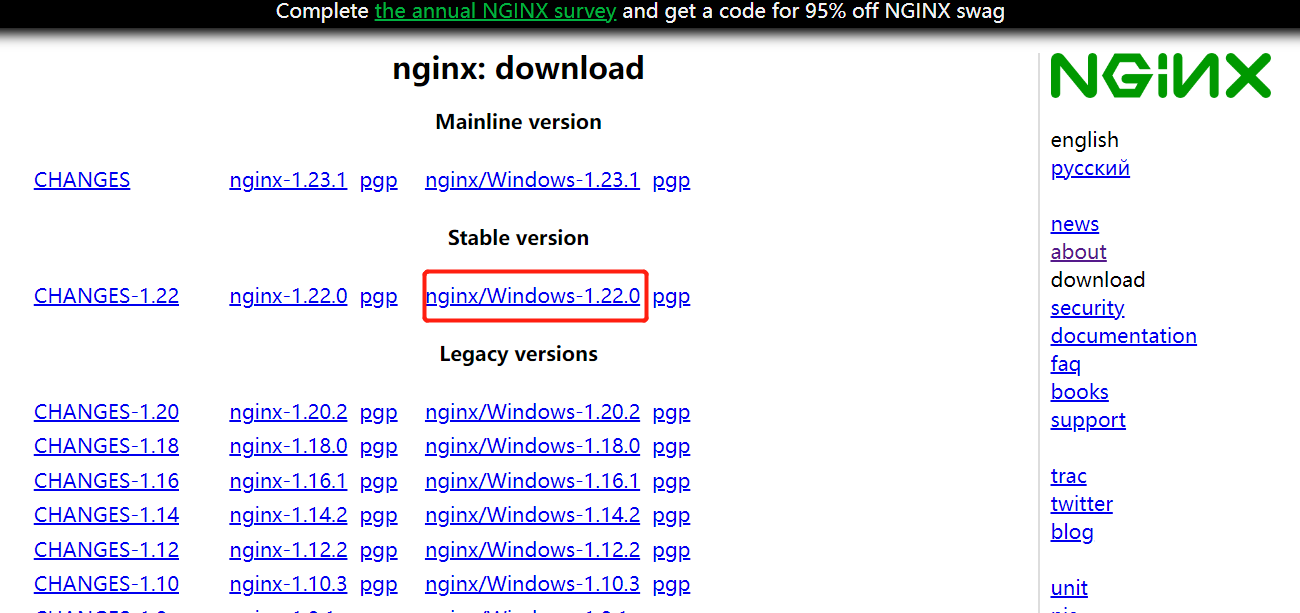
1、官网下载Nginx包(http://nginx.org/en/download.html)

2、解压文件如图:

注意:解压路径不可存在中文,否则会不可解析。
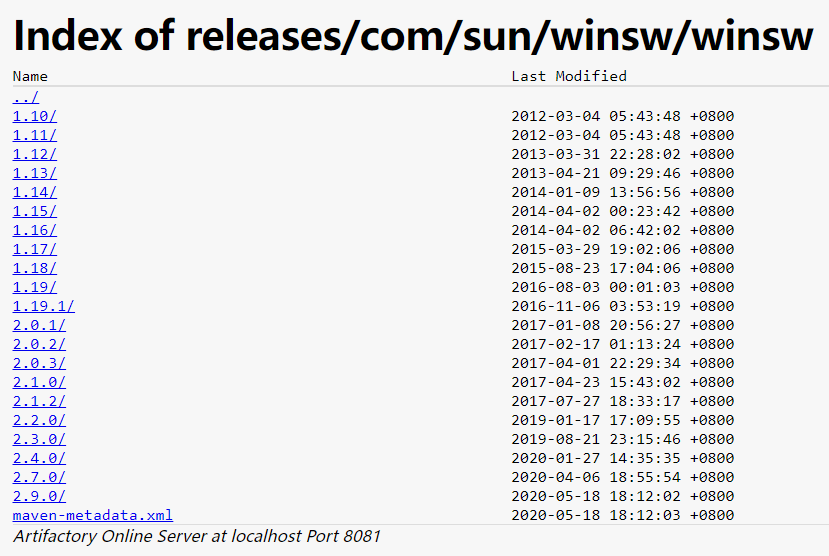
3、下载Windows Service Wrapper 工具,选择合适的版本进行下载,该工具可将Nginx设置为windows服务。(https://repo.jenkins-ci.org/ui/native/releases/com/sun/winsw/winsw/)


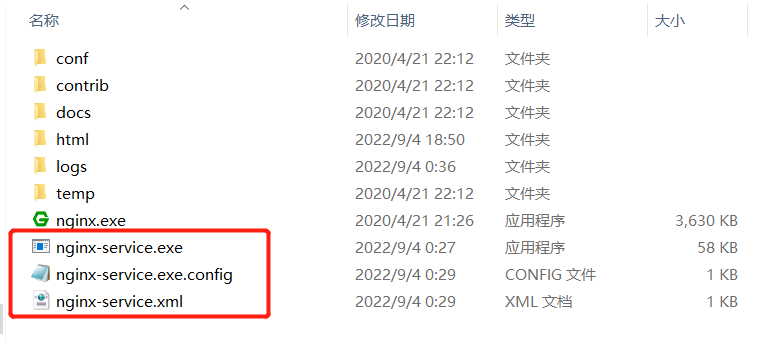
4、下载后把下载的winsw-1.18-bin.exe 文件放在Nginx安装目录(F:\Nginx\nginx-1.22.0),并修改名称为nginx-service.exe,
然后分别创建nginx-service.exe.config,nginx-service.xml文件,把这两个文件放在Nginx安装目录下。如下图

nginx-service.exe.config内容如下:
<configuration>
  <startup>
    <supportedRuntime version="v2.0.50727" />
    <supportedRuntime version="v4.0" />
  </startup>
  <runtime>
    <generatePublisherEvidence enabled="false"/>
  </runtime>
</configuration>
nginx-service.xml内容如下:(根据解压路径进行修改)
<service>
    <id>nginx</id>
    <name>Nginx Service</name>
    <description>Nginx Service</description>
    <logpath>C:\Nginx\nginx-1.18.0\logs\</logpath>
    <log mode="roll-by-size">
        <sizeThreshold>10240</sizeThreshold>
        <keepFiles>8</keepFiles>
    </log>
    <executable>C:\Nginx\nginx-1.18.0\nginx.exe</executable>
    <startarguments>-p C:\Nginx\nginx-1.18.0\nginx</startarguments>
    <stopexecutable>nginx-1.18.0\nginx.exe</stopexecutable>
    <stoparguments>-p nginx-1.18.0\nginx -s stop</stoparguments>
</service>
5、进入Nginx安装目录执行进行服务安装与启动
安装:nginx-service.exe install
卸载:nginx-service.exe uninstall
启动:nginx-service.exe start
终止:nginx-service.exe stop
若操作完成,在服务页面找不到该服务,可检查一下nginx版本与你下载的“Windows Service Wrapper”工具版本是否一致。
如果错误1067则检查Nginx监控的端口是否被占用。
第二部:发布前端项目
1、VsCode编译Vue项目形成dist文件(作用是将Vue文件编译为浏览器认识的js、css、html文件)
npm run build
2、将打包后的dist文件放进Nginx安装目录的html文件夹下(也可以放进其他地方,只要路径后续配置好一切都OK)

3、修改Nginx配置文件(nginx.conf)
server {
        listen       8200; // 监控的端口
        server_name  localhost; // 域名、Ip地址
        location / {
            root   C:/Nginx/nginx-1.18.0/html/dist; // dist存放位置
            index  index.html index.htm;
            try_files $uri $uri/ /index.html;
        }
        error_page   500 502 503 504  /50x.html;
        location = /50x.html {
            root   html;
        }
    }
4、如果前端项目配置了反向代理,则需要注意
因为在vue.config.js中配置的devServer.proxy只是在开发环境下将请求代理到后端服务器的本地服务,
我们把项目打包成dist文件只是把我们的组件等资源打包了,并不会将代理服务器给打包,所以项目中的请求路径不完整导致访问不到对应资源
所以需要有另一个代理服务器来装载它,此时只需要修改Nginx的配置文件在Server中添加location ^~/api/即可。
location ^~/api/ {
     proxy_pass http://xxx.xxx.xxx.xxx:8889/api/;
 }
xxx.xxx.xxxx.xxx表示你的服务器地址,8889是我后端的访问端口。


【推荐】国内首个AI IDE,深度理解中文开发场景,立即下载体验Trae
【推荐】编程新体验,更懂你的AI,立即体验豆包MarsCode编程助手
【推荐】抖音旗下AI助手豆包,你的智能百科全书,全免费不限次数
【推荐】轻量又高性能的 SSH 工具 IShell:AI 加持,快人一步
· 震惊!C++程序真的从main开始吗?99%的程序员都答错了
· 别再用vector<bool>了!Google高级工程师:这可能是STL最大的设计失误
· 单元测试从入门到精通
· 【硬核科普】Trae如何「偷看」你的代码?零基础破解AI编程运行原理
· 上周热点回顾(3.3-3.9)