Vue状态管理-Bus
1.父子组件之间进行通讯:
父组件通过属性和子组件通讯,子组件通过事件和父组件通讯。vue2.x只允许单向数据传递。
先定义一个子组件AInput.vue:
<template>
  <div>
    <input @input="handleInput" :value="value"/>
  </div>
</template>
<script>
export default {
  name:'AInput',
  props:{
    value:{
      type:[String,Number],
      default:''
    }
  },
  methods:{
    handleInput(event){
      const value=event.target.value;
      this.$emit('input',value);
    }
  }
}
</script>
在父组件store.vue中引用子组件:
<template>
  <div>
    <a-input :value="inputValue" @input="handlerInput"></a-input>
    <p>{{inputValue}}</p>
  </div>
</template>
<script>
import AInput from "_c/AInput.vue";
export default {
  name: "store",
  data() {
    return {
      inputValue: ""
    };
  },
  components: {
    AInput: AInput
  },
  methods: {
    handlerInput(val) {
      this.inputValue = val;
    }
  }
};
</script>
由于v-model可以进行双向数据绑定,所以store.vue的写法等效于:
<template>
  <div>
    <a-input v-model="inputValue"></a-input>
    <p>{{inputValue}}</p>
  </div>
</template>
<script>
import AInput from "_c/AInput.vue";
export default {
  name: "store",
  data() {
    return {
      inputValue: ""
    };
  },
  components: {
    AInput: AInput
  }
};
</script>
实现效果:
2.兄弟之间进行通讯:
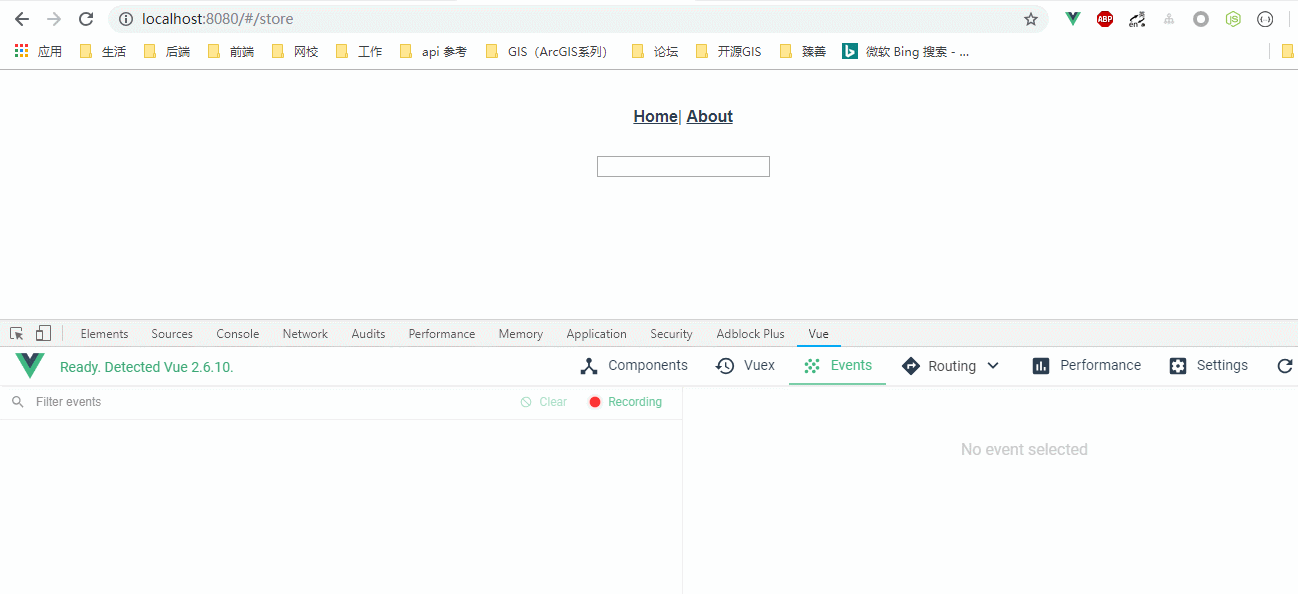
2.1如果是同一页面之间的子组件进行通讯:
<template>
  <div>
    <a-input :value="inputValue" @input="handlerInput"></a-input>
    <a-show :content="inputValue"/>
  </div>
</template>
<script>
import AInput from "_c/AInput.vue";
import AShow from "_c/AShow.vue";

export default {
  name: "store",
  data() {
    return {
      inputValue: ""
    };
  },
  components: {
    AInput: AInput,
    AShow:AShow
  },
  methods: {
    handlerInput(val) {
      this.inputValue = val;
    }
  }
};
</script>
<template>
  <div>
    <p>AShow: {{ content }}</p>
  </div>
</template>
<script>
export default {
  props: {
    content: {
      type: [String, Number],
      default: ""
    }
  }
};
</script>
2.2如果是不同页面之间的子组件进行通讯,需要借助借助中央事件总线
新建一个bus.js:
import Vue from 'vue'
const Bus =new Vue();
export default Bus;
在main.js中引用Bus,同时在Vue实例原型增加$bus:
import Vue from 'vue'
import App from './App.vue'
import router from './router'
import store from './store'
import Bus from './lib/bus'

Vue.config.productionTip = false
Vue.prototype.$bus = Bus;

new Vue({
  router,
  store,
  render: h => h(App)
}).$mount('#app')
App.vue:
<template>
  <div id="app">
    <div id="nav">
      <router-link to="/">Home</router-link>|
      <!-- 命名路由 -->
      <router-link :to="{name:'about'}">About</router-link>
    </div>
    <!-- 路由视图组件 -->
    <router-view/>
    <router-view name="email"/>
    <router-view name="tel"/>
  </div>
</template>

<style lang="less">
#app {
  font-family: "Avenir", Helvetica, Arial, sans-serif;
  -webkit-font-smoothing: antialiased;
  -moz-osx-font-smoothing: grayscale;
  text-align: center;
  color: #2c3e50;
}
#nav {
  padding: 30px;
  a {
    font-weight: bold;
    color: #2c3e50;
    &.router-link-exact-active {
      color: #42b983;
    }
  }
}
</style>
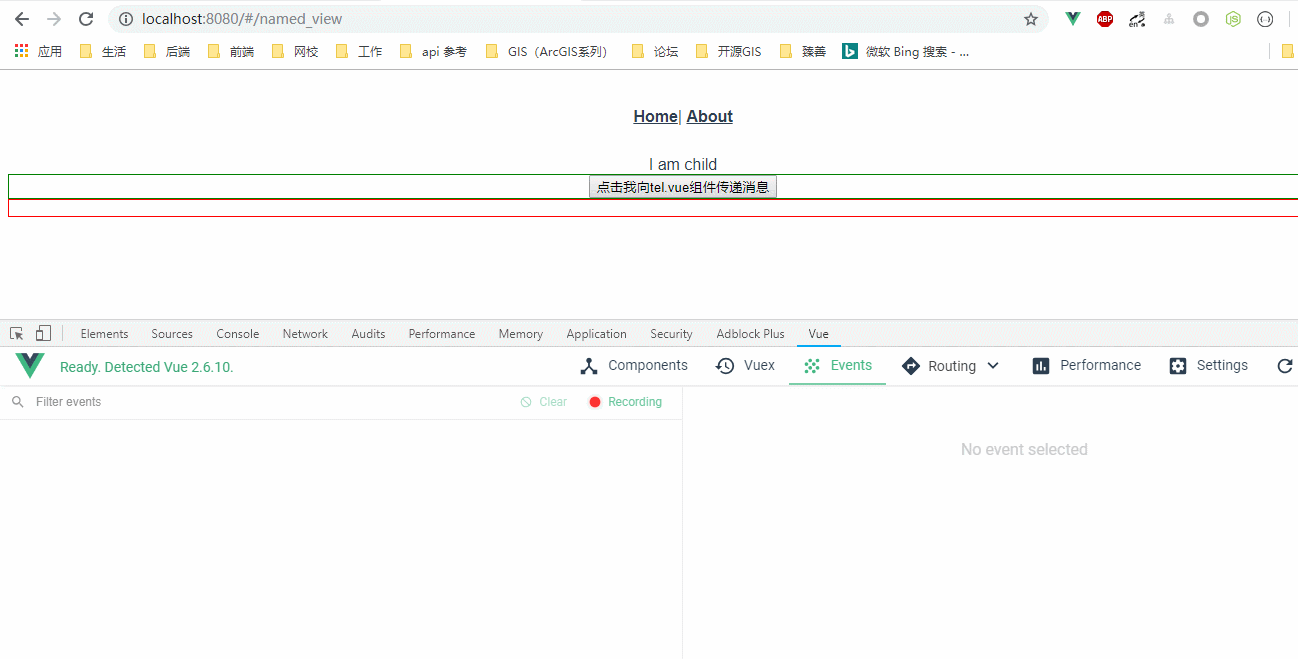
下面演示:http://localhost:8080/#/named_view页面中email和tel组件进行通信:
email.vue:
<template>
  <div class="email">
    <button @click="handleClick">点击我向tel.vue组件传递消息</button>
  </div>
</template>
<script>
export default {
  methods: {
    handleClick() {
      this.$bus.$emit("on-click", "hello,我是通过email传递的");
    }
  }
};
</script>
<style>
.email {
  border: 1px solid green;
}
</style>
在tel.vue中监听事件:
<template>
  <div class="tel">
    <p>{{ message }}</p>
  </div>
</template>
<script>
export default {
  data() {
    return {
      message: ""
    };
  },
  mounted() {
    this.$bus.$on("on-click", mes => {
      this.message = mes;
    });
  }
};
</script>
<style>
.tel {
  border: 1px solid red;
}
</style>
效果: