springmvc框架快速入门
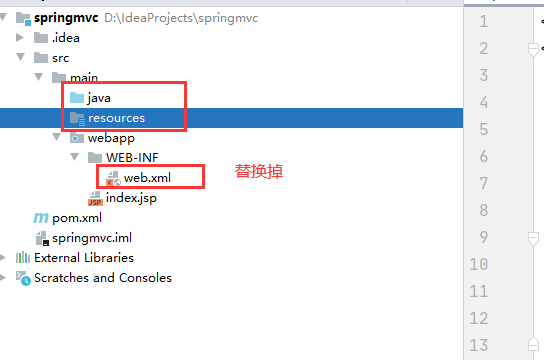
(1)创建一个maven得web工程

(2)引入springmvc的依赖
1 <dependencies>
2     <dependency>
3       <groupId>org.springframework</groupId>
4       <artifactId>spring-webmvc</artifactId>
5       <version>5.3.4</version>
6     </dependency>
7 </dependencies>
(3) springmvc得配置文件
<?xml version="1.0" encoding="UTF-8"?>
<beans xmlns="http://www.springframework.org/schema/beans"
       xmlns:xsi="http://www.w3.org/2001/XMLSchema-instance"
       xmlns:context="http://www.springframework.org/schema/context"
       xsi:schemaLocation="http://www.springframework.org/schema/beans http://www.springframework.org/schema/beans/spring-beans.xsd http://www.springframework.org/schema/context https://www.springframework.org/schema/context/spring-context.xsd">

    <!--包扫码 controller中类-->
    <context:component-scan base-package="com.ykq.controller"/>
    <!--视图解析器
           prefix=前缀  /views/
           suffix=后缀  .jsp
    -->
    <bean class="org.springframework.web.servlet.view.InternalResourceViewResolver">
         <property name="prefix" value="/views/"/>
         <property name="suffix" value=".jsp"/>
    </bean>
</beans>
(4)创建一个控制类
@Controller //表示该类为控制层类。
public class HelloController {
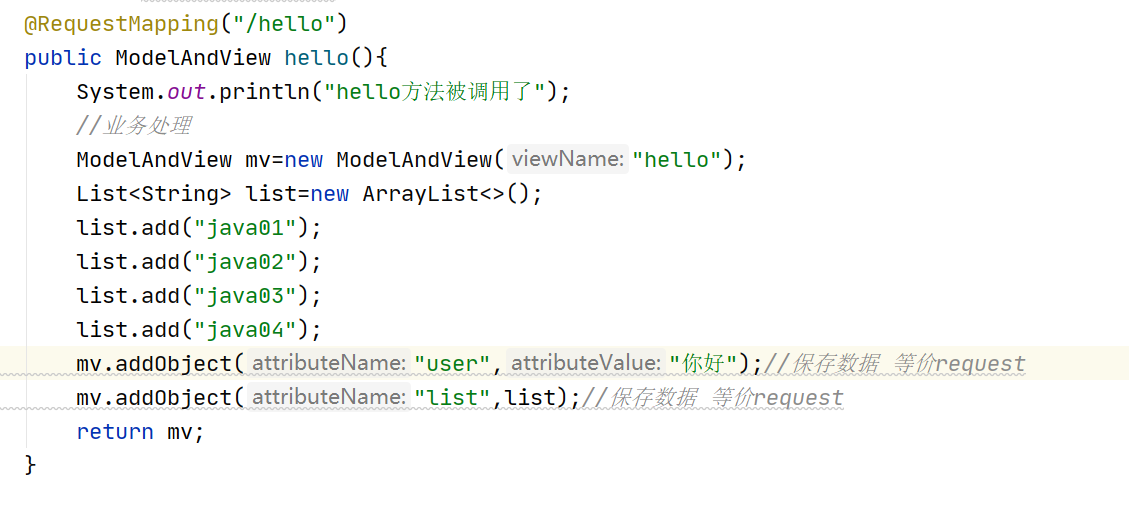
    @RequestMapping("/hello")
    public ModelAndView hello(){
        System.out.println("hello方法被调用了");
        ModelAndView mv=new ModelAndView("hello");
        return mv;
    }
}
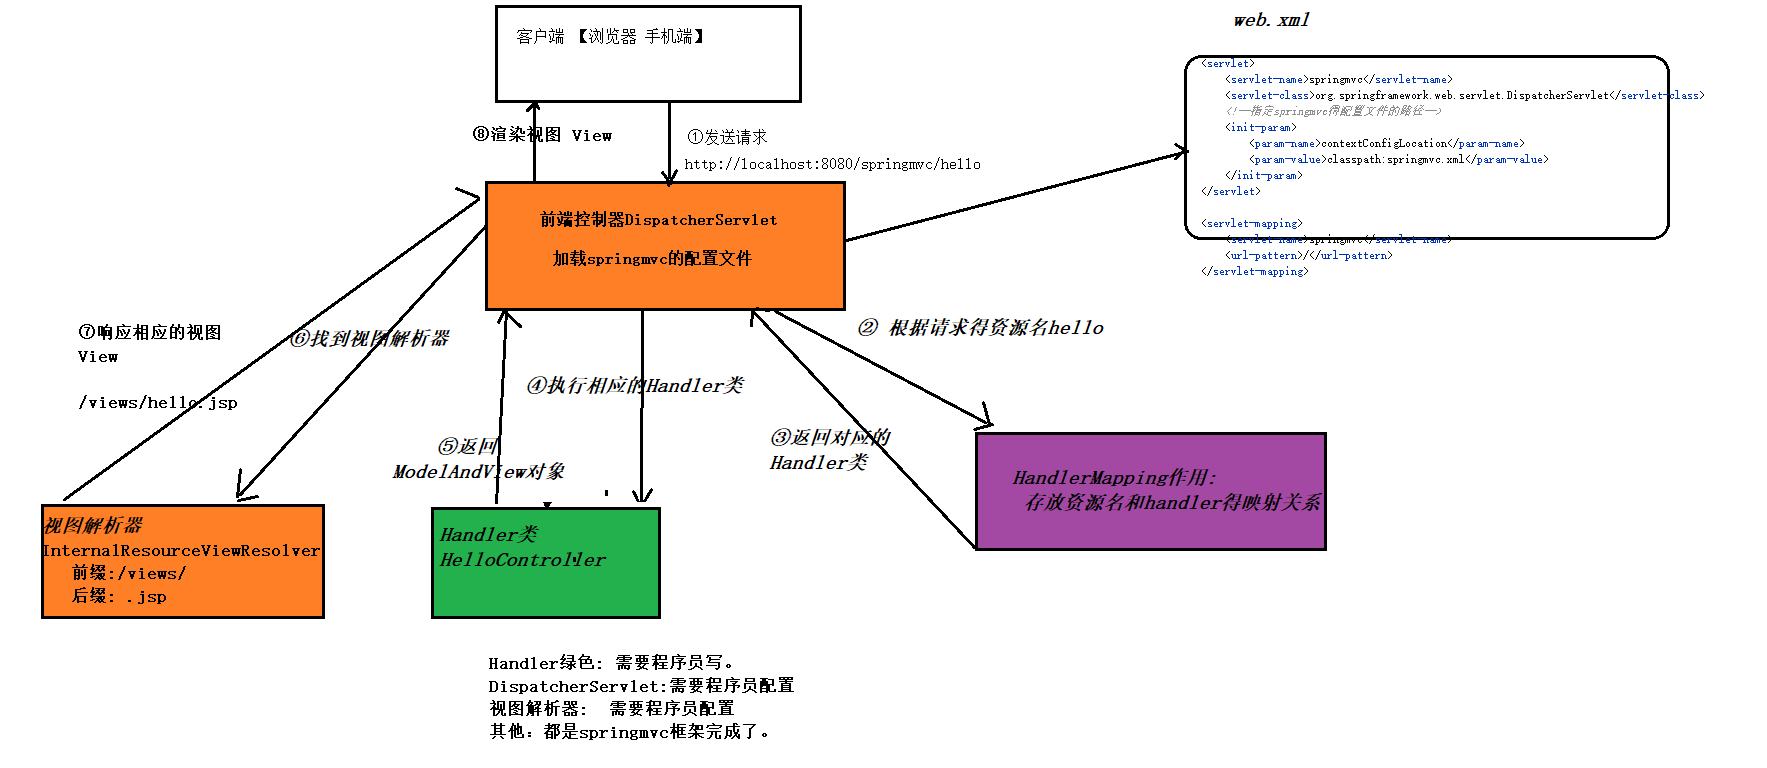
(5) 在web.xml文件加载springmvc得配置文件
<servlet>
    <servlet-name>springmvc</servlet-name>
    <servlet-class>org.springframework.web.servlet.DispatcherServlet</servlet-class>
    <!--指定springmvc得配置文件的路径-->
    <init-param>
        <param-name>contextConfigLocation</param-name>
        <param-value>classpath:springmvc.xml</param-value>
    </init-param>
</servlet>

<servlet-mapping>
    <servlet-name>springmvc</servlet-name>
    <url-pattern>/</url-pattern>
</servlet-mapping>


