
编译部署lnmp
编译部署lnmp
lnmp是什么
LNMP是一种兼容性的服务器环境,由Linux操作系统、Nginx web服务器、MySQL数据库和PHP编程语言(或其他替代语言)组成。
在企业中,LNMP具有以下优势:
-
高性能:Nginx是一款轻量级的web服务器,具有高并发处理能力和低内存消耗,能够快速响应请求,提供更好的性能和用户体验。
-
可靠性:Linux操作系统在稳定性和可靠性方面表现出色,能够保证系统长时间运行而不会出现系统崩溃等问题。
-
可扩展性:LNMP环境可以根据业务需求进行灵活扩展。Nginx支持反向代理、负载均衡等功能,能够处理大量的并发请求,保证系统的稳定运行。
-
安全性:LNMP环境具有较好的安全性,Linux操作系统提供了强大的安全机制和权限控制,能够防止未经授权的访问和攻击。Nginx也具备一些安全功能,如访问控制、防止DDoS攻击等。
-
简单易用:LNMP环境的安装和配置相对简单,对于开发人员和管理员来说更易于操作和维护。
综上所述,LNMP在企业中能够提供高性能、可靠性、可扩展性和安全性,适用于各种网站和应用的部署和运维。
lnmp工作流程
LNMP是指使用Linux操作系统、Nginx作为Web服务器、MySQL作为数据库服务器、PHP作为服务器端脚本语言的一种技术组合,因此LNMP的工作流程可以概括为以下几个步骤:
- 客户端发出HTTP请求:用户在浏览器中输入网址或者点击链接等操作,发起HTTP请求。
- Nginx接收请求:Nginx作为Web服务器,接收到客户端发出的HTTP请求。
- Nginx根据配置进行解析和路由:Nginx根据配置文件中的规则,解析HTTP请求中的URL,将请求路由到相应的处理程序或静态文件。
- 处理程序生成动态内容:如果请求的是动态内容,Nginx将请求转发给后端的PHP处理程序,PHP处理程序根据请求参数和业务逻辑生成动态内容。
- 数据库操作:如果需要从数据库中获取数据,PHP处理程序会调用MySQL数据库服务器执行相应的查询操作。
- 生成响应内容:PHP处理程序根据前面的处理结果,生成相应的HTTP响应内容。
- Nginx返回响应:Nginx将PHP处理程序生成的HTTP响应返回给客户端。
- 客户端渲染和展示:客户端浏览器接收到响应后,对响应进行渲染和展示,最终呈现给用户。
- 过程结束:LNMP处理流程结束,等待下一次HTTP请求。
需要注意的是,LNMP工作流程中的每个步骤都需要配置和优化,以提高系统的性能和稳定性。
1.0部署前准备
1.1 环境介绍
-
vmware 虚拟机环境下
-
L Linux
[root@lnmp ~]#cat /etc/redhat-release
CentOS Linux release 7.5.1804 (Core)
- N nginx
nginx-1.18.0
-
M mysql
-
P php
-
使用的是阿里云的yum源
1.2 基础工具安装
1,安装编译工具
yum install -y gcc gcc-c++ autoconf automake make
1.3 linux 环境准备
1,关闭系统防火墙
systemctl stop firewalld
2,关闭selinux
 [root@centos7 ~]#getenforce   #查看是关闭状态的
Disabled
如果不是关闭状态的,可以通过如下步骤
-
打开终端,以管理员身份登录到您的CentOS 7系统。
-
执行以下命令,查看当前SELinux的状态:
sestatus -
如果SELinux处于启用状态(Enforcing),请继续执行以下步骤;如果SELinux处于停用状态(Disabled)或为弱强制模式(Permissive),则不需要执行下面的步骤。
-
执行以下命令,临时关闭SELinux:
sudo setenforce 0 -
通过再次运行
sestatus命令,您将看到SELinux的状态已更改为Permissive。 -
若希望永久关闭SELinux,编辑
/etc/selinux/config文件:在该文件中,找到SELINUX=行,将其设置为SELINUX=disabled。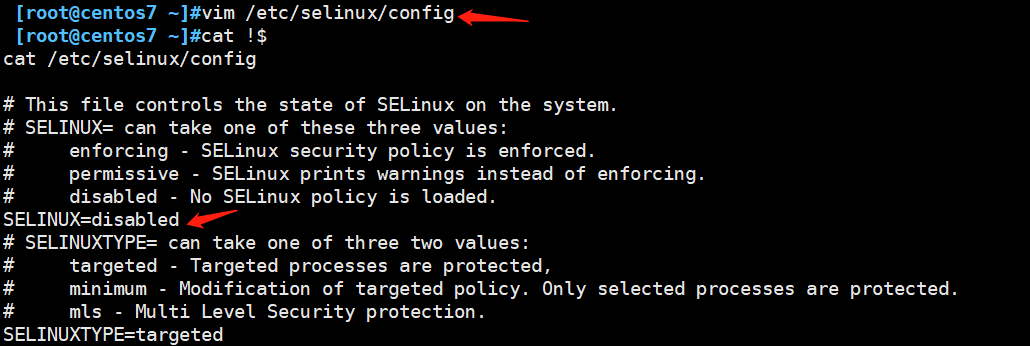
-
当重启系统后,SELinux将保持关闭状态。
3,确保可以正常上网(还是查看下比较好)
ping www.baidu.com
查看可以网络是正常的

2.0 编译部署安装nginx
1,安装nginx的静态资源压缩功能所需的gzip lib库,以及nginx需要支持URL重写,所需的pcre库,perl开发的依赖库,以及nginx搭建加密站点https 所需要的openssl依赖库等
yum install -y zlib zlib-devel openssl openssl-devel pcre pcre-devel wget httpd-tools vim
2,下载Nginx源代码
 [root@centos7 ~]#mkdir /mytools #创建一个nginx安装目录
 [root@centos7 ~]#cd /mytools/
 [root@centos7 mytools]# wget https://nginx.org/download/nginx-1.18.0.tar.gz
3,解压缩源代码
  [root@centos7 mytools]#ls
nginx-1.18.0.tar.gz
 [root@centos7 mytools]# tar -zxf nginx-1.18.0.tar.gz
 [root@centos7 mytools]#ls
nginx-1.18.0  nginx-1.18.0.tar.gz
 [root@centos7 mytools]#cd nginx-1.18.0/  #进入解压缩后的文件
 [root@centos7 nginx-1.18.0]#ls
auto  CHANGES  CHANGES.ru  conf  configure  contrib  html  LICENSE  man  README  src
4,创建普通nginx用户,用于运行nginx进程,降低nginx的系统权限
 [root@centos7 nginx-1.18.0]#  nginx -u 1111 -s /sbin/nologin -M
#这个命令是在Linux系统中创建一个用户,并将该用户的用户名设置为nginx,用户ID设置为1111,用户的登录shell设置为/sbin/nologin,禁止该用户进行登录操作,最后的-M选项表示不创建用户的家目录。
5,开始编译安装nginx服务
 [root@centos7 nginx-1.18.0]#  ./configure --user=nginx --group=nginx --prefix=/mytools/nginx1180/  --with-http_stub_status_module --with-http_ssl_module && make && make install


 ...................//////////////////////////////////////////////
  test -d '/mytools/nginx1180//html' \
	|| cp -R html '/mytools/nginx1180/'
test -d '/mytools/nginx1180//logs' \
	|| mkdir -p '/mytools/nginx1180//logs'
make[1]: Leaving directory `/mytools/nginx-1.18.0'  #显示这个就是安装成功了。
这是一系列用于编译和安装Nginx的命令。它们的含义如下:

1. `./configure`:这是一个脚本文件,用于根据指定的配置选项生成定制的Makefile文件,以供后续的编译使用。

   - `--user=nginx`:指定运行Nginx的用户为nginx。
   - `--group=nginx`:指定运行Nginx的用户组为nginx。
   - `--prefix=/mytools/nginx1180/`:指定安装路径,即将Nginx安装到`/mytools/nginx1180/`目录下。
   - `--with-http_ssl_module`:添加对HTTPS协议的支持。
   - `--with-http_stub_status_module`:添加状态监控模块的支持。

2. `make`:这个命令用于编译源代码,并生成可执行文件。

3. `make install`:这个命令用于将编译好的可执行文件和相关文件安装到指定的目录中,完成Nginx的部署。

总结来说,这一系列命令的目的是根据自定义的参数编译和安装Nginx,并将可执行文件和相关文件部署到指定的目录中。这样,可以在指定的路径`/mytools/nginx1180/`下找到已经部署好的Nginx服务器了。
 [root@centos7 nginx-1.18.0]# cd ..
 [root@centos7 mytools]#ls
nginx1180  nginx-1.18.0  nginx-1.18.0.tar.gz
 [root@centos7 mytools]#rm -rf nginx-1.18.0  #删除不必要的解压文件
 [root@centos7 mytools]#ls
nginx1180  nginx-1.18.0.tar.gz
6, 添加一个软连接
 [root@centos7 mytools]# ln -s /mytools/nginx1180/ /mytools/nginx
 [root@centos7 mytools]#ll
total 1016
lrwxrwxrwx 1 root root      19 Aug  3 00:57 nginx -> /mytools/nginx1180/
drwxr-xr-x 6 root root      54 Aug  3 00:45 nginx1180
-rw-r--r-- 1 root root 1039530 Apr 21  2020 nginx-1.18.0.tar.gz
 [root@centos7 mytools]#cd nginx
 [root@centos7 nginx]#pwd
/mytools/nginx
7, 配置nginx环境变量,快捷使用。
 [root@centos7 nginx]#echo 'PATH="$PATH:/mytools/nginx/sbin"' >> /etc/profile
 [root@centos7 nginx]#source /etc/profile #重新加载 /etc/profile 文件中的环境变量,以使其在当前终端会话中生效
3.0 二进制安装mysql
卸载centos存在的mariadb相关的依赖包
 [root@centos7 ~]#rpm -e --nodeps mariadb-libs
  [root@centos7 ~]#rpm -e --nodeps mysql
1,创建普通mysql用户,降低程序运行权限
 [root@centos7 ~]#useradd -s /sbin/nologin mysql
 [root@centos7 ~]#id mysql
uid=1112(mysql) gid=1112(mysql) groups=1112(mysql)
2,下载mysql二进制代码包
wget https://repo.huaweicloud.com/mysql/Downloads/MySQL-5.7/mysql-5.7.33-linux-glibc2.12-x86_64.tar
3,解压缩上传的二进制代码
 [root@centos7 mytools]#tar -xf mysql-5.7.33-linux-glibc2.12-x86_64.tar
 [root@centos7 mytools]#ls
data                                        mysql-test-5.7.33-linux-glibc2.12-x86_64.tar.gz
mysql-5.7.33-linux-glibc2.12-x86_64         nginx
mysql-5.7.33-linux-glibc2.12-x86_64.tar     nginx1180
mysql-5.7.33-linux-glibc2.12-x86_64.tar.gz  nginx-1.18.0.tar.gz
 [root@centos7 mytools]# tar -zxvf  mysql-5.7.33-linux-glibc2.12-x86_64.tar.gz
4,配置软链接
[root@centos7 mytools]#ln -s /mytools/mysql-5.7.33-linux-glibc2.12-x86_64 /mytools/mysql
5,准备启动mysql的配置文件,
 [root@centos7 ~]#vim /etc/my.cnf
 [root@centos7 ~]#cat !$
cat /etc/my.cnf

[mysqld]
basedir=/mytools/mysql
datadir=/mytools/mysql/data
socket=/tmp/mysql.sock
server_id=1
port=3306
log_error=/mytools/mysql/data/mysql_err.log

[mysql]
socket=/tmp/mysql.sock
配置文件解释
根据你提供的代码,这是一个MySQL的配置文件(通常是my.cnf或my.ini)。以下是代码中各个配置项的解释:

1. [mysqld]:这是MySQL服务器的配置段开始标识,用于指定服务器端的配置。

2. basedir=/mytools/mysql/:该配置项指定MySQL的安装目录,即MySQL的根目录。

3. datadir=/mytools/mysql/data:该配置项指定MySQL的数据目录,即存储数据库文件的目录。

4. socket=/tmp/mysgl.sock:该配置项指定MySQL服务器监听的Socket文件路径,用于客户端连接服务器。这里设置的路径是 `/tmp/mysgl.sock`。

5. server_id=l:该配置项是MySQL服务器的唯一标识符。在配置中,将其设置为 `l`,这是一个不合法的值。server_id 应为一个唯一的整数值,用于区分不同的MySQL服务器实例。

6. port=3306:该配置项指定MySQL服务器的监听端口号。默认情况下,MySQL使用3306作为默认端口。

7. log_error=/mytools/mysql/data/mysql_err.log:该配置项指定MySQL错误日志文件的路径,即记录MySQL服务器错误日志的文件位置。

8. [mysql]:这是MySQL客户端的配置段开始标识,用于指定客户端的配置。

9. socket=/tmp/mysql.sock:该配置项指定MySQL客户端连接服务器时使用的Socket文件路径。这里设置的路径是 `/tmp/mysql.sock`。

总结:
配置项包括了MySQL服务器的基本配置,如根目录、数据目录、日志文件路径以及MySQL客户端的配置。需要注意的是,修正了 server_id 的值为一个有效整数后,该配置文件应该能正确解析并使用。
6,初始化mysql服务端
1,卸载系统自带的mariadb的依赖
 [root@centos7 ~]#rpm -e --nodeps mariadb-libs

2,安装msyql所需的依赖环境
 [root@centos7 ~]#yum install -y libaio-devel

3,创建msyql数据文件夹,用于初始化数据和进行权限控制
 [root@centos7 ~]#mkdir -p /mytools/data
 [root@centos7 ~]#chown -R mysql.mysql /mytools/mysql/ #更改
 #初始化
 [root@centos7 mytools]#cd mysql
 [root@centos7 mysql]#  /mytools/mysql/bin/mysqld --initialize-insecure --user=mysql --basedir=/mysql/ --datadir=/mytools/mysql/data/
7,配置mysql客户端
1,编写一个MySQL启动的脚本,定义一个mysqld.service
 [root@centos7 mysql]#vim /etc/systemd/system/mysqld.service
 [root@centos7 mysql]#cat !$
cat /etc/systemd/system/mysqld.service
[Unit]
Description=MySQL server by qianqian
Documentation=man:mysqld(8)
Documentation=http://dev.mysql.com/doc/refman/en/using-systemd.html
After=network.target
After=syslog.target

[Insta11]
WantedBy=multi-user.target

[Service]
User=mysql
Group=mysql
ExecStart=/mytools/mysql/bin/mysqld --defaults-file=/etc/my.cnf
LimitNOFILE=5000
8,启动MySQL服务端口
[root@centos7 mysql]#systemctl start mysqld
 [root@centos7 mysql]#systemctl status mysqld
● mysqld.service - MySQL server by qianqian
   Loaded: loaded (/etc/systemd/system/mysqld.service; static; vendor preset: disabled)
   Active: active (running) since Thu 2023-08-03 07:45:54 CST; 7s ago
     Docs: man:mysqld(8)
           http://dev.mysql.com/doc/refman/en/using-systemd.html
 Main PID: 21719 (mysqld)
    Tasks: 27
   CGroup: /system.slice/mysqld.service
           └─21719 /mytools/mysql/bin/mysqld --defaults-file=/etc/my.cnf

Aug 03 07:45:54 centos7 systemd[1]: Started MySQL server by qianqian.
Aug 03 07:45:54 centos7 systemd[1]: Starting MySQL server by qianqian...
 [root@centos7 mysql]#ps -ef |grep mysql
mysql     21719      1  1 07:45 ?        00:00:00 /mytools/mysql/bin/mysqld --defaults-file=/etc/my.cnf
root      21757  20529  0 07:46 pts/4    00:00:00 grep --color=auto mysql
 [root@centos7 mysql]#
9,登录MySQL数据库
#先启动MySQL服务端,然后才可使用客户端登录
#如果之前装过其他的数据库,可以使用yum直接卸载,不会影响二进制安装

1,配置安装的二进制 mysql PATH 环境变量
/mytools/mysql/bin

/usr/local/sbin:/usr/local/bin:/usr/sbin:/usr/bin:/opt/nginx1180/sbin:/root/bin:/opt/nginx1180/sbin:/mytools/nginx

 [root@centos7 bin]# vim /etc/profile  #删除之前的nginx单独配置的PATH 环境变量,然后追加写入新的环境变量

 [root@centos7 etc]#tail 1 /etc/profile
tail: cannot open ‘1’ for reading: No such file or directory
==> /etc/profile <==
            . "$i"
        else
            . "$i" >/dev/null
        fi
    fi
done

unset i
unset -f pathmunge
PATH="$PATH:/mytools/mysql/bin:/mytools/nginx"
2,重新加载变量文件
 [root@centos7 etc]#source  /etc/profile
 [root@centos7 etc]#echo $PATH #此时查看就配置成功了
/usr/local/sbin:/usr/local/bin:/usr/sbin:/usr/bin:/opt/nginx1180/sbin:/root/bin:/opt/nginx1180/sbin:/mytools/nginx:/opt/nginx1180/sbin:/mytools/mysql/bin:/mytools/nginx

#看到这个就是证明配置了正确的变量
 [root@centos7 mysql]#which mysql
/mytools/mysql/bin/mysql

3,此时就可以登录数据库了
 [root@centos7 mytools]#mysql -uroot -p
Enter password:
Welcome to the MySQL monitor.  Commands end with ; or \g.
Your MySQL connection id is 4
Server version: 5.7.33 MySQL Community Server (GPL)

Copyright (c) 2000, 2021, Oracle and/or its affiliates.

Oracle is a registered trademark of Oracle Corporation and/or its
affiliates. Other names may be trademarks of their respective
owners.

Type 'help;' or '\h' for help. Type '\c' to clear the current input statement.

mysql> show databases;
+--------------------+
| Database           |
+--------------------+
| information_schema |
| mysql              |
| performance_schema |
| sys                |
+--------------------+
4 rows in set (0.00 sec)

mysql> CREATE DATABASE `qianqian` CHARACTER SET utf8 COLLATE utf8_general_ci;
Query OK, 1 row affected (0.00 sec)

mysql> show databases;
+--------------------+
| Database           |
+--------------------+
| information_schema |
| mysql              |
| performance_schema |
| qianqian           |
| sys                |
+--------------------+
5 rows in set (0.00 sec)

mysql> use qianqian
Database changed
mysql>
10,修改数据库密码
# 法1:直接修改密码
 [root@centos7 mytools]#mysqladmin -u root password '000000'
mysqladmin: [Warning] Using a password on the command line interface can be insecure.
Warning: Since password will be sent to server in plain text, use ssl connection to ensure password safety.

#法2:跑安全脚本
mysql_secure_installation

#法3:进入mysql修改密码
ALTER USER 'root'@'localhost' IDENTIFIED WITH mysql_native_password BY '000000';

##刷新权限
FLUSH PRIVILEGES;
4.0 编译部署php
1,检查nginx和msyql的安装和启动
 [root@centos7 ~]#  ps -ef |grep nginx
root       2634      1  0 Aug02 ?        00:00:00 nginx: master process nginx
nobody     9806   2634  0 03:06 ?        00:00:00 nginx: worker process
root      22851  22674  0 12:27 pts/6    00:00:00 grep --color=auto nginx
 [root@centos7 ~]#  ps -ef |grep mysql
mysql     21973      1  0 11:55 ?        00:00:01 /mytools/mysql/bin/mysqld --defaults-file=/etc/my.cnf
root      22114  20492  0 12:05 pts/3    00:00:00 mysql_secure_installation
root      22861  22674  0 12:28 pts/6    00:00:00 grep --color=auto mysql
2,安装php需要的依赖环境
1,yum安装一些依赖环境

yum install gcc gcc-c++ make zlib-devel libxml2-devel libjpeg-devel libjpeg-turbo-devel  freetype-devel libpng-devel gd-devel libcurl-devel libxslt-devel libxslt-devel -y
2,编译安装libiconv
cd /mytools/

wget https://mirrors.aliyun.com/gnu/libiconv/libiconv-1.15.tar.gz?spm=a2c6h.25603864.0.0.61d71c36ue4huA

tar -zxvf libiconv-1.15.tar.gz\?spm\=a2c6h.25603864.0.0.61d71c36byoslU   #解压缩文件

 cd libiconv-1.15/

 ./configure --prefix=/mytools/libiconv  #指定安装路径为 `/mytools/libiconv`

  [root@centos7 libiconv-1.15]#echo $?  #返回值为 0  说明编译安装时正确的
0

make && make isntall
3,编译安装php程序
1,下载源代码
#还是自己下载完后传到服务器吧。
wget https://www.php.net/distributions/php-7.3.5.tar.gz

2,解压缩
tar -zxvf php-7.3.5.tar.gz

3,编译安装
cd php-7.3.5/
./configure --prefix=/mytools/php7.3.5 \
--enable-mysqlnd \
--with-mysqli=mysqlnd \
--with-pdo-mysql=mysqlnd \
--with-iconv-dir=/mytools/libiconv \
--with-freetype-dir \
--with-jpeg-dir \
--with-png-dir \
--with-zlib \
--with-libxml-dir=/usr \
--enable-xml \
-disable-rpath \
--enable-bcmath \
--enable-shmop \
--enable-sysvsem \
--enable-inline-optimization \
--with-curl \
--enable-mbregex \
--enable-fpm \
--enable-mbstring \
--with-gd \
--with-openssl \
--with-mhash \
--enable-pcntl \
--enable-sockets \
--with-xmlrpc \
--enable-soap \
--enable-short-tags \
--enable-static \
--with-xsl \
--with-fpm-user=nginx \
--with-fpm-group=nginx \
--enable-ftp \
--enable-opcache=no
部分解释

--prefix=/mytools/php7.3.5:指定 PHP 的安装路径为/mytools/php7.3.5。这意味着编译完成后的 PHP 可执行文件以及相关的库文件将被安装到这个目录下。

--enable-mysqlnd:启用 MySQL Native Driver(mysqlnd),mysqlnd 是 PHP 的一个 MySQL 数据库的驱动器,可以提供更好的性能和功能。启用这个选项后,PHP 将与 mysqlnd 兼容,并使用它来连接 MySQL 数据库。

--with-mysqli=mysqlnd:为 mysqli 扩展配置 MySQL Native Driver。mysqli 是 PHP 的一个扩展,用于与 MySQL 数据库进行交互。这个选项指定了 mysqli 扩展将使用 mysqlnd 驱动。

--with-pdo-mysql=mysqlnd:为 PDO MySQL 驱动配置 MySQL Native Driver。PDO (PHP Data Objects) 是 PHP 的一个数据库抽象层,用于与各种类型的数据库进行交互。这个选项指定了 PDO MySQL 驱动将使用 mysqlnd 驱动。

--with-iconv-dir=/mytools/libiconv:指定 iconv 库的安装路径为/mytools/libiconv。iconv 是一个用于字符编码转换的库,PHP 中的 iconv 扩展依赖于它。这个选项告诉 PHP 在编译时使用指定路径下的 iconv 库。
无报错即是安装成功
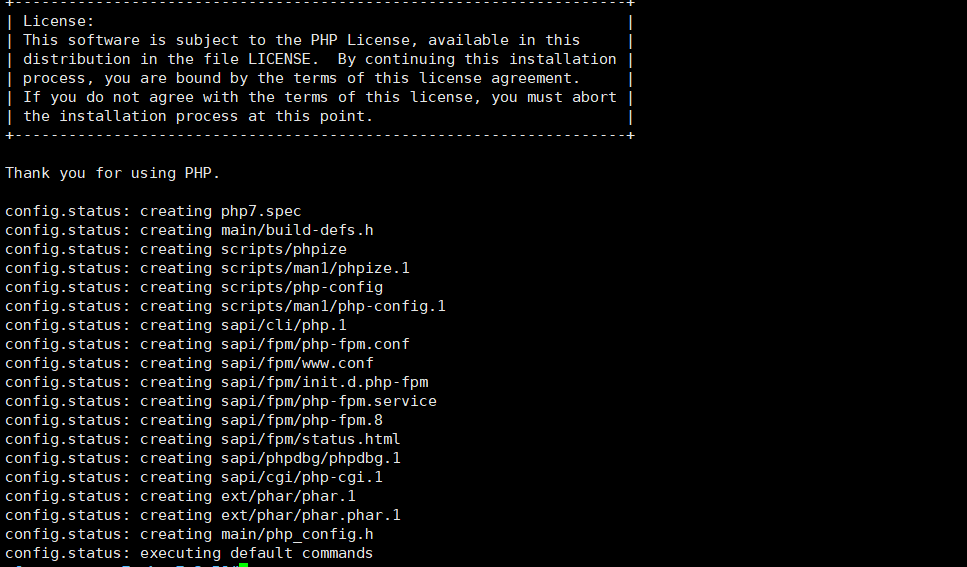
4,使用make命令编译源代码,使用make install命令将编译生成的文件安装到指定目录
make && make install
无报错安装成功
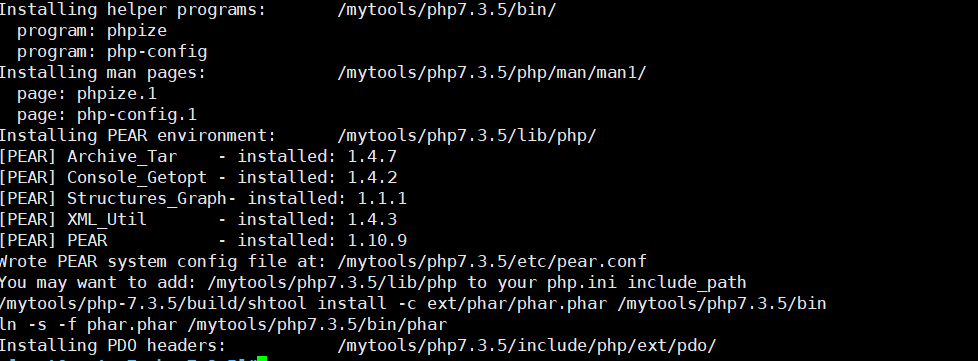
[root@centos7 php-7.3.5]#echo $?  #检测安装成功
0
4,php配置文件处理
1,查看当前的配置文件模板的源码目录,在`解压`的目录下。
[root@centos7 php-7.3.5]#ls php.ini*
php.ini-development php.ini-production
[root@centos7 php-7.3.5]#pwd
/mytools/php-7.3.5
[root@centos7 php-7.3.5]#
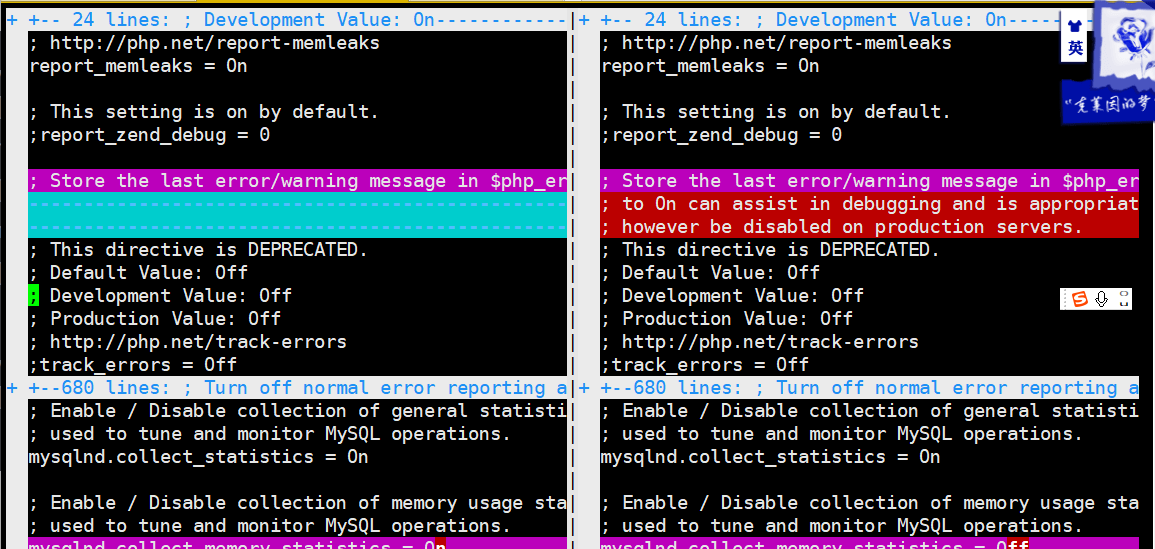
# 比较生产模式和开发模式的区别
[root@centos7 php-7.3.5]#vimdiff php.ini-development php.ini-production
2 files to edit
效果,高亮即表示文件不一样的地方。
2,拷贝该配置文件到php的`编译安装`目录下
 [root@centos7 php-7.3.5]# cp php.ini-development /mytools/php7.3.5/lib/php.ini
5,FASTCGI配置文件处理
1,检查`FASTCGI`的默认配置文件
 [root@centos7 php-7.3.5]#cd ../php7.3.5/
 [root@centos7 php7.3.5]#ls
bin  etc  include  lib  php  sbin  var
 [root@centos7 php7.3.5]#cd etc/
 [root@centos7 etc]#ls
pear.conf  php-fpm.conf.default  php-fpm.d
 [root@centos7 etc]#pwd
/mytools/php7.3.5/etc

2,拷贝模板配置文件生成新的php配置文件
 [root@centos7 etc]#cp php-fpm.conf.default php-fpm.conf
 [root@centos7 etc]#ls
pear.conf  php-fpm.conf  php-fpm.conf.default  php-fpm.d
 [root@centos7 etc]#cd php-fpm.d/
 [root@centos7 php-fpm.d]#ls
www.conf.default
 [root@centos7 php-fpm.d]#cp www.conf.default www.conf
6,启动php服务,指定以fastcgi形式
#用绝对路径启动环境变量
 [root@centos7 sbin]#pwd
 /mytools/php7.3.5/sbin
 [root@centos7 sbin]#ls
php-fpm
 [root@centos7 sbin]#/mytools/php7.3.5/sbin/php-fpm
#查看运行状态
 [root@centos7 sbin]#netstat -tnulp |grep php
tcp        0      0 127.0.0.1:9000          0.0.0.0:*               LISTEN      89198/php-fpm: mast
 [root@centos7 sbin]#ps -ef |grep php
root      89198      1  0 15:09 ?        00:00:00 php-fpm: master process (/mytools/php7.3.5/etc/php-fpm.conf)
nginx     89199  89198  0 15:09 ?        00:00:00 php-fpm: pool www
nginx     89200  89198  0 15:09 ?        00:00:00 php-fpm: pool www
root      89229  22674  0 15:11 pts/6    00:00:00 grep --color=auto php
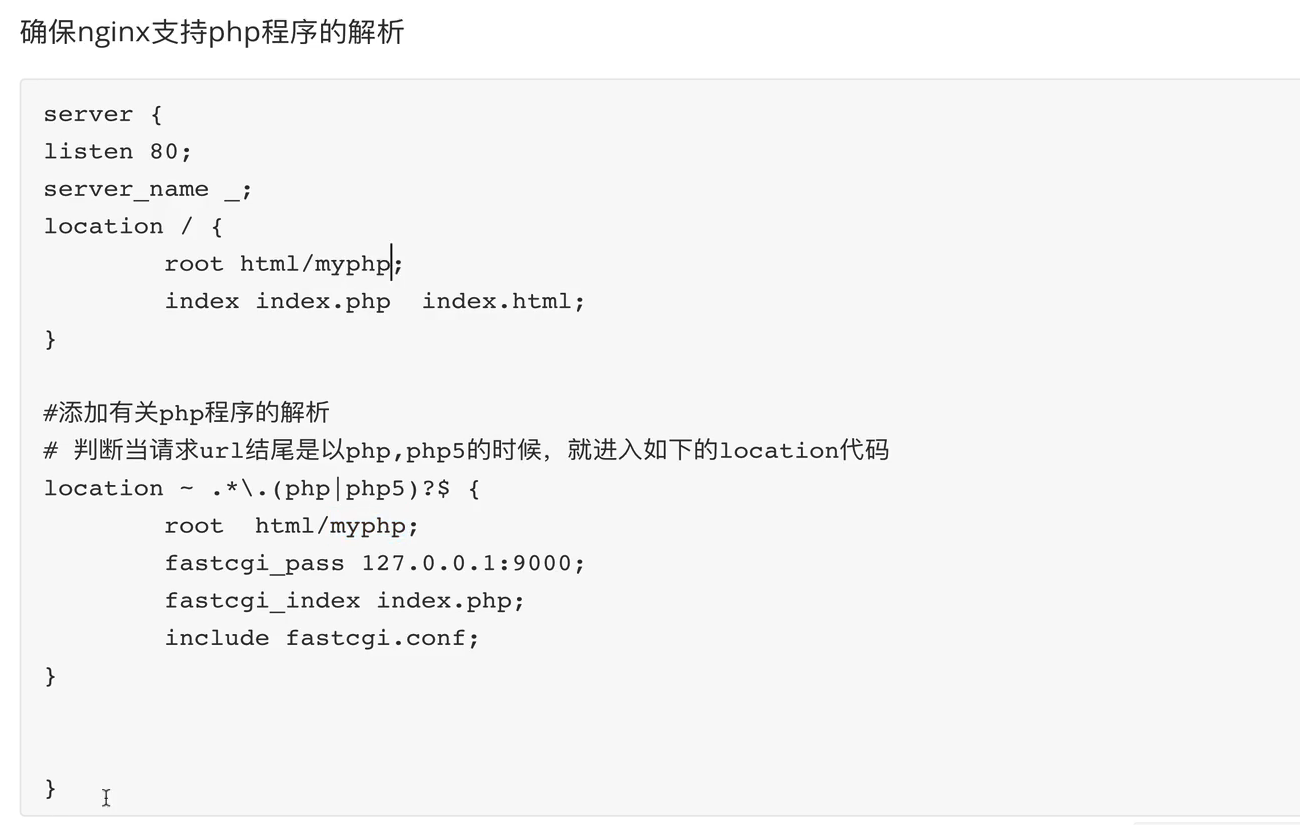
7,修改nginx支持php代码
 [root@centos7 sbin]#vim /mytools/nginx/conf/nginx.conf
 #删除了一些参数以及注释。也补充了include参数。
 [root@centos7 sbin]#cat /mytools/nginx/conf/nginx.conf

#user  nobody;
worker_processes  1;

#error_log  logs/error.log;
#error_log  logs/error.log  notice;
#error_log  logs/error.log  info;
#pid        logs/nginx.pid;


events {
    worker_connections  1024;
}


http {
    include       mime.types;
    default_type  application/octet-stream;
    sendfile    on;

    #keepalive_timeout  0;
    keepalive_timeout  65;

    #gzip on;
include extra/my_php.conf;

}
8,网页文件配置
 [root@centos7 sbin]#cd /mytools/nginx/conf/
 [root@centos7 conf]#mkdir extra
 [root@centos7 conf]#cd extra
 [root@centos7 extra]#vim my_php.conf
 [root@centos7 extra]#cat my_php.conf
server{
    listen 80;
    server_name _;
    location / {
        root html;
        index index.html;
    }
    #判断当请求的url的结尾是以 `.php` 或者 `.php5`  的时候,就进入如下的location
    location ~ .*\.(php|php5)?$ {
        root html/myphp;
        fastcgi_pass 127.0.0.1:9000;
        fastcgi_index index.php;
        include fastcgi.conf;
    }
}

9,检查配置文件语法和重读写
 [root@centos7 mytools]#nginx -t
nginx: the configuration file /opt/nginx1180/conf/nginx.conf syntax is ok
nginx: configuration file /opt/nginx1180/conf/nginx.conf test is successful
 [root@centos7 mytools]#nginx -s reload
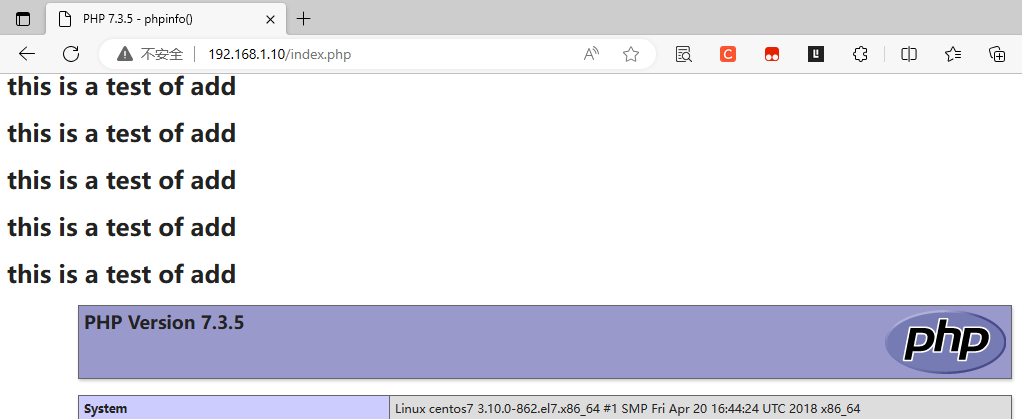
10,检查php首页脚本文件
[root@centos7 extra]# mkdir -p /mytools/nginx/html/myphp
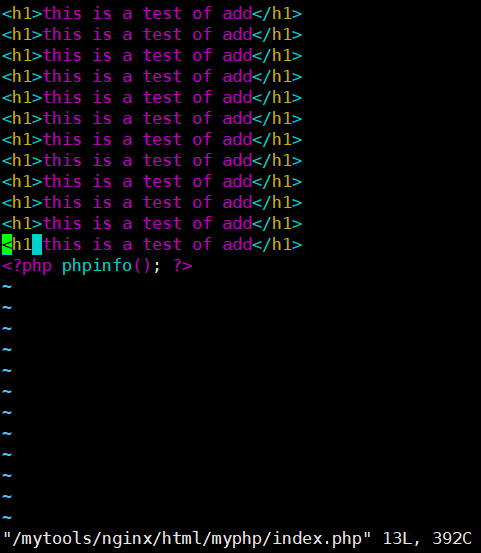
[root@centos7 extra]# echo "<?php phpinfo(); ?>" > /mytools/nginx/html/myphp/index.php
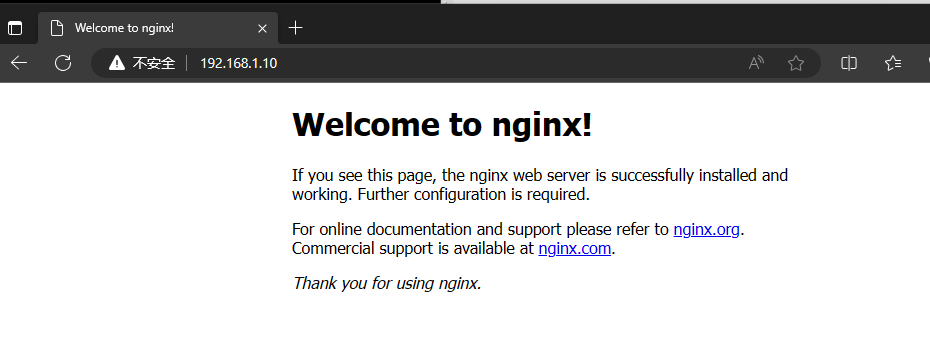
11,测试lnmp 的结合关系
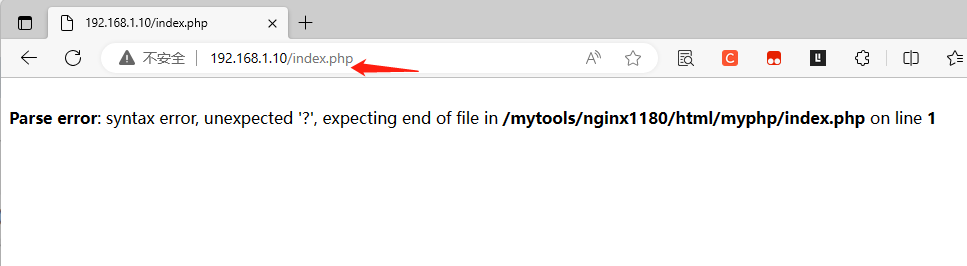
添加一些内容测试下

模式测试502 服务器宕机,停止该服务

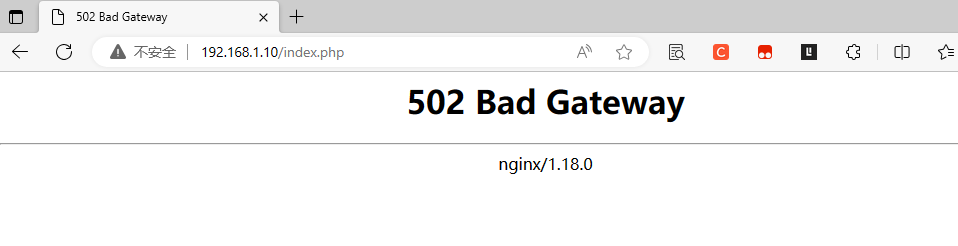
将服务重新启动就恢复了
/mytools/php7.3.5/sbin/php-fpm
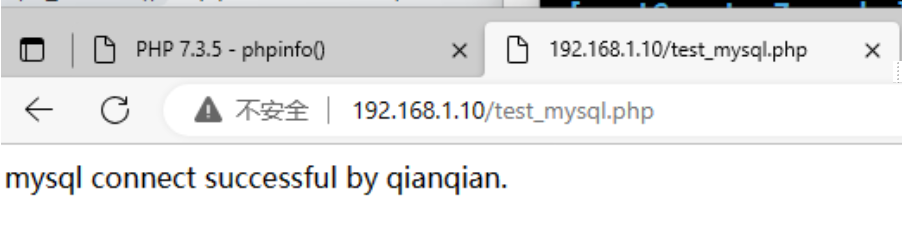
4.1 测试php访问mysql
编写php脚本代码,直接在网页中访问即可
 [root@centos7 myphp]#pwd
/mytools/nginx/html/myphp
 [root@centos7 myphp]#ls
index.php  test_mysql.php
 [root@centos7 myphp]#cat test_mysql.php
脚本内容
<?php
    $link_id=mysqli_connect('localhost','root','000000') or mysql_error();
if($link_id){

    echo "mysql connect successful by qianqian.\n";
}else {
    echo mysql_error();
}
    ?>
#代码解释
具体来说,这段代码完成以下几个步骤:

1,调用 mysqli_connect() 函数尝试连接到 MySQL 数据库。它接受三个参数:主机名('localhost'),用户名('root')和密码('000000')。连接操作通过 \$link_id 变量进行处理。
2,使用逻辑运算符 or 来判断连接是否成功。如果 mysqli_connect() 返回 true(表示连接成功),则会执行连接成功的代码块。
3,如果连接成功,输出字符串 "mysql connect successful by qianqian.\n",其中 'qianqian' 是作者留下的注释。
4,如果连接失败,则执行连接失败的代码块。
访问成功
访问失败测试
#停掉mysql服务
systemctl stop mysqld

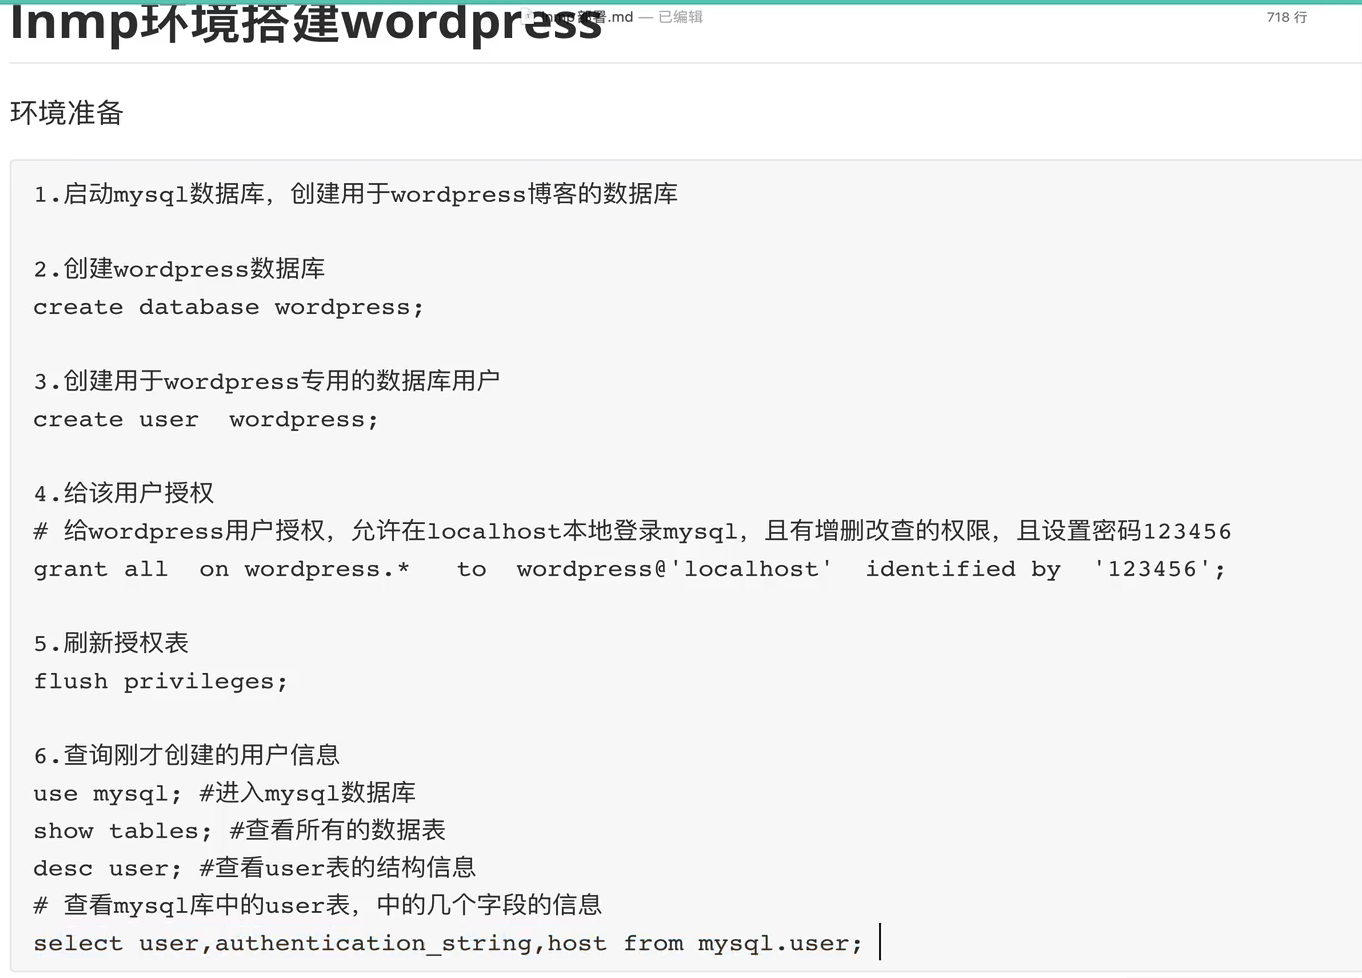
5.0 wordpress


 浙公网安备 33010602011771号