tomcat用做图片服务器
最近做了个小网站,就是用tinyce富文本编辑器,https://www.511easy.com/ 保持字体排版和图片
发现博客园的图片,一天之后就无法显示
就想着自己做一个图片服务器,上传图片到指定的目录,然后返回新的访问地址
上传图片的接口很容易,很快就写好了
package com.example.demo.service;

import org.springframework.beans.factory.annotation.Value;
import org.springframework.core.io.FileSystemResource;
import org.springframework.stereotype.Service;
import org.springframework.web.multipart.MultipartFile;

import java.io.File;
import java.io.IOException;
import java.util.UUID;

@Service
public class ImageServiceImpl implements ImageService {

    @Value("${pic-path}")
    private String save_path;


    @Override
    public String uploadImg(MultipartFile file) throws IOException {

        String path = null;// 文件路径
        double fileSize = file.getSize();
        System.out.println("文件的大小是" + fileSize);

        byte[] sizebyte = new byte[0];
        try {
            sizebyte = file.getBytes();
        } catch (IOException e) {
            e.printStackTrace();
        }
        System.out.println("文件的byte大小是" + sizebyte.toString());


        if (file != null) {// 判断上传的文件是否为空
            String type = null;// 文件类型
            String fileName = file.getOriginalFilename();// 文件原名称
            String newName= UUID.randomUUID().toString();
            System.out.println("上传的文件原名称:" + fileName);
            // 判断文件类型
            type = fileName.indexOf(".") != -1 ? fileName.substring(fileName.lastIndexOf(".") + 1, fileName.length()) : null;
            if (type != null) {// 判断文件类型是否为空

                if ("GIF".equals(type.toUpperCase()) || "PNG".equals(type.toUpperCase()) || "JPG".equals(type.toUpperCase())) {

                    // 项目在容器中实际发布运行的根路径
                    //String realPath = request.getSession().getServletContext().getRealPath("/");
                    // 自定义的文件名称
                    //String trueFileName = String.valueOf(System.currentTimeMillis()) + "." + type;
                    // 设置存放图片文件的路径

                    path = save_path + newName+"."+type;
                    System.out.println("存放图片文件的路径:" + path);

                    // 转存文件到指定的路径
                    file.transferTo(new File(path));
                    System.out.println("文件成功上传到指定目录下");


                    String imagePath = path;
                    FileSystemResource avatar = new FileSystemResource(imagePath);
                    return avatar.toString();

                    //return "文件成功上传到指定目录下";
                }

            } else {
                System.out.println("不是我们想要的文件类型,请按要求重新上传");
                return "不是我们想要的文件类型,请按要求重新上传";
            }
        } else {
            System.out.println("文件类型为空");
            return "文件类型为空";
        }

        return "已经成功上传到指定目录";
    }

}
读取图片并显示,就非常累,想用InputStream流读取,之后在用html接收,发现这样真麻烦
问过高人,高人指点用tomcat做图片服务器啊,指定访问的path就ok
自己试了一下,完全ok
下面是步骤:
1. 本地总要安装jdk,配置java_home
2. 下载tomcat,配置conf目录下的server.xml
<Context path="/img" docBase="C:/pic" reloadable="false"></Context>  就是我指定的访问的路径,访问ip:port后的img目录下的图片名称
C:/pic是指定服务器的目录
这边的端口,我用了8051
<?xml version="1.0" encoding="UTF-8"?>

<Server port="8005" shutdown="SHUTDOWN">
  <Listener className="org.apache.catalina.startup.VersionLoggerListener" />

  <!--APR library loader. Documentation at /docs/apr.html -->
  <Listener className="org.apache.catalina.core.AprLifecycleListener" SSLEngine="on" />
  <!-- Prevent memory leaks due to use of particular java/javax APIs-->
  <Listener className="org.apache.catalina.core.JreMemoryLeakPreventionListener" />
  <Listener className="org.apache.catalina.mbeans.GlobalResourcesLifecycleListener" />
  <Listener className="org.apache.catalina.core.ThreadLocalLeakPreventionListener" />


  <GlobalNamingResources>
    <Resource name="UserDatabase" auth="Container"
              type="org.apache.catalina.UserDatabase"
              description="User database that can be updated and saved"
              factory="org.apache.catalina.users.MemoryUserDatabaseFactory"
              pathname="conf/tomcat-users.xml" />
  </GlobalNamingResources>


  <Service name="Catalina">
    <Connector port="8051" protocol="HTTP/1.1"
               connectionTimeout="20000"
               redirectPort="8444" />

    <!-- Define an AJP 1.3 Connector on port 8009 -->
    <Connector port="8009" protocol="AJP/1.3" redirectPort="8443" />
    <Engine name="Catalina" defaultHost="localhost">
      <Realm className="org.apache.catalina.realm.LockOutRealm">
        <Realm className="org.apache.catalina.realm.UserDatabaseRealm"
               resourceName="UserDatabase"/>
      </Realm>

      <Host name="localhost"  appBase="webapps"
            unpackWARs="true" autoDeploy="true">

	<Context path="/img" docBase="C:/pic" reloadable="false"></Context>

        <Valve className="org.apache.catalina.valves.AccessLogValve" directory="logs"
               prefix="localhost_access_log" suffix=".txt"
               pattern="%h %l %u %t "%r" %s %b" />

      </Host>
    </Engine>
  </Service>
</Server>
3. 启动tomcat
我是在windows下启动的,进入bin目录下,点击startup.bat即可
遇到的问题,我在本地OK,在远程windows上一样启动失败,发现远程window上点击startup.bat总是闪退,也看不到日志
之后首先要知道是什么原因,闪退,用cmd命令行启动startup.bat,报错java_home不存在,其实该机器安装了JDK,只是现在很多应用能直接用,就没有配置路径
然后系统变量里面配置JDK,之后再次运行就成功了
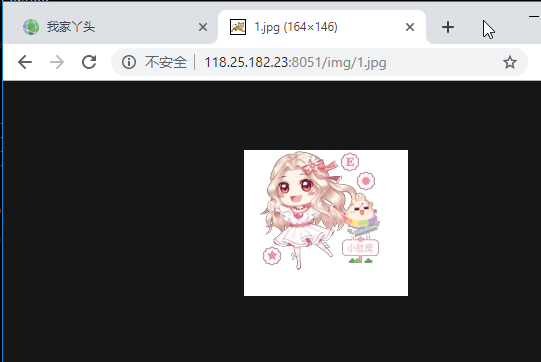
http://118.25.182.23:8051/img/1.jpg

4. 上述的启动,不能关闭启动的tomcat,并且电脑关机不能自动开启tomcat服务
这个时候用bin目录下的执行 service.bat install
看到提示Tomcat9 has been installed
这个时候开启服务即可后台运行 net start Tomcat9
重启自动运行,到services.msc中找到对应的Apache Tomcat,将服务设置为自动即可
 ------------------------- A little Progress a day makes you a big success... ----------------------------


