

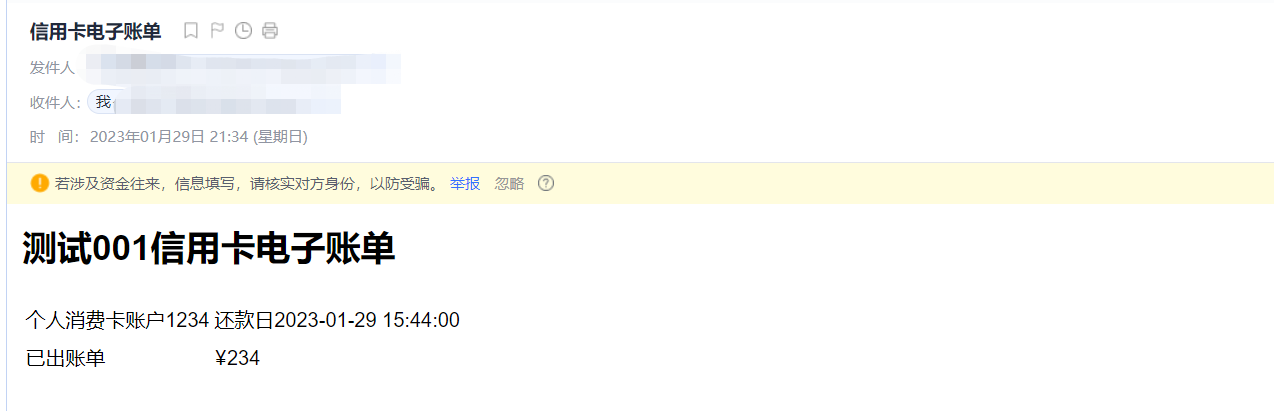
springboot实现邮件发送功能
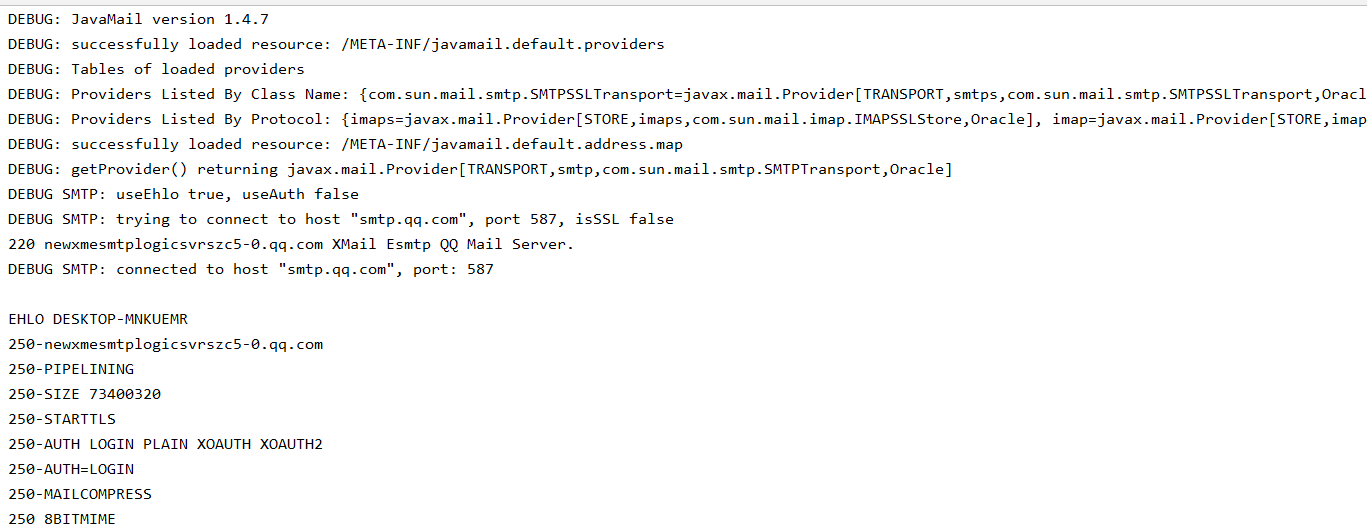
本想使用网易,结果使用465端口尝试了半天,老是提示无法连接,后面说是要开通vip,果断放弃,本次教程使用是qq邮箱,端口号是587,之所以这样是阿里云服务器无法使用25端口发送邮件了
废话不多说直接贴效果图
邮件发送的日志打印
pom文件
1 2 3 4 5 6 7 8 9 10 11 12 13 14 15 16 17 18 19 20 21 22 23 24 25 26 27 28 29 30 31 32 33 | <!--引入junit单元测试依赖--> <dependency> <groupId>junit</groupId> <artifactId>junit</artifactId> <version>4.12</version> </dependency> <dependency> <groupId>org.springframework.boot</groupId> <artifactId>spring-boot-starter</artifactId> </dependency> <dependency> <groupId>org.springframework.boot</groupId> <artifactId>spring-boot-starter-test</artifactId> <scope>test</scope> </dependency> <!--下面是springboot实现邮件发送的相关依赖--> <!--springboot整合邮件发送--> <dependency> <groupId>org.springframework.boot</groupId> <artifactId>spring-boot-starter-mail</artifactId> </dependency> <!--引入thymeleaf依赖--> <dependency> <groupId>org.springframework.boot</groupId> <artifactId>spring-boot-starter-thymeleaf</artifactId> </dependency> <!--添加fastjson依赖--> <dependency> <groupId>com.alibaba</groupId> <artifactId>fastjson</artifactId> <version>1.2.70</version> </dependency> |
springboot使用的版本
1 2 3 4 5 6 | <parent> <groupId>org.springframework.boot</groupId> <artifactId>spring-boot-starter-parent</artifactId> <version>2.5.0</version> <relativePath/> </parent> |
配置文件
1 2 3 4 5 6 7 8 9 10 | server.port=8081spring.mail.host=smtp.qq.comspring.mail.port=587spring.mail.username=123@qq.comspring.mail.password=123spring.mail.default-encoding=UTF-8spring.mail.properties.mail.smtp.socketFactoryClass=javax.net.ssl.SSLSocketFactoryspring.mail.properties.mail.debug=true |
1 2 3 4 5 6 7 8 9 10 11 12 13 14 15 16 17 18 19 20 21 22 23 24 25 | package com.mail.service;import com.alibaba.fastjson.JSONObject;/** * @Description: * @Author: Yourheart * @Create: 2023/1/29 15:35 */public interface MailService { /** * 邮件发送 * @param title * @param content * @param targetAddress */ void sendEmail(String title,String content,String targetAddress); /** * 使用thymeleaf的形式发送邮件 * @param jsonObject */ void sendThymeleafMail(JSONObject jsonObject);} |
1 2 3 4 5 6 7 8 9 10 11 12 13 14 15 16 17 18 19 20 21 22 23 24 25 26 27 28 29 30 31 32 33 34 35 36 37 38 39 40 41 42 43 44 45 46 47 48 49 50 51 52 53 54 55 56 57 58 59 60 61 62 63 64 65 66 67 68 69 70 71 72 73 74 75 76 77 78 79 80 81 82 83 84 85 | package com.mail.service.impl;import com.alibaba.fastjson.JSONObject;import com.mail.service.MailService;import lombok.extern.slf4j.Slf4j;import org.springframework.beans.factory.annotation.Autowired;import org.springframework.beans.factory.annotation.Value;import org.springframework.mail.SimpleMailMessage;import org.springframework.mail.javamail.JavaMailSender;import org.springframework.mail.javamail.MimeMessageHelper;import org.springframework.stereotype.Service;import org.thymeleaf.context.Context;import org.thymeleaf.spring5.SpringTemplateEngine;import javax.mail.MessagingException;import javax.mail.internet.MimeMessage;import java.util.Date;/** * @Description: * @Author: Yourheart * @Create: 2023/1/29 15:36 */@Service@Slf4jpublic class UniversalServiceImpl implements MailService { @Autowired private JavaMailSender javaMailSender; @Autowired private SpringTemplateEngine templateEngine; @Value("${spring.mail.username}") private String fromMail; /** * 邮件发送 * * @param title * @param content * @param targetAddress */ @Override public void sendEmail(String title, String content, String targetAddress) { SimpleMailMessage msg = new SimpleMailMessage(); //构建一个邮件对象 msg.setSubject(title); // 设置邮件主题 msg.setFrom(fromMail); // 设置邮箱发送者 msg.setTo(targetAddress); // 设置邮件接收者,可以有多个接收者 msg.setSentDate(new Date()); // 设置邮件发送日期 msg.setText(content); // 设置邮件的正文 javaMailSender.send(msg); } /** * 使用thymeleaf的形式发送邮件 * * @param jsonObject */ @Override public void sendThymeleafMail(JSONObject jsonObject) { try { MimeMessage mimeMessage = javaMailSender.createMimeMessage(); MimeMessageHelper helper = new MimeMessageHelper(mimeMessage,true); helper.setSubject(jsonObject.getString("title")); helper.setFrom(fromMail); helper.setTo(jsonObject.getString("toAddress")); helper.setSentDate(new Date()); Context context = new Context(); context.setVariable("bankName",jsonObject.getString("bankName")); context.setVariable("endCard",jsonObject.getString("endCard")); context.setVariable("times",jsonObject.getString("times")); context.setVariable("TheAmountOf",jsonObject.getString("TheAmountOf")); String process = templateEngine.process("mail.html",context); helper.setText(process,true); javaMailSender.send(mimeMessage); } catch (MessagingException e) { e.printStackTrace(); } }} |
测试类
1 2 3 4 5 6 7 8 9 10 11 12 13 14 15 16 17 18 19 20 21 22 23 24 25 26 27 28 29 30 31 32 33 34 35 36 37 38 39 40 | package com.mail;import com.alibaba.fastjson.JSONObject;import com.mail.entity.MimeMessageDTO;import com.mail.service.MailService;import com.mail.service.SendMailsService;import lombok.Data;import lombok.extern.slf4j.Slf4j;import org.junit.Test;import org.junit.runner.RunWith;import org.springframework.beans.factory.annotation.Autowired;import org.springframework.boot.test.context.SpringBootTest;import org.springframework.test.context.junit4.SpringRunner;import java.util.Date;import static org.junit.Assert.*;@RunWith(SpringRunner.class)@SpringBootTest@Slf4jpublic class MailApplicationTest { @Autowired private MailService mailService; @Test public void test(){ //开始邮件发送 JSONObject jsonObject=new JSONObject(); jsonObject.put("title","信用卡电子账单"); jsonObject.put("toAddress","18852782003@163.com"); jsonObject.put("bankName","测试001"); jsonObject.put("endCard","1234"); jsonObject.put("times","2023-01-29 15:44:00"); jsonObject.put("TheAmountOf","234"); mailService.sendThymeleafMail(jsonObject); }} |
同时使用了页面
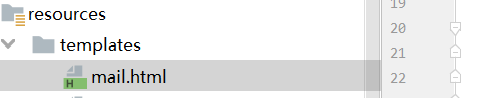
mail.html前端代码
1 2 3 4 5 6 7 8 9 10 11 12 13 14 15 16 17 18 19 20 21 22 23 24 25 26 27 | <!DOCTYPE html><html lang="zh-CN" xmlns:th="http://www.thymeleaf.org"><head> <meta charset="UTF-8"> <title>Thymeleaf邮件模板</title> <meta name="viewport" content="width=device-width, initial-scale=1"> <link href="https://cdn.staticfile.org/twitter-bootstrap/3.3.7/css/bootstrap.min.css" rel="stylesheet"></head><body><div class="container"> <h1><span th:text="${bankName}"></span>信用卡电子账单</h1> <table class="table"> <tr> <td>个人消费卡账户<span th:text="${endCard}"></span></td> <td>还款日<span th:text="${times}"></span></td> </tr> <tr> <td>已出账单</td> <td>¥<span th:text="${TheAmountOf}"></span> </td> </tr> </table></div></body></html> |
以上是全部代码
标签:
邮件


【推荐】国内首个AI IDE,深度理解中文开发场景,立即下载体验Trae
【推荐】编程新体验,更懂你的AI,立即体验豆包MarsCode编程助手
【推荐】抖音旗下AI助手豆包,你的智能百科全书,全免费不限次数
【推荐】轻量又高性能的 SSH 工具 IShell:AI 加持,快人一步
· 阿里最新开源QwQ-32B,效果媲美deepseek-r1满血版,部署成本又又又降低了!
· 开源Multi-agent AI智能体框架aevatar.ai,欢迎大家贡献代码
· Manus重磅发布:全球首款通用AI代理技术深度解析与实战指南
· 被坑几百块钱后,我竟然真的恢复了删除的微信聊天记录!
· AI技术革命,工作效率10个最佳AI工具