
tensorflow.物体识别_资料20200113(英文的6步[step]教程)
1、TensorFlow物体识别——通过机器学习搭建属于自己的物体识别库_迷途无归的博客-CSDN博客.html(https://blog.csdn.net/qq_27297393/article/details/80557294)
Python Programming Tutorials.html(https://pythonprogramming.net/search/?q=Tensorflow+Object+Detection+API+Tutorial)
Python Programming Tutorials.html
Part 1、(https://pythonprogramming.net/introduction-use-tensorflow-object-detection-api-tutorial/)
ZC:照着步骤做,例子 演示了一下 物体检测(狗)的 操作步骤 和 效果
Part 2、(https://pythonprogramming.net/video-tensorflow-object-detection-api-tutorial/)
ZC:比上一个例子 更进一步:在图片中进行物体检测 ==> 在摄像头视频数据中进行物体检测
ZC:大概是 python调用OpenCV 用已经训练好的模型(ckpt) 进行视频中的物体检测。没有仔细看,也没有跟着弄...
Part 3、(https://pythonprogramming.net/custom-objects-tracking-tensorflow-object-detection-api-tutorial/)
ZC:制作 tfrecord文件的准备工作,给每个图片制作标签,然后 分类 "训练"&"测试"
ZC:作者 预制作的 文件:object-detection-macaroni.zip,应该可以直接使用它来进行下一步操作
Part 4、(https://pythonprogramming.net/creating-tfrecord-files-tensorflow-object-detection-api-tutorial/)
ZC:制作 tfrecord文件
ZC:上一篇文章 作者提供的 object-detection-macaroni.zip,貌似里面没有 csv文件,只提供了 jpg&xml文件
我将 G:\Tensorflow_dataset\raccoon_dataset\xml_to_csv.py文件 复制了一份,取名为 xml_to_csv__zz.py 并修改内容,将 原来的 images文件夹 改名为images_bakByZC_20200115,将上一篇作者提供的images文件夹复制过来。
将原来的文件夹data改名为data_bakByZC_20200115,新建一个 data文件夹;将原来的文件夹training改名为training_bakByZC_20200115,新建一个 training文件夹;
执行了 xml_to_csv__zz.py之后,data文件夹中出现了2个文件:test_labels.csv 和 train_labels.csv。
ZC:我把 "G:\TensorFlow_ZZ\models_copy\research\object_detection"复制了一份,并命名为"object_detection_zc_macncheese",将"G:\TensorFlow_ZZ\models_copy\research\setup.py"也复制了一份 并命名为"setup_zc_macncheese.py"(并且将文件中的"object_detection"都改成了"object_detection_zc_macncheese")
CMD中执行:“set path=%path%;"G:\TensorFlow_ZZ\models_copy\research\slim"”
G:\Tensorflow_dataset\raccoon_dataset>python generate_tfrecord__zz.py --csv_input=data/train_labels.csv --output_path=data/train.record --image_dir=images/
G:\Tensorflow_dataset\raccoon_dataset>python generate_tfrecord__zz.py --csv_input=data/test_labels.csv --output_path=data/test.record --image_dir=images/
(PS:文章上也说到了,现在的python,上面的命令 要加" --image_dir=images/",我也遇到了这个问题,不加这个的时候,python进程会报错 导致 record文件生成不成功...)
Part 5、(https://pythonprogramming.net/training-custom-objects-tensorflow-object-detection-api-tutorial/)
ZC:文件夹"data" 我在"G:\Tensorflow_dataset\raccoon_dataset"中复制了一份并改名为"data_zc",然后Copy到"G:\TensorFlow_ZZ\models_copy\research\object_detection_zc_macncheese"中
ZC:文件夹"training" 我在"G:\Tensorflow_dataset\raccoon_dataset"中复制了一份并改名为"training_zc",然后Copy到"G:\TensorFlow_ZZ\models_copy\research\object_detection_zc_macncheese"中
ZC:train.py找不到,可以度娘一下,新版已经改成 model_main.py 了...[ (1条消息)Tensorflow object detection api没有train.py_weixin_43713682的博客-CSDN博客.html(https://blog.csdn.net/weixin_43713682/article/details/84138134) ]
百度了很久才发现新版的train.py换成了model_main.py,同时命令也有一点不同:
python object_detection/model_main.py \
–pipeline_config_path=object_detection/train/ssd_mobilenet_v1_coco.config \ #配置文件路径
–model_dir=object_detection/training \ #保存训练模型路径
–num_train_steps=50000 \ #设置训练步数50000
–num_eval_steps=2000 \ #设置评估步数2000
–alsologtostderr
注:使用新版api训练模型的时候可能会出现terminal卡住的情况,不过不要紧可以去tensorboard里面观察训练情况。
希望可以帮助到刚开始学习的朋友
具体教程链接:https://blog.csdn.net/dy_guox/article/details/79111949
ZC:python3 train.py --logtostderr --train_dir=training/ --pipeline_config_path=training/ssd_mobilenet_v1_pets.config (文章中的命令)
ZC:python model_main.py --alsologtostderr --model_dir=training_zc/ --pipeline_config_path=training_zc/ssd_mobilenet_v1_pets.config (我的命令,执行命令的路径为:"G:\TensorFlow_ZZ\models_copy\research\object_detection_zc_macncheese")
ZC:tensorboard 查看:tensorboard --logdir=G:\TensorFlow_ZZ\models_copy\research\object_detection_zc_macncheese\training_zc (文章中也说了,tensorboard确实是看保存训练模型路径)
ZC:SH的python路径(x64): set path=%path%;"C:\Program Files\Python37\Scripts\";"C:\Program Files\Python37\"
ZC:将训练的 .ckpt 打包成 pb文件 等
2、"Part 4"里面
2.1、
其中的“protoc object_detection/protos/*.proto --python_out=.”,改成这样:“protoc object_detection_zc_macncheese/protos/*.proto --python_out=.” 也是无法执行的,说找不到文件或目录"*.proto".
网上搜了下,Windows下貌似不能一条命令搞定,需要对每一个proto文件一一执行,我的步骤如下:
(1)、dir *.proto (目录“G:\TensorFlow_ZZ\models_copy\research\object_detection_zc_macncheese\protos”中)得到所有 proto文件的文件名,将它们放到一个文件中
(2)、将上面的文件用vs2017打开,里面 可以使用 ALT键 对所有文件名 统一加上前面你的部分"protoc --python_out=. object_detection_zc_macncheese/protos/"
(3)、然后就可以 将这些命令 一起复制 放到 CMD中去执行了
(4)、"(2)"中 拼接起来的命令如下所示:
protoc --python_out=.  object_detection_zc_macncheese/protos/anchor_generator.proto
protoc --python_out=.  object_detection_zc_macncheese/protos/argmax_matcher.proto
protoc --python_out=.  object_detection_zc_macncheese/protos/bipartite_matcher.proto
protoc --python_out=.  object_detection_zc_macncheese/protos/box_coder.proto
protoc --python_out=.  object_detection_zc_macncheese/protos/box_predictor.proto
protoc --python_out=.  object_detection_zc_macncheese/protos/calibration.proto
protoc --python_out=.  object_detection_zc_macncheese/protos/eval.proto
protoc --python_out=.  object_detection_zc_macncheese/protos/faster_rcnn.proto
protoc --python_out=.  object_detection_zc_macncheese/protos/faster_rcnn_box_coder.proto
protoc --python_out=.  object_detection_zc_macncheese/protos/flexible_grid_anchor_generator.proto
protoc --python_out=.  object_detection_zc_macncheese/protos/graph_rewriter.proto
protoc --python_out=.  object_detection_zc_macncheese/protos/grid_anchor_generator.proto
protoc --python_out=.  object_detection_zc_macncheese/protos/hyperparams.proto
protoc --python_out=.  object_detection_zc_macncheese/protos/image_resizer.proto
protoc --python_out=.  object_detection_zc_macncheese/protos/input_reader.proto
protoc --python_out=.  object_detection_zc_macncheese/protos/keypoint_box_coder.proto
protoc --python_out=.  object_detection_zc_macncheese/protos/losses.proto
protoc --python_out=.  object_detection_zc_macncheese/protos/matcher.proto
protoc --python_out=.  object_detection_zc_macncheese/protos/mean_stddev_box_coder.proto
protoc --python_out=.  object_detection_zc_macncheese/protos/model.proto
protoc --python_out=.  object_detection_zc_macncheese/protos/multiscale_anchor_generator.proto
protoc --python_out=.  object_detection_zc_macncheese/protos/optimizer.proto
protoc --python_out=.  object_detection_zc_macncheese/protos/pipeline.proto
protoc --python_out=.  object_detection_zc_macncheese/protos/post_processing.proto
protoc --python_out=.  object_detection_zc_macncheese/protos/preprocessor.proto
protoc --python_out=.  object_detection_zc_macncheese/protos/region_similarity_calculator.proto
protoc --python_out=.  object_detection_zc_macncheese/protos/square_box_coder.proto
protoc --python_out=.  object_detection_zc_macncheese/protos/ssd.proto
protoc --python_out=.  object_detection_zc_macncheese/protos/ssd_anchor_generator.proto
protoc --python_out=.  object_detection_zc_macncheese/protos/string_int_label_map.proto
protoc --python_out=.  object_detection_zc_macncheese/protos/train.proto
2.2、[SH] 命令:“G:\Tensorflow_dataset\raccoon_dataset>python generate_tfrecord__zz.py --csv_input=data/train_labels.csv --output_path=data/train.record”,报错:
G:\Tensorflow_dataset\raccoon_dataset>python generate_tfrecord__zz.py --csv_input=data/train_labels.
csv --output_path=data/train.record
Traceback (most recent call last):
  File "C:\Program Files\Python37\lib\site-packages\tensorflow\python\platform\self_check.py", line
87, in preload_check
    ctypes.WinDLL(build_info.cudnn_dll_name)
  File "C:\Program Files\Python37\lib\ctypes\__init__.py", line 364, in __init__
    self._handle = _dlopen(self._name, mode)
OSError: [WinError 126] 找不到指定的模块。

During handling of the above exception, another exception occurred:

Traceback (most recent call last):
  File "generate_tfrecord__zz.py", line 17, in <module>
    import tensorflow as tf
  File "C:\Program Files\Python37\lib\site-packages\tensorflow\__init__.py", line 28, in <module>
    from tensorflow.python import pywrap_tensorflow  # pylint: disable=unused-import
  File "C:\Program Files\Python37\lib\site-packages\tensorflow\python\__init__.py", line 49, in <mod
ule>
    from tensorflow.python import pywrap_tensorflow
  File "C:\Program Files\Python37\lib\site-packages\tensorflow\python\pywrap_tensorflow.py", line 30
, in <module>
    self_check.preload_check()
  File "C:\Program Files\Python37\lib\site-packages\tensorflow\python\platform\self_check.py", line
97, in preload_check
    % (build_info.cudnn_dll_name, build_info.cudnn_version_number))
ImportError: Could not find 'cudnn64_7.dll'. TensorFlow requires that this DLL be installed in a dir
ectory that is named in your %PATH% environment variable. Note that installing cuDNN is a separate s
tep from installing CUDA, and this DLL is often found in a different directory from the CUDA DLLs. Y
ou may install the necessary DLL by downloading cuDNN 7 from this URL: https://developer.nvidia.com/
cudnn

G:\Tensorflow_dataset\raccoon_dataset>
ZC:应该是我之前 从CPU版的Tensorflow改成GPU版的tensorflow的原因,当时是装了 NVIDIA的CUDA的,现在也不知道装在哪里了...
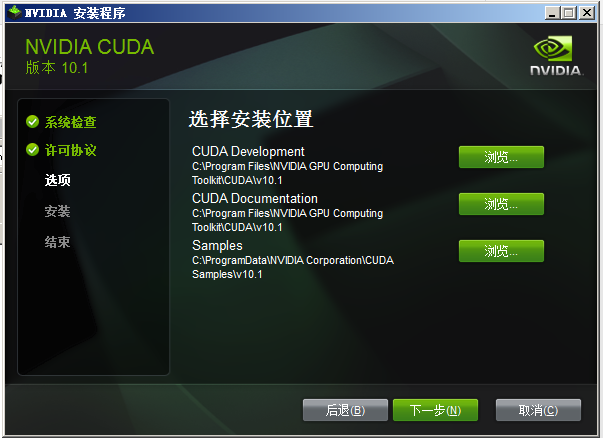
ZC:搜索了一下,发现 安装文件是在 "G:\NVidia\"中(cuda_10.1.168_425.25_win7.exe、cuda_10.1.168_425.25_win10.exe、cudnn-10.1-windows7-x64-v7.6.0.64.zip、cudnn-10.1-windows10-x64-v7.6.0.64.zip),当时应该是使用的 安装版(非zip的解压版),然后尝试安装 发现是 先默认解压到"C:\Users\Administrator\AppData\Local\Temp\CUDA"然后再安装(这个解压目录 会在安装完成 或 取消安装时 自动删除...)(我在Win7x64里面尝试安装时 发现默认使用的是32位的安装程序...),然后 发现安装的默认路径为 (之前安装的路径也是这个路径,这一次 就没有再次安装了[取消安装了])
C:\Program Files\NVIDIA Corporation
C:\Program Files\NVIDIA GPU Computing Toolkit
C:\ProgramData\NVIDIA Corporation
C:\ProgramData\NVIDIA GPU Computing Toolkit
ZC:但是在 这4个路径中还是没有发现 cudnn64_7.dll...于是 回到 "G:\NVidia",将"cudnn-10.1-windows7-x64-v7.6.0.64.zip"解压出来得到 文件夹"cudnn-10.1-windows7-x64-v7.6.0.64"(这里面有"cudnn64_7.dll"),添加 环境变量:set path=%path%;"G:\NVidia\cudnn-10.1-windows7-x64-v7.6.0.64\cuda\bin\"
ZC:上面的 设置 环境变量的方式 不行还是一样的报错... 搜了一下(忘了哪里看到的了),说 安装好了 cuda_10.1.168_425.25_win7.exe 之后,还要用到 cudnn-10.1-windows7-x64-v7.6.0.64.zip 里面的文件:
G:\NVidia\cudnn-10.1-windows7-x64-v7.6.0.64\cuda\bin\cudnn64_7.dll 复制到 C:\Program Files\NVIDIA GPU Computing Toolkit\CUDA\v10.1\bin
G:\NVidia\cudnn-10.1-windows7-x64-v7.6.0.64\cuda\include\cudnn.h 复制到 C:\Program Files\NVIDIA GPU Computing Toolkit\CUDA\v10.1\include
G:\NVidia\cudnn-10.1-windows7-x64-v7.6.0.64\cuda\lib\x64\cudnn.lib 复制到 C:\Program Files\NVIDIA GPU Computing Toolkit\CUDA\v10.1\lib\x64
ZC:然后 就真的OK了...
3、
4、
5、

 浙公网安备 33010602011771号