
from config import app, db
from model import User, Article
import flask_bcrypt
from flask import render_template


@app.route("/")
def hello_world():
    return "hello flask!"


# 添加用户
@app.route("/user/add")
def user_add():
    password = flask_bcrypt.generate_password_hash("88888888")
    # 创建ORM对象
    user = User(name="Tina", email="xx@qq.com", password=password)
    # 将ORM对象添加到db.session中
    db.session.add(user)
    # 将db.session中的数据同步至数据库.
    db.session.commit()
    return "用户添加成功!"


# 数据查询
@app.route("/user/query/<int:user_id>")
def user_query(user_id=1):
    # # 1. get查询 根据主键值进行查询
    # user = User.query.get(user_id)
    # if user:
    #     ret = {"ID": user.id, "name": user.name, "email": user.email}
    #     return f"数据查找成功{ret}"
    # return "未找到该用户信息!"

    # 2. filter_by 查找 (普遍用的比较多)
    users = User.query.filter_by(id=user_id)
    # users: Query对象
    ret = []
    for user in users:
        ret.append({"ID": user.id, "name": user.name, "email": user.email})
    if ret:
        return f"数据查找成功{ret}"
    return "未找到用户信息!"


@app.route("/user/update/<int:user_id>")
def user_update(user_id=1):
    user = User.query.filter_by(id=user_id).first()
    if user:
        user.email = "xxxx@qq.com"
        db.session.commit()
        return "数据更新成功!"
    return "未找到用户信息!"


@app.route("/user/delete/<int:user_id>")
def user_delete(user_id=1):
    user = User.query.get(user_id)
    if user:
        db.session.delete(user)
        db.session.commit()
        return "数据删除成功!"
    return "未找到用户信息!"


# 下面为新内容 增加article
@app.route("/article/add")
def article_add():
    article1 = Article(title="Flask学习", content="Flask学习...")
    # 通过author赋值 直接赋值了一个对象.
    article1.author = User.query.get(1)

    article2 = Article(title="Flask学习2", content="Flask学习2...")
    # 通过author_id赋值.赋值id,会自动生成类对象(article.author)
    article2.author_id = 1

    # 添加道session中
    db.session.add_all([article1, article2])
    db.session.commit()
    # 此处增加{article1.author.name}, {article2.author.name}显示,验证一下article下的author
    return f"文章添加成功!{article1.author.name}, {article2.author.name}"


@app.route("/article/query")
def article_query():
    user = User.query.get(1)
    articles = user.articles
    # 这里使用了html模板,继承,循环语句,复习一下前面的知识.
    return render_template("article.html", articles=articles)


if __name__ == "__main__":
    app.run(host="0.0.0.0", port=5001, debug=True)
配置文件(config.py)
from flask import Flask
from flask_sqlalchemy import SQLAlchemy

app = Flask(__name__)

# 主机IP地址
HOSTNAME = "127.0.0.1"
# MySql的监听端口号,默认3306
PORT = 3306
# 用户名,密码,自己设置的
USERNAME = "root"
PASSWORD = "root"
# MySql上创建的数据库名称.
DATABASE = "database_learn"


app.config['SQLALCHEMY_DATABASE_URI'] = \
    f"mysql+pymysql://{USERNAME}:{PASSWORD}@{HOSTNAME}:{PORT}/{DATABASE}?charset=utf8"


# 在app.config中设置好连接数据库信息.
# 然后使用SQLAlchemy(app)创建db对象,SQLAlchemy就会自动读取app.config中设置的连接信息.
# 读取的就是上面这个设置的地方app.config['SQLALCHEMY_DATABASE_URI']
db = SQLAlchemy(app)

# 测试连接是否成功!
# 涉及到Flask上下文的问题,所以需要加上with app.app_context().
# with app.app_context():
#     with db.engine.connect() as conn:
#         # 注意这里需要加上text(),不然会报错
#         # sqlalchemy.exc.ObjectNotExecutableError: Not an executable object: 'select 1 from dual'
#         # 需要导入from sqlalchemy import text
#         ret = conn.execute(text("select 1 from dual"))
#         # 正常的话的应该返回(1,)
#         print(ret.fetchone())
数据模块(model.py)
 from config import db


# 继承db.Model固定写法.
class User(db.Model):
    # 这里table和tablename还是要区分清楚的.不然会报错
    # "AttributeError: 'str' object has no attribute 'c'"
    # 可以使用tablename
    # __table__ = "users"
    __tablename__ = "user"
    id = db.Column(db.Integer, primary_key=True, autoincrement=True)
    name = db.Column(db.String(80), nullable=False)
    email = db.Column(db.String(140), nullable=False)
    password = db.Column(db.String(128))
    # 使用back_populates关键词,需要两个类都绑定.
    # articles = db.relationship("Article", back_populates="author")

    def __init__(self, name, email, password):
        self.name = name
        self.email = email
        self.password = password


# 新增加内容,文章类.
class Article(db.Model):
    __tablename = "article"
    id = db.Column(db.Integer, primary_key=True, autoincrement=True)
    title = db.Column(db.String(200), nullable=False)
    content = db.Column(db.Text, nullable=False)
    # 添加作者的外键.
    author_id = db.Column(db.Integer, db.ForeignKey("user.id"))
    # 不过如果是多人开发的话,建议使用back_populates.在User类和Article类中都写明.这样的话,比较直观
    # 看到User类就直观的能使用articles来获取作者的文章列表.
    # author = db.relationship("User", back_populates="articles")
    # backref会给User类添加一个articles属性,获取文件列表.
    author = db.relationship("User", backref="articles")
创建库(createdb.py)
import flask_bcrypt
import config
from model import User


# # 涉及到Flask上下文的问题,所以需要加上with app.app_context().
with config.app.app_context():
    config.db.create_all()
    password = flask_bcrypt.generate_password_hash("88888888")
    tina = User(name="Tina", email="714514386@qq.com", password=password)

    config.db.session.add(tina)
    # 插入数据需要提交
    config.db.session.commit()
模板文件(base.html,article.html)
<!DOCTYPE html>
<html lang="en">
<head>
<meta charset="UTF-8">
<!-- 这里通过挖坑(block)的方式定义标题-->
<title>{% block title %}{% endblock %}</title>
</head>
<body>
<!--同理这里是也是挖坑(block).-->
<!--加入这里就是导航条-->
<ul>
<li><a href="#">首页</a></li>
<li><a href="#">新闻</a></li>
</ul>
{% block body %}
{% endblock %}
<footer>这是底部的标签</footer>
</body>
</html>
<!--以上为模板文件base.html-->
{% extends "base.html" %}
{% block title %}
我的文章
{% endblock %}
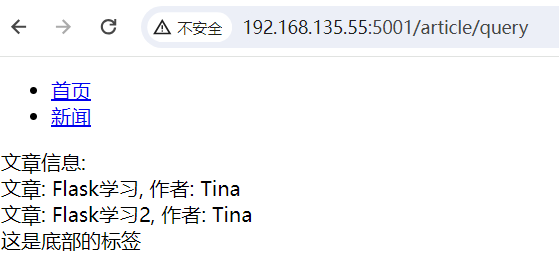
{% block body %}
<div>文章信息:<br></div>
{% for article in articles %}
<div>
文章: {{ article.title }}, 作者: {{ article.author.name }} <br>
</div>
{% endfor %}
{% endblock %}
<!--以上为模板文件article.html-->实际查询出来的效果:

 浙公网安备 33010602011771号