
第三篇、dom操作续
一、属性操作
属性操作
attributes                // 获取所有标签属性
setAttribute(key,value)   // 设置标签属性
getAttribute(key)         // 获取指定标签属性
removeAttribute(key)      //移除指定标签属性
例子1
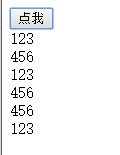
<!DOCTYPE html>
<html lang="en">
<head>
    <meta charset="UTF-8">
    <title></title>
</head>
<body>
<input type="button" onclick="func()" value="点我"/>
<div id="i1">
    <div class="c1">123</div>
    <div class="c1" pyrene="aa">123</div>
    <div class="c1">123</div>
    <div class="c1" pyrene="aa">123</div>
    <div class="c1" pyrene="aa">123</div>
    <div class="c1">123</div>
</div>
<script>
    function func(){
        //首先找到il下面的子元素
        //然后遍历,判断,如果有元素pyrnee为aa那么就修改值为456
        var li=document.getElementById("i1");
        var divs=li.children;
        for(var i=0;i<divs.length;i++){
            var current=divs[i];
            if(aa=current.getAttribute("pyrene")){
                current.innerText=456;
            }
        }
    }
</script>
</body>
</html>
例子2:设置属性的操作:
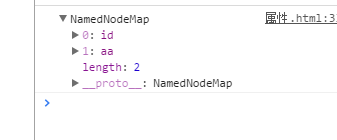
<!DOCTYPE html>
<html lang="en">
<head>
    <meta charset="UTF-8">
    <title></title>
</head>
<body>
<input type="button" onclick="func()" value="点我"/>
<div id="i1">
    <div class="c1">123</div>
<script>
    xo=document.getElementById("i1");
    xo.setAttribute("aa","bb");
    console.log(xo.attributes);
</script>
</body>
</html>
实例:tab标签


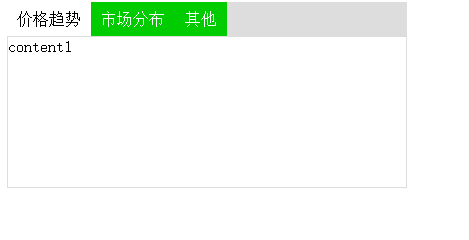
1、首先搞定上面的菜单
a、浏览器调试源代码,这个时候发现li没有撑起来这个时候就要用到clearfix选择器
.clearfix:after{
dispay:block;
content:”.”    这里的内容随便写
height:0
visibility:hidden
clear:both
}
    b给菜单设置背景颜色
2、设置内容
    a首先设置边框,实线,并且min-height  设置最小的高度,如果内容高于这个高度就会撑起来

开始写js   先设置菜单的属性
1、
这里的active表示激活的,和点击事件结合起来,即谁点击,谁就绑定这个active,然后把其他的active去掉,所以这里要加上this
2、
如果市场分布和content2结合起来或者又和content3结合起来怎么办
让定义的属性相同


设置内容
1、首先找到content的子元素
2、遍历子元素,找到con属性的值,之后判断如果这个值等于菜单里面的值target那么就移除hide,否则就加上hide
<!DOCTYPE html>
<html lang="en">
<head>
    <meta charset="UTF-8">
    <title></title>
    <style>
        ul{
            list-style:none;
            padding: 0;
            margin: 0;
        }
        ul li{
            float: left;
            background-color: #00CC00;
            color: white;
            padding: 8px 10px;
        }
        .clearfix:after{   主要让后面内容反这个块级下面
            display: block;
            content: '.';
            height: 0;
            visibility: hidden;   隐藏content内容
            clear: both;
        }
        .tab-menu .title{
            background-color: #dddddd;
        }
        .tab-menu .content{
            border: 1px solid #dddddd;
            min-height: 150px;
        }
        .tab-menu .title .active{
            background-color: white;
            color: black;
        }
        .hide{
            display: none;
        }
    </style>
</head>
<body>
    <div style="width: 400px;margin: 0 auto">
        <div class="tab-menu">
            <div class="title clearfix">
                <ul>
                    <li target="h1" class="active" onclick="show(this);">价格趋势</li>
                    <li target="h3" onclick="show(this)">市场分布</li>
                    <li target="h2" onclick="show(this)">其他</li>
                </ul>
            </div>
            <div class="content" id="content">
                <div con="h1" >content1</div>
                <div con="h2" class="hide">content2</div>
                <div con="h3" class="hide">content3</div>
            </div>
        </div>
    </div>
<script>
    function show(ths){
        //ths表示当前标签
        var target=ths.getAttribute("target");  //h3
        //给自己添加样式active
        //兄弟去掉,这里判断,如果是自己就不需要执行,不是那么就去掉
        ths.className="active";
        var brother=ths.parentElement.children;
        for(var i=0;i<brother.length;i++){
            if(ths == brother[i]){

            }else{
                brother[i].removeAttribute("class")
            }
        }
        //操作内容
        var content=document.getElementById("content").children;
        for(var j=0;j<content.length;j++){
            var current_content=content[j];
            var con=current_content.getAttribute("con");
            if(con==target){
                current_content.classList.remove("hide");
            }else{
                current_content.className="hide";
            }
        }
    }
</script>
</body>
</html>
实现效果图

二、样式操作
样式操作是style操作,style里面都是键值对级别的
可以用obj.style.color=”red”;可以用对象的方式来修改属性操作,但是如果遇到两个单词用连接符的操作:去掉连接符,
然后让第二个单词开头字母变成大写
如:
obj.style.backgroundColor=”red”
var obj = document.getElementById('i1')

obj.style.fontSize = "32px";
obj.style.backgroundColor = "red";
三、操作标签
// 方式一
var obj = "<input type='text' />";
xxx.insertAdjacentHTML("beforeEnd",obj);
xxx.insertAdjacentElement('afterBegin',document.createElement('p'))

//注意:第一个参数只能是'beforeBegin'、 'afterBegin'、 'beforeEnd'、 'afterEnd'

// 方式二
var tag = document.createElement('a')
xxx.appendChild(tag)
xxx.insertBefore(tag,xxx[1])
如果要实现下面的页面

xxx.insertAdjacentHTML("beforeEnd",obj); 这个方法只能用来添加字符串
第一个参数只能是'beforeBegin'、 'afterBegin'、 'beforeEnd'、 'afterEnd'
beforeBegin: ul外部li标签上面
afterBegin: li标签最上面
beforeEnd :li标签内部最后
afterEnd ul外部li标签下面

<!DOCTYPE html>
<html lang="en">
<head>
    <meta charset="UTF-8">
    <title></title>
</head>
<body>
        <div>
            <input type="text"/>
            <input type="button" value="添加" onclick="addElement(this)"/>
        </div>
        <div>
            <ul id="conmentList">
                <li>aa</li>
                <li>bb</li>
            </ul>
        </div>
    <script>
        function addElement(ths){
            //获取输入的值
            var val=ths.previousElementSibling.value;
            //添加完成之后要把input文本框中的数字为空
            ths.previousElementSibling.value="";
            //找到li标签
            var conmentList=document.getElementById("conmentList");
            //让输入的内容放入到列表,第一种方法
            var str="<li>"+val+"</li>";
            //把li标签中加入内容
            conmentList.insertAdjacentHTML("beforeEnd",str);
        }
    </script>
</body>
</html>
实现效果

上面是第一种方式
创建字符串,然后把字符串拼接插进去
第二种方式:
下面是对象的方式
对于创建的页面来说,每一个标签都是一个节点,也就是对象
而这里就是创建一个节点(对象)
document.crateElement(“li”); 创建对象(节点)li
xxx.insertBefore(tag,xxx[1]) 把tag添加到xxx[1]的前面
推荐用对象的方式(可以进行重用)
下面代码就是创建对象,然后添加输入的元素,之后添加到列表中
之后在创建的对象(元素)中再创建一个对象2:先创建对象2,之后让对象2添加到对象中,这里创建了一个a标签
<!DOCTYPE html>
<html lang="en">
<head>
    <meta charset="UTF-8">
    <title></title>
</head>
<body>
        <div>
            <input type="text"/>
            <input type="button" value="添加" onclick="addElement(this)"/>
        </div>
        <div>
            <ul id="conmentList">
                <li>aa</li>
                <li>bb</li>
            </ul>
        </div>
    <script>
        function addElement(ths){
            //获取输入的值
            var val=ths.previousElementSibling.value;
            //添加完成之后要把input文本框中的数字为空
            ths.previousElementSibling.value="";
            //找到li标签
            var conmentList=document.getElementById("conmentList");
            //第二种方式
            var tag=document.createElement("li");
            //在li标签中添加输入的值,下面的val不能加引号
            tag.innerText=val;
            //在创建的li标签中添加a标签
            var tmp=document.createElement("a");
            tmp.innerText="博客";
            tmp.href="http://wwww.cnblogs.com/pyrene/";
            //让a标签添加到li标签里面,这里的tmp不能加引号
            tag.appendChild(tmp);

            //让创建的li标签添加到ul中
 //           conmentList.appendChild("tag");
            //让创建的li标签放到ul中最下面
            conmentList.insertBefore(tag,conmentList[1]);
        }
    </script>
</body>
</html>
实现效果

四、标签操作之移动和拷贝
移动:首先获得需要移动的标签,然后再获得要移动到位置的上一个标签,然后在上一个标签上加上.appendChild()方法
拷贝:克隆的时候如果不加参数true的时候就只克隆标签,如果加上参数true,那就就会克隆标签和内容
<!DOCTYPE html>
<html lang="en">
<head>
    <meta charset="UTF-8">
    <title></title>
</head>
<body>
    <h2 id="h1">333
        <span>123</span>
        <a>123</a>
    </h2>
    <div id="content">
        <div>1</div>
        <div>2</div>
    </div>
<script>
    //让h2标签移动到content下面
    //首先先获得h2标签
    var h=document.getElementById("h1");
    //之后获得content的标签
    var c=document.getElementById("content");
    //然后用appendChild方法
    //c.appendChild(h)

    //拷贝的方法
    //首先用cloneNode方法,这里注意该方法的参数的区别
    var newH= h.cloneNode(true);
    c.appendChild(newH);
</script>
</body>
</html>
实现效果图

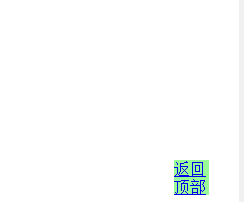
例子:返回顶部
注意点:
只有出现滚轮的时候才会出现返回顶部

onscroll=”func()”;  表示只要鼠标滚动滚轮就执行一次该函数
scorllTop   设置滚轮
document.body  获取body
document.body.scrollTop;  表示获取滚轮高度,如果等于0,那么就是在顶部
a标签中的href=“”如果引号里面什么都不写的话就代表刷新
a标签中的href=”#”代表什么也不干
a标签中的href=”javascript:void(0)”代表什么也不干
<!DOCTYPE html>
<html lang="en">
<head>
    <meta charset="UTF-8">
    <title></title>
    <style>
        .go-top{
            position: fixed;
            background-color: palegreen;
            right: 30px;
            bottom: 30px;
            height: 35px;
            width: 35px;
            color: white;
        }
        .hide{
            display: none;
        }
    </style>

</head>
<body onscroll="func()">
    <div id="i1" style="height: 2000px">
        <h1>1asd</h1>
    </div>

    <div id="i2" class="go-top hide">
        <a href="javascript:void(0);" onclick="GOtop();">返回顶部</a>
    </div>
    <script>
        function func(){
            var scrollTop=document.body.scrollTop;
            var li=document.getElementById("i2");
            if(scrollTop>100){
                li.classList.remove("hide");
            }else{
                li.classList.add("hide");
            }
        }
        function GOtop(){
            document.body.scrollTop=0;
        }
    </script>
</body>
</html>
五、高度相关的操作
总文档高度
document.documentElement.offsetHeight

当前文档占屏幕高度
document.documentElement.clientHeight

自身高度
tag.offsetHeight

距离上级定位高度
tag.offsetTop

父定位标签
tag.offsetParent

滚动高度
scrollTop    滚动条距离顶部的高度
scrollheight  文档高度:自身高度+padding高度

clientTop     边框的高度
clientHeight   可见范围的高度+paddong高度,即如果没有滚动条scrollHeight和这个相等,如果有滚动条,那么这个就比scrollHeight高度小

offsetTop     如果在当前标签的父标签没有出现position,那么当前标签距离文档顶部(body)的高度;如果出现position位置属性的话,那么当前标签距离位置标签的高度

offsetParent    当前标签距离“上部”定位标签,即上面如果没有position等会一直往上找直到找到body
offsetHeight  可见范围的高度:自身+padding+border
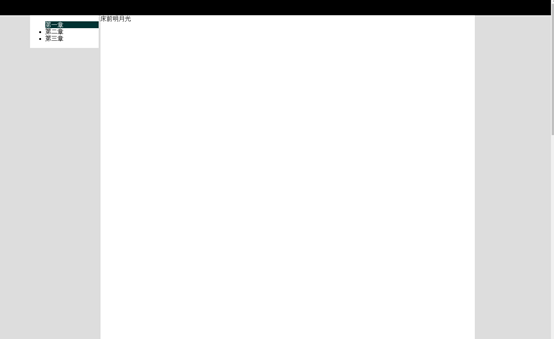
例子:滚动菜单
操作:
1、 制定html骨架
a) 先制定头部和内容,布局
i. 头部样式
ii. 内容样式
iii. 布局
2、 定制js样式
a) 左边JS
b) 右边JS
c) 左右js联动
<!DOCTYPE html>
<html lang="en">
<head>
    <meta charset="UTF-8">
    <title></title>
    <style>
        /*让页面和html之间没有间隔*/
        body{
            margin: 0;
            background-color: #dddddd;
        }
        /*让内容居中显示*/
        .w{
            margin: 0 auto;
            width: 980px;
        }
        .pg-header{
            background-color: black;
            color: white;
            height: 47px;
        }
        /*下面菜单和内容设置脱离文档流,进行位置属性绝对定位*/
        .pg-body .menu{
            position: absolute;
            left: 200px;
            width: 180px;

            background-color: white;
            float: left;
        }
        /*给菜单制定高度*/
        .pg-body .fixed{
            position: fixed;
            top: 5px;
        }
        .pg-body .content{
            position: absolute;
            left: 385px;
            right: 200px;

            background-color: white;
            float: left;
        }
        .pg-body .content .item{
            height: 900px;
        }
        .pg-body .menu .active{
            background-color: #003333;
            color: white;
        }
    </style>
</head>
<body onscroll="hua()">
    <div class="pg-header">
    <div class="w">

    </div>
    </div>
    <div class="pg-body">

            <div id="menu" class="menu">
                <!--放置菜单-->
                <ul>
                    <li >第一章</li>
                    <li>第二章</li>
                    <li>第三章</li>
                </ul>
            </div>
            <div id="content" class="content">
                <div class="item">床前明月光</div>
                <div class="item">疑是地上霜</div>
                <div class="item">我是郭德纲</div>
            </div>
    </div>
<script>
//    先制定html框架,之后进行js定位,首先和滚轮固定左边菜单的位置
//    这里让菜单绑定滑轮事件,如果高度大于顶部高度,那么就让内容中菜单悬浮,小于就正常
    function hua(){
        //获取滑轮高度
        var huaGao=document.body.scrollTop;
        var caiDan=document.getElementById("menu");
        if(huaGao>48){
            caiDan.classList.add("fixed");
        }else{
            caiDan.classList.remove("fixed");
        }

        var items=document.getElementById("content").children;
        for(var i=0;i<items.length;i++){
            var currentItem=items[i];
//            item距离div的高度+div距离文档的高度   绝对高度
            var currentItemBodyTop=currentItem.offsetTop+currentItem.offsetParent.offsetTop;
//            距离顶部的高度就是总高度减去滑轮华东的高度  相对高度
            var currentWindowTop=currentItemBodyTop-huaGao;
            console.log(currentWindowTop);

//            当前item章节的高度      相对高度
            var currentHeight=currentItem.offsetHeight;
//            章节底部距离文档的高度
            var bottomHeight=currentItemBodyTop+currentHeight;
//            然后判断如果文档高度小于0或者滑轮高度小于当前章节的高度+第一个章节距离顶部的高度
//            这里的i指代的是第几个   注意:这里的break是添加active之后就结束
            if(currentWindowTop<0 && huaGao<bottomHeight){
                var ziji=caiDan.getElementsByTagName("li")[i];
                ziji.classList.add("active");

//                遍历列表
                var lis=caiDan.getElementsByTagName("li");
                for(var j=0;j<lis.length;j++){
                    if(ziji==lis[j]){

                    }else{
                        lis[j].classList.remove("active");
                    }
                }
                break;
            }
        }
    }
</script>
</body>
</html>
效果图:
调整上面的bug,当内容拉到底部的时候,菜单章节显示不正确
根据算法:
自身距离顶部高度 <  范围   <  距离顶部高度+自身高度
document.documentElement 表示的是当前的窗口(浏览器)

这里的document.body.offsetHeight的高度为47px也就是菜单的高度的原因:这个本来就是显示body的高度,
但是这里除了菜单其他都用了absolute,脱离了文档流,所以这里的高度就是菜单的高度
document.getElementById("content").offsetHeight  显示内容的高度
如果上面这两个加起来,那么就是滚轮滚动的高度,也就是滚轮滚动到结尾了
  1 <!DOCTYPE html>
  2 <html lang="en">
  3 <head>
  4     <meta charset="UTF-8">
  5     <title></title>
  6     <style>
  7         /*让页面和html之间没有间隔*/
  8         body{
  9             margin: 0;
 10             background-color: #dddddd;
 11         }
 12         /*让内容居中显示*/
 13         .w{
 14             margin: 0 auto;
 15             width: 980px;
 16         }
 17         .pg-header{
 18             background-color: black;
 19             color: white;
 20             height: 47px;
 21         }
 22         /*下面菜单和内容设置脱离文档流,进行位置属性绝对定位*/
 23         .pg-body .menu{
 24             position: absolute;
 25             left: 200px;
 26             width: 180px;
 27
 28             background-color: white;
 29             float: left;
 30         }
 31         /*给菜单制定高度*/
 32         .pg-body .fixed{
 33             position: fixed;
 34             top: 5px;
 35         }
 36         .pg-body .content{
 37             position: absolute;
 38             left: 385px;
 39             right: 200px;
 40
 41             background-color: white;
 42             float: left;
 43         }
 44         .pg-body .content .item{
 45             height: 900px;
 46         }
 47         .pg-body .menu .active{
 48             background-color: #003333;
 49             color: white;
 50         }
 51     </style>
 52 </head>
 53 <body onscroll="hua()">
 54     <div class="pg-header">
 55     <div class="w">
 56
 57     </div>
 58     </div>
 59     <div class="pg-body">
 60
 61             <div id="menu" class="menu">
 62                 <!--放置菜单-->
 63                 <ul>
 64                     <li >第一章</li>
 65                     <li>第二章</li>
 66                     <li>第三章</li>
 67                 </ul>
 68             </div>
 69             <div id="content" class="content">
 70                 <div class="item">床前明月光</div>
 71                 <div class="item">疑是地上霜</div>
 72                 <div class="item">我是郭德纲</div>
 73             </div>
 74     </div>
 75 <script>
 76 //    先制定html框架,之后进行js定位,首先和滚轮固定左边菜单的位置
 77 //    这里让菜单绑定滑轮事件,如果高度大于顶部高度,那么就让内容中菜单悬浮,小于就正常
 78     function hua(){
 79         //body的高度,因为content脱离了文档流,所以这个高度是菜单的高度
 80         var a=document.body.offsetHeight;
 81         //content的高度
 82         var b=document.getElementById("content").offsetHeight;
 83         //当前适口的高度
 84         var c=document.documentElement.clientHeight;
 85
 86
 87
 88         //获取滑轮高度
 89         var huaGao=document.body.scrollTop;
 90         var caiDan=document.getElementById("menu");
 91
 92         console.log(a,b,c,huaGao);
 93
 94         if((a+b)==(c+huaGao)){
 95             //这里的children[0]的意思是第一个ul以后说不定还有很多个
 96             var mu=document.getElementById("menu").children[0].lastElementChild;
 97             var aa=document.getElementById("menu").getElementsByTagName("li");
 98             //这里先查找包含active的标签,找到后移除结束循环,然后滚轮拉到底之后题那家active
 99             //这里必须用return,原因是到底部了,所以必须结束,不然会往下执行
100             for (var m=0;m<aa.length;m++){
101                 var bb=aa[m];
102                 if(bb.getAttribute("class")=="active"){
103                     bb.classList.remove("active");
104                     break;
105                 }
106             }
107             mu.classList.add("active");
108             return
109         }
110
111
112         if(huaGao>48){
113             caiDan.classList.add("fixed");
114         }else{
115             caiDan.classList.remove("fixed");
116         }
117
118         var items=document.getElementById("content").children;
119         for(var i=0;i<items.length;i++){
120             var currentItem=items[i];
121 //            item距离div的高度+div距离文档的高度   绝对高度
122             var currentItemBodyTop=currentItem.offsetTop+currentItem.offsetParent.offsetTop;
123 //            距离顶部的高度就是总高度减去滑轮华东的高度  相对高度
124             var currentWindowTop=currentItemBodyTop-huaGao;
125             console.log(currentWindowTop);
126
127 //            当前item章节的高度      相对高度
128             var currentHeight=currentItem.offsetHeight;
129 //            章节底部距离文档的高度
130             var bottomHeight=currentItemBodyTop+currentHeight;
131 //            然后判断如果文档高度小于0或者滑轮高度小于当前章节的高度+第一个章节距离顶部的高度
132 //            这里的i指代的是第几个   注意:这里的break是添加active之后就结束
133             if(currentWindowTop<0 && huaGao<bottomHeight){
134                 var ziji=caiDan.getElementsByTagName("li")[i];
135                 ziji.classList.add("active");
136
137 //                遍历列表
138                 var lis=caiDan.getElementsByTagName("li");
139                 for(var j=0;j<lis.length;j++){
140                     if(ziji==lis[j]){
141
142                     }else{
143                         lis[j].classList.remove("active");
144                     }
145                 }
146                 break;
147             }
148         }
149     }
150 </script>
151 </body>
152 </html>
六、提交表单
document.geElementById('form').submit()
<!DOCTYPE html>
<html lang="en">
<head>
    <meta charset="UTF-8">
    <title></title>
</head>
<body>
        <!--action提交到哪里   method 提交方式-->
    <form  id="form" action="https://www.sogou.com/web?" method="get">
        <input name="query" type="text"/>
        <input type="button" onclick="SubmitForm()" value="提交"/>
    </form>
    <script>
        function SubmitForm(){
            document.getElementById("form").submit();
        }
    </script>
</body>
</html>
效果图

点击确定就在后台显示true,点击取消就在后台显示false

确认框
<!DOCTYPE html>
<html lang="en">
<head>
    <meta charset="UTF-8">
    <title></title>
</head>
<body>
        <!--action提交到哪里   method 提交方式-->
    <form  id="form" action="https://www.sogou.com/web?" method="get">
        <input name="query" type="text"/>
        <input type="button" onclick="SubmitForm()" value="提交"/>
    </form>
        <hr/>
        <input type="button" value="confirm" onclick="firm();"/>


    <script>
        function SubmitForm(){
            document.getElementById("form").submit();
        }
        function firm(){
            var r=confirm("aaa");
            console.log(r)
        }
    </script>
</body>
</html>
七、其他操作
console.log                 输出框
alert                       弹出框
confirm                     确认框

// URL和刷新
location.href               可以获取当前页面的url
location.href = "url"       可以跳转到一个新的页面地址
location.reload()           重新加载

// 定时器
setInterval                 多次定时器
clearInterval               清除多次定时器
setTimeout                  单次定时器
clearTimeout                清除单次定时器
定时器,单次定时和多次定时
效果图:
setTimeout 执行一次就消失了

2秒后这个已删除三个字就没有了。
如果想把这个执行一次的定时器清除掉,也就是把已删除这三个字保留
clearTimeout 清除单次定时器
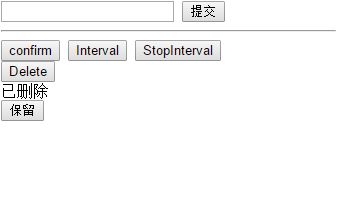
<!DOCTYPE html>
<html lang="en">
<head>
    <meta charset="UTF-8">
    <title></title>
</head>
<body>
        <!--action提交到哪里   method 提交方式-->
    <form  id="form" action="https://www.sogou.com/web?" method="get">
        <input name="query" type="text"/>
        <input type="button" onclick="SubmitForm()" value="提交"/>
    </form>
        <hr/>
        <input type="button" value="confirm" onclick="firm();"/>

        <input type="button" value="Interval" onclick="Interval();"/>
        <input type="button" value="StopInterval" onclick="StopInterval()"/>

        <div>
            <input type="button" value="Delete" onclick="Delete();"/>
            <div id="status"></div>
            <input type="button" value="保留" onclick="unDelete();"/>
        </div>


    <script>
        //清除单次定时器
        function unDelete(){
            clearTimeout(t1);
        }
        //执行单次定时器
        function Delete(){
            document.getElementById("status").innerText="已删除";
            t1=setTimeout(ClearStatus,2000);
        }
        function ClearStatus(){
            document.getElementById("status").innerText="";
        }

        function f1(){
            console.log(1);
        }
        //多次定时器
        function Interval(){
//            setInterval("console.log(1)",1000);
//            setInterval(f1,1000)
            s1=setInterval(function(){
                console.log(1)
            },1000);
        }
        //暂定多次定时器
        function StopInterval(){
            clearInterval(s1);
        }


        function SubmitForm(){
            document.getElementById("form").submit();
        }
        function firm(){
            var r=confirm("aaa");
            console.log(r)
        }
    </script>
</body>
</html>

 浙公网安备 33010602011771号