dom事件
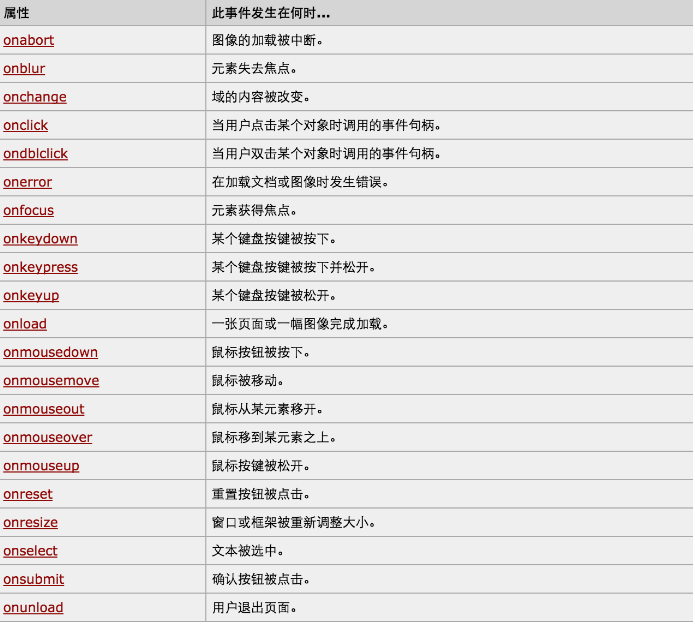
一、属性

2、this
this特殊的。表示谁点击当前的标签,那么this就代表点击的标签。即谁点击,就代表谁
<!DOCTYPE html>
<html lang="en">
<head>
    <meta charset="UTF-8">
    <title></title>
</head>
<body>
<div onclick="func(123,'123');">ads</div>
<div onclick="func1(this);">111</div>
<div onclick="func2(this);">222</div>
<script>
    function func(arg){
        console.log(arg);
    }
    function func1(arg){
        console.log(arg);
    }
    function func2(arg){
        console.log(arg);
    }
</script>
</body>
</html>
下面就是分别点击下面显示的内容

例子:折叠菜单
margin和padding是在html中的盒模型的基础上出现的,margin是盒子的外边距,即盒子与盒子之间的距离,而pdding是内边距,是盒子的边与盒子内部元素的距离
<!DOCTYPE html>
<html lang="en">
<head>
    <meta charset="UTF-8">
    <title></title>
    <style>
        ul{
            padding: 0;
            margin: 0;
        }
        .menu{
            background-color: #00CCFF;
            border:solid 2px red;
            height: 700px;
            width: 300px;
        }
        .menu .title{
            background-color: #00CC00;
            cursor:pointer ;
        }
        .menu .content{
            background-color: white;
        }
        .hide{
            display:none;
        }
    </style>
</head>
<body>
<div class="menu">
    <div class="item">
        <div class="title" onclick="show(this)">菜单一</div>
        <div class="content hide">
            <ul>
                <li>内容一</li>
                <li>内容二</li>
                <li>内容三</li>
            </ul>
        </div>
    </div>
    <div class="item">
        <div class="title" onclick="show(this)">菜单二</div>
        <div class="content hide">
            <ul>
                <li>内容一</li>
                <li>内容二</li>
                <li>内容三</li>
            </ul>
        </div>
    </div>
    <div class="item">
        <div class="title" onclick="show(this)">菜单三</div>
        <div class="content hide">
            <ul>
                <li>内容一</li>
                <li>内容二</li>
                <li>内容三</li>
            </ul>
        </div>
    </div>
</div>
<script>
    function show(arg){
        //arg当前菜单,思路点击当前菜单的时候就把下面的标签中的hide去掉
        console.log(arg);
        arg.nextElementSibling.classList.remove("hide");
        //father=item
        var father=arg.parentElement;
        //由于item数量不确定,所以要从menu的子标签开始
        var sons=father.parentElement.children;
        for(var i=0;i<sons.length;i++){
            var current_ele=sons[i];
            //这里判断的意思,如果遍历出current_ele是arg的father也就是当前点击的标签,由于需要展开内容,所以不能添加hide
            //添加hide就无法展示,如果不是当前点击的标签,由于需要他们把内容隐藏,所以需要添加hide
            if(current_ele == father){

            }else{
                current_ele.children[1].classList.add("hide");
            }
        }
    }
</script>
</body>
</html>

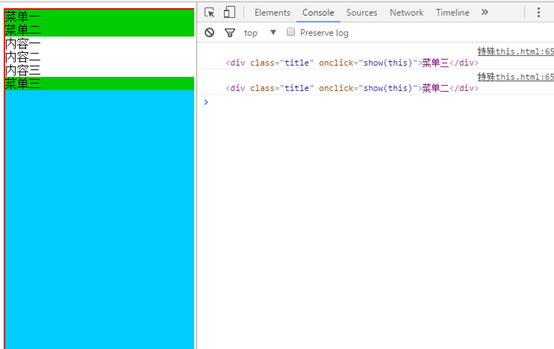
点击菜单二,就会隐藏菜单一和菜单三的内容
三、事件
对于事件:下面4种
1、    注册事件的方式
    a)    在标签中注册<div onxxx””></div>
    b)    直接注册 document,......onxxx=function(){}
2、    this,触发当前事件的标签
3、    event,触发当前标签的事件内容,keyCode(获取键盘上面按键对应的数字),key(按下的键)
<!DOCTYPE html>
<html lang="en">
<head>
    <meta charset="UTF-8">
    <title></title>
</head>
<body>
    <div onmouseover="func(this)"onmouseout="Out(this)">123</div>
    <input type="text" onkeydown="Down(event)"/>

    <script>
        function func(arg){
            arg.style.background="palegreen";
        }
        function Out(arg){
            arg.style.background="white";
        }
        function Down(ths){
            console.log(ths.keyCode,ths.key);
        }
    </script>

</body>
</html>
实现效果图

4、 默认事件和自定义事件:
自定义事件的默认优先级 > 默认事件优先级
如果想要阻止后面的事件发生:
onclick=”return func();”

function func(){
return false;
}
如果想让后面的事件执行,那么就把返回值为true或者

<!DOCTYPE html>
<html lang="en">
<head>
    <meta charset="UTF-8">
    <title></title>
</head>
<body>
<a href="http://www.cnblogs.com/pyrene" onclick=" return tt()">博客</a>

<script>
    function tt(){
        alert(123);
        return false;
    }
</script>
</body>
</html>
这个可以应用于验证信息,例如验证表格中是否有内容输入:

<!DOCTYPE html>
<html lang="en">
<head>
    <meta charset="UTF-8">
    <title></title>
</head>
<body>
    <form action="滚动菜单.html">
        <div id="form1">
            <p>账号:<input type="text"/></p>
            <p>密码:<input type="password"/></p>
        </div>
        <input type="submit" value="确认提交"onclick="return SubmitForm()"/>
    </form>
<script>
    function SubmitForm(){
        var inputs=document.getElementById("form1").getElementsByTagName("input");
        for(var i=0;i<inputs.length;i++){
            var current_input=inputs[i];
            var val=current_input.value;
            if(val.trim().length==0){
                return false;
            }
        }
    }
</script>
</body>
</html>
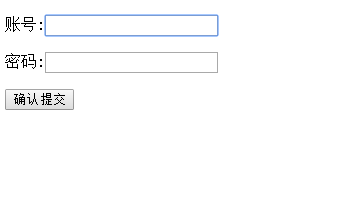
实现效果图:当里面不输入内容的时候,无法提交上去


 浙公网安备 33010602011771号