spring cloud Config--server
概述
使用Config Server,您可以在所有环境中管理应用程序的外部属性。客户端和服务器上的概念映射与Spring Environment和PropertySource抽象相同,因此它们与Spring应用程序非常契合,但可以与任何以任何语言运行的应用程序一起使用。随着应用程序通过从开发人员到测试和生产的部署流程,您可以管理这些环境之间的配置,并确定应用程序具有迁移时需要运行的一切。服务器存储后端的默认实现使用git,因此它轻松支持标签版本的配置环境,以及可以访问用于管理内容的各种工具。很容易添加替代实现,并使用Spring配置将其插入
以上是Spring Cloud官网对配置服务的描述, 简单阐述一下我的理解。比如我们要搭建一个网站,需要配置数据库连接,指定数据库服务器的IP地址,数据库名称,用户名和口令等信息。通常的方法, 我们可以在一个配置文件中定义这些信息,或者开发一个页面专门配置这些东西。只有一个web服务器的时候, 很方便。
但假如需要搭建同多台服务器时,当然可以每台服务器做同样配置,但维护和同步会很麻烦。我理解的配置服务至少有两种不同场景:
1). 多个客户使用同一配置: 比如,多台服务器组成的集群,假如后端使用同一数据库,那么每台服务器都是用相同的配置。
2). 不同客户使用不同的配置: 比如典型的场景是,开发,测试,生产使用相同的系统,但使用不同的数据库
如果有个统一的根本配置,是不是就很方便,一个可行的办法是,把这些配置文件放到一个共享存储(比如网络共享盘)中。这样只需要在共享存储修改一个或多个配置文件就可以了。但共享文件的方式受到具体布署环境的限制,很多时候很难达到多台Web服务器共享同一个存储硬盘。
共享盘的缺点是资源定位比较困难,Spring Cloud的解决方案是, 将这些配置文件放到版本管理服务器里面,Spring Cloud缺省配置使用GIT中。所有Web服务均从GIT中获取这些配置文件。由于GIT服务器与具体Web服务器之间不需要共享存储, 只要网络可达就行,从而可以实现Web服务于配置信息的存放位置的解耦。
其架构原理图大致如下:
我们将配置文件放入git或者svn等服务中,通过一个Config Server服务来获取git中的配置数据,而我们需要使用的到配置文件的Config Client系统可以通过Config Server来获取对应的配置。
下面我们通过一个示例来演示一下config是如何被各个微服务系统获取到的。
1.向git中上传示例配置文件
multiple-test.properties
#datasource -- mysql
multiple.datasource.master.url=jdbc:mysql://localhost:3306/test1?useUnicode=true&characterEncoding=utf8&autoReconnect=true&allowMultiQueries=true
multiple.datasource.master.username=root
multiple.datasource.master.password=pypua
multiple.datasource.master.driverClassName=com.mysql.jdbc.Driver
multiple.datasource.master.InitialSize=10
multiple.datasource.master.MinIdle=10
multiple.datasource.master.MaxActive=100

multiple.datasource.slave.url=jdbc:mysql://localhost:3306/test2?useUnicode=true&characterEncoding=utf8&autoReconnect=true&allowMultiQueries=true
multiple.datasource.slave.username=root
multiple.datasource.slave.password=pypua
multiple.datasource.slave.driverClassName=com.mysql.jdbc.Driver
multiple.datasource.slave.InitialSize=10
multiple.datasource.slave.MinIdle=10
multiple.datasource.slave.MaxActive=100
文件名分别为:
microservice-dev.properties
microservice-production.properties
microservice-test.properties
对应不同的三个环境。其中命名规则如下
onfig server提供的REST接口,Spring Cloud官方文档提供了几个可选URL可以是如下几个:
- /{application}/{profile}[/{label}]
- /{application}-{profile}.yml
- /{label}/{application}-{profile}.yml
- /{application}-{profile}.properties
- /{label}/{application}-{profile}.properties
比如 第三个格式,如果我们在GIT版本库中有一个配置文件 spring-cloud/helloworldConfig/config-client-dev.properties. 那么访问http://localhost:8888/config-client-dev.properties就可以显示配置文件内容。这个例子中, application的名字是"config-client"(也是下面我们即将创建的client), profile名字是dev, 文件后缀是.properties
2.创建springcloud-configserver微服务(这里需要注册到eureka服务,配合eureka使用)
父项目pom.xml
<?xml version="1.0" encoding="UTF-8"?>
<project xmlns="http://maven.apache.org/POM/4.0.0" xmlns:xsi="http://www.w3.org/2001/XMLSchema-instance"
    xsi:schemaLocation="http://maven.apache.org/POM/4.0.0 http://maven.apache.org/xsd/maven-4.0.0.xsd">
    <modelVersion>4.0.0</modelVersion>
    <!-- 父项目骨架 -->
    <groupId>com.pupeiyuan.springcloud</groupId>
    <artifactId>spring-Cloud</artifactId>
    <version>0.0.1-SNAPSHOT</version>
    <packaging>pom</packaging>
    <!-- 包含的子项目 -->
    <modules>
        <module>springcloud-eureka</module>
        <module>springcloud-configServer</module>
        <module>springcloud-configClient</module>
        <module>springcloud-ssmServer</module>
    </modules>
    <!-- java版本信息 -->
    <properties>
        <project.build.sourceEncoding>UTF-8</project.build.sourceEncoding>
        <project.reporting.outputEncoding>UTF-8</project.reporting.outputEncoding>
        <java.version>1.8</java.version>
    </properties>
    <!-- springboot以来的父项目 -->
    <parent>
        <groupId>org.springframework.boot</groupId>
        <artifactId>spring-boot-starter-parent</artifactId>
        <version>1.5.2.RELEASE</version>
    </parent>

    <dependencyManagement>
        <dependencies>
            <!-- springcloud版本依赖 -->
            <dependency>
                <groupId>org.springframework.cloud</groupId>
                <artifactId>spring-cloud-dependencies</artifactId>
                <version>Dalston.SR3</version>
                <type>pom</type>
                <scope>import</scope>
            </dependency>
        </dependencies>
    </dependencyManagement>

    <build>
        <plugins>
            <!-- maven插件 -->
            <plugin>
                <groupId>org.springframework.boot</groupId>
                <artifactId>spring-boot-maven-plugin</artifactId>
            </plugin>
        </plugins>
    </build>
</project>
项目pom.xml
<project xmlns="http://maven.apache.org/POM/4.0.0" xmlns:xsi="http://www.w3.org/2001/XMLSchema-instance"
    xsi:schemaLocation="http://maven.apache.org/POM/4.0.0 http://maven.apache.org/xsd/maven-4.0.0.xsd">
    <modelVersion>4.0.0</modelVersion>
    <parent>
        <groupId>com.pupeiyuan.springcloud</groupId>
        <artifactId>spring-Cloud</artifactId>
        <version>0.0.1-SNAPSHOT</version>
    </parent>
    <artifactId>springcloud-configServer</artifactId>

    <dependencies>
        <!--Spring Cloud Config 服务端依赖 -->
        <dependency>
            <groupId>org.springframework.cloud</groupId>
            <artifactId>spring-cloud-config-server</artifactId>
        </dependency>
        <dependency>
            <groupId>org.springframework.cloud</groupId>
            <artifactId>spring-cloud-starter-eureka</artifactId>
        </dependency>
    </dependencies>
</project>
aaplication.yml
server:
  port: 8080
spring:
  cloud:
    config:
      server:
        git:
          uri: https://gitee.com/admin_pypua/test.git  #uri:表示你配置文件在git中的地址
          username:
          password:
  application:
    name: pringcloud-configServer

eureka:
  client:
    serviceUrl:
      defaultZone: http://root:123456@peer1:8000/eureka
  instance:
    prefer-ip-address: true
启动类 ConfigServerApplication.java
package com.spring.pupeiyuan;

import org.springframework.boot.SpringApplication;
import org.springframework.boot.autoconfigure.SpringBootApplication;
import org.springframework.cloud.client.discovery.EnableDiscoveryClient;
import org.springframework.cloud.config.server.EnableConfigServer;

@SpringBootApplication
@EnableConfigServer
@EnableDiscoveryClient
public class ConfigServerApplication {
  public static void main(String[] args) {
    SpringApplication.run(ConfigServerApplication.class, args);
  }
}
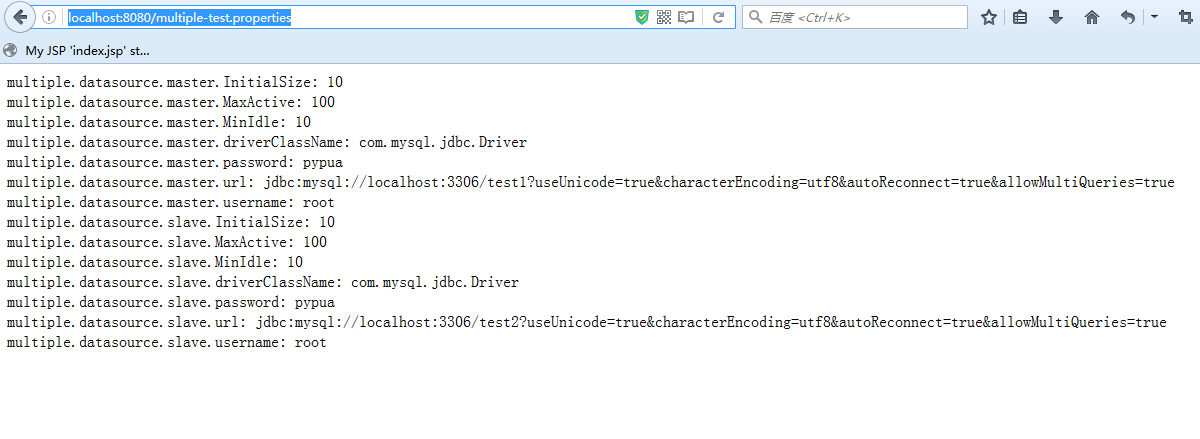
3.这样一个单点config server就写好了下面启动测试一下

至此,单点config部署完毕


