ceph添加扩展mon和mgr节点
扩展 ceph 集群实现高可用
扩展 ceph 集群的 mon 节点以及 mgr 节点,以实现集群高可用。
扩展 ceph-mon 节点
Ceph-mon 是原生具备自选举以实现高可用机制的 ceph 服务,节点数量通常是奇数。
1、在mon节点安装ceph-mon
centos:
[root@ceph-mon2 ~]# yum install ceph-common ceph-monubuntu:
服务器需要先配置好ceph软件仓库源
root@ceph-mon2:~# grep ceph /etc/apt/sources.list
deb https://mirrors.tuna.tsinghua.edu.cn/ceph/debian-pacific/ bionic main
# deb-src https://mirrors.tuna.tsinghua.edu.cn/ceph/debian-pacific/ bionic main

#节点依次安装ceph-mon
root@ceph-mon2:~# apt install ceph-mon
root@ceph-mon3:~# apt install ceph-mon
2、在部署节点添加mon节点
添加mon2
cephadmin@ceph-deploy:~/ceph-cluster$ pwd
/home/cephadmin/ceph-cluster

cephadmin@ceph-deploy:~/ceph-cluster$ ceph-deploy mon add ceph-mon2
添加mon3
cephadmin@ceph-deploy:~/ceph-cluster$ pwd
/home/cephadmin/ceph-cluster

cephadmin@ceph-deploy:~/ceph-cluster$ ceph-deploy mon add ceph-mon3
3、验证ceph-mon状态
cephadmin@ceph-deploy:~/ceph-cluster$ ceph quorum_status
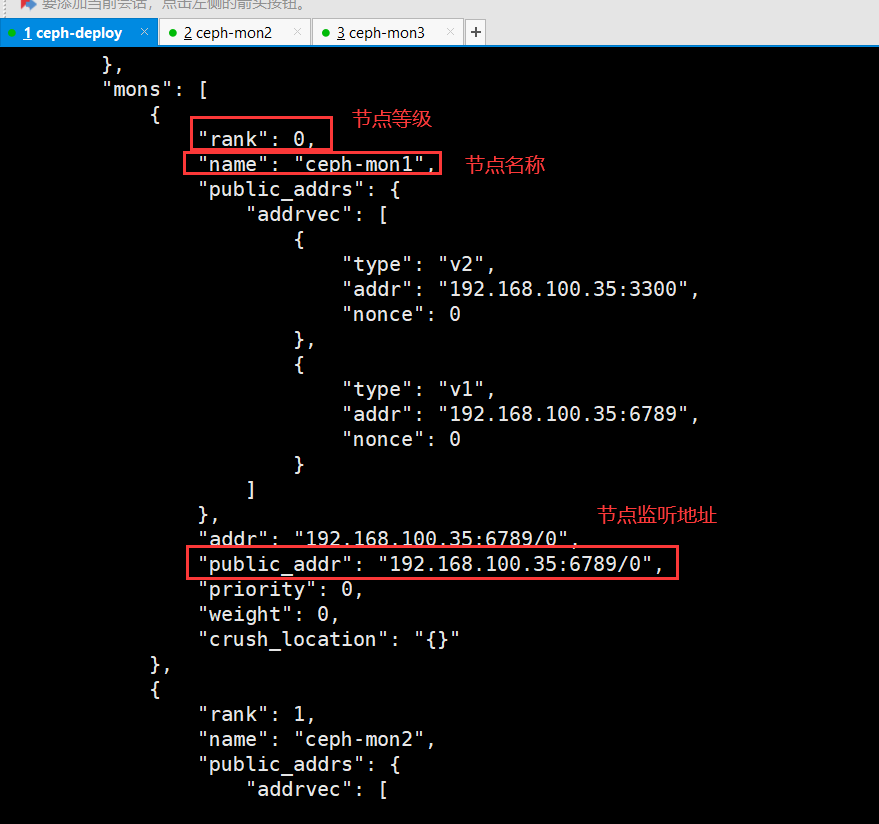
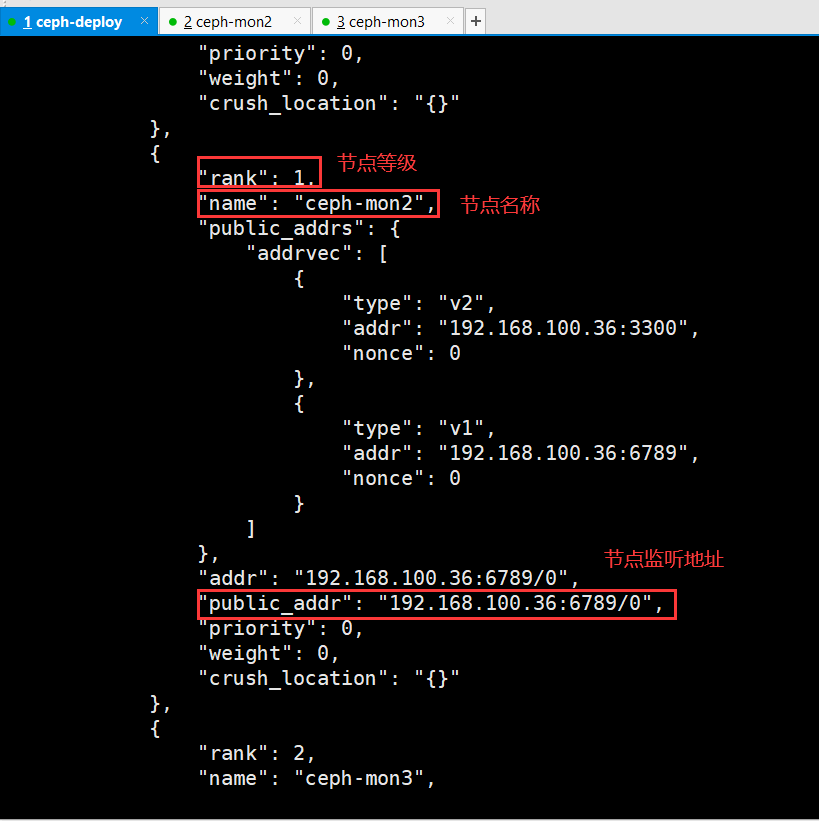
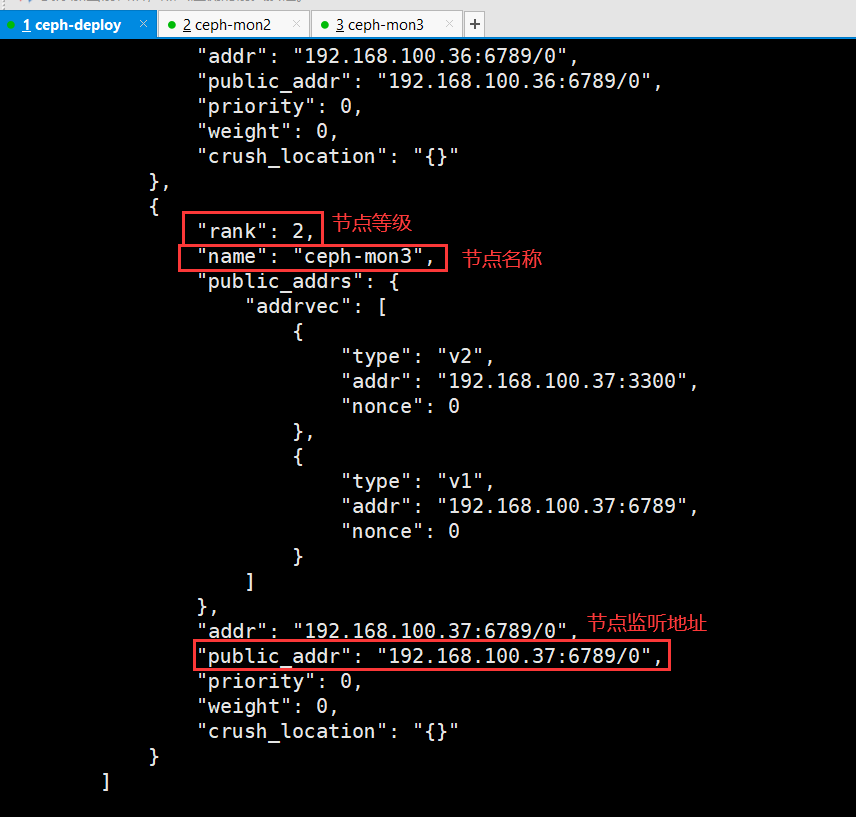
cephadmin@ceph-deploy:~/ceph-cluster$ ceph quorum_status --format json-pretty

4、验证ceph状态
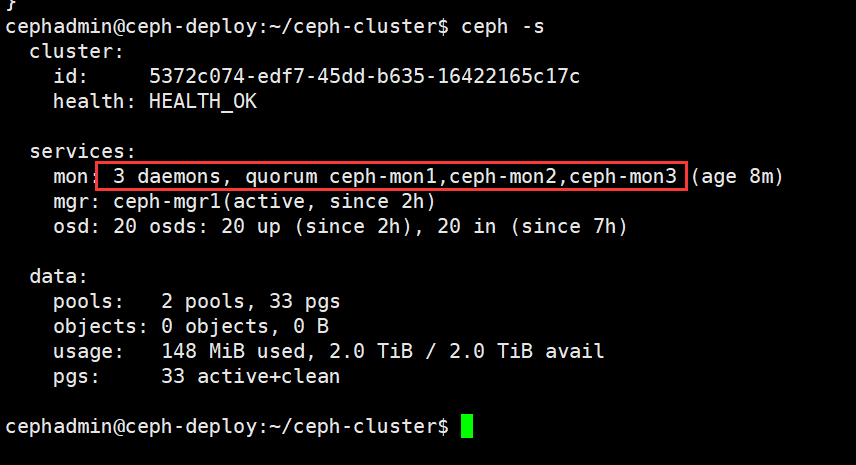
查看详细mon节点信息
cephadmin@ceph-deploy:~/ceph-cluster$ ceph mon stat
e3: 3 mons at {ceph-mon1=[v2:192.168.100.35:3300/0,v1:192.168.100.35:6789/0],ceph-mon2=[v2:192.168.100.36:3300/0,v1:192.168.100.36:6789/0],ceph-mon3=[v2:192.168.100.37:3300/0,v1:192.168.100.37:6789/0]}, election epoch 644, leader 0 ceph-mon1, quorum 0,1,2 ceph-mon1,ceph-mon2,ceph-mon3

cephadmin@ceph-deploy:~/ceph-cluster$ ceph mon dump
epoch 3
fsid 5372c074-edf7-45dd-b635-16422165c17c
last_changed 2022-10-23T16:04:00.758427+0800
created 2022-10-22T15:30:07.716415+0800
min_mon_release 16 (pacific)
election_strategy: 1
0: [v2:192.168.100.35:3300/0,v1:192.168.100.35:6789/0] mon.ceph-mon1
1: [v2:192.168.100.36:3300/0,v1:192.168.100.36:6789/0] mon.ceph-mon2
2: [v2:192.168.100.37:3300/0,v1:192.168.100.37:6789/0] mon.ceph-mon3
dumped monmap epoch 3
ceph-deploy的集群初始化目录需要更新ceph.conf配置文件,将扩展的mon节点ip,更新到ceph.conf配置文件中
cephadmin@ceph-deploy:~/ceph-cluster$ pwd
/home/cephadmin/ceph-cluster

cephadmin@ceph-deploy:~/ceph-cluster$ cat ceph.conf
[global]
fsid = 5372c074-edf7-45dd-b635-16422165c17c
public_network = 192.168.100.0/24
cluster_network = 172.16.100.0/24
mon_initial_members = ceph-mon1
mon_host = 192.168.100.35,192.168.100.36,192.168.100.37
检查各个ceph集群节点的ceph.conf,是否已经添加了后续扩展的mon节点ip,如果没有添加,则使用ceph-deploy下发配置
cephadmin@ceph-deploy:~/ceph-cluster$ ceph-deploy --overwrite-conf config push ceph-node1 ceph-node2 ceph-node3 ceph-node4 ceph-mgr1 ceph-mgr2 ceph-mon2 ceph-mon3 ceph-mon1
注意:
1、扩展mon节点一般为奇数个
2、扩展点后需要检查ceph.conf集群配置文件,如果mon_host 只指定了一个mon节点ip,那么就不能够实现真正的高可用,如果该mon节点发生宕机,整个ceph集群将无法使用。
扩展 mgr 节点
1、在mgr节点安装ceph-mgr
CentOS
[root@ceph-mgr2 ~]# yum install ceph-mgr -y
Ubuntu
首先先保证系统已添加ceph软件仓库源
root@ceph-mgr2:~# grep ceph /etc/apt/sources.list
deb https://mirrors.tuna.tsinghua.edu.cn/ceph/debian-pacific/ bionic main
# deb-src https://mirrors.tuna.tsinghua.edu.cn/ceph/debian-pacific/ bionic main
在mgr节点安装ceph-mgr
root@ceph-mgr2:~# apt install ceph-mgr
2、ceph-deploy部署节点创建mgr
cephadmin@ceph-deploy:~/ceph-cluster$ pwd
/home/cephadmin/ceph-cluster

cephadmin@ceph-deploy:~/ceph-cluster$ ceph-deploy mgr create ceph-mgr2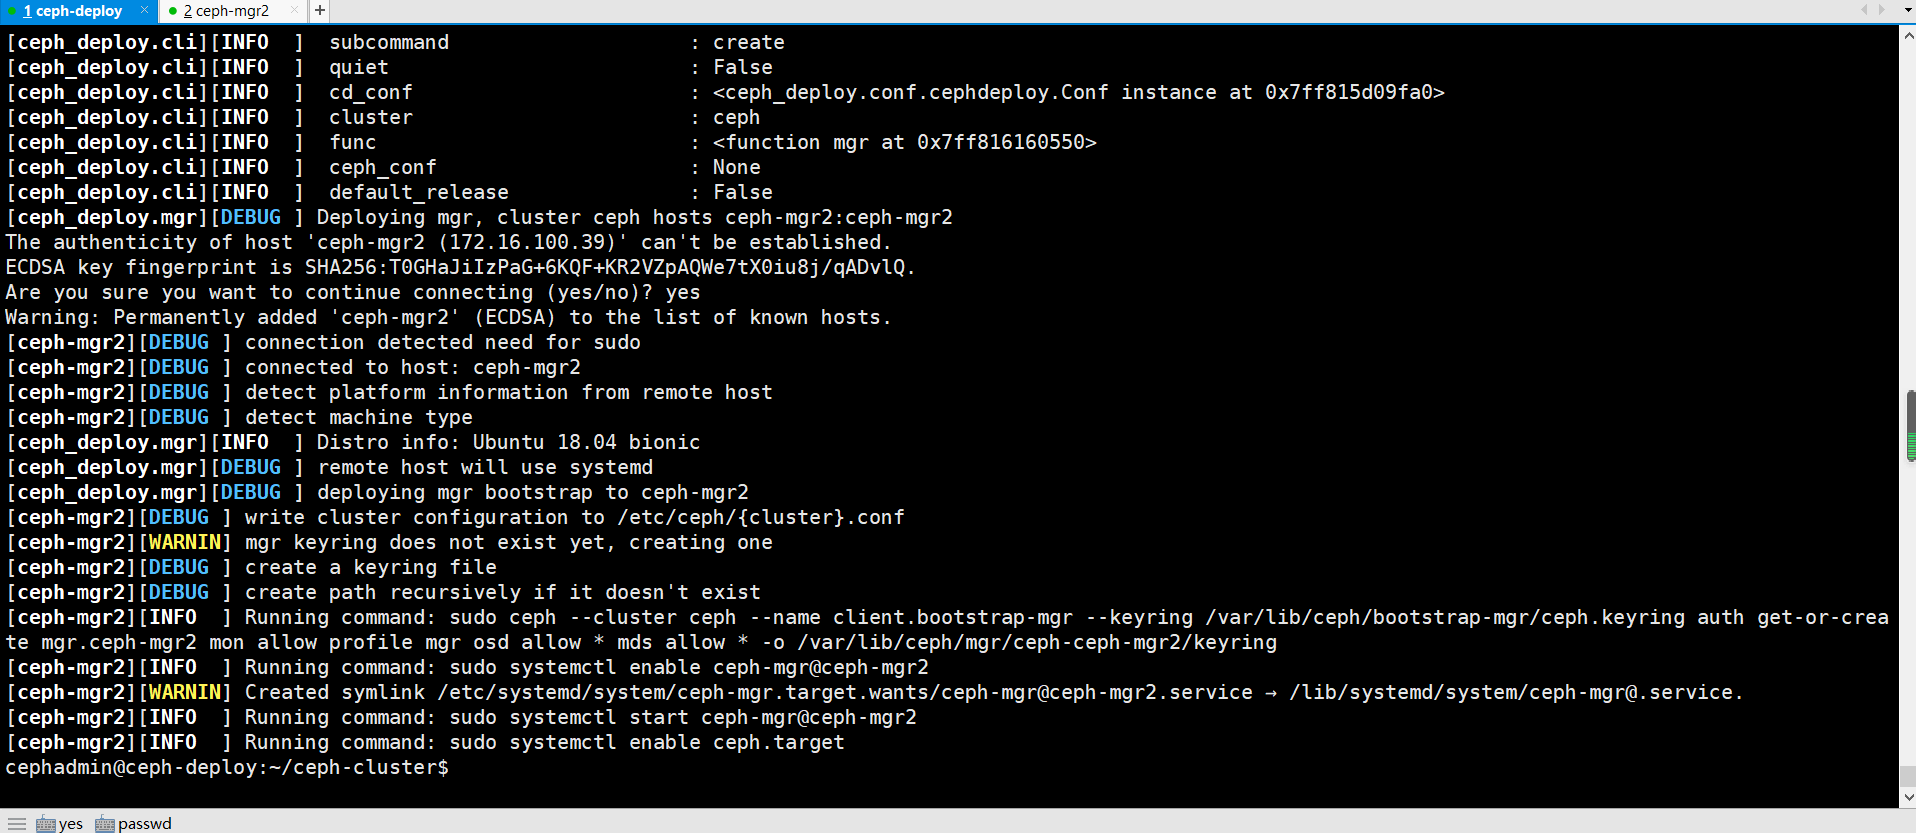
推送ceph admin秘钥和集群配置文件到mgr2节点
cephadmin@ceph-deploy:~/ceph-cluster$ ceph-deploy admin ceph-mgr2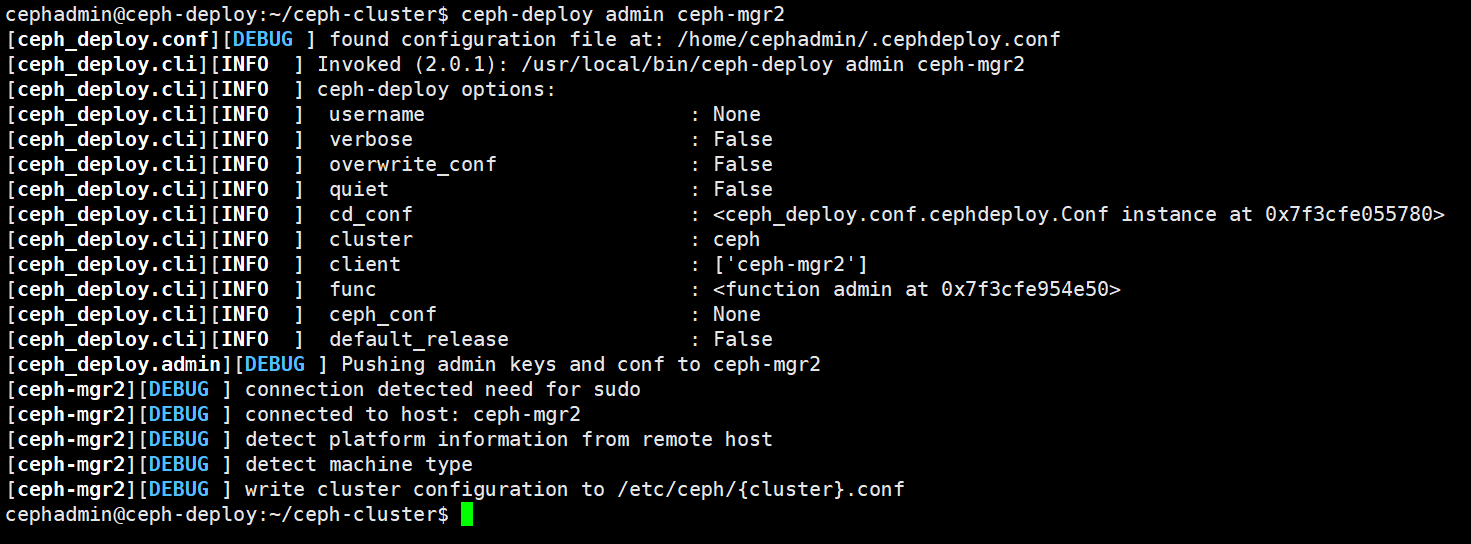
3、验证mgr状态
root@ceph-mgr2:~# systemctl status ceph-mgr@ceph-mgr2.service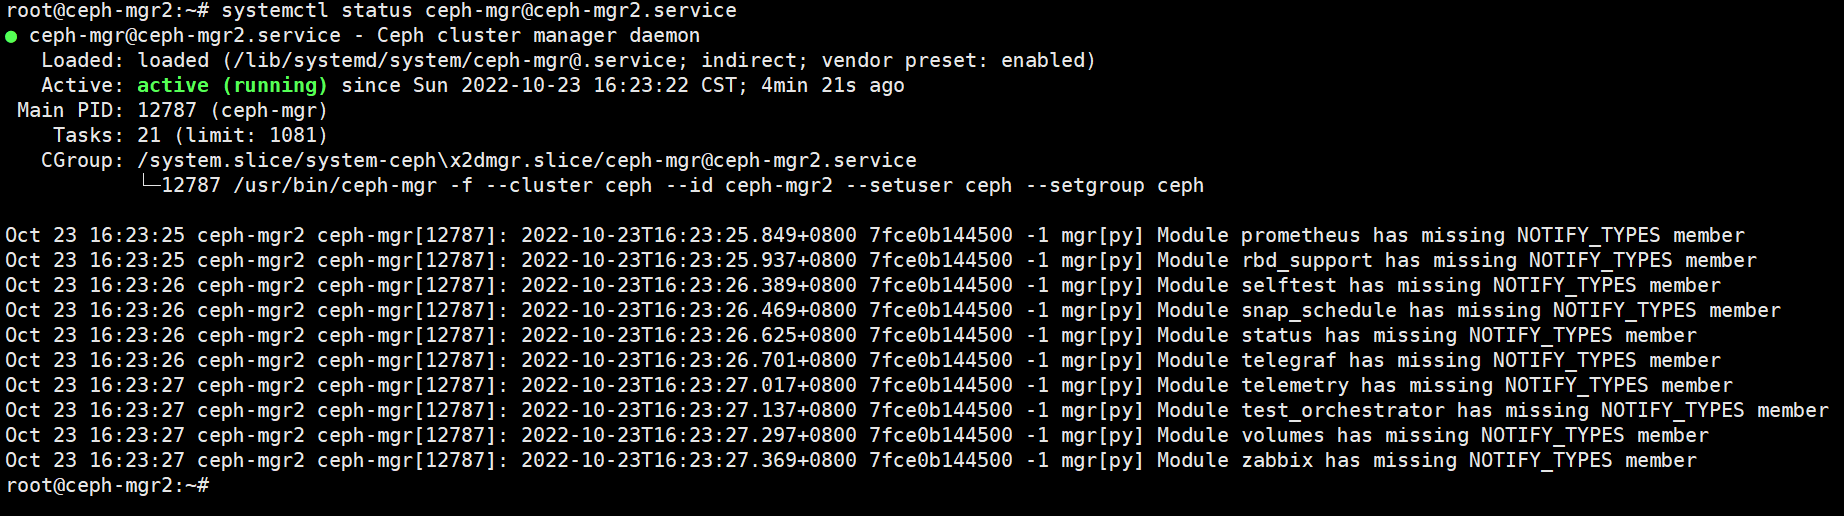
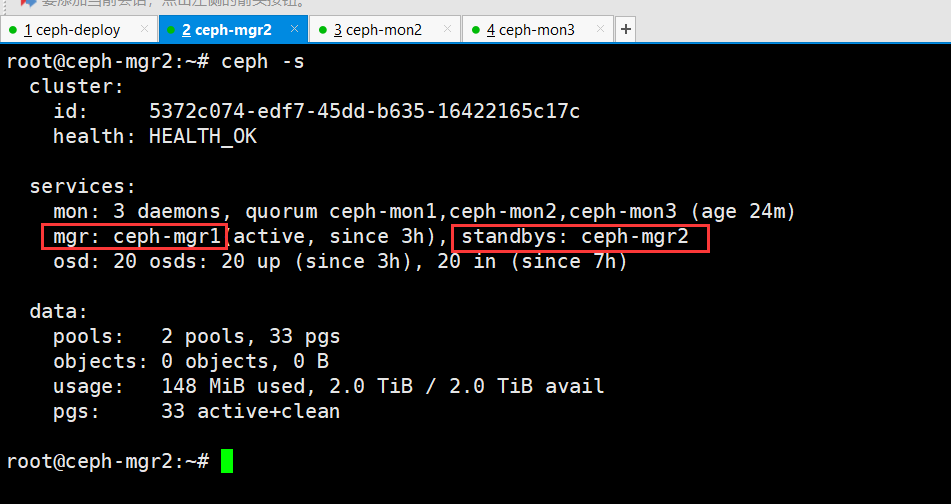
4、验证ceph集群状态
本文来自博客园,作者:PunchLinux,转载请注明原文链接:https://www.cnblogs.com/punchlinux/p/17058064.html

 浙公网安备 33010602011771号