基于StatefulSet有状态部署与DaemonSet部署prometheus node-exporter
statefulset有状态应用部署
考虑无状态的pod因素,让每个pod独立,保持pod启动顺序和唯一性。拥有唯一的网络标识符,持久存储。启动顺序有序,例如mysql主从节点
应用场景
为了解决有服务状态的集群部署、集群之间的数据同步问题(Mysql主从等)
稳定的持久化存储:Pod重新调度后访问相同的持久化数据,基于PVC来实现。
稳定的网络标志:Pod重新调度后PodName和HostName不变,基于Headless Service来实现。
有序扩展:在扩展的时候要依据定义的顺序依次依次进行,基于init containers 实现。在下一个Pod运行之前所有Pod必须是Running和Ready状态)。
有序删除,从后到前逐个删除pod。
组成部分
从上面的应用场景可以发现,StatefulSet由以下几个部分组成:
Headless Service,用于定义网络标志(DNS domain)的。
volumeClaimTemplates,用于创建PVC,指定pvc名称大小,pvc必须由存储类提供存储。为每个Pod生成不同的pvc,并绑定pv,从而实现各pod有专用存储。
StatefulSet,定义具体应用,与deployments类似。
deployment和statefulset区别:有身份(具有唯一标识符)
(1)根据主机名+按照一定规则生成域名
(2)每个pod拥有唯一的主机名
(3)唯一域名:格式:
(4)Pod主机名称.service名称.名称空间.svc.cluster.local
部署有状态服务:
声明svc取消ip地址的暴露,将clusterip置位None
root@deploy:/statefulset# kubectl create ns test
namespace/test created

root@deploy:/statefulset# vim statefulset.yaml
apiVersion: apps/v1
kind: StatefulSet
metadata:
  name: web-statefulset
  namespace: test
spec:
  serviceName: test-statefulset
  replicas: 2
  selector:
    matchLabels:
      app: web
  template:
    metadata:
      labels:
        app: web
    spec:
      containers:
      - image: nginx
        name: nginx
        ports:
          - containerPort: 80
      - name: tomcat
        image: tomcat
        ports:
          - containerPort: 8080
---
apiVersion: v1
kind: Service
metadata:
  labels:
    app: web
  name: test-statefulset
  namespace: test
spec:
  clusterIP: None
  ports:
    - port: 80
      name: nginx
      protocol: TCP
      targetPort: 80
    - port: 8080
      protocol: TCP
      targetPort: 8080
      name: tomcat
  selector:
    app: web


root@deploy:/statefulset# kubectl apply -f statefulset.yaml
查看statefulset pod
root@deploy:/statefulset# kubectl get pods
NAME                READY   STATUS    RESTARTS   AGE
web-statefulset-0   2/2     Running   0          70s
web-statefulset-1   2/2     Running   0          38s
进入到pod测试网络和主机名称
#查看svc
root@deploy:/statefulset# kubectl get svc
NAME               TYPE        CLUSTER-IP   EXTERNAL-IP   PORT(S)           AGE
test-statefulset   ClusterIP   None         <none>        80/TCP,8080/TCP   8m33s


root@deploy:/statefulset# kubectl exec -it web-statefulset-0 -- bash
Defaulted container "nginx" out of: nginx, tomcat
root@web-statefulset-0:/# cat /etc/hosts
# Kubernetes-managed hosts file.
127.0.0.1	localhost
::1	localhost ip6-localhost ip6-loopback
fe00::0	ip6-localnet
fe00::0	ip6-mcastprefix
fe00::1	ip6-allnodes
fe00::2	ip6-allrouters
10.200.166.175	web-statefulset-0.test-statefulset.test.svc.cluster.local	web-statefulset-0
使用其他namespace下的pod访问test 名称空间下的statefulset应用
root@master1:~# kubectl get pods -n default
NAME                                     READY   STATUS    RESTARTS       AGE
aliyun-web-deployment-668cb5f7b5-5rnqs   1/1     Running   1 (127m ago)   3d21h
aliyun-web-deployment-668cb5f7b5-sgs2g   1/1     Running   1 (127m ago)   3d21h
web-deployment-647db54fb5-fkggx          1/1     Running   1 (127m ago)   4d1h
web-deployment-647db54fb5-lz64s          1/1     Running   1 (127m ago)   4d1h

root@master1:~# kubectl exec -it -n default web-deployment-647db54fb5-lz64s -- curl test-statefulset.test
<!DOCTYPE html>
<html>
<head>
<title>Welcome to nginx!</title>
<style>
html { color-scheme: light dark; }
body { width: 35em; margin: 0 auto;
font-family: Tahoma, Verdana, Arial, sans-serif; }
</style>
</head>
<body>
<h1>Welcome to nginx!</h1>
<p>If you see this page, the nginx web server is successfully installed and
working. Further configuration is required.</p>

<p>For online documentation and support please refer to
<a href="http://nginx.org/">nginx.org</a>.<br/>
Commercial support is available at
<a href="http://nginx.com/">nginx.com</a>.</p>

<p><em>Thank you for using nginx.</em></p>
</body>
</html>
root@master1:~#
pod访问测试
root@web-statefulset-0:/usr/local/tomcat# curl web-statefulset-0.test-statefulset.test.svc.cluster.local
<!DOCTYPE html>
<html>
<head>
<title>Welcome to nginx!</title>
<style>
html { color-scheme: light dark; }
body { width: 35em; margin: 0 auto;
font-family: Tahoma, Verdana, Arial, sans-serif; }
</style>
</head>
<body>
<h1>Welcome to nginx!</h1>
<p>If you see this page, the nginx web server is successfully installed and
working. Further configuration is required.</p>

<p>For online documentation and support please refer to
<a href="http://nginx.org/">nginx.org</a>.<br/>
Commercial support is available at
<a href="http://nginx.com/">nginx.com</a>.</p>

<p><em>Thank you for using nginx.</em></p>
</body>
</html>
DaemonSet守护进程
DaemonSet确保集群中每个(部分)node运行一份pod副本,当node加入集群时创建pod,当node离开集群时回收pod。如果删除DaemonSet,其创建的所有pod也被删除,DaemonSet中的pod覆盖整个集群。
DaemonSet配置文件的语法和结构与Deployment几乎完全一样,区别是:
1.kind设为DaemonSet
2.不需replicas
DaemonSet 的一些典型使用场景:
在每个节点上运行集群守护进程
在每个节点上运行日志收集守护进程
在每个节点上运行监控守护进程
设置maser节点污点容忍,在master节点部署pod
root@deploy:/daemonset# kubectl get nodes
NAME         STATUS                ROLES    AGE   VERSION
192.168.100.2   Ready,SchedulingDisabled   master   11d   v1.24.3
192.168.100.5   Ready                      node     11d   v1.24.3
192.168.100.6   Ready                      node     11d   v1.24.3
查看master污点
root@deploy:/daemonset# kubectl get nodes
NAME            STATUS                     ROLES    AGE   VERSION
192.168.100.2   Ready,SchedulingDisabled   master   11d   v1.24.3
192.168.100.5   Ready                      node     11d   v1.24.3
192.168.100.6   Ready                      node     11d   v1.24.3

root@deploy:/daemonset# kubectl describe node 192.168.100.2|grep -i taint
Taints:             node.kubernetes.io/unschedulable:NoSchedule
创建daemonset,污点容忍key填写master设置的污点key
设置 hostNetwork: true,将pod端口映射在k8s节点
root@deploy:/daemonset# vim daemonset.yaml
apiVersion: apps/v1
kind: DaemonSet
metadata:
  labels:
    app: web
  name: web
  namespace: test
spec:
  selector:
    matchLabels:
      app: web
  template:
    metadata:
      labels:
        app: web
    spec:
      hostNetwork: true
      hostPID: true
      containers:
      - image: nginx
        name: nginx
        imagePullPolicy: IfNotPresent
        ports:
        - containerPort: 80
      tolerations:
      - key: "node.kubernetes.io/unschedulable"
        operator: "Exists"
        effect: "NoSchedule"

查看k8s节点端口80监听
root@master1:~# lsof -i :80
COMMAND    PID       USER   FD   TYPE DEVICE SIZE/OFF NODE NAME
nginx   114536            root    7u  IPv4 569545      0t0  TCP *:http (LISTEN)
nginx   114536            root    8u  IPv6 569546      0t0  TCP *:http (LISTEN)
nginx   114583 systemd-resolve    7u  IPv4 569545      0t0  TCP *:http (LISTEN)
nginx   114583 systemd-resolve    8u  IPv6 569546      0t0  TCP *:http (LISTEN)
nginx   114583 systemd-resolve   13u  IPv4 589033      0t0  TCP master1:http->192.168.100.1:60148 (ESTABLISHED)
nginx   114584 systemd-resolve    7u  IPv4 569545      0t0  TCP *:http (LISTEN)
nginx   114584 systemd-resolve    8u  IPv6 569546      0t0  TCP *:http (LISTEN)
客户端访问:
部署普罗米修斯node客户端
设置hostNetwork: true将pod端口在k8s节点监听;
设置hostPort: 9100,将pod端口监听在宿主机k8s节点的9100端口
root@deploy:/daemonset# vim prometheus_node.yaml
apiVersion: apps/v1
kind: DaemonSet
metadata:
  labels:
    app: prometheus-node
  name: prometheus-node-daemonset
  namespace: test
spec:
  selector:
    matchLabels:
      app: prometheus-node
  template:
    metadata:
      labels:
        app: prometheus-node
    spec:
      hostNetwork: true
      hostPID: true
      tolerations:
      - key: "node.kubernetes.io/unschedulable"
        operator: "Exists"
        effect: "NoSchedule"
      containers:
      - image: prom/node-exporter:v1.3.1
        name: prometheus-node
        imagePullPolicy: IfNotPresent
        ports:
        - containerPort: 9100
          hostPort: 9100
          protocol: TCP
          name: metrics
        volumeMounts:
        - mountPath: /host/proc
          name: proc
        - mountPath: /host/sys
          name: sys
        - mountPath: /host
          name: rootfs
        args:
        - --path.procfs=/host/proc
        - --path.sysfs=/host/sys
        - --path.rootfs=/host
      volumes:
        - name: proc
          hostPath:
            path: /proc
        - name: sys
          hostPath:
            path: /sys
        - name: rootfs
          hostPath:
            path: /
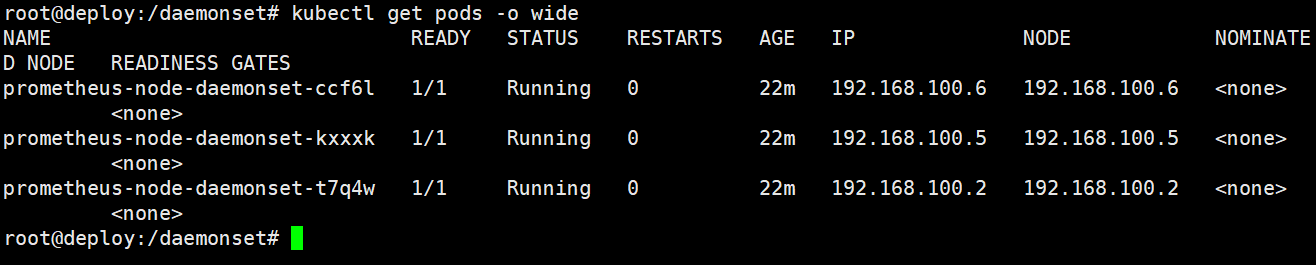
查看pod在集群中运行
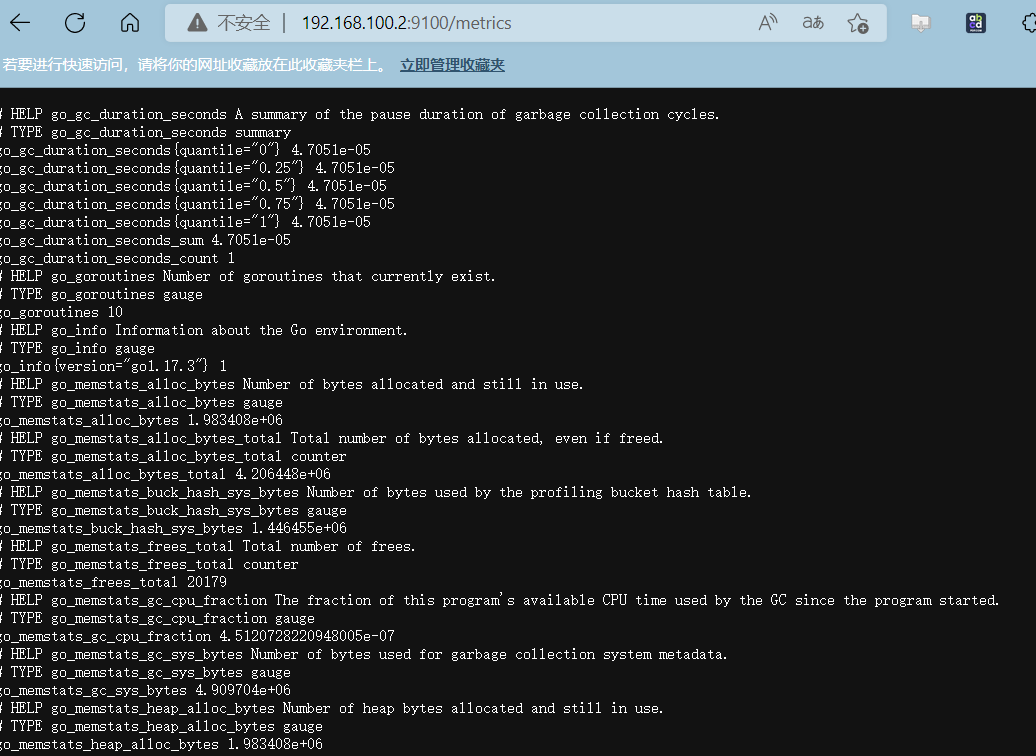
客户端访问:节点端口

master节点
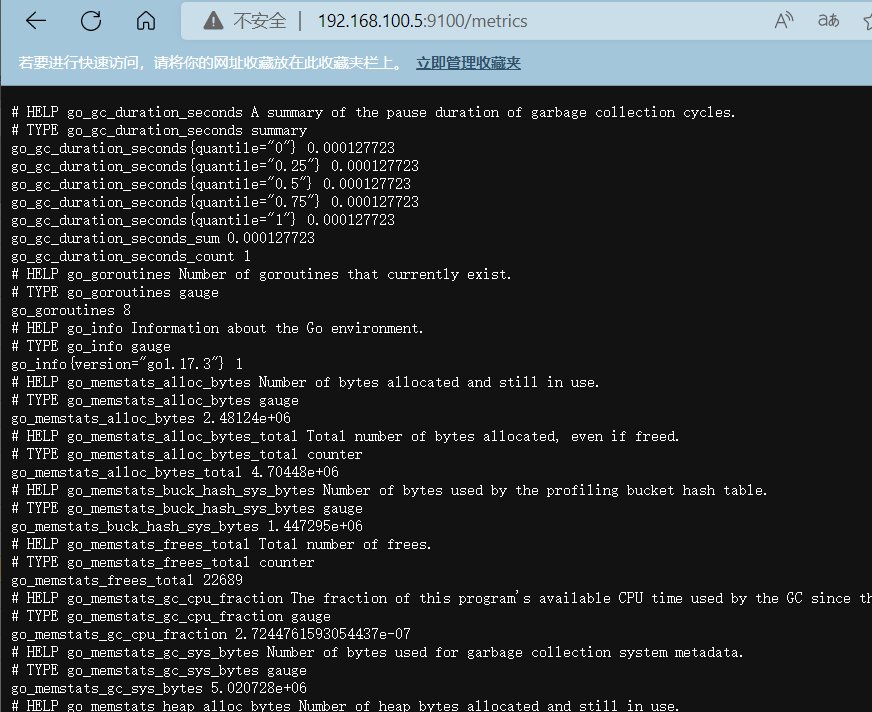
node1节点
node2节点

本文来自博客园,作者:PunchLinux,转载请注明原文链接:https://www.cnblogs.com/punchlinux/p/16561471.html

 浙公网安备 33010602011771号