[转]Cube Map
http://wiki.polycount.net/CubeMap
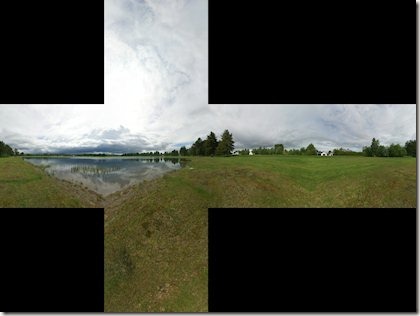
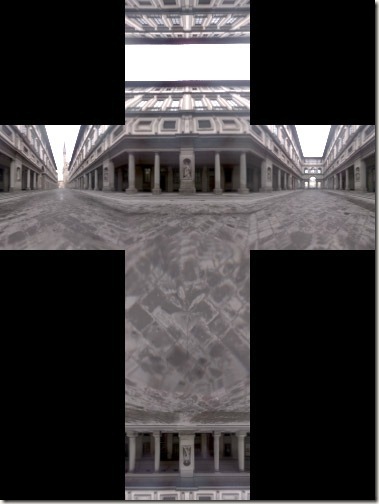
A cubemap is six images that are mapped onto a cube, creating a 360° panorama. Cubemaps are supported natively in graphics hardware so they're really quick to transform and render, because of this there's a unified method for rendering them in games.
Contents
1. Cube Map
3. 3ds Max
1. Metal Bump9
4. DxTex
5. Maya
6. Photoshop
4. Links
5. Software
| A cubemap in horizontal-cross format. | A cubemap in vertical-cross format. |
| A cubemap using a horizontal layout. |
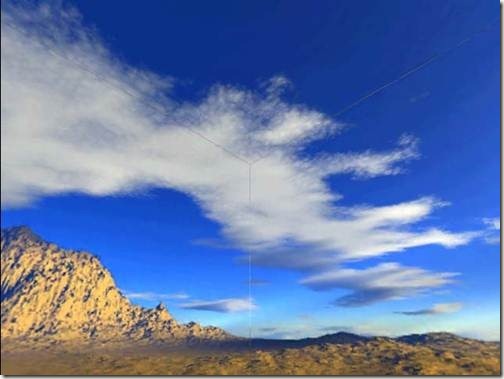
The cube is usually centered on the current viewpoint or camera. This means, when used as a backdrop or skybox it always appears infinitely distant. If you turn on wireframe mode in any 3d engine using a cubemap skybox, you'll see the geometry of the box. In the end it's just a regular mesh object.
Reflections & Lighting
When used for reflections, the reflection cubemap is usually centered on the mesh object. The viewing angle bounces off the mesh surface at an angle opposite to the surface normals, so it points to particular parts of the cube map.
Cubemaps can also be used for soft ambient-occlusion-like environment lighting, by using a diffusely convolved cubemap.
Creating Cubemaps
Angular Distortion
A cube map has to be created with some angular distortion in order to display a seamless panoramic image.
A cube map is always displayed from a viewpoint in the center of a cube mesh. This means the center of each cube face is closer to you than the edges and corners are. To counteract this, a cube map needs angular distortion.
This distortion becomes more obvious when you view it at any other angle, other than from the center of a cube.
| (distortion images needed) |
Cube Map Formats
The bitmaps for each of the six sides need to be square, each needs to be powers-of-two in size (128, 256, 512, etc.), and all six images need to be the same resolution.
Usually for games you store the bitmaps all in one file using DDS or another compressed format, though some editors prefer them stored as six separate bitmaps (then compress them internally).
3ds Max
There are two main ways to create cubemaps in 3ds Max:
- Metal Bump9 ... saves directly into DDS cubemap format, but it's limited to 256x256 and you can't set the DDS compression format (it always uses ARGB, which is uncompressed).
- Reflect/Refract Map ... more steps, but you're not limited to a particular resolution or format.
3ds Max can display cubemaps in real-time if you use the DDS cubemap format and a DirectX Shader material.
Metal Bump9
- Setup a 3D scene you wish to render into a cubemap.
- Place some type of object at the viewpoint you wish to render the cubemap from, for example a camera or a point helper or a geometric object. The orientation of the object doesn't matter, and the object itself won't be rendered into the cubemap.
- Create a Standard material, open the DirectX Manager rollout, and change the None flyout to Metal Bump9.
- Press Pick object and create and select the object.
- Choose a name and a location to render to.
3ds Max will render it directly into DDS cubemap format, but it's limited to 256x256, and you can't set the DDS compression (it uses ARGB).
Reflect/Refract Map
- Setup a 3D scene you wish to render into a cubemap.
- Place some type of object at the viewpoint you wish to render the cubemap from, for example a camera or a point helper or a geometric object. The object itself won't be rendered into the cubemap.
- Setup your rendering options (texture filtering, anti-aliasing, etc.).
- Create a Standard material and load a Reflect/Refract map into any slot.
- In the map, set Source = From File.
- Set the Size spinner to the resolution you want to render. If you're going to use the cubemap for a game it should be a powers-of-two number (128, 256, 512, etc.).
- Use the Render Cubic Map Files / To File: button to set the prefix name and bitmap format to render to.
- Press Pick Object and Render Maps and select the viewpoint object.
The six rendered bitmaps will automatically be loaded into the Reflect/Refect map, or you can convert them into a DDS cubemap with Dxtex or another tool.
Warning: The render cannot be canceled once the object is picked, so save your Max file before rendering, in case Max freezes!
DxTex
Microsoft's DxTex offers a way to create a single DDS cube bitmap from six bitmaps. DxTex is automatically installed when you install the DirectX SDK. Once installed it will be found in the folder (SDK root)\Utilities\Bin\x86 or x64. Use the x86 version unless you're running a 64bit OS. There's also a DDS plugin for Photoshop in the SDK, it expects a 1x6 layout in Photoshop:
- +X
- -X
- +Y
- -Y
- +Z
- -Z
The DDS format does not actually store the images in a horizontal layout... each image is stored as a separate layer or slice in the DDS file. The DxTex plugin merely lays them out horizontally to make the cubemap easier to edit in Photoshop.
How to compile a DDS cubemap in DxTex:
- Open an existing texture by selecting the File -> Open... menu item.
- Select the Format -> Make Into Cube Map... menu item.
- The current texture will occupy one face of the cube map. From the dialog that pops up, select which face you want the texture to occupy, and click OK.
- For each of the other cube faces, select the View->Cube Map Face menu item and select a face from the list that appears.
- Select the File->Open Onto This Cubemap Face... menu item and select a texture to open from the dialog that pops up.
Maya
The easiest way to render a Maya scene into a cubemap is to use six cameras, then stitch the six images together into a cubemap.
Workflow tips can be found in the Polycount thread [Maya 2009] how to render an environment map?.
Photoshop
The NVIDIA DDS plugin for Photoshop is one way to create DDS cubemaps. It expects you to lay out the faces of the cubemap horizontally: +X -X +Y -Y +Z -Z. In 3ds Max terms this is: RT, LF, UP, DN, BK, FR.
The DDS format does not actually store the images in a horizontal layout... each image is stored as a separate layer or slice in the DDS file. The Nvidia plugin merely lays them out horizontally to make the cubemap easier to edit in Photoshop.
Cubemap Seams
Cubemaps can show seams along the edges of the cube if they aren't mapped properly.
When a cubemap is rendered automatically in graphics hardware by a game engine, it will be seamless because it uses the Clamp uv address mode.
However if an artist manually creates a cube mesh and maps the six bitmaps onto it, usually this will cause seams from texture filtering. By default most materials use the Wrap uv address mode, which allows a texture to tile across a mesh. With a cubemap however this causes a sliver of the opposite side of each texture to be filtered into each edge. If your material has the option to use Clamp instead of Wrap, this will remove the seams.
There are two solutions for this:
- Set the texture coordinate address mode to Clamp instead of Wrap. Then the edge pixels will be sampled instead of the opposite side.
- Or, for each face of the cube: copy the edge pixels out a couple times, scale each face back down to a powers-of-two size, and scale the UVs down a little. The PowerVR SDK has a tutorial about this in their docs.
| Seams on the edges of a cubemap. | Seams are solved by adding borders to each face texture. |
Links
- Cubemaps how-to and why by Zeller Samuel
A great introduction to cubemaps. - Cubemaps Tutorial by CGTextures.com
Tutorial using Photoshop, NVIDIA's Photoshop plugin, and CubeMapGen to convert cubemaps into various layouts. - Diffusely Convolved Cube Map wiki page describes how to downsample cubemaps to use for lighting.
- Correct uvmapping for a cub to preview cubemap on the Polycount forum.
Software
- CubeMapGen from AMD.
- DirectX SDK has the DxTex tool from Microsoft.
- DDS plugin for Photoshop from NVIDIA.
- HDR Shop ($) older version is free for non-commercial use.
- Bixorama ($) panorama conversion utility (warning... conversions are aliased and jaggy).
- Planettool command line conversion tool.
- Flexify ($) conversion filter for Photoshop.
- PanoCube ($) conversion tool.
- Hugin stitching and conversion tool.
- Generate Cubemap conversion tool for Unity
- Skypaint ($) cube map painting tool that requires Photoshop, Paint Shop Pro, or Photo Paint.


 浙公网安备 33010602011771号