

4.spring-security基于数据库实现认证功能
spring-security基于数据库实现认证功能
之前我们所使用的用户名和密码是来源于框架自动生成的, 现在我们需要实现基于数据库中的用户名和密码功能,首先得需要实现security的一个UserDetailsService 接口, 重写这个接口里面 loadUserByUsername;
1 2 3 4 5 6 7 8 9 10 11 12 13 14 15 16 17 18 19 20 21 22 23 24 25 26 27 28 29 30 31 32 33 34 35 36 37 38 39 40 41 42 | package com.po.service.impl;import com.po.domain.User;import com.po.service.UserService;import org.springframework.beans.factory.annotation.Autowired;import org.springframework.security.core.GrantedAuthority;import org.springframework.security.core.userdetails.UserDetails;import org.springframework.security.core.userdetails.UserDetailsService;import org.springframework.security.core.userdetails.UsernameNotFoundException;import org.springframework.stereotype.Service;import java.util.ArrayList;import java.util.Collection;@Servicepublic class MyUserDetailsService implements UserDetailsService { @Autowired private UserService userService; /** * 根据用户名查询用户 * @param username 前端传入的用户名 * @return * @throws UsernameNotFoundException */ @Override public UserDetails loadUserByUsername(String username) throws UsernameNotFoundException { User user = userService.findByUsername(username); if (user == null) { throw new UsernameNotFoundException("user is ==>" + username); } Collection<? extends GrantedAuthority> authorities = new ArrayList<>(); UserDetails userDetails = new org.springframework.security.core.userdetails.User(username, "{noop}"+user.getPassword(),//不使用密码加密 true, //用户是否启用 (true:启用) true,//用户是否过期 (true:没有过期) true, //用户凭证是否过期 (true:没有过期) true, // 用户是否锁定 (true:没有锁定) authorities); return userDetails; }} |
在SecurityConfiguration配置类中指定自定义用户认证
1 2 3 4 5 6 7 8 9 10 11 12 13 14 15 16 17 18 19 20 21 22 23 24 25 26 27 28 29 30 31 32 33 34 35 36 37 38 39 40 41 42 43 44 45 46 47 48 49 50 51 52 53 54 55 56 57 58 59 | package com.po.config;import com.po.service.impl.MyUserDetailsService;import org.springframework.beans.factory.annotation.Autowired;import org.springframework.context.annotation.Configuration;import org.springframework.security.config.annotation.authentication.builders.AuthenticationManagerBuilder;import org.springframework.security.config.annotation.web.builders.HttpSecurity;import org.springframework.security.config.annotation.web.builders.WebSecurity;import org.springframework.security.config.annotation.web.configuration.WebSecurityConfigurerAdapter;@Configurationpublic class SecurityConfiguration extends WebSecurityConfigurerAdapter { @Autowired private MyUserDetailsService myUserDetailsService; /** * http请求方法 * * @param http * @throws Exception */ @Override protected void configure(HttpSecurity http) throws Exception { /** http.httpBasic() //开启httpBasic认证 .and().authorizeRequests().anyRequest().authenticated(); //所有请求都需要认证之后访问 *//* http.formLogin().loginPage("/login.html")//开启表单认证 // .and().authorizeRequests() //放行登录页面 // .anyRequest().authenticated(); // .and().authorizeRequests().antMatchers("/login.html").permitAll() //放行登录页面 .and().authorizeRequests().antMatchers("/toLoginPage").permitAll() //放行登录页面 .anyRequest().authenticated();*/ http.formLogin() //开启表单认证 .loginPage("/toLoginPage") // 自定义登陆页面 .loginProcessingUrl("/login") //表单提交路径 .usernameParameter("username").passwordParameter("password") //自定义input额name值和password .successForwardUrl("/") //登录成功之后跳转的路径 .and().authorizeRequests().antMatchers("/toLoginPage").permitAll() //放行登录页面 .anyRequest().authenticated() .and().headers().frameOptions().sameOrigin() //加载同源域名下iframe页面 .and().csrf().disable();//关闭csrf防护 } @Override public void configure(WebSecurity web) throws Exception { //解决静态资源被拦截的问题 web.ignoring().antMatchers("/css/**","/images/**","/js/**"); } /** *身份安全管理器 * @param auth * @throws Exception */ @Override protected void configure(AuthenticationManagerBuilder auth) throws Exception { auth.userDetailsService(myUserDetailsService); }} |
此时,控制台也不会生成随机密码,现在走的是数据库的认证方式;
在数据库加入一条数据 密码是明文
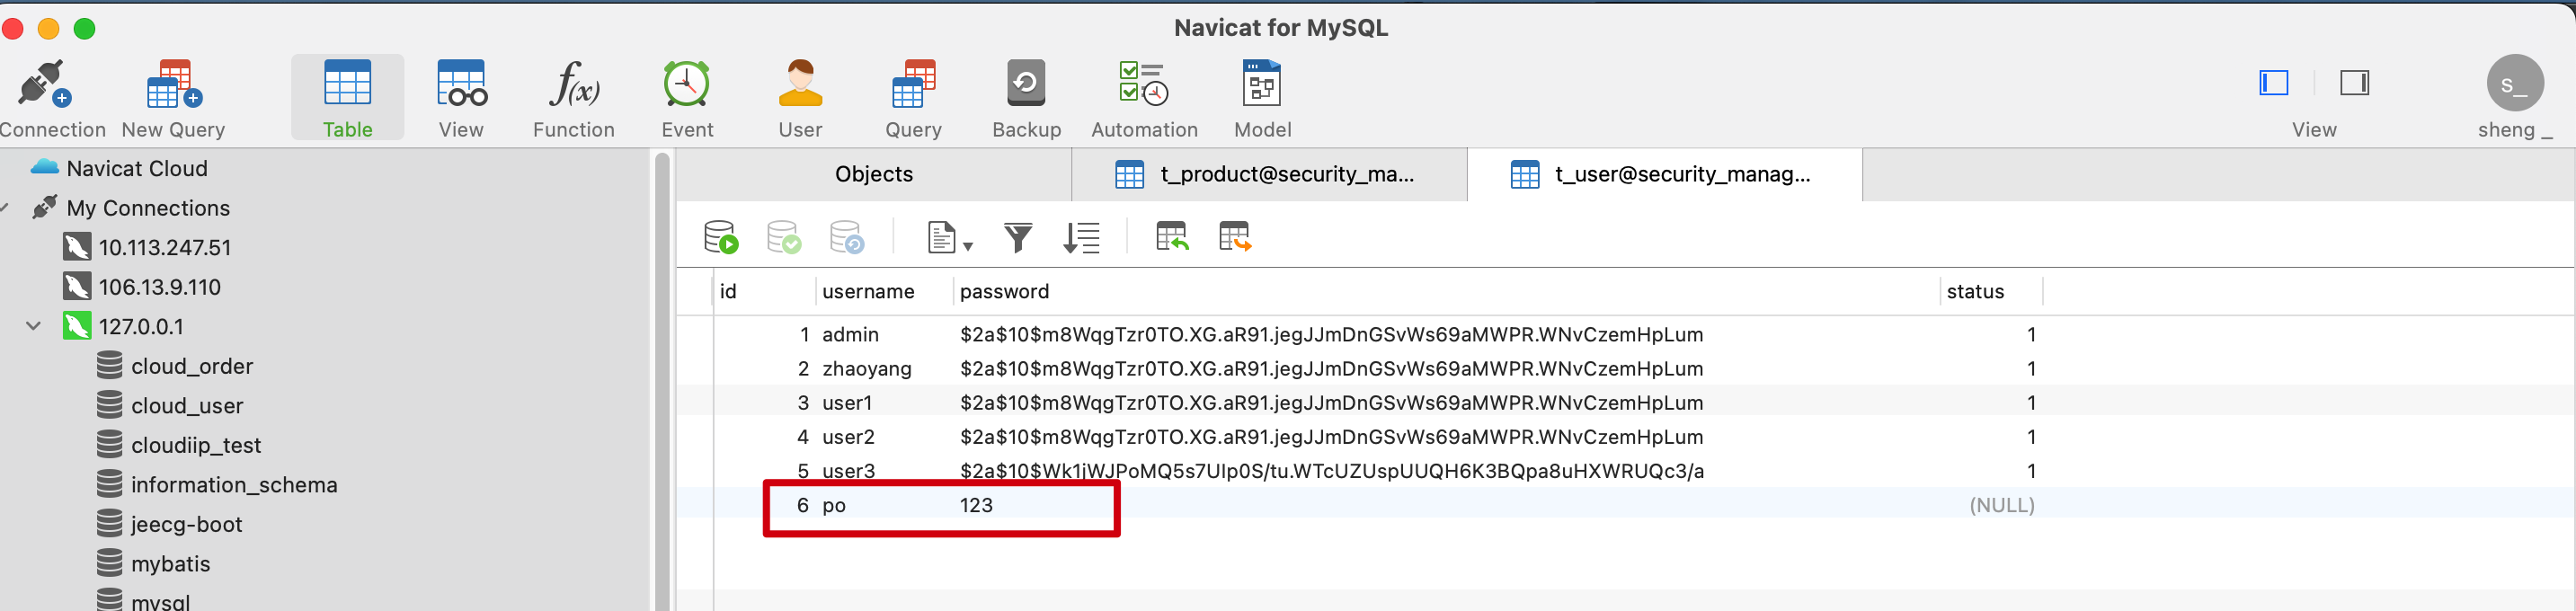
在基于数据库完成用户登录的过程中,我们所是使用的密码是明文的,规则是通过对密码明文添加 {noop} 前缀。
输入用户名po 密码123
可以验证登录成功。
密码加密认证
那么下面 Spring Security 中的密码编码进行一些探讨。
Spring Security 中 PasswordEncoder 就是我们对密码进行编码的工具接口。该接口只有两个功能: 一个是匹配验证(matches)。另一个是密码加密(encode)。
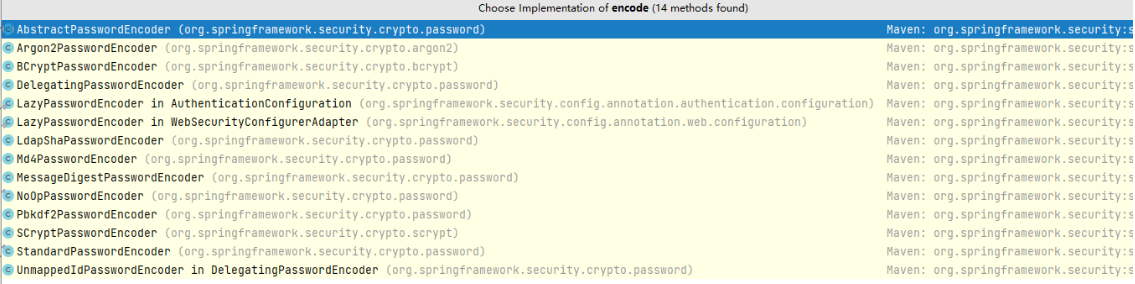
Spring Security主流用法就是 BCryptPasswordEncoder
BCrypt算法介绍:
任何应用考虑到安全,绝不能明文的方式保存密码。密码应该通过哈希算法进行加密。 有很多标准的算法比如SHA或者MD5,结合salt(盐)是一个不错的选择。Spring Security 提供了 BCryptPasswordEncoder类,实现Spring的PasswordEncoder接口使用BCrypt强哈希方法来加密密码。BCrypt强哈希方法 每次加密的结果都不一样,所以更加的安全。
bcrypt加密后的字符串形如:$2a$10$wouq9P/HNgvYj2jKtUN8rOJJNRVCWvn1XoWy55N3sCkEHZPo3lyWq
其中$是分割符,无意义;2a是bcrypt加密版本号;10是const的值;而后的前22位是salt值;再然后的字符串就是密码的密文了;这里的const值即生成salt的迭代次数,默认值是10,推荐值 12。
下面在项目中使用BCrypt算法进行加密
首先先看一个 PasswordEncoderFactories,它是密码器工厂
1 2 3 4 5 6 7 8 9 10 11 12 13 14 15 16 17 18 19 20 21 22 23 24 25 26 27 28 29 30 31 32 33 34 35 36 37 38 39 40 41 42 | //// Source code recreated from a .class file by IntelliJ IDEA// (powered by FernFlower decompiler)//package org.springframework.security.crypto.factory;import java.util.HashMap;import java.util.Map;import org.springframework.security.crypto.argon2.Argon2PasswordEncoder;import org.springframework.security.crypto.bcrypt.BCryptPasswordEncoder;import org.springframework.security.crypto.password.DelegatingPasswordEncoder;import org.springframework.security.crypto.password.LdapShaPasswordEncoder;import org.springframework.security.crypto.password.Md4PasswordEncoder;import org.springframework.security.crypto.password.MessageDigestPasswordEncoder;import org.springframework.security.crypto.password.NoOpPasswordEncoder;import org.springframework.security.crypto.password.PasswordEncoder;import org.springframework.security.crypto.password.Pbkdf2PasswordEncoder;import org.springframework.security.crypto.password.StandardPasswordEncoder;import org.springframework.security.crypto.scrypt.SCryptPasswordEncoder;public class PasswordEncoderFactories { public static PasswordEncoder createDelegatingPasswordEncoder() { String encodingId = "bcrypt"; Map<String, PasswordEncoder> encoders = new HashMap(); encoders.put(encodingId, new BCryptPasswordEncoder()); encoders.put("ldap", new LdapShaPasswordEncoder()); encoders.put("MD4", new Md4PasswordEncoder()); encoders.put("MD5", new MessageDigestPasswordEncoder("MD5")); encoders.put("noop", NoOpPasswordEncoder.getInstance()); encoders.put("pbkdf2", new Pbkdf2PasswordEncoder()); encoders.put("scrypt", new SCryptPasswordEncoder()); encoders.put("SHA-1", new MessageDigestPasswordEncoder("SHA-1")); encoders.put("SHA-256", new MessageDigestPasswordEncoder("SHA-256")); encoders.put("sha256", new StandardPasswordEncoder()); encoders.put("argon2", new Argon2PasswordEncoder()); return new DelegatingPasswordEncoder(encodingId, encoders); } private PasswordEncoderFactories() { }} |
之前我们在项目中密码使用的是明文的是 noop , 代表不加密使用明文密码, 现在用BCrypt只需要将 noop 换成 bcrypt 即可,如下
1 2 3 4 5 6 7 8 9 10 11 12 13 14 15 16 17 18 19 20 21 22 23 24 25 26 27 28 29 30 31 32 33 34 35 36 37 38 39 40 41 42 | package com.po.service.impl;import com.po.domain.User;import com.po.service.UserService;import org.springframework.beans.factory.annotation.Autowired;import org.springframework.security.core.GrantedAuthority;import org.springframework.security.core.userdetails.UserDetails;import org.springframework.security.core.userdetails.UserDetailsService;import org.springframework.security.core.userdetails.UsernameNotFoundException;import org.springframework.stereotype.Service;import java.util.ArrayList;import java.util.Collection;@Servicepublic class MyUserDetailsService implements UserDetailsService { @Autowired private UserService userService; /** * 根据用户名查询用户 * @param username 前端传入的用户名 * @return * @throws UsernameNotFoundException */ @Override public UserDetails loadUserByUsername(String username) throws UsernameNotFoundException { User user = userService.findByUsername(username); if (user == null) { throw new UsernameNotFoundException("user is ==>" + username); } Collection<? extends GrantedAuthority> authorities = new ArrayList<>(); UserDetails userDetails = new org.springframework.security.core.userdetails.User(username, "{bcrypt}"+user.getPassword(),//不使用密码加密 true, //用户是否启用 (true:启用) true,//用户是否过期 (true:没有过期) true, //用户凭证是否过期 (true:没有过期) true, // 用户是否锁定 (true:没有锁定) authorities); return userDetails; }} |
再次启动 发现输入po 123 不能登录成功了
我们可以写个main方法测试一下
1 2 3 4 5 6 7 8 9 10 11 12 13 14 | package com.po.test;import org.springframework.security.crypto.bcrypt.BCryptPasswordEncoder;public class TestBcrypt { public static void main(String[] args) { BCryptPasswordEncoder bCryptPasswordEncoder = new BCryptPasswordEncoder(); String encode = bCryptPasswordEncoder.encode("123"); System.out.println(encode); String encode1 = bCryptPasswordEncoder.encode("123"); System.out.println(encode1); }} |
运行打印结果:
$2a$10$cOSDRbSY/I9/33mx86otqu.Sdvcc6O.X54nadrgoeYMXhk/s6EfDq
$2a$10$X.05M/HB373NLiNoaO/Z..M41wp4EMuvP4f5NWsdMtHS2.lg0Rmq2
由于BCrypt是强哈希算法,可见加密结果是不一样的;
我们把其中的一个结果 复制到数据库里
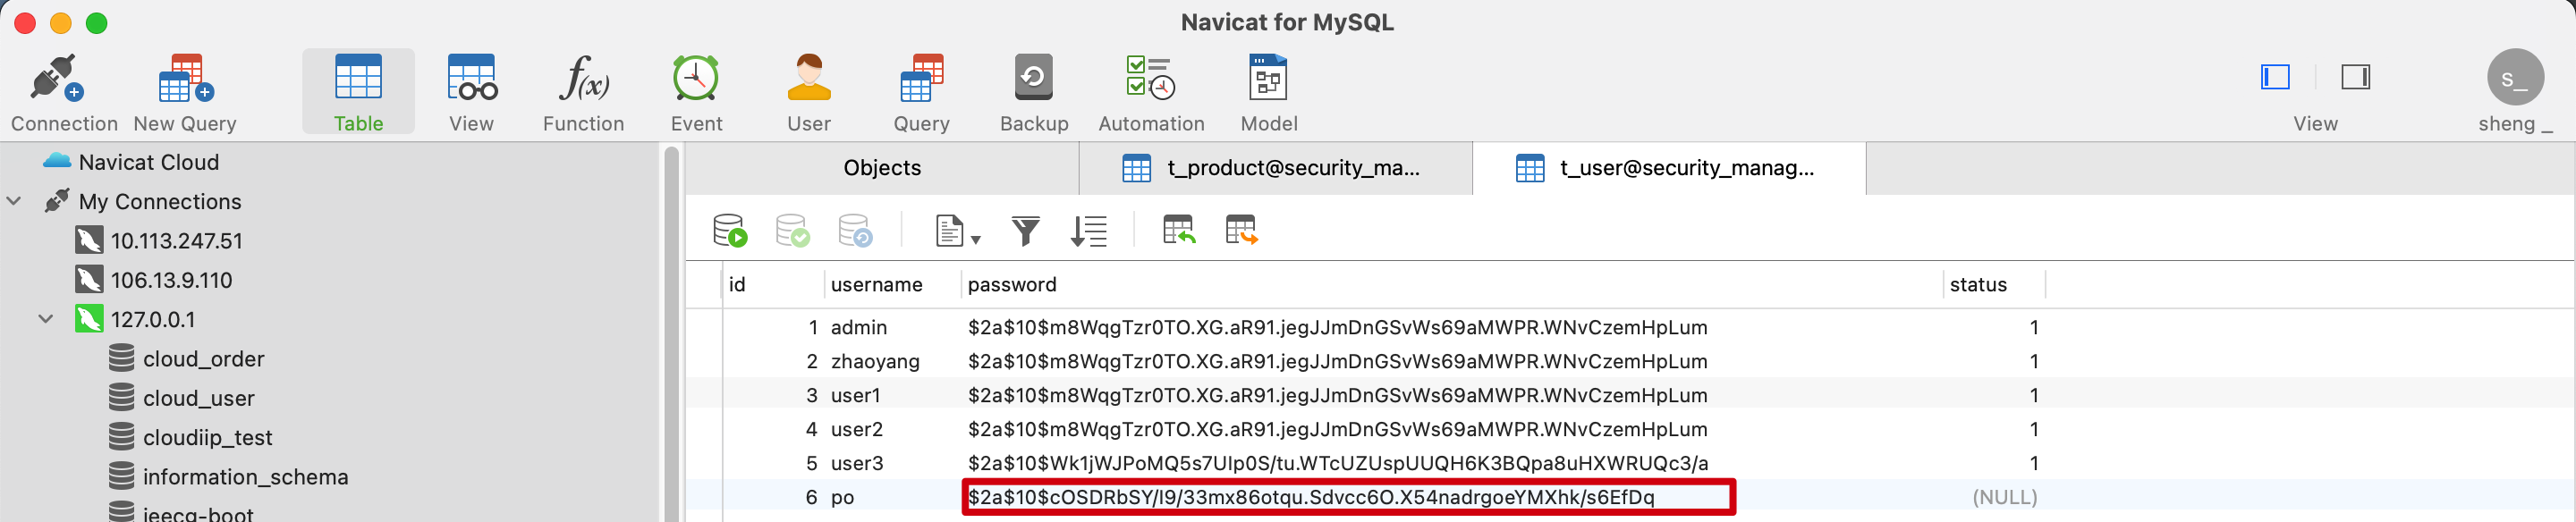
再次启动 输入 po 123
发现登录成功


【推荐】国内首个AI IDE,深度理解中文开发场景,立即下载体验Trae
【推荐】编程新体验,更懂你的AI,立即体验豆包MarsCode编程助手
【推荐】抖音旗下AI助手豆包,你的智能百科全书,全免费不限次数
【推荐】轻量又高性能的 SSH 工具 IShell:AI 加持,快人一步
· 开源Multi-agent AI智能体框架aevatar.ai,欢迎大家贡献代码
· Manus重磅发布:全球首款通用AI代理技术深度解析与实战指南
· 被坑几百块钱后,我竟然真的恢复了删除的微信聊天记录!
· 没有Manus邀请码?试试免邀请码的MGX或者开源的OpenManus吧
· 园子的第一款AI主题卫衣上架——"HELLO! HOW CAN I ASSIST YOU TODAY