 本篇开始模拟一个船舶管理系统,提供查询、添加、修改船舶的功能,这里介绍其中的数据展示和查询功能。
本篇开始模拟一个船舶管理系统,提供查询、添加、修改船舶的功能,这里介绍其中的数据展示和查询功能。
目录
1. 数据展示
2. 数据查询
3. 在线演示
1. 数据展示
在这里我们将模拟一个船舶管理系统,并提供查询、添加、修改的功能。
大致的目录结构如下:

ShipMgrTab.js :船舶业务的入口。
controller 目录:存放船舶业务的逻辑控制文件。
model 目录:存放船舶业务的model文件。
store 目录 :存放船舶业务的store文件。
view 目录 :存放船舶业务的组件文件。
1.1 设定Model
在展示数据之前要先做一些准备功能,比如业务与服务器数据交互的方式。
Model表示业务的实体对象,在这里设定船舶的Model:
Ext.define('App.ShipMgr.model.ShipModel', {
    extend: 'Ext.data.Model',
    fields: [
        { name: 'ShipId', type: 'string', remark: '船舶ID' },
        { name: 'ShipName', type: 'string', remark: '船舶名称' },
        { name: 'State', type: 'string', remark: '状态' },
        { name: 'StateName', type: 'string', remark: '状态名称' },
        { name: 'Tonnage', type: 'string', remark: '吨位' },
        { name: 'LoadNumber', type: 'int', remark: '核载人数' },
    ]
});
1.2 设定Store
Store封装了一个Model对象的缓存,通过 Proxy 加载数据,并提供了对数据进行排序、筛选和查询的功能。 (在这里只是简单写出需要的Model和Store;若需要对Mode、 Store和Proxy三者具体关系的了解可以访问 http://docs.sencha.com/extjs/4.2.1/#!/guide/data)
var shipMgrStore = Ext.create('Ext.data.Store', {
    model: 'App.ShipMgr.model.ShipModel',
    pageSize: 25,
    autoLoad: true,
    proxy: {
        type: 'ajax',
        url: '/Business/ShipMgr/Query',
        reader: {
            reader: 'json',
            root: 'data',
            totalProperty: 'rowCount',
        },
        actionMethods: {
            create: 'Post'
        }
    }
});
1.3 创建Grid组件
Grid组件常用语业务中数据的列表展示。
// 创建grid
var shipMgrGrid = Ext.create('Ext.grid.Panel', {
    store: shipMgrStore,
    columnLines: true,
    rowLines: true,
    bbar: Ext.create('Ext.toolbar.Paging', {
        store: shipMgrStore,
        pageSize: 25,
        displayInfo: true,
        displayMsg: '当前显示第{0}行到第{1}行,一共{2}行。',
        emptyMsg: '没有任何记录'
    }),
    columns: [
        Ext.create('Ext.grid.RowNumberer', {
            text: '序号',
            width: 50
        }), {
            text: '船舶名称',
            dataIndex: 'ShipName',
            flex:1
        }, {
            text: '状态名称',
            dataIndex: 'StateName',
            width: 150
        }, {
            text: '吨位',
            dataIndex: 'Tonnage',
            width: 150
        }, {
            text: '核载人数',
            dataIndex: 'LoadNumber',
            width: 150
        }
    ]
});
1.4 服务器返回的数据格式
在这里shipMgrStore接收的是json格式的数据:
{"success":true,
"rowCount":100,
"data":[
{"ShipId":"989f1ace-5961-46d4-8f93-b56decb893af","ShipName":"船舶1","StateName":"离线","Tonnage":1.0,"LoadNumber":1},
{"ShipId":"f4dc1dd9-a173-4822-b3d3-4b3caa12820b","ShipName":"船舶2","StateName":"在线","Tonnage":1.0,"LoadNumber":1},
{"ShipId":"7b33d073-412b-460d-8e43-4f2d061d39a0","ShipName":"船舶3","StateName":"在线","Tonnage":2.0,"LoadNumber":2},
{"ShipId":"6ad72f6d-a4e6-4637-ab8b-038b9a7fc1b1","ShipName":"船舶4","StateName":"离线","Tonnage":3.0,"LoadNumber":3},
{"ShipId":"c3614867-a722-4ca8-961f-1324d5da4ad2","ShipName":"船舶5","StateName":"在线","Tonnage":1.0,"LoadNumber":4},
{"ShipId":"526befcf-0202-45b6-8175-4ca29a698acb","ShipName":"船舶6","StateName":"在线","Tonnage":5.0,"LoadNumber":1},
{"ShipId":"058295b4-e4d6-4fb6-b232-ed0e07515571","ShipName":"船舶7","StateName":"离线","Tonnage":6.0,"LoadNumber":6}
]}
1.5 运行图

2. 数据查询
查询功能比较简单,只需要shipMgrStore在每次请求时附加上查询条件。
2.1 创建一个搜索框
首先在shipMgrGrid的上方工具栏处创建一个文本输入框和一个查询按钮。
点击查询按钮,会触发shipMgrStore.loadPage(1)事件:
// 创建工具条
var shipMgrToolBarPanel = Ext.create('Ext.panel.Panel', {
    width: '100%',
    height: 40,
    bodyBorder: false,
    border: false,
    region: 'north',
    tbar: [
        Ext.create('Ext.form.field.Text', {
            name: 'SearchTxt',
            emptyText: '请输入船舶名称',
            width: 200,
            enableKeyEvents: true,
            listeners: {
                keyup: function (thisControl, e, eOpts) {
                    if (e.button == 12) {  // 若敲的键为回车,就执行【查询】搜索
                        shipMgrToolBarPanel.down('[name=QueryBtn]').handler();
                    }
                }
            }
        }),
        Ext.create('Ext.Action', {
            icon: 'Resources/icon/find.png',
            text: '查询',
            name: 'QueryBtn',
            handler: function () {
                // 设置搜索条件
                searchConditionObj.SearchTxt = shipMgrToolBarPanel.down('[name=SearchTxt]').value;
                shipMgrStore.loadPage(1);
            }
        })
    ]
});
2.2. store附加搜索条件
shipMgrStore每次请求时都附加搜索条件:
// 创建store
var shipMgrStore = Ext.create('Ext.data.Store', {
    model: 'App.ShipMgr.model.ShipModel',
    pageSize: 25,
    autoLoad: true,
    proxy: {
        type: 'ajax',
        url: '/Business/ShipMgr/Query',
        reader: {
            reader: 'json',
            root: 'data',
            totalProperty: 'rowCount',
        },
        actionMethods: {
            create: 'Post'
        }
    },
    listeners: {
        beforeload: function (thisStore, record, opts) {
            // 附加检索条件
            thisStore.proxy.extraParams = searchConditionObj;
        }
    }
});
2.3 运行图
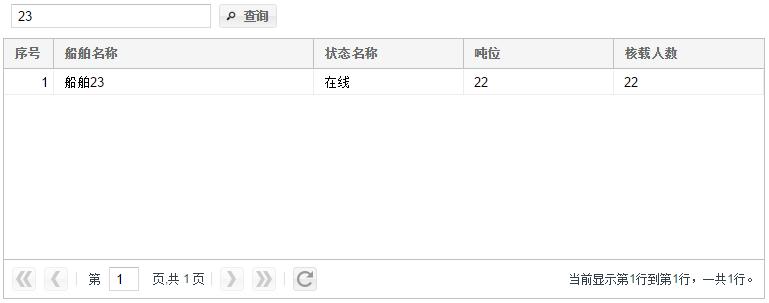
3. 在线演示
在线演示:http://www.akmsg.com/ExtJS/index.html#App.ShipMgr.ShipMgrTab

 浙公网安备 33010602011771号