
Unity PostProcessing : Outlines
写在前面:
本文章为个人学习笔记,方便以后自己复习,也希望能帮助到他人。
由于本人水平有限难免出现错误,还请评论区指出,多多指教。
部分图元和素材来源于网络,如有侵权请联系本人删除。
参考资料与链接会在文章末尾贴出。
=======================================================================
本文简单介绍一下如何在unity中通过后处理实现描边效果。
轮廓描边是常见的后处理效果之一,相较于Hull outlines,它更擅长检测边缘,而且不必费心在所有物体的材质中添加描边功能的代码。
1 Depth Outlines
先在C#脚本中渲染深度法线纹理
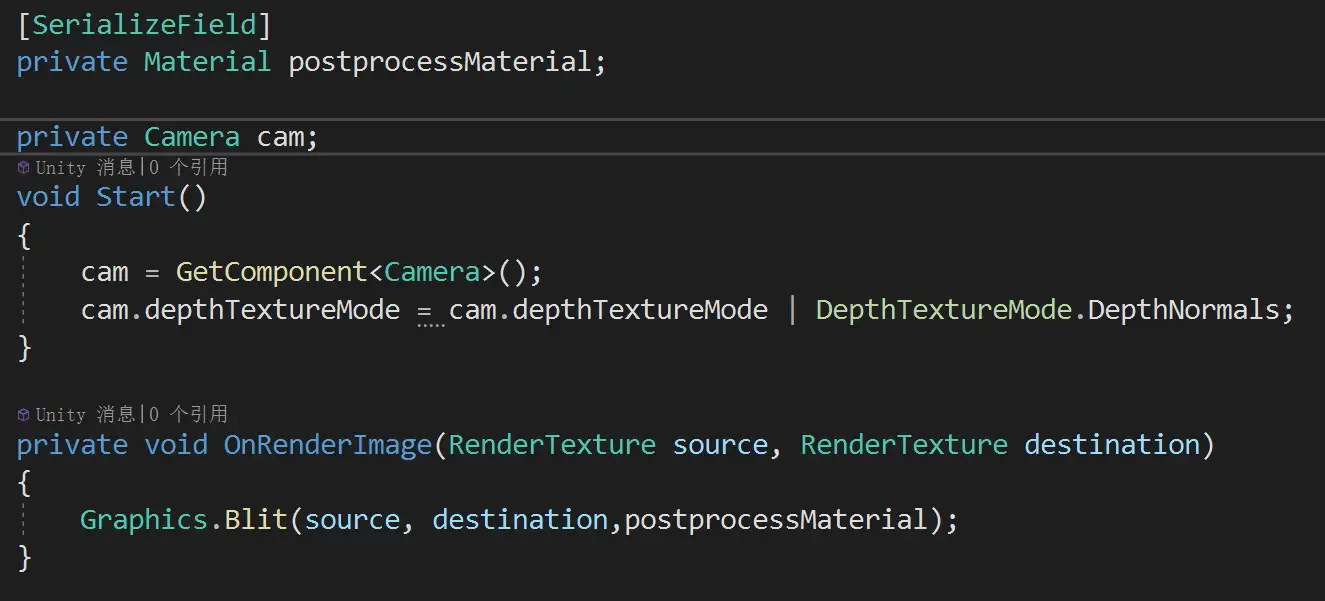
要做描边效果首先我们要知道轮廓在哪,哪些像素属于是轮廓。
我们这里计算轮廓的方法是,我们将从我们正在渲染的像素周围的几个像素(上下左右)中读取数据,并计算中心像素与周围像素的深度和法线的差异。它们差异越大,轮廓理应越明显。
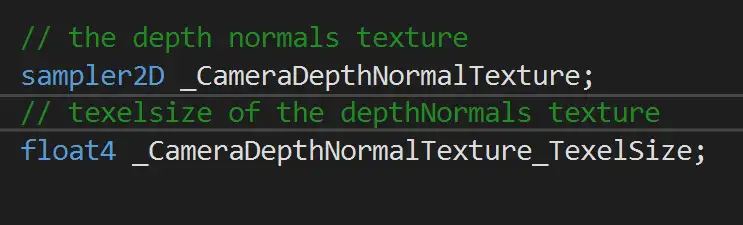
要计算相邻像素的位置,我们需要知道一个像素有多大。Unity提供了方法给我们,我们可以简单地添加一个具有特定名称的变量,然后Unity告诉我们大小。因为我们正在使用纹理像素,所以它被称为 texelsize。
我们可以为任何纹理创建一个名为 texturename_TexelSize 的变量并获取它的大小。
Vector4(1/tex.width,1/tex.height,tex.width,tex.height)
接下来我们需要访问某一像素周围的像素(上下左右)
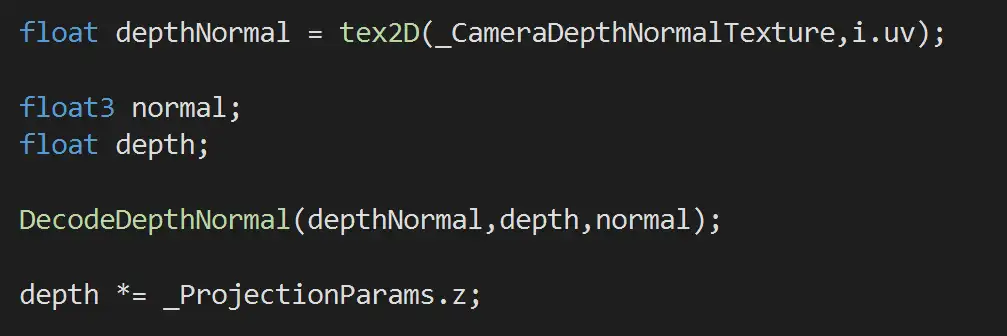
          float2 offset = float2(1,0);
                float4 neighborDepthNormal = tex2D(_CameraDepthNormalsTexture,i.uv + _CameraDepthNormalTexture_TexelSize.xy * offset);
                float3 neighborNormal;
                float neighborDepth;
                DecodeDepthNormal(neighborDepthNormal,neighborDepth,neighborNormal);
                neighborDepth *=_ProjectionParams.z;
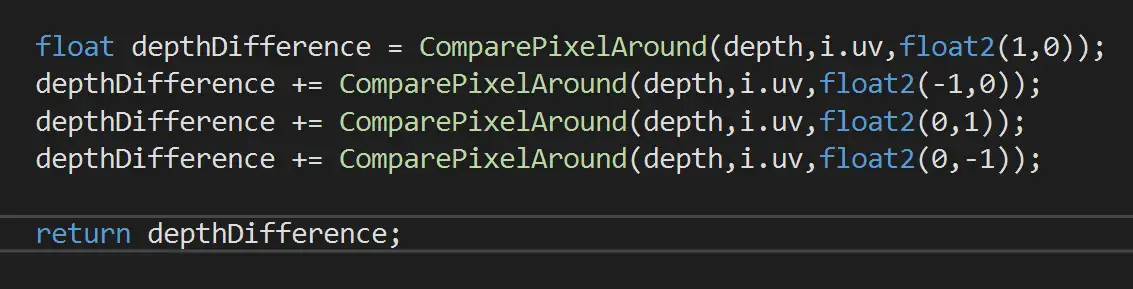
由于我们要访问四次,最好直接封装成方法:
       float ComparePixelAround(float baseDepth,float2 uv,float2 offset)
            {
                // read neighbor pixel
                float4 neighborDepthNormal = tex2D(_CameraDepthNormalsTexture, uv + _CameraDepthNormalsTexture_TexelSize.xy * offset);

                float3 neighborNormal;
                float neighborDepth;
                DecodeDepthNormal(neighborDepthNormal,neighborDepth,neighborNormal);

                neighborDepth *= _ProjectionParams.z;

                return baseDepth - neighborDepth;
            }
接下来所我们在fragment shader中往四个方向采样像素,并将所有的结果加在一起。
2 Normal Outlines
使用深度纹理已经为我们提供了不错的效果,但我们还可以通过使用法线纹理做得更好。
因此我们还将在ComparePixelAround函数中对法线进行采样,不过函数在 hlsl 中只能返回一个值,因此我们不能在此处使用返回值。我们可以使用 inout 关键字添加新参数,而不是使用返回值。从法线生成轮廓的另一件事是我们需要中心像素的轮廓,因此我们也将其添加到参数列表中。
接下来考虑如何改变ComparePixelAround的方法。
假如两根法线处于边界的两边,显然他门指向的是不同的方向。比较两个归一化向量的一种简单快捷的方法是采用点积。点积的计算是,当两个向量指向相同的方向时,点积为 1,当两个向量指向完全不同的方向,值为-1,这与我们想要的相反。解决的方法是从1中减去点积结果。然后,当点积的结果为1时,整体结果为0,当点积的结果变小时,最终结果变大。
       //depth and normal outline version
            void ComparePixelAround(inout float depthOutline, inout float normalOutline,
                                    float baseDepth ,float3 baseNormal,float2 uv,float2 offset)
            {
                // read neighbor pixel
                float4 neighborDepthNormal = tex2D(_CameraDepthNormalsTexture, uv + _CameraDepthNormalsTexture_TexelSize.xy * offset);

                float3 neighborNormal;
                float neighborDepth;
                DecodeDepthNormal(neighborDepthNormal,neighborDepth,neighborNormal);

                neighborDepth *= _ProjectionParams.z;

                float depthDifference = baseDepth - neighborDepth;;
                depthOutline +=depthDifference;

                float3 normalDifference = baseNormal - neighborNormal;
                normalDifference = normalDifference.r + normalDifference.g + normalDifference.b;
                normalOutline += normalDifference;
            }
然后在fragment shader里面调用:
          float depthDifference = 0;
                float normalDifference = 0;

                ComparePixelAround(depthDifference, normalDifference, depth, normal, i.uv, float2(1, 0));
                ComparePixelAround(depthDifference, normalDifference, depth, normal, i.uv, float2(-1, 0));
                ComparePixelAround(depthDifference, normalDifference, depth, normal, i.uv, float2(0, 1));
                ComparePixelAround(depthDifference, normalDifference, depth, normal, i.uv, float2(0, -1));

                float ouline = depthDifference + normalDifference;

3 Customizable Outlines
我们注意到,现在的描边粗细是固定的,此外轮廓线靠近的地方有一些灰色的部分,想要消除其实就是把值变小或为0。
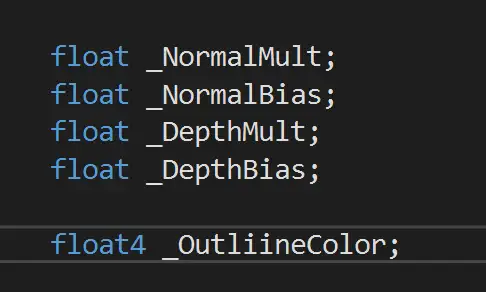
因此我们来使轮廓更加可定制。我们为每个深度和法线轮廓添加了两个变量。使轮廓看起来更强或更弱的Mult和可以使轮廓的灰色部分(看上图)消失的Bias。
           float depthDifference = 0;
                float normalDifference = 0;

                ComparePixelAround(depthDifference, normalDifference, depth, normal, i.uv, float2(1, 0));
                ComparePixelAround(depthDifference, normalDifference, depth, normal, i.uv, float2(-1, 0));
                ComparePixelAround(depthDifference, normalDifference, depth, normal, i.uv, float2(0, 1));
                ComparePixelAround(depthDifference, normalDifference, depth, normal, i.uv, float2(0, -1));

                depthDifference *= _DepthMult;
                depthDifference = saturate(depthDifference);
                depthDifference = pow(depthDifference,_DepthBias);

                normalDifference *= _NormalMult;
                normalDifference = saturate(normalDifference);
                normalDifference = pow(normalDifference,_NormalBias);

                float outline = depthDifference + normalDifference;

                float4 sourceColor = tex2D(_MainTex,i.uv);
                float4 finalColor = lerp(sourceColor,_OutlineColor,outline);

                return finalColor;
HLSL 的saturate函数,用于将变量限制在 0 和 1 之间,防止接下来的power运算出现奇怪的效果。
最后,我们从源图像中都读取颜色并应用描边效果:
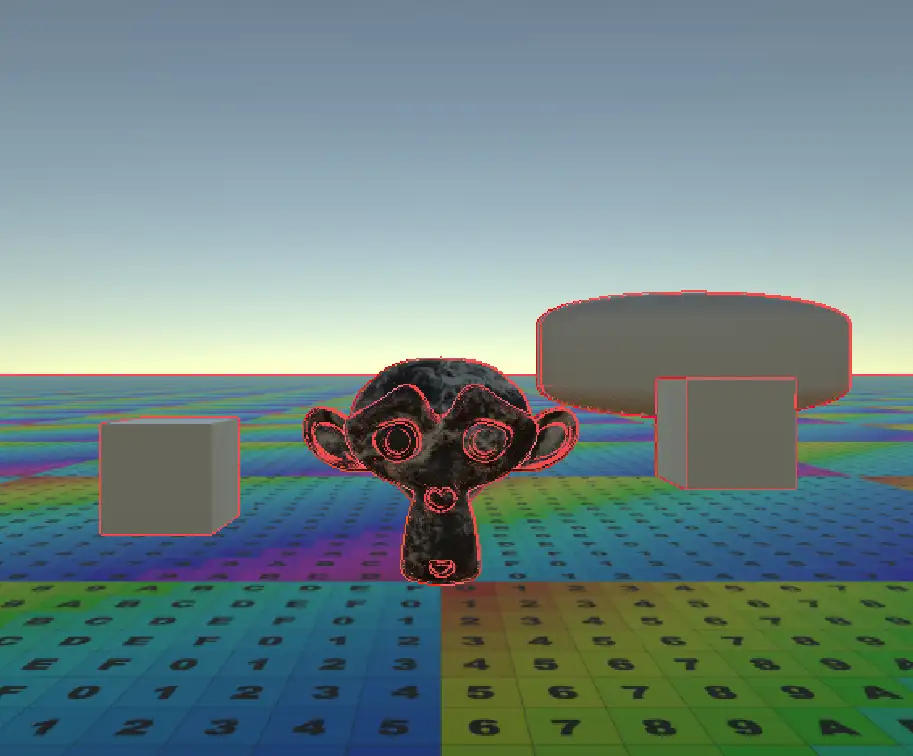
现在我们来谈一谈后处理描边的主要缺点:
1.你会将描边应用于场景中的所有对象。
2.代码决定什么是轮廓,什么不是轮廓的方式和结果可能与你的预期不符合。
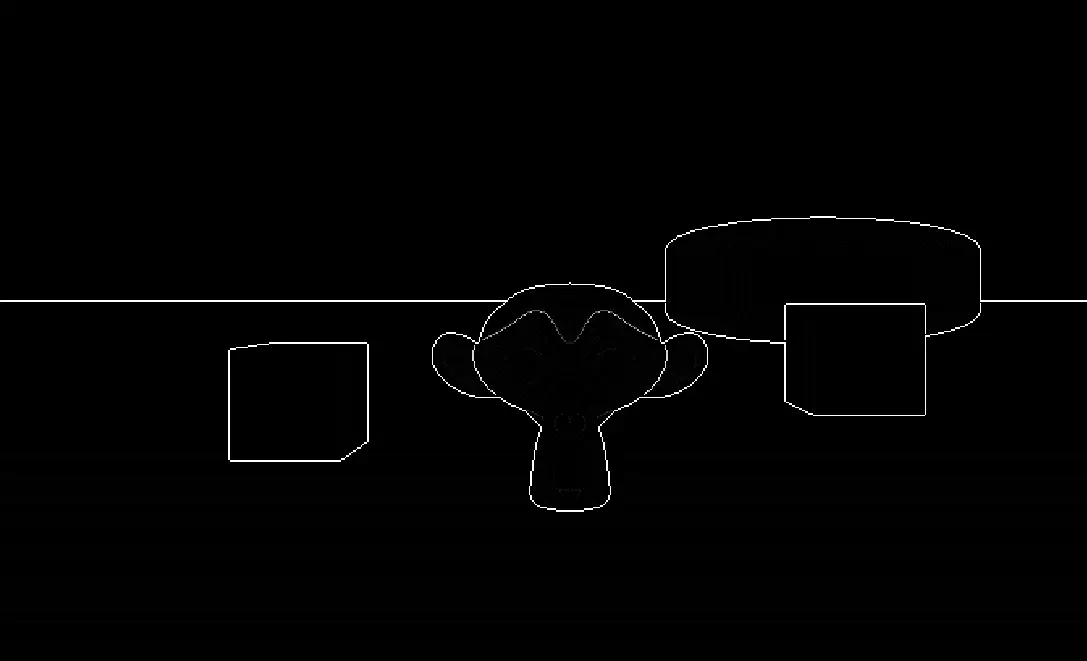
3.可以看到明显的锯齿问题。
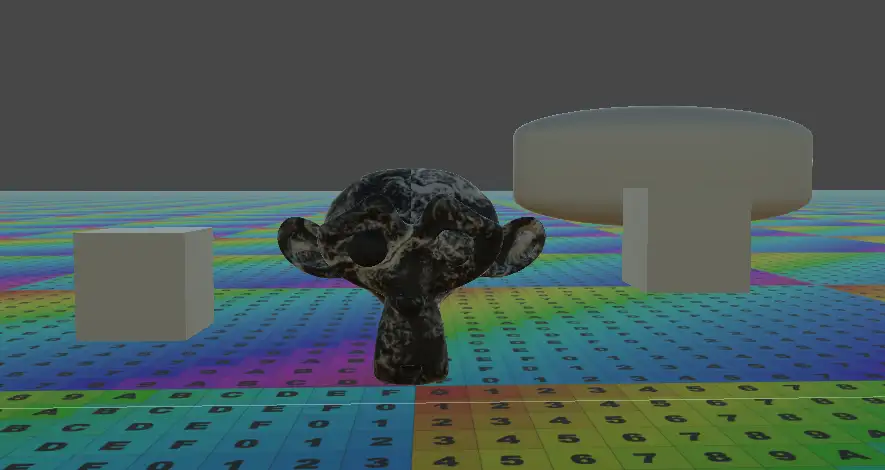
4.对比图中cube和猴头你会法线,如果模型几何细节太多,描边效果反而会奇怪了起来;当你的几何细节足够丰富的时候,黑色描边会把你的模型一大半都涂成了黑色。
参考资料:

 浙公网安备 33010602011771号