一个简单的rust字符串时钟
1、简介
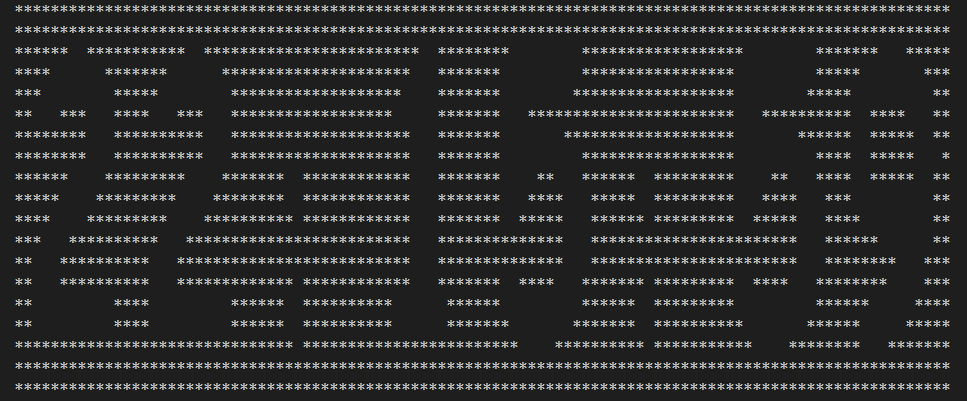
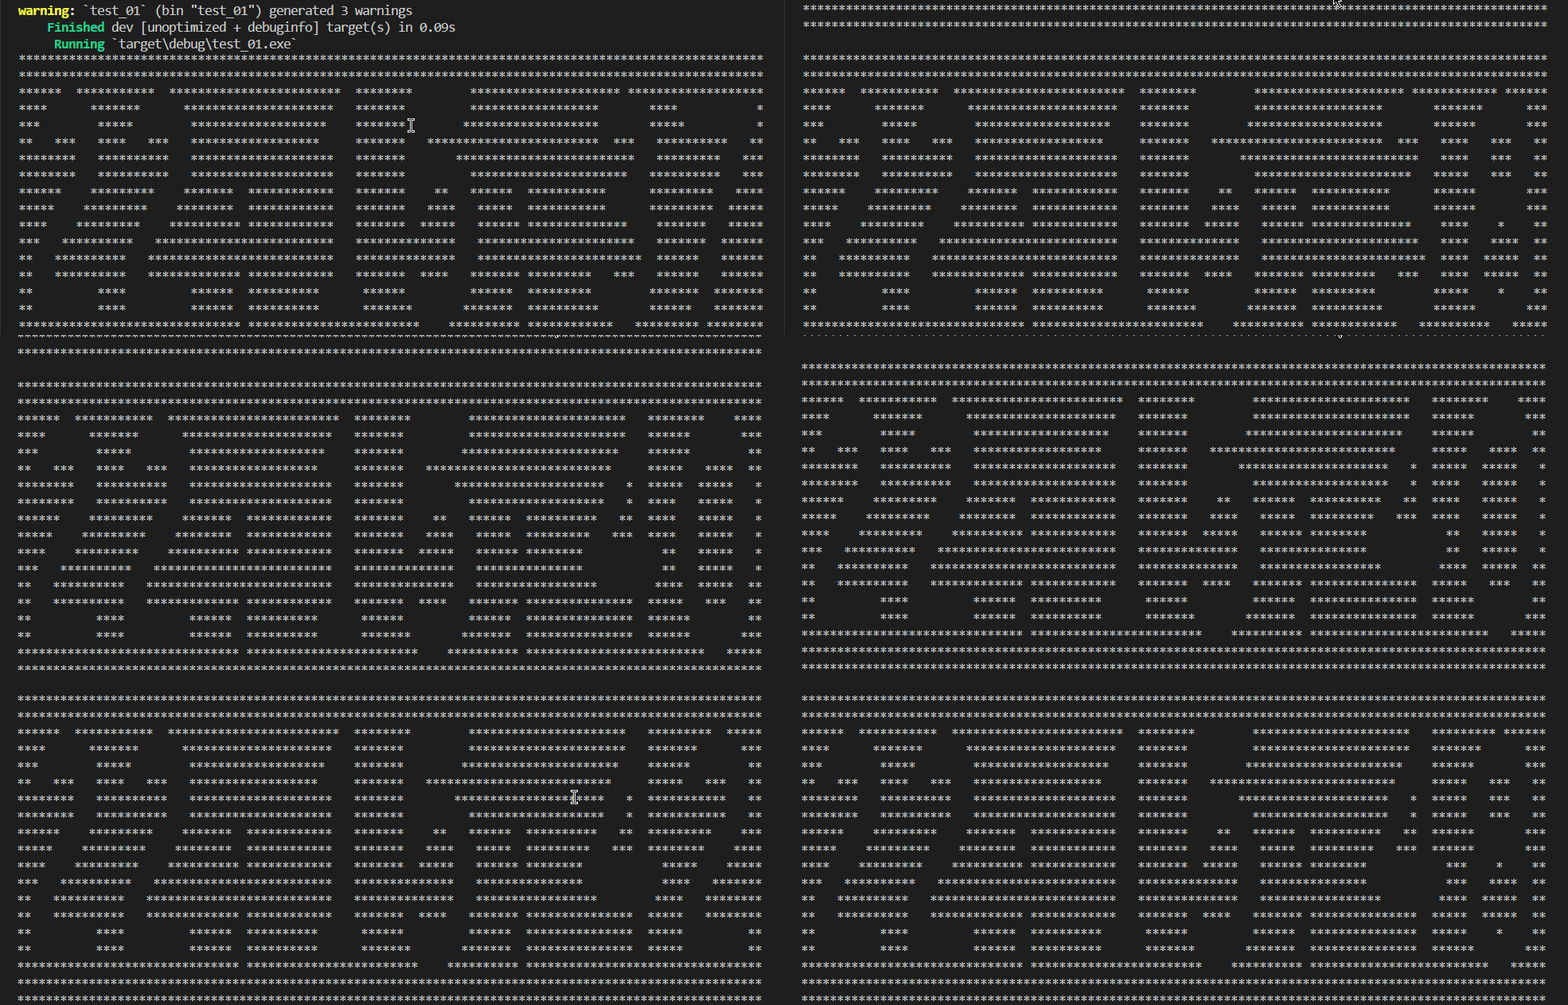
用rust写的一个简单的练手的demo,一个字符串时钟,在终端用字符串方式显示当前时间。本质是对图片取灰度,然后每个像素按灰度门限用星号代替灰度值,就把图片变为由星号组成的字符型图案。把时间字符串的每个字符按照字母和数字图片的样式转换为字符,然后拼接字符图案就实现了字符时钟的效果。
主要用到的知识有:rust操作时间、字符串、vector,字符串和vector的转换、string,以及让人恼火的生命周期。对比python,rust的列表入门难度可以说是地狱级的,一会borrow、一会move,晕头转向。

2、用到的知识点
2.1 取utc时间
时间库使用chrono = "0.4",获取秒数等时间。
    let five_seconds = Duration::new(5, 0);
    let five_seconds_and_five_nanos = five_seconds + Duration::new(0, 10);

    assert_eq!(five_seconds_and_five_nanos.as_secs(), 5);
    assert_eq!(five_seconds_and_five_nanos.subsec_nanos(), 10);


    let five_seconds = Duration::from_secs(5);
    assert_eq!(five_seconds, Duration::from_millis(5_000));
    assert_eq!(five_seconds, Duration::from_micros(5_000_000));
    assert_eq!(five_seconds, Duration::from_nanos(5_000_000_000));

    let ten_seconds = Duration::from_secs(10);
    let seven_nanos = Duration::from_nanos(7);
    let total = ten_seconds + seven_nanos;
    assert_eq!(total, Duration::new(10, 7));
获取实时utc时间。
    let local:DateTime<Local>= Local::now();
    println!("{:?}", local.format("%Y-%m-%d %H:%M:%S").to_string());
    println!("{:?}", local.format("%a %b %e %T %Y").to_string());
    println!("{:?}", local.format("%c").to_string());
    println!("{:?}", local.to_string());
    println!("{:?}", local.to_rfc2822());
    println!("{:?}", local.to_rfc3339());

    let dt = Local.with_ymd_and_hms(2020 as i32, 12, 05, 12, 0, 9).unwrap();
    println!("{:?}", dt.format("%Y-%m-%d %H:%M:%S").to_string());
    println!("{:?}", dt.format("%a %b %e %T %Y").to_string());
    println!("{:?}", dt.format("%c").to_string());
    println!("{:?}", dt.to_string());
    println!("{:?}", dt.to_rfc2822());
    println!("{:?}", dt.to_rfc3339());
输出为:
"2022-12-25 23:20:03"
"Sun Dec 25 23:20:03 2022"
"Sun Dec 25 23:20:03 2022"
"2022-12-25 23:20:03.499293300 +08:00"
"Sun, 25 Dec 2022 23:20:03 +0800"
"2022-12-25T23:20:03.499293300+08:00"
"2020-12-05 12:00:09"
"Sat Dec 5 12:00:09 2020"
"Sat Dec 5 12:00:09 2020"
"2020-12-05 12:00:09 +08:00"
"Sat, 05 Dec 2020 12:00:09 +0800"
"2020-12-05T12:00:09+08:00"
获取当前时间,如下格式化为20:15:23类似的格式。
let curdate =  Local::now();
let datecollect = curdate.format("%H:%M:%S").to_string();
2.2 图片变换为像素图案
1、读取图片
先准备每个数字的图片,然后读取图片,转换为灰度表示。

    let cur_dir = std::env::current_dir().unwrap().
        into_os_string().into_string().unwrap();

    let _path = if number == ':' {
        format!("{}/number_pic/{}.png", &cur_dir, "maohao")
    }
    else{
        format!("{}/number_pic/{}.png", &cur_dir, number)
    };

    // println!("imagepath = {}", _path);
    let gray_pic = image::open(_path).unwrap()
    .resize(nwidth, nheight, image::imageops::FilterType::Nearest)
    .into_luma8();
初始化pix_clock结构体,解析需要用到的10个数字和冒号时间分隔字符。
pub struct pix_clock {
    words : HashMap<char, Vec<String>>,
}


impl pix_clock {
    pub fn new() -> pix_clock {
        let mut dict_result = HashMap::new();
        let numbers = vec!['0', '1', '2', '3', '4', '5', '6', '7', '8', '9', ':'];
        for value in numbers {
            let result = get_num_pic(value);
            dict_result.insert(value, result);
            // println!("num={} {:#?}", value, dict_result[&value]);
        }

        return pix_clock {
            words: dict_result,
        };
    }
}
2、图片按像素灰度转换为字符图案
每行作为1个string字符串,按行处理,读取完一行后把当前行的字符串push到列表,然后清空行变量,准备解析下一行的像素。每行都解析完成后,pix_data就形成了一个由nheight行,每行nwidth个字符构成的列表。
   let mut pix_data: Vec<String> = vec![];
    let mut line = String::from("");
    for (index, tmp) in gray_pic.to_vec().iter().enumerate() {
        if index % nwidth as usize == 0 {
            if line.len()>0 {
                let line2 = line.clone();
                pix_data.push(line2);
            }
            line.clear();
        }
        if tmp > &gap_value {
            line.push_str("*");
        }
        else {
            line.push_str(" ");
        }
    }
以数字3为例:println!("result data {} {:#?}", number, &pix_data);// 输出数据为:
result data 3 [
    "*************",
    "*************",
    "****** ******",
    "***       ***",
    "***       ***",
    "***  ***   **",
    "********   **",
    "*******   ***",
    "****      ***",
    "****      ***",
    "*******    **",
    "********   **",
    "*********  **",
    "**   ***   **",
    "**        ***",
    "***       ***",
    "*****   *****",
    "*************",
    "*************",
]
2.3 字符方式显示当前时间
上一步已经完成了单个数字转换为字符图案,由于时间字符串由多位数字构成,所以需要拼接图案。例如20:15:23,就由6个数字和2个冒号组成,所以字符串“20:15:23”就需要按行合并。
1)合并每个数组的团案,而高度不变。
let time_str = datestr.chars(); // 把字符串解析为char型字符
let mut final_vector: Vec<String> = vec![];
for _index in 0..self.words.get(&'0').unwrap().len() { // 合并后的图案高度不变,即行数不变
    final_vector.push("".to_string()); // 每行的字符串变长了,先预留空String来接收每行字符
}
2)按行合并每个字符,拼接字符串的图案
for value in time_str { //遍历时间字符串的每个字符
    let value_pix = self.words.get(&value).unwrap(); //获取单个字符的图案
    let mut index = 0;
    for x in value_pix.iter() {
        final_vector[index].push_str(&x); # 每个字符相同行的字符串合并为一个大字符串
        index += 1;
      }
}

for temp in final_vector { // 合并后的字符串,高度不变(即行数不变)
   println!("{}", format!("{}", temp));  // 打印合并后的字符串,按行显示
}
println!("");
2.4 时间刷新
按秒刷新,每秒计算一次图案字符串,然后清屏后显示,实现时间跑秒的感觉。
fn main() {
    let pix_clock = pix_clock::new();
    let delay = time::Duration::from_secs(1);
    loop {
        let curdate =  Local::now();
        let datecollect = curdate.format("%H:%M:%S").to_string();
        pix_clock.beautifyshow(&datecollect);
        thread::sleep(delay);
        Clear(ClearType::All);
    }
}

参考文献:
1、特别感谢 https://github.com/yuanzhoulvpi2017/countdown
2、https://docs.rs/chrono/latest/chrono/
尊重原创技术文章,转载请注明:https://www.cnblogs.com/pingwen/p/17004872.html


 浙公网安备 33010602011771号